

Model: Revell 03053 / Leopard 2A4 (or Italeri 243 - later kit).
Track: Elite Single Link Track (same as AFV Club and HKCW).
Decals: The Echelon set with Swedish decals was not available, so they are from the spare box.
Update: several home-made bits and pieces and home-cast parts.
Swedish skirts and parts: home-made and partly hand-cast.
Colors: All self-mixed Humbrol or Tamiya.
References: Internet.
This model was finished in summer 2007, long before the Hobby Boss kit (or the more recent Revell or Meng) appeared on the market.
At that time you had to accept the mistakes and the simple construction of the available Leopard 2 kits (first Italeri, then Esci - even worth it), or spend a lot of work to make a decent model of the Leopard 2.
I remember how disappointed I was when Italeri released their Leopard 2 and it was so poorly detailed (especially when considering that their Leopard 1A4 was 'state of the art' in those days).
Later, Revell Germany re-tooled the old Italeri Leopard 2 and added some small bits and pieces to make a Leoaprd 2A4. The rear hull had better detail and defined ring coolers, showing some ring detail under the mesh, which improved the look remarkably.
Tamiya came out with their Leopard 2A5 and that was much better than the older kits. To achieve a decent look of an early Leopard 2A4 with the old-style turret, you had to add several parts from the spares box and invest a lot of work in building the Italeri kit. But that is real classic modelling.
First, we added the Tamiya 2A5 wheels. These had to be amended at the back axle section to fit the Revell swing arms. The amended wheels were hand-cast in resin and replaced the very simple Revell wheels.
The track comes from Elite and is identical to these sold under HKCW (Hong Kong Creation Workshop) and AFV Club. They are a bit fiddly to make, but look great.
FurtHermore, the ugly and very simple front fittings for the heavy side skirts were replaced by home-made parts. This was done just by using plastic profiles, long before Perfect-Scale released such parts in their Leopard 2A4 update set. Also, the rear hull section got some updates and was replaced by a resin-copy of the Tamiya 2A5 part.
The 'Italeri-typical' openings on the hull sides were filled with sheet, sanded down and new hatches were scribed and detailed. That was done to avoid the complicated filling and sanding around the hatches which is mandatory if you make the Italeri kit from the box.
Several welding seams were added, too. The towing cables are flexible steel wires.
The main gun was replaced by a left-over gun from Tamiya's 2A6 kit (it also has the shorter 2A5 gun inside).
Some details around the turret gunner's sight were added, as well as new antenna mounts (hand-cast from the spares box).
To resemble the typical look of the Swedish Leopards, called the Strv 121 (Stridsvagn 121), several parts like front fenders, side skirts, etc. were changed and the parts were cast in resin. The front section was detailed by adding rails for the track-grousers and parts from the spares box.
Painting was done with self-mixed colours from Humbrol and Tamiya.
The model is already nine years old, so I hope you all like it.
Model: Hobby Boss
Track: Bronco
Gun Barrel: RB Models
Antenna: Schatton
Mirrors: Echelon
Update: various parts from Perfect Scale and bits and pieces from the spares box (mainly home casted).
Colours:
Build by Jürgen Kreissl / Stephan Hinz
Painted by Jürgen Kreissl
I would like to share this model with all fans of the Leopard 2A4. Now that MENG obviously released the "ultimate" kit, it is also interesting to see how much work had to be done to make former kits into decent models.
This model was only shown in a local German forum.
I started this model when HobbyBoss released their 2A4 kit (long ago). It waited in my stash for completion. When I had collected several photos of the Greek Leopard 2A4, I immediately decided to complete the model. My friend Jürgen Kreissl took it into his Panzerkeller (Tank-Cellar) and started to add the missing parts. When I started, there was no update kit from Perfect Scale available, so I started to make my own supports for the heavy front side skirts. They had been removed by Jürgen because they did not fit the side skirts which he used. They are cast parts from the old Italeri / Revell kit and therefore also the supports were replaced by the Perfect Scale parts.
Some detailing was made here and there and the etched screens on the rear air intakes were replaced by Perfect Scale parts. The rear hull plate remains the wrong Hobby Boss part. It was too dangerous to break out the well cemented part and risk damage to the hull.
The track comes from Bronco. With some filing it goes well around the sprockets, which are copies of the Tamiya part. The barrel comes from RB and looks nice on the model. The antennae are very tiny turned brass items from Schatton. They look great, but need careful handling. The painting is done with the above paints which are mixed until they look 'Greek' and just a subtle weathering was added.
The Hobby Boss kit is not bad at all, but like all kits of the Leopard 2A4, it needs some attention.
I hope you like this model. There are not many Leopard 2A4 in Greek camo around on the web.
Some years ago a friend of mine sent me a test shot of a Leopard 2 model, made in die-cast metal by Minichamps in 1:35. The parts went into my stash and for a long time and were nearly forgotten. After some time I just tried to put them together and it worked fine. There were just a few missing parts which have been replaced by Italeri parts. Also the hatches were replaced by better detailed items from my "Leopard-Box".
I finally added etched mesh to the intakes on the rear hull from Perfect-Scale. The tracks come from a Tamiya Leopard 2A5.
The models of Minichamps come as fully assembled and painted collectors die-cast models which look nice, but they run too low. The suspension does not have the correct riding height. I therefore warmed up the torsion bars and amended the suspension until it looked right. In a British modeller magazine I found an article showing a Challenger model which was painted in a metal coat. That gave the inspiration for my model. It was just painted with Humbrol polishable paints, a mixture of steel and aluminium paint. The stand is from wood and the plate comes from a local shop. Insignia came from Ebay.
I made the model, it was painted by my friend Jürgen Kreissl (aka "Panzerkeller"). Although it is not highly detailed, I like it because it is heavy and it looks like a Leopard 2.
This is my second Minichamps Leopard. Maybe because they are so heavy due to die-cast, I like them. OK, if you buy them new, they are expensive and meanwhile not available anymore, because Minichamps stopped production, but with some patience and luck, you can still get them on Ebay or on flea markets.
I got this one in damaged condition via Ebay. When it arrived, the metal track was broken, wheels were partly missing and broken and some of the shock absorbers were missing. As I have a lot of parts in my stash from various Leopard kits, it was not a big deal to replace the parts. Anyhow, the road wheel was difficult, because none of the plastic parts really fit. My friend made resin copies and problem was solved.
Again the metal track was replaced with a Tamiya track and several details were added. I did not want to change the chunky look of a die-cast model, so I did not go too far with detailing.
After changing and adding the parts, the model went to my friend Jürgen Kreissl(aka "Panzerkeller") who did the painting and slight weathering. I did not want the model too dirty, because it was planned to go on a wooden base.
The base was made by my friend Bernd and the insignia and plate came from eBay and local shops.
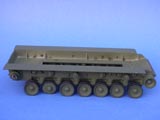
moremissing parts visible after dismantling
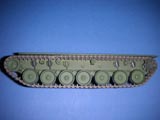
shock absorbers, roadwheel and drive wheel replaced with Italeri and self casted parts
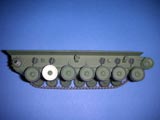
shock absorbers and drive wheel replaced by Italeri parts
This is my third Minichamps Leopard.
As already told, they are normally too expensive for just changing them, but I like them and I like the weight of these models.
You can see the difference between what is in the box when you buy the Minichamps model and what has been made by me.
Also this model rides too low - the suspension is made workable with PVC torsion bars. The tension is not high enough to let the model ride as it should. So again I changed this by carefully warming the torsion bars and bend to better shape.
Parts from the scrap box were added and due to the fact that I have to paint the model, I also decided to give it the insignias of a tank group which was based here in the northern part of Germany. These decals were available from their early Leopard 2 kit.
After changing and adding the parts, the model went to my friend Jürgen Kreissl (aka "Panzerkeller") who did the painting and slight weathering. Also this model was planned to be displayed on a wooden base and therefore just a careful coat of washing was applied.
The base was again made by my friend Bernd, the plate was engraved by a local shop and the company badge came from Ebay.
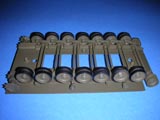
compare the rear suspension with the original tension (flat ride)
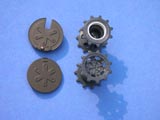
drive sprockets from Italeri amended to fit the Tamiya track (Original sprockets were too narrow)
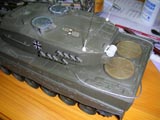
all amendments (sorry for the chaos on my desk)
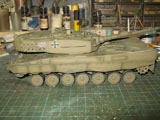
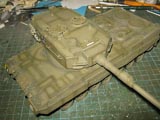
during painting at Panzerkeller