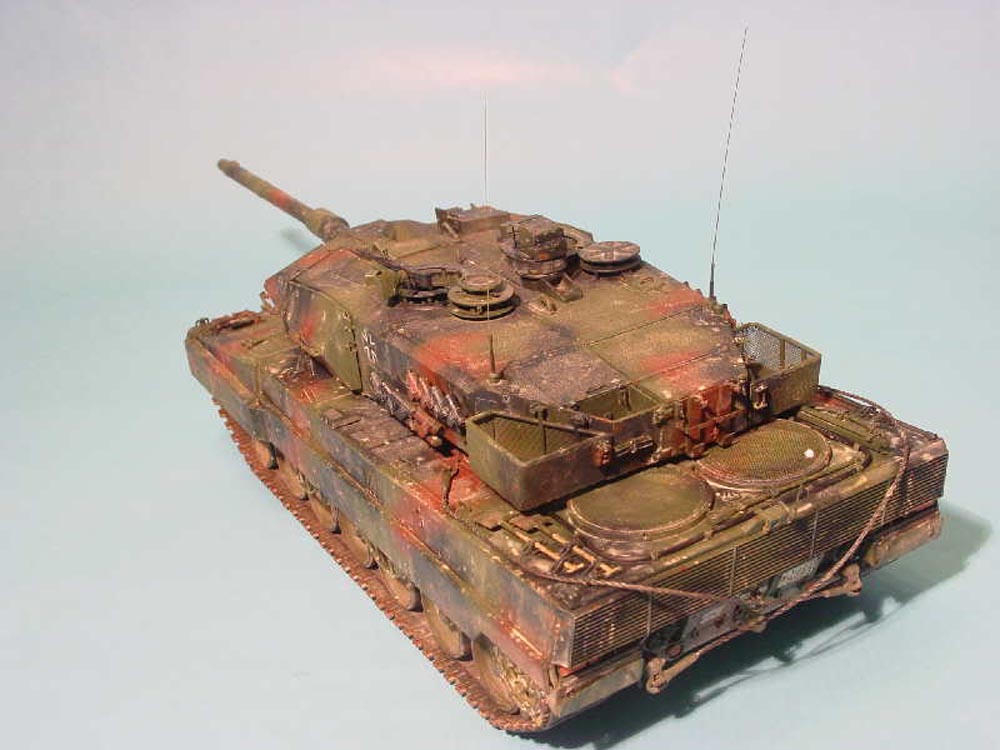
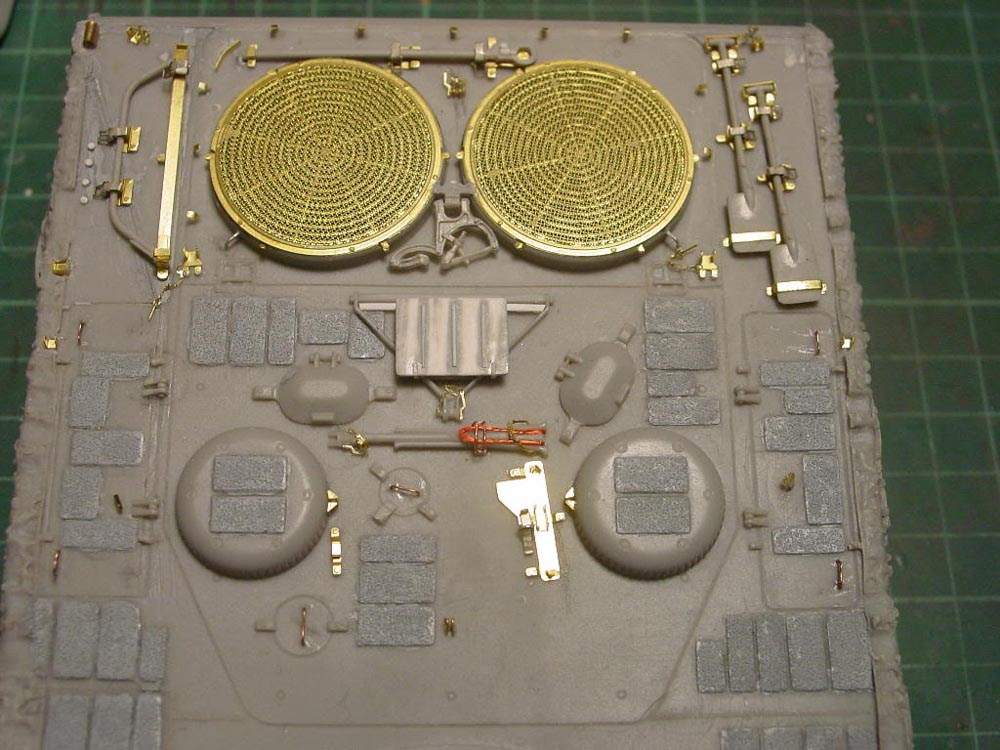
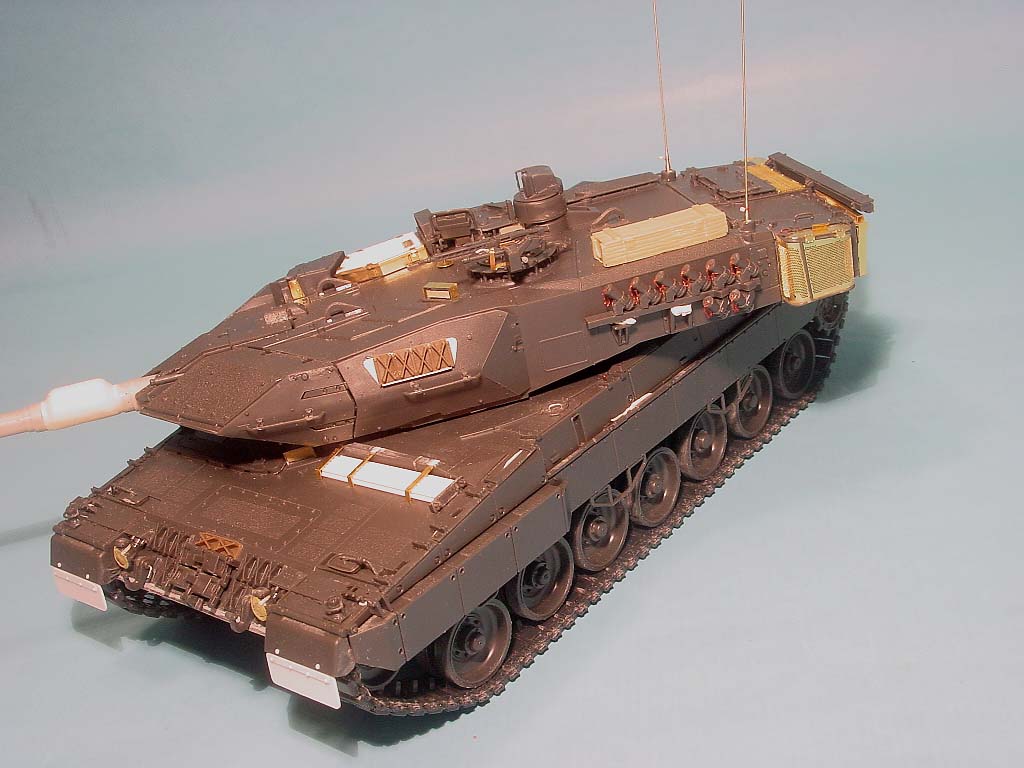
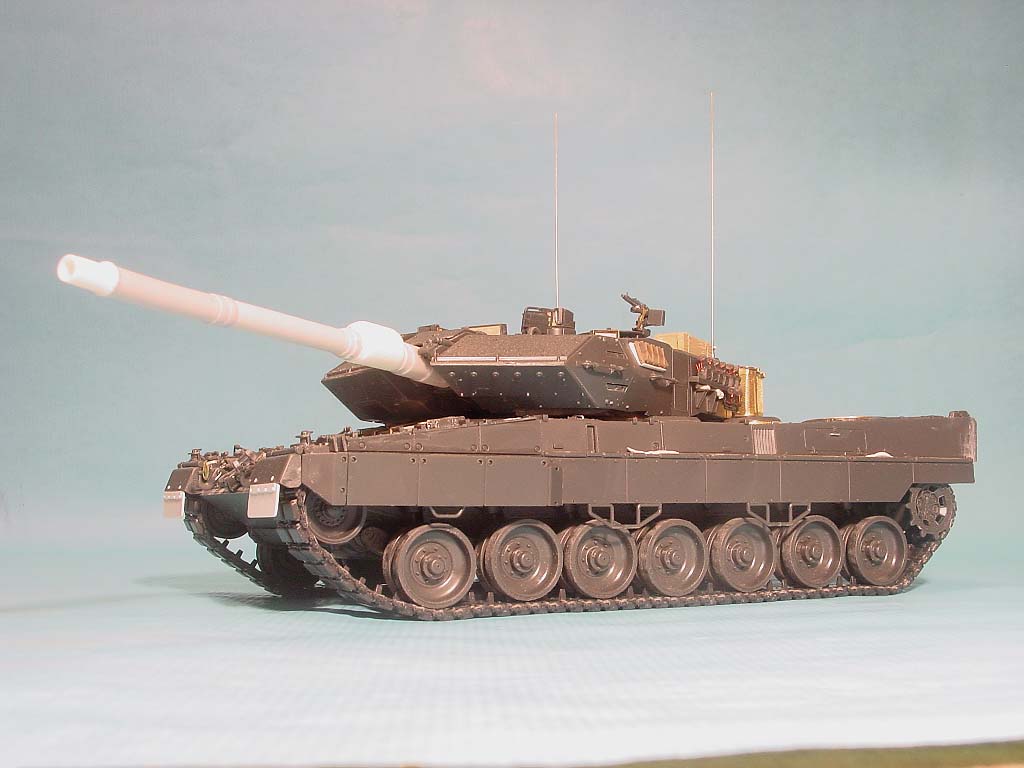
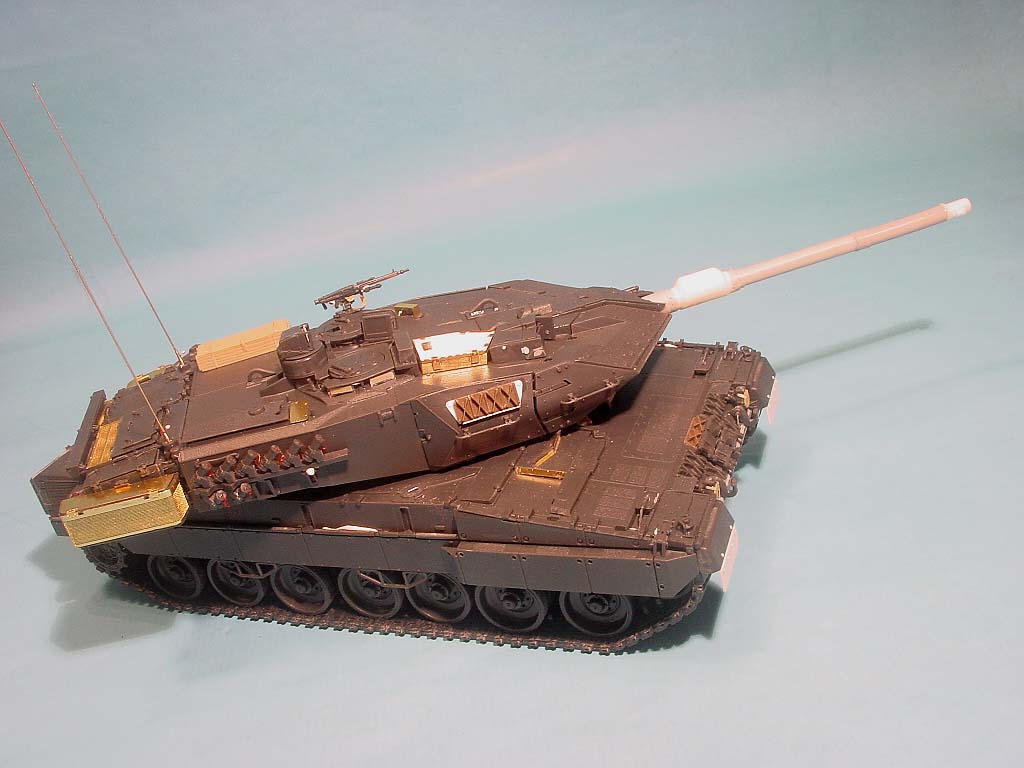
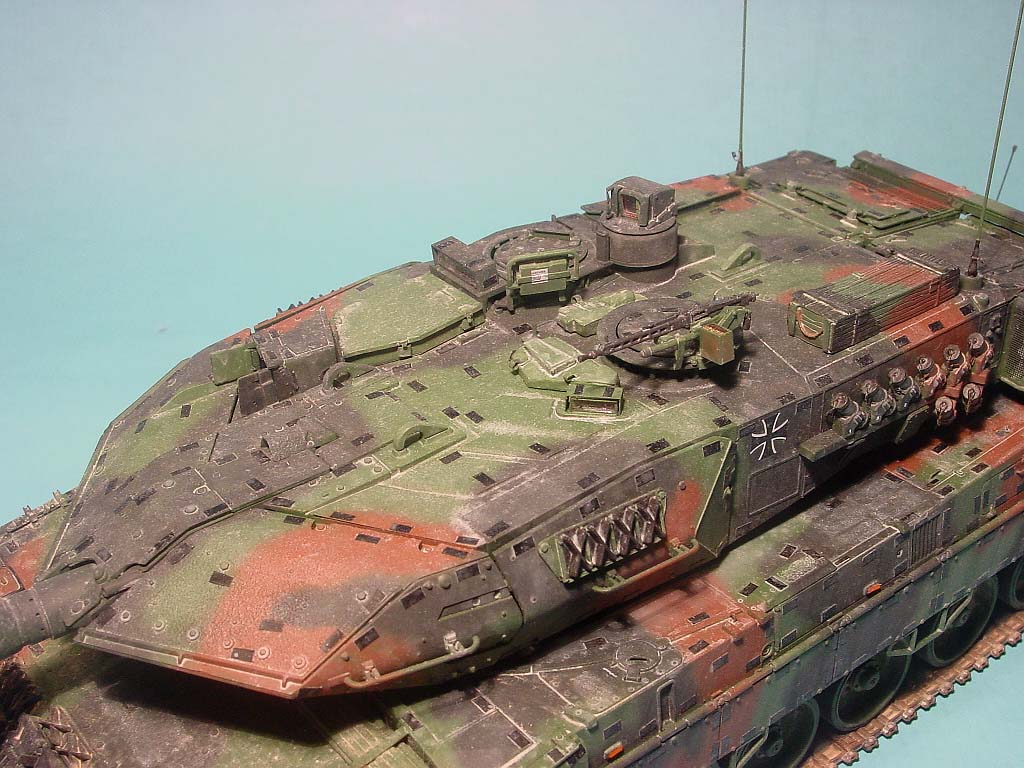
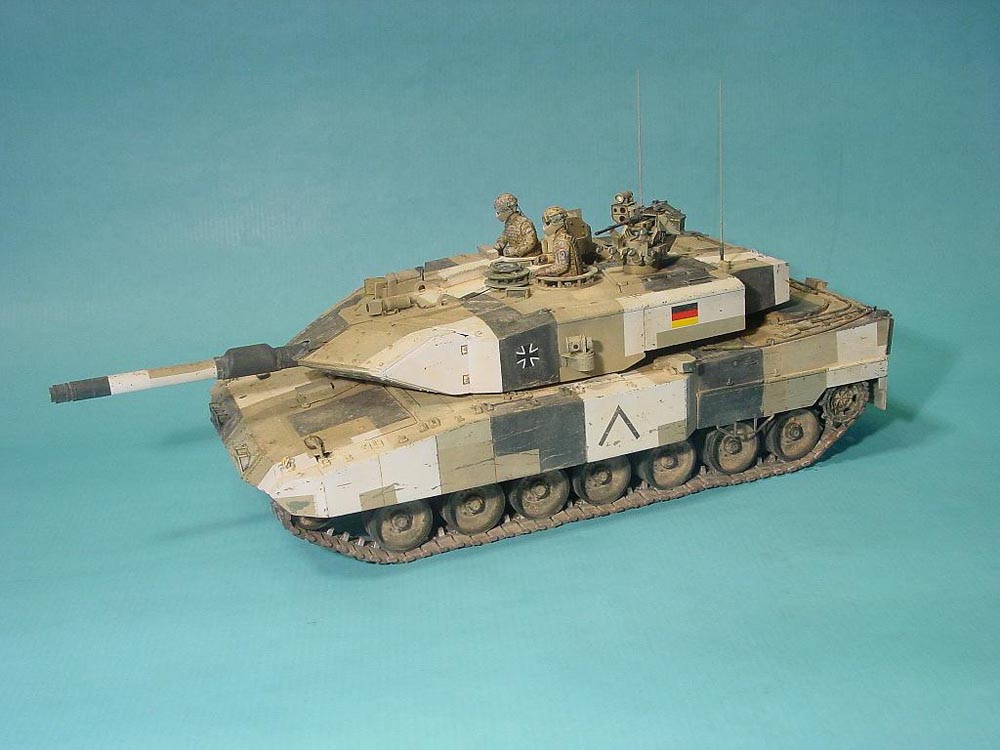
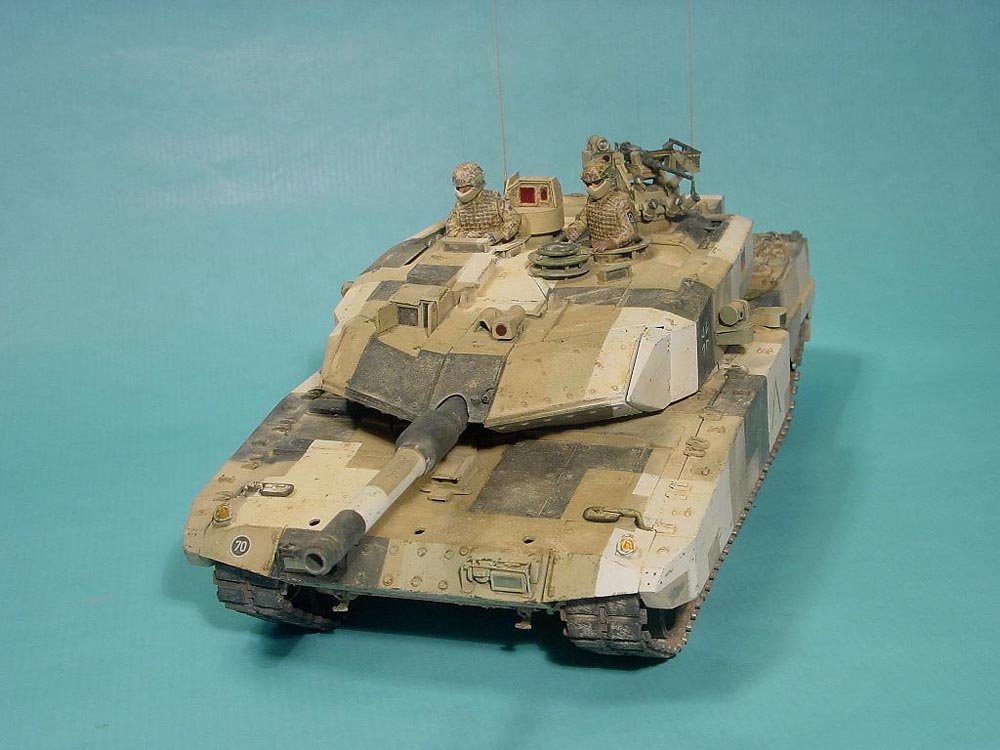
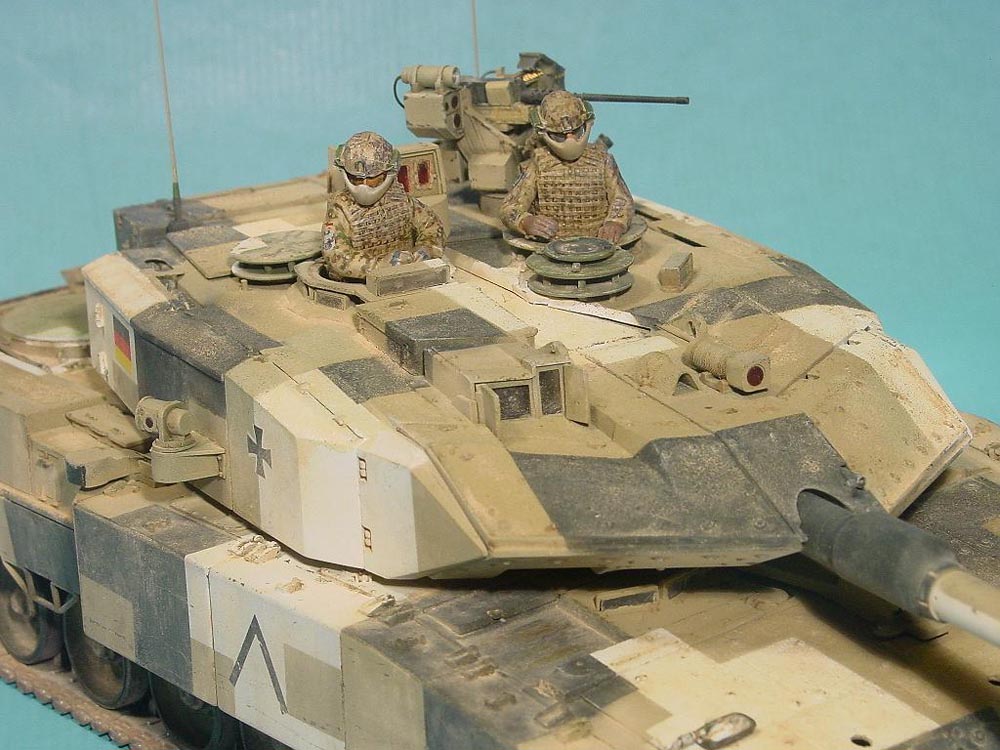
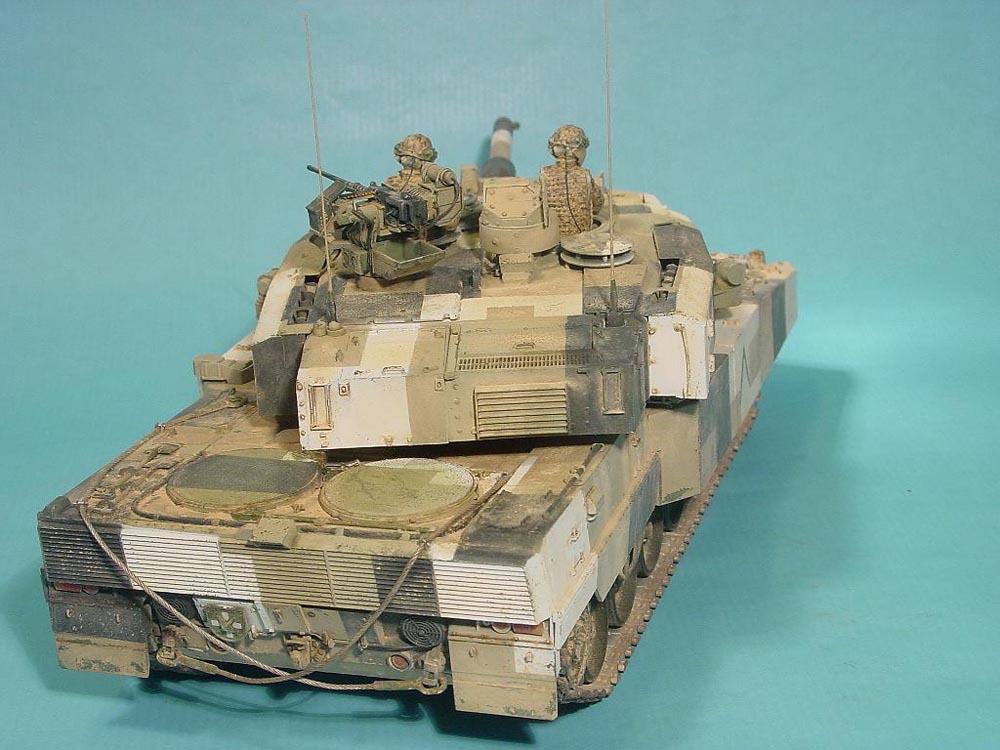
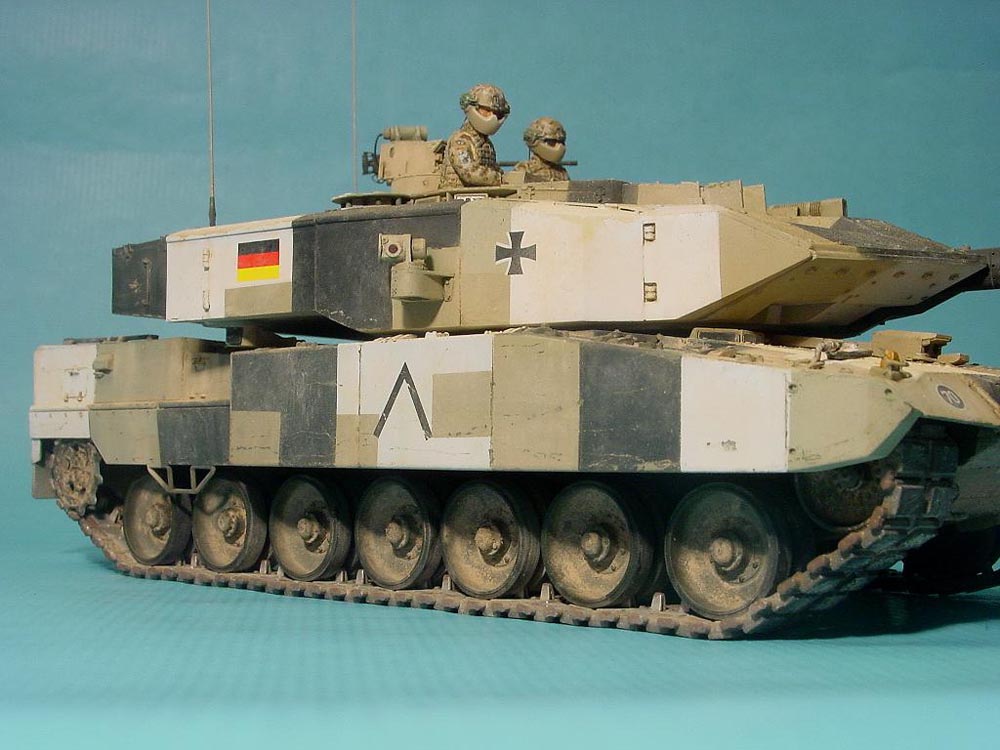
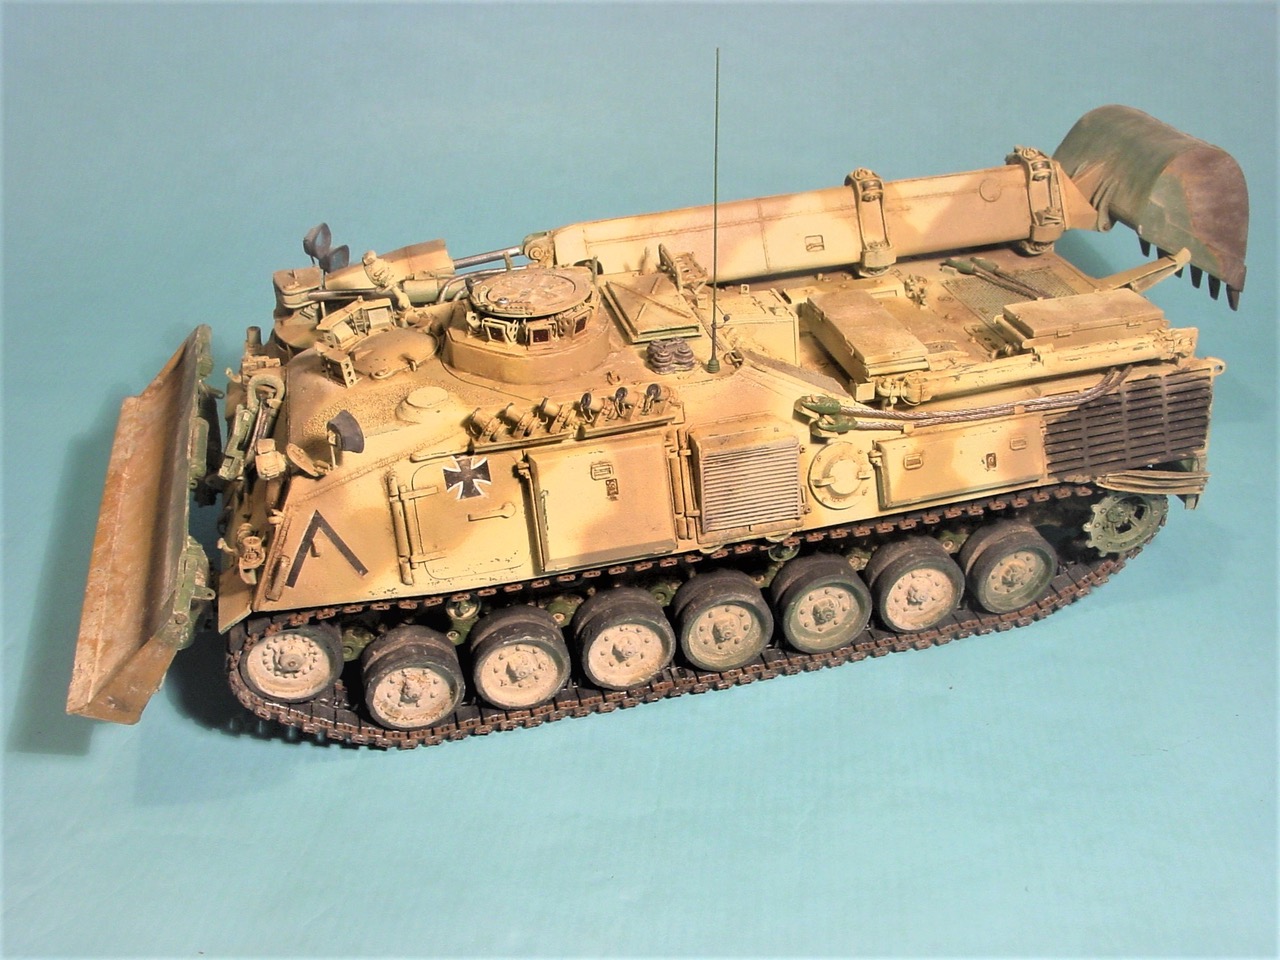
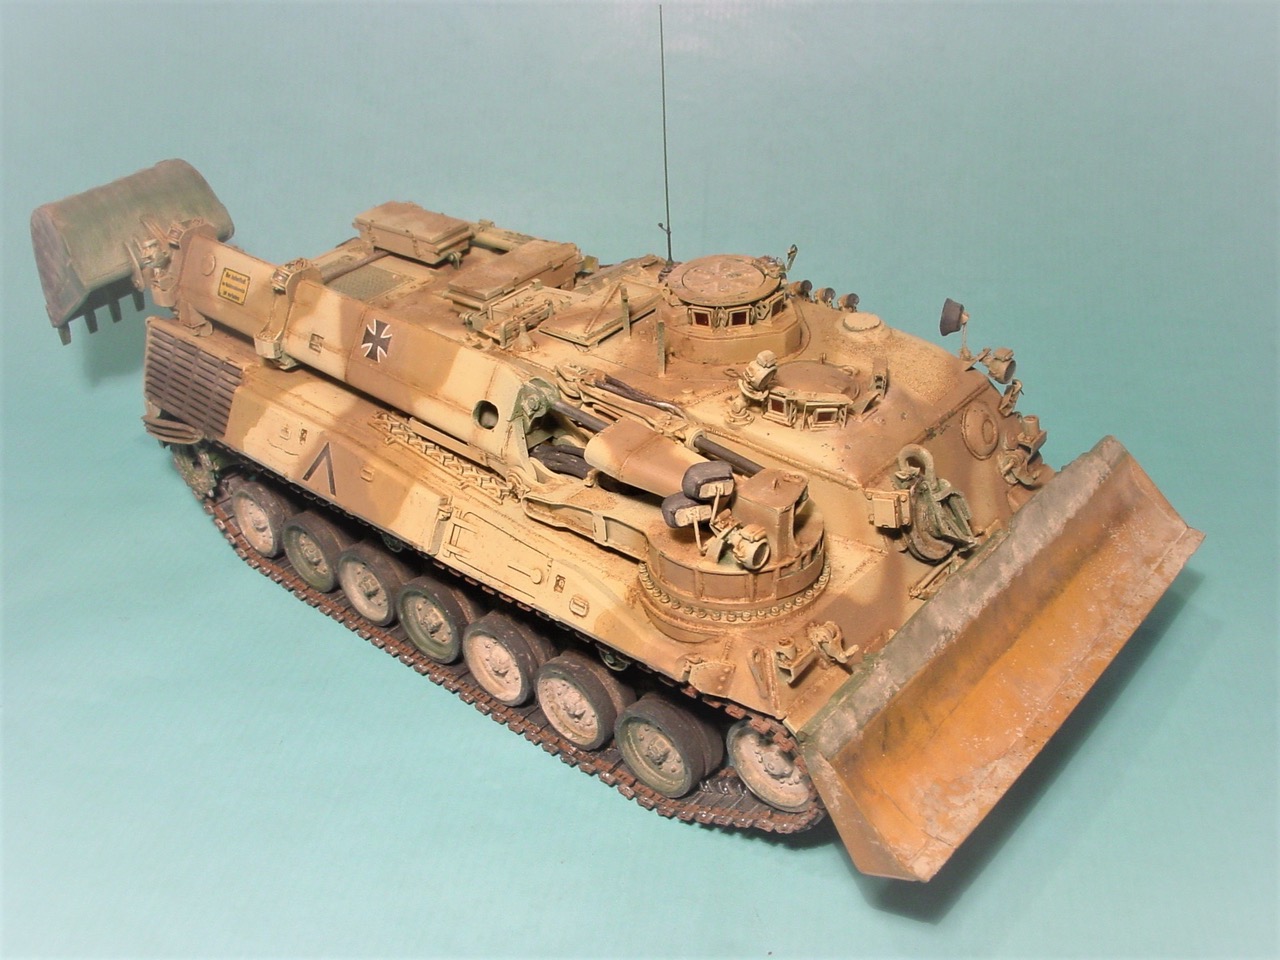
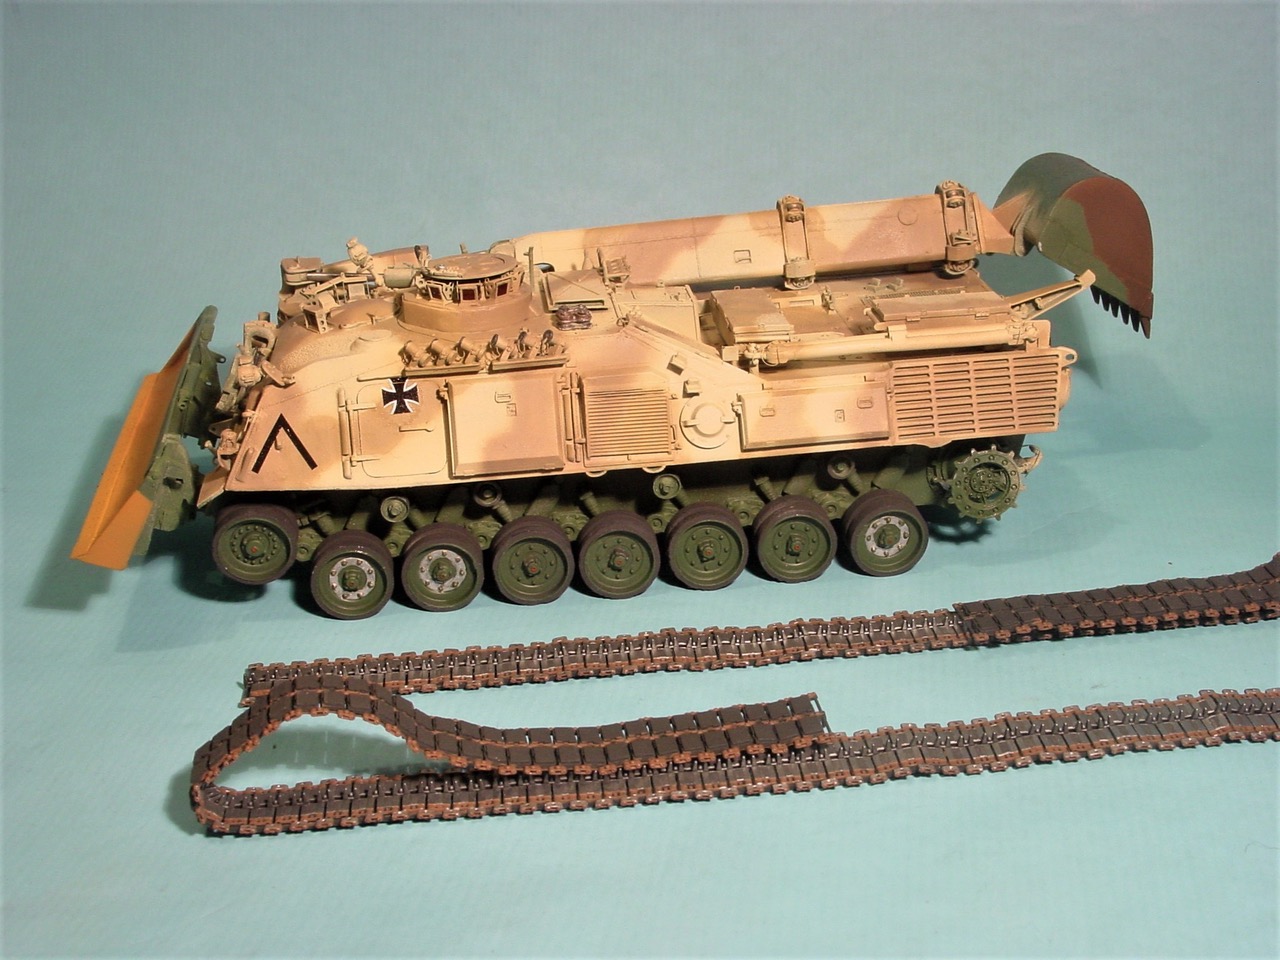
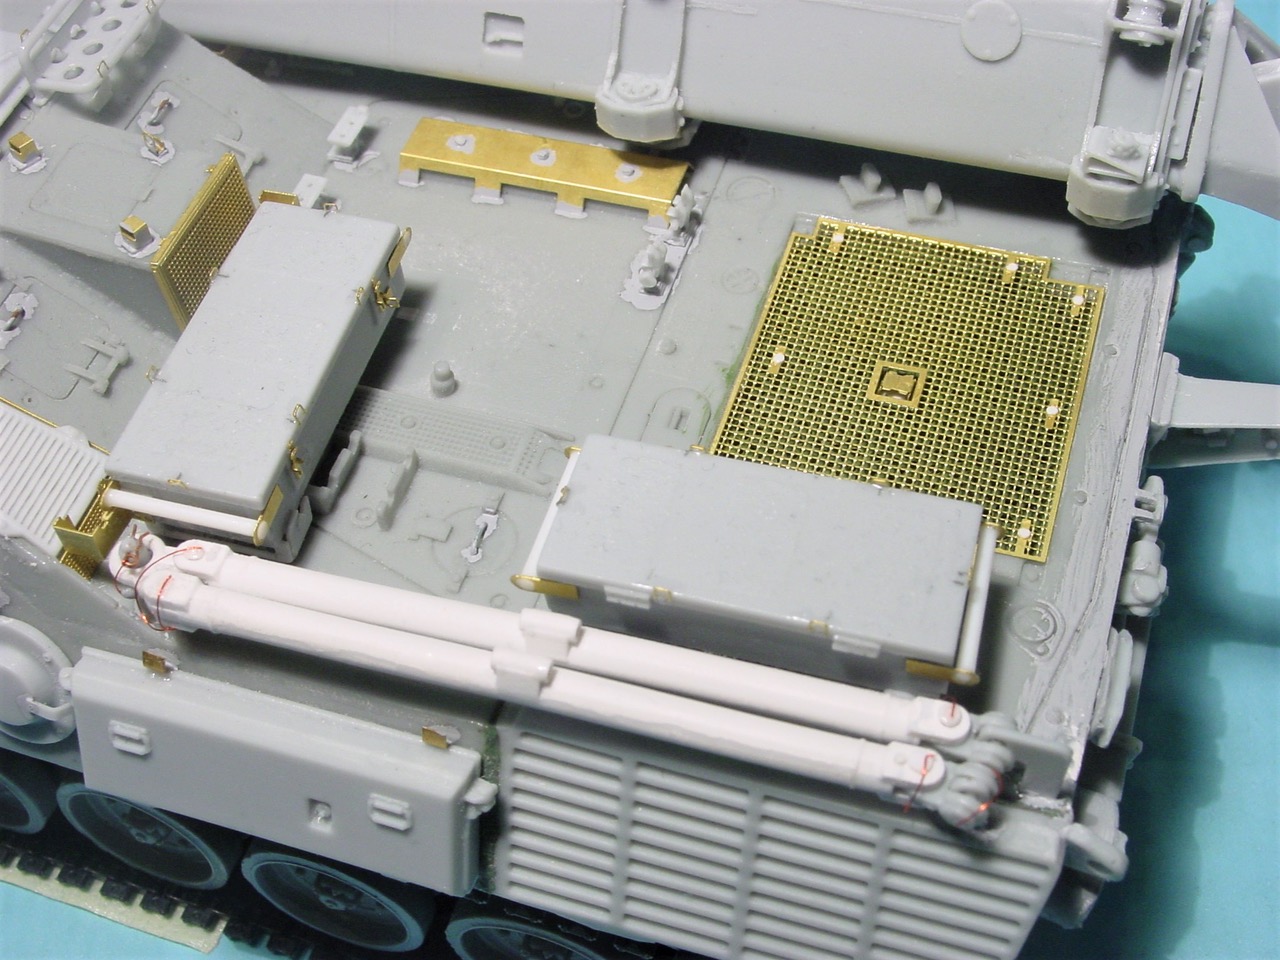
I built it as a 2nd batch vehicle and updated the model with the following after-market sets:
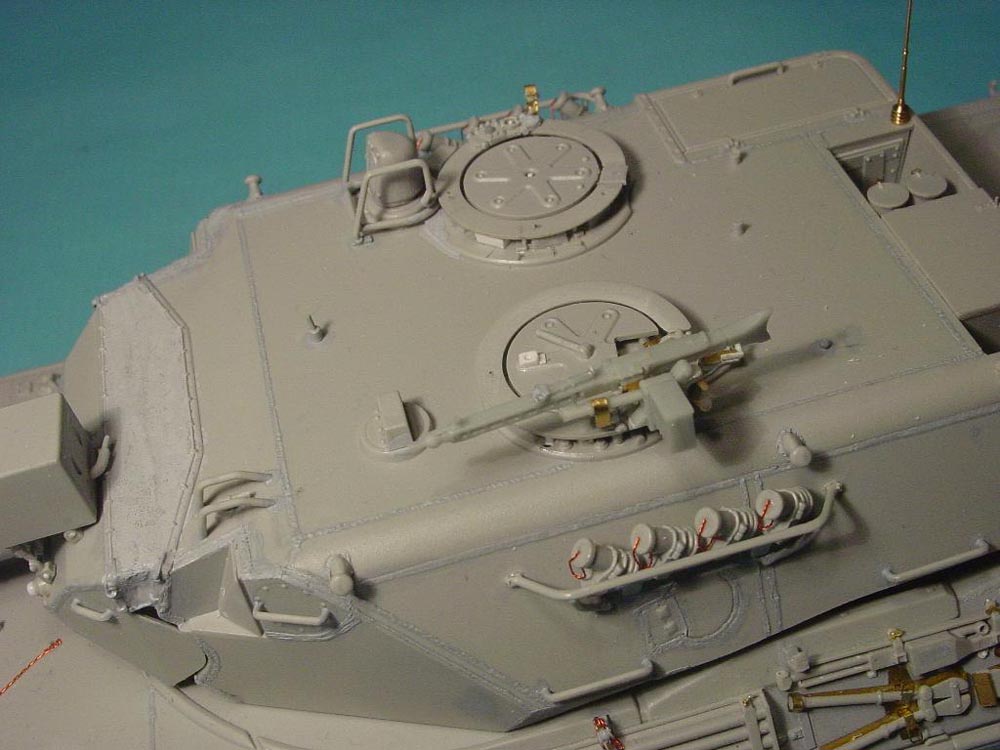
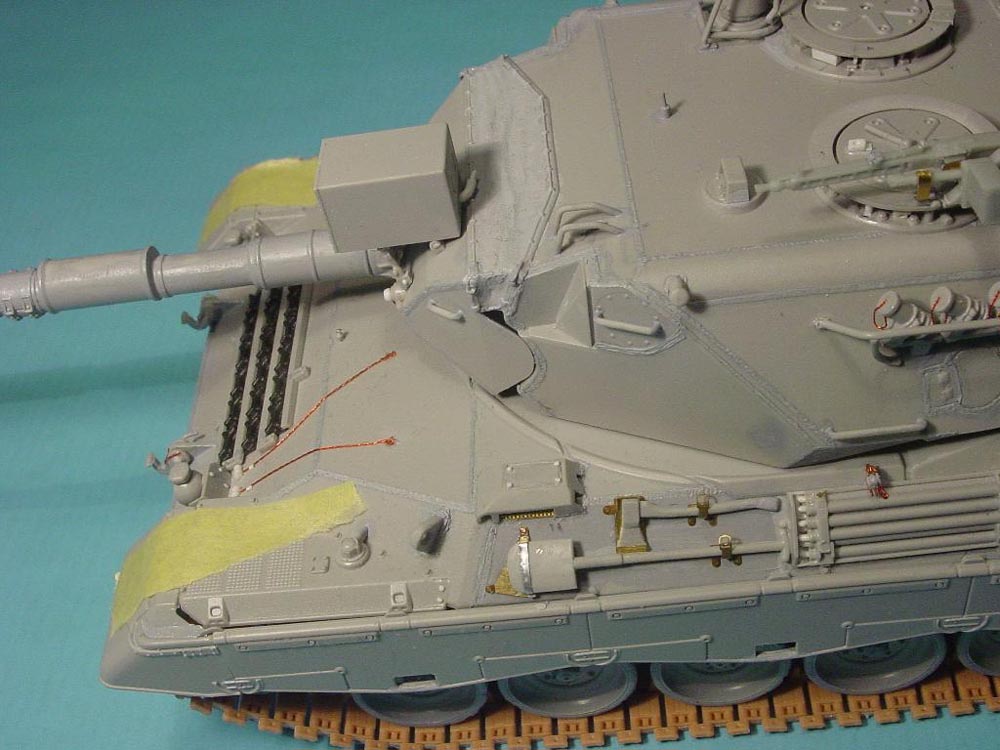
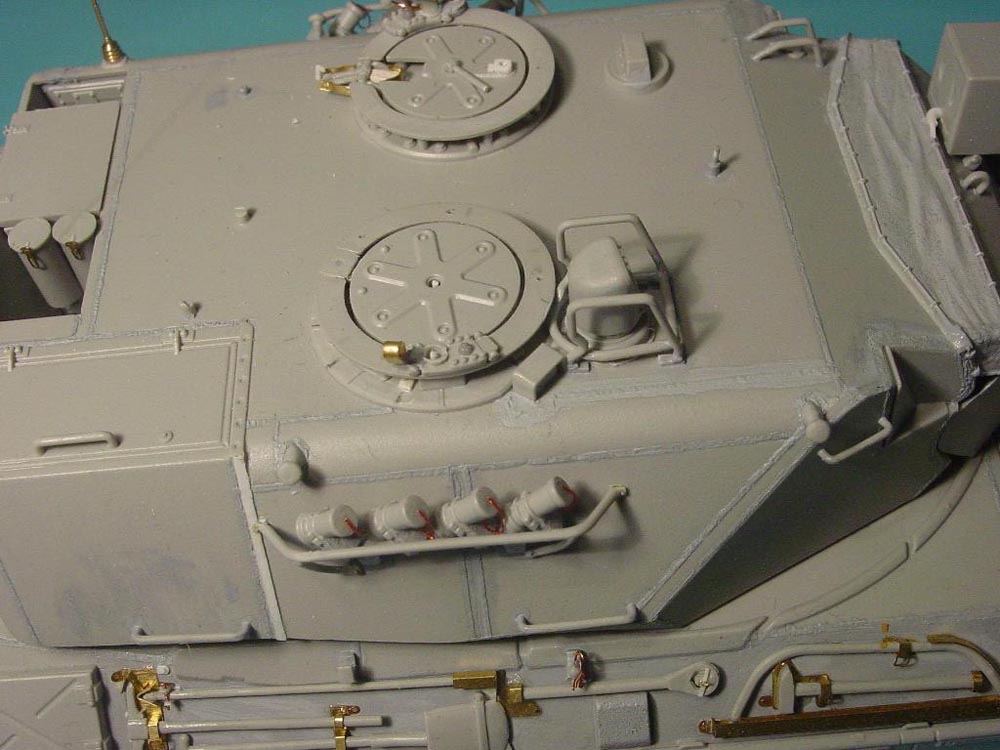
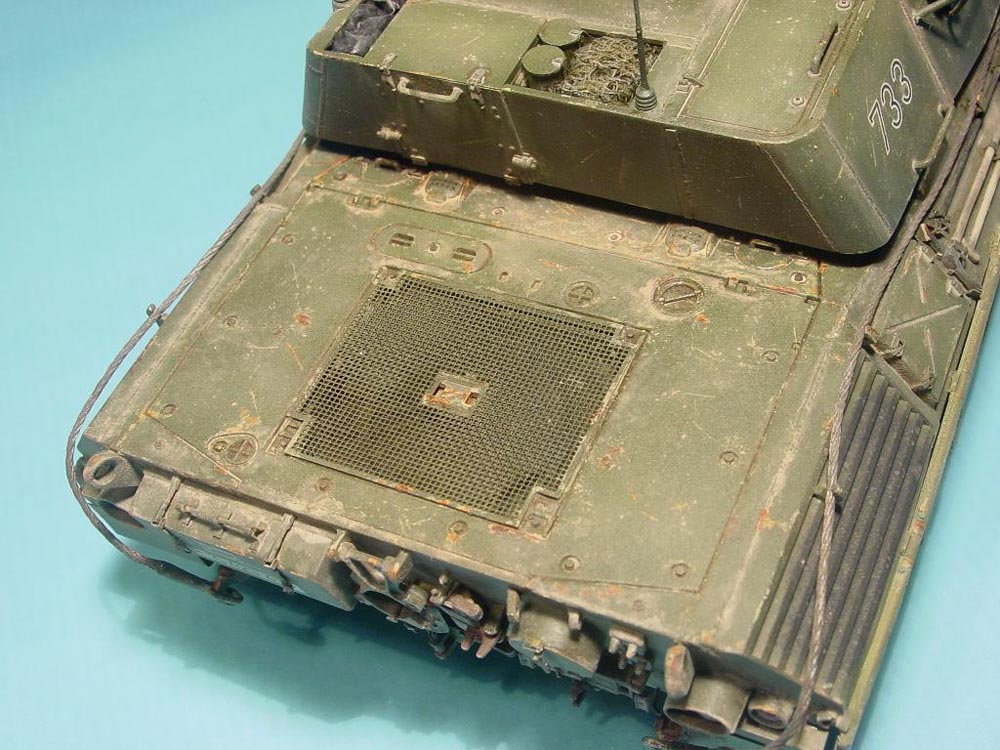
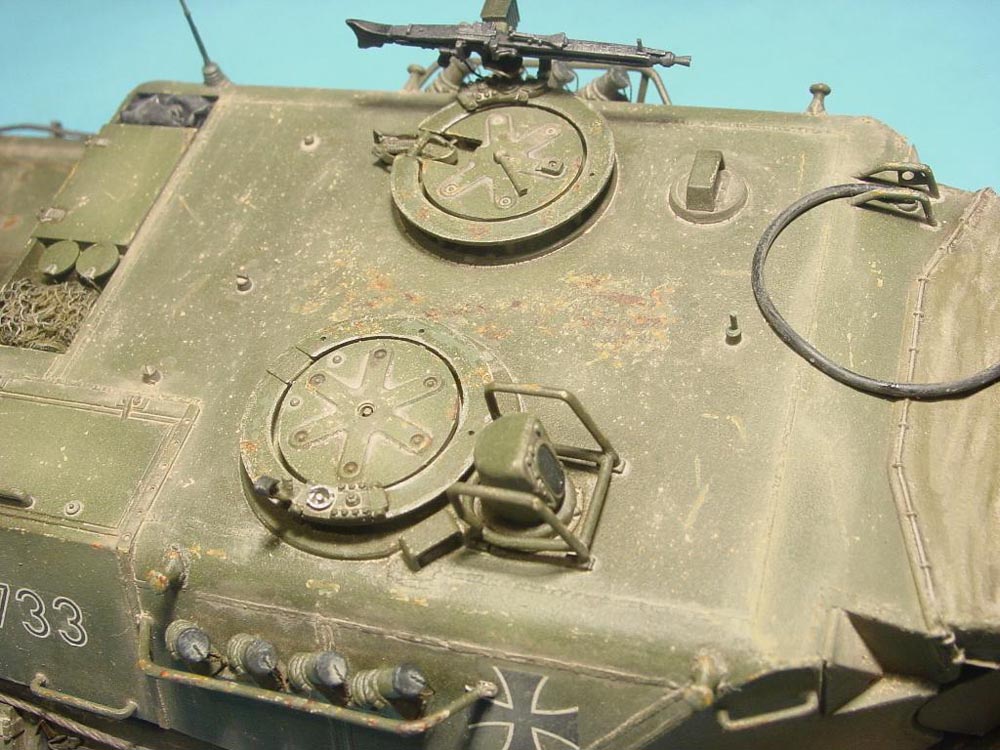
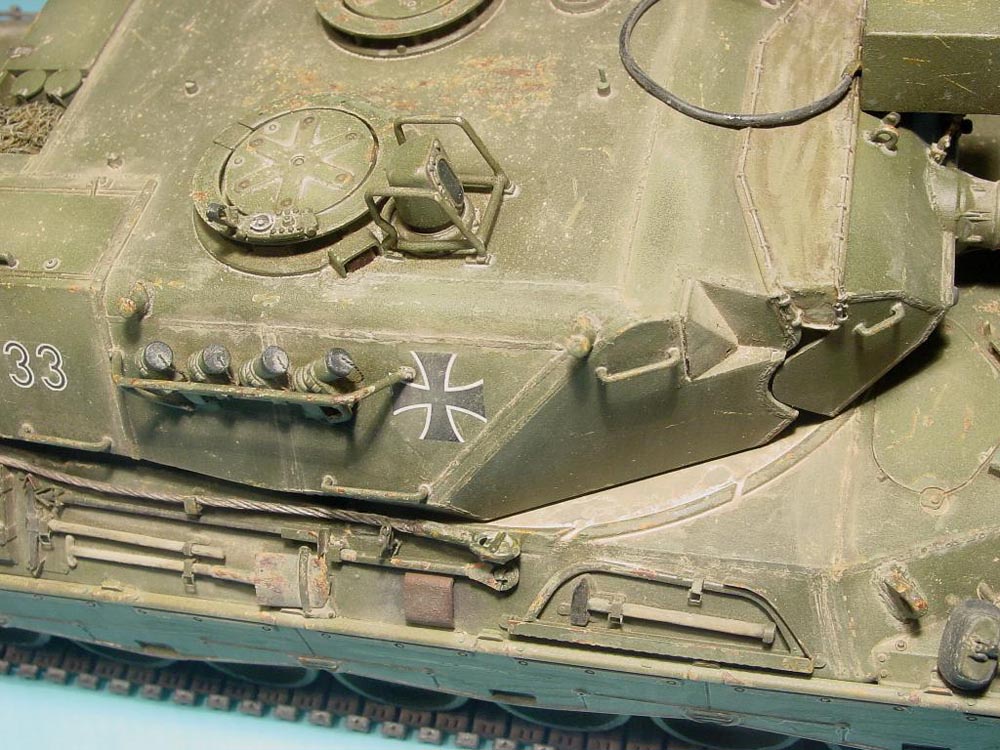
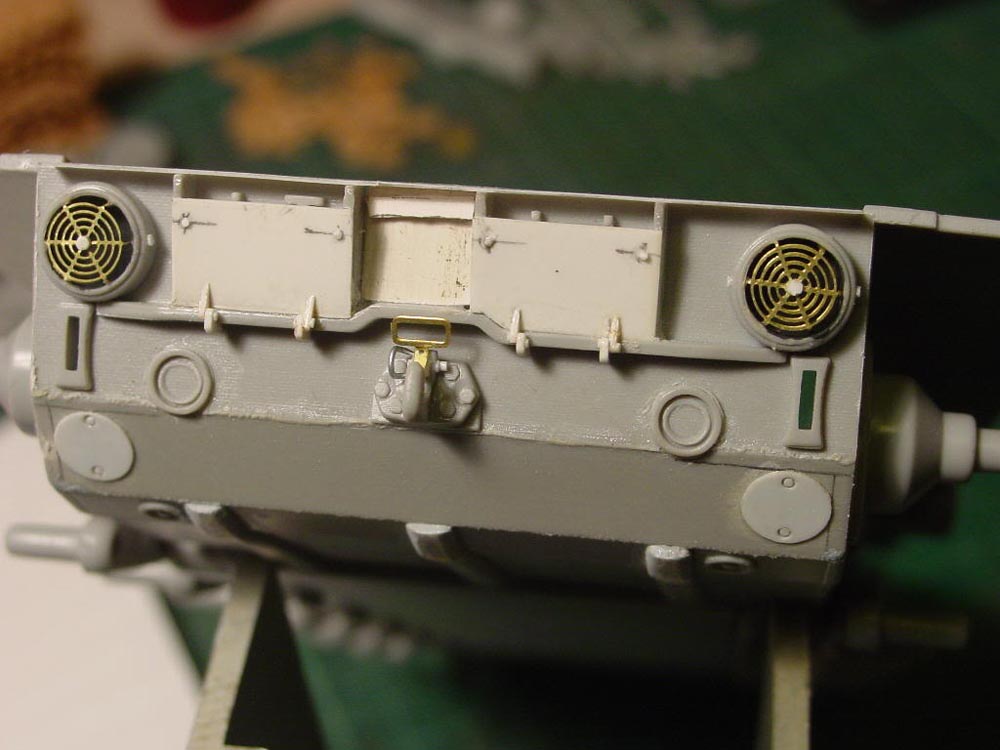
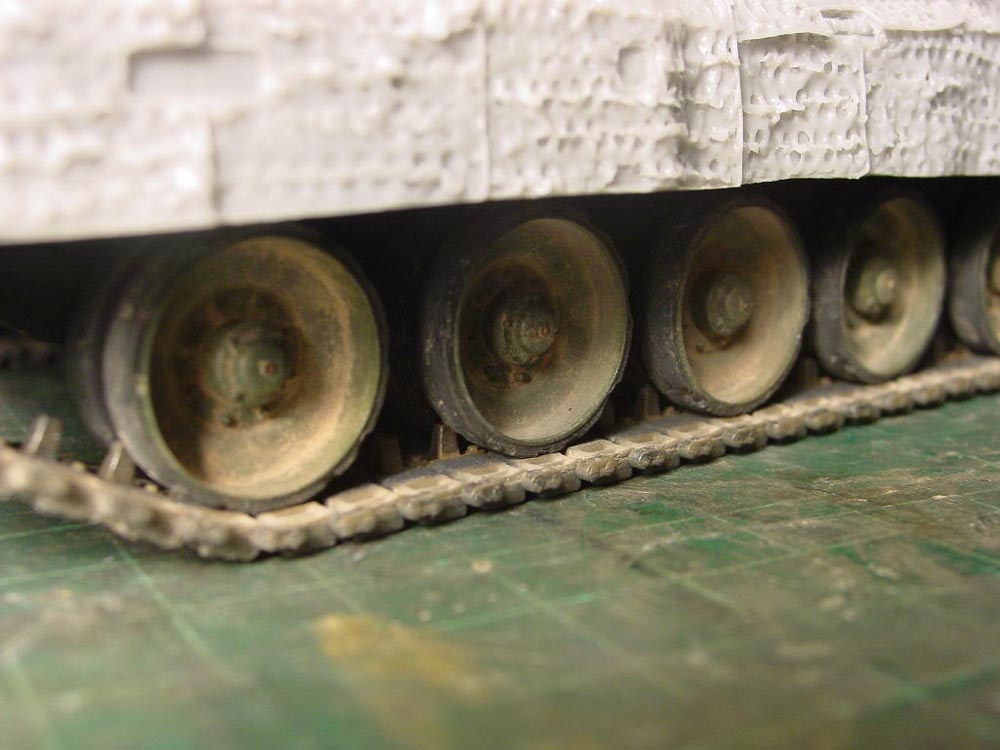
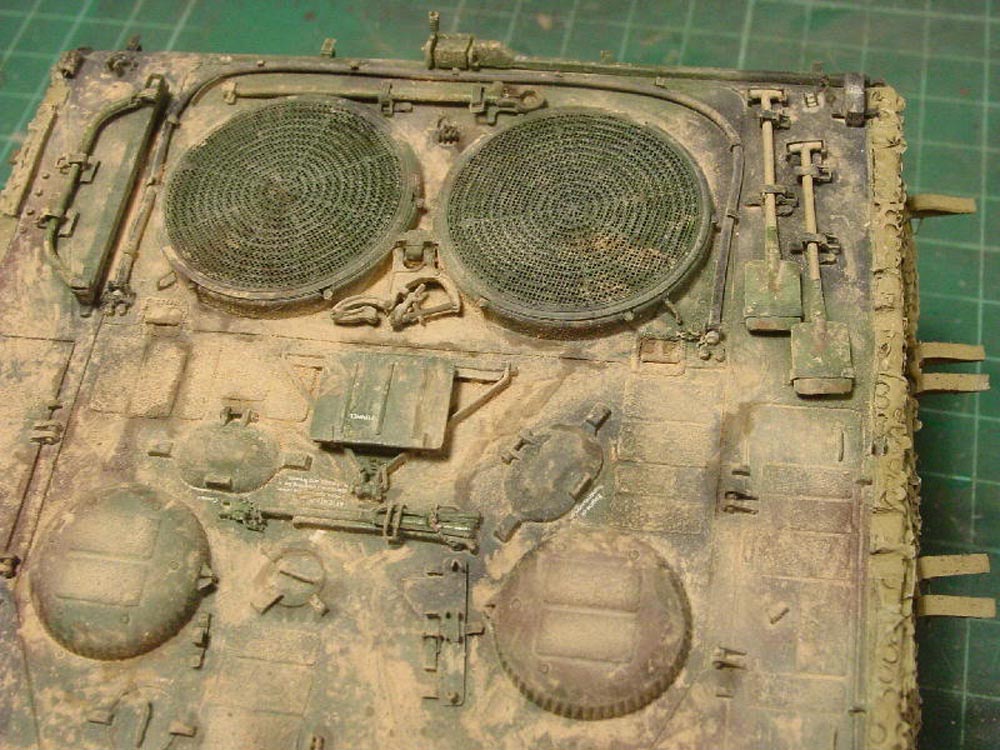
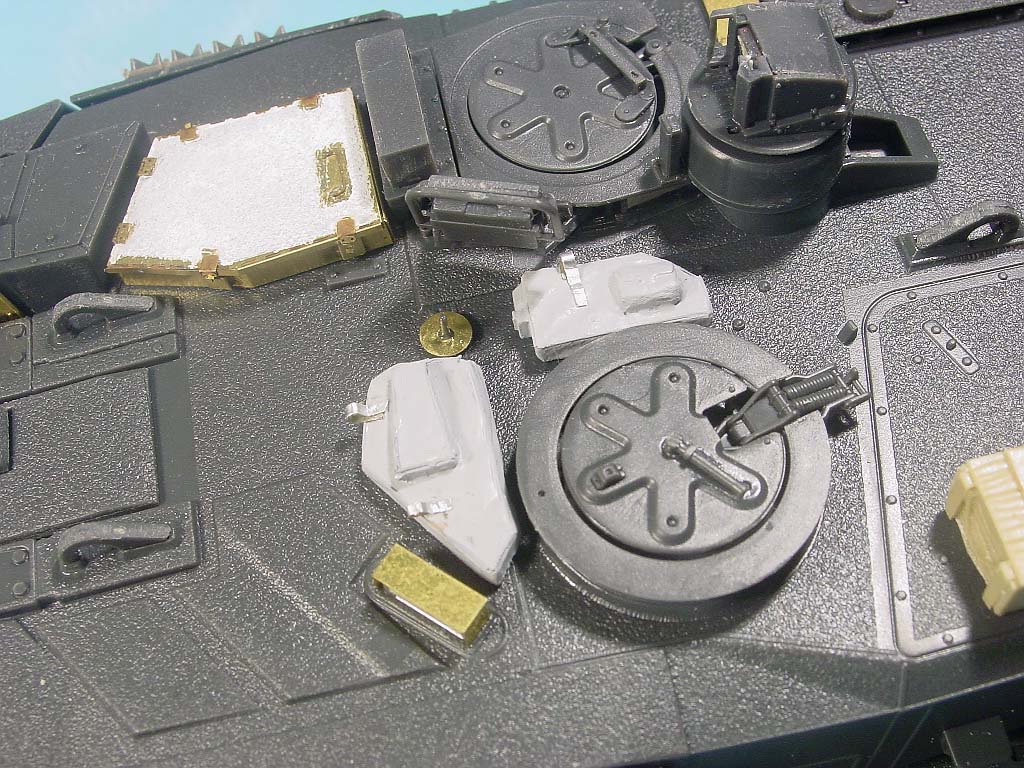
In addition, I covered the turret with putty and sanded it down to get rid of the overdone casting structure, drilled out the cooling grille and replaced it with a PE part from the spares box, same for the idler wheels, added weld beads and detailed a few minor things here and there.
Painted with Ammo MIG acrylics, weathered mainly with oils and pigments.
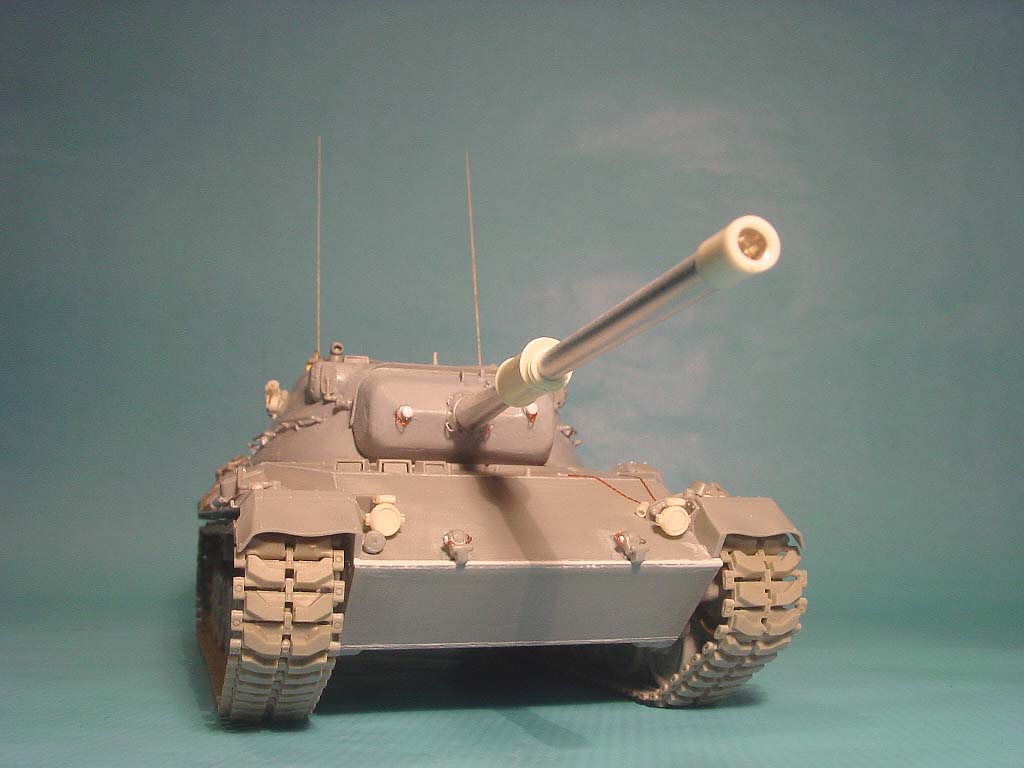
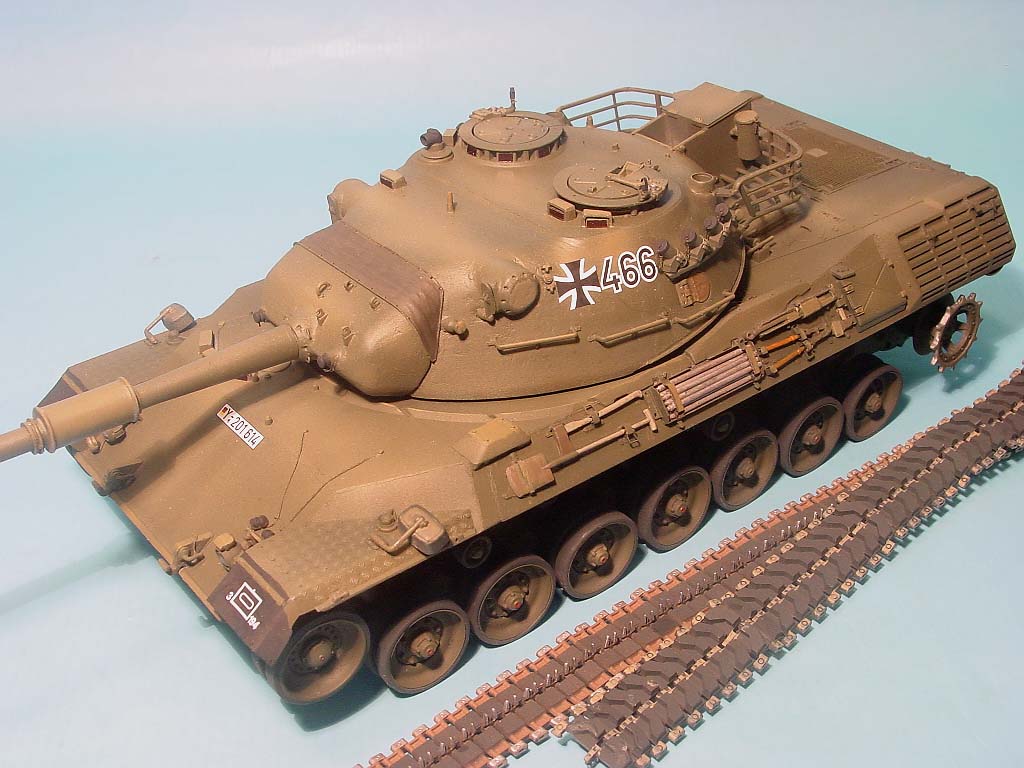


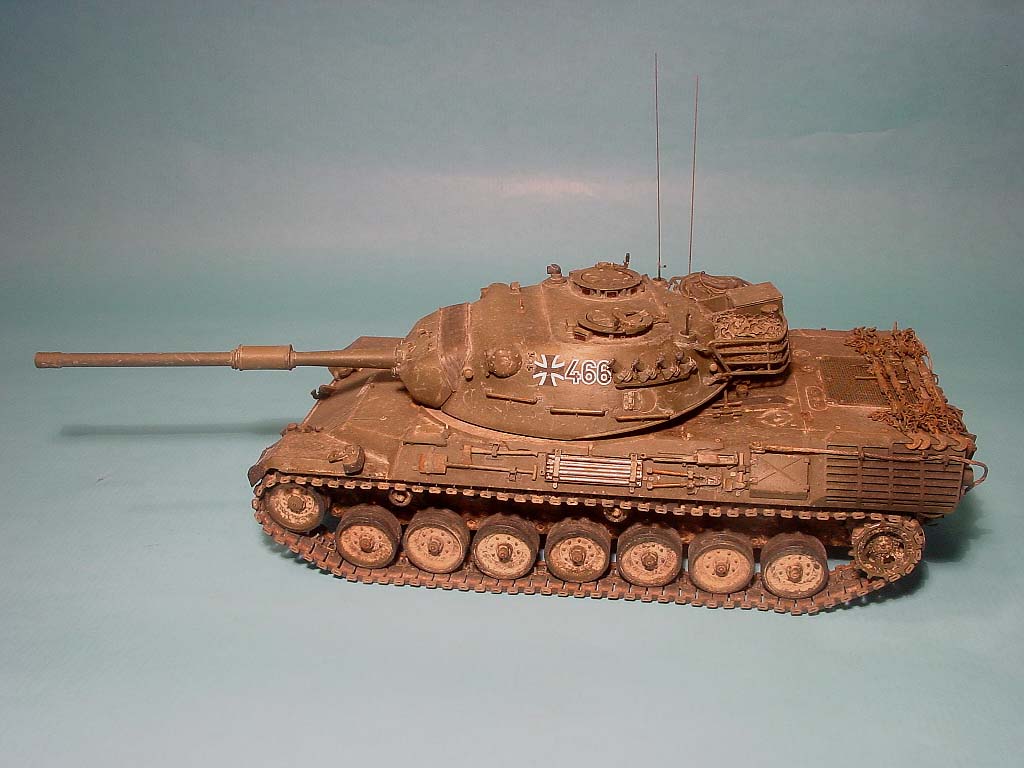

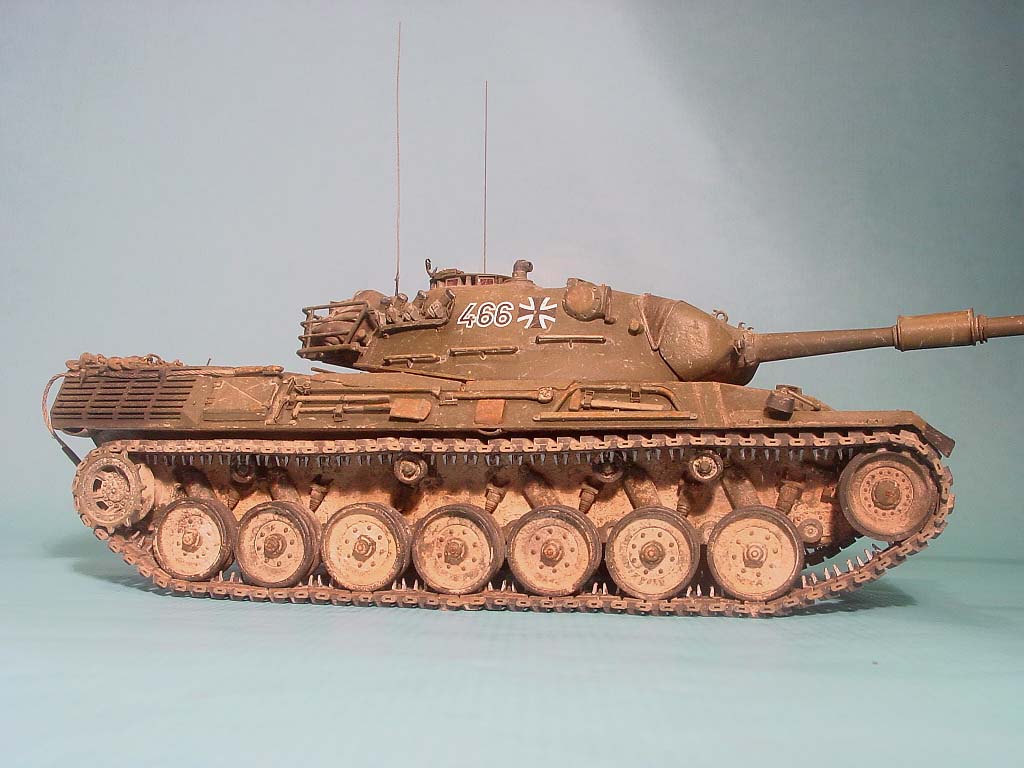
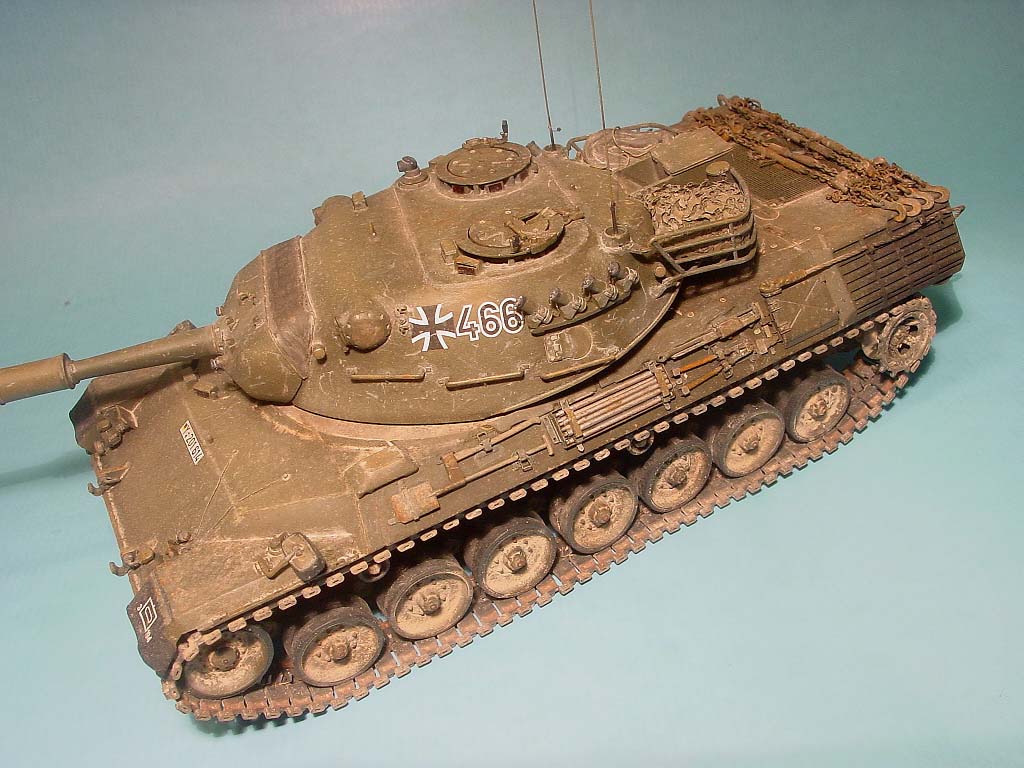
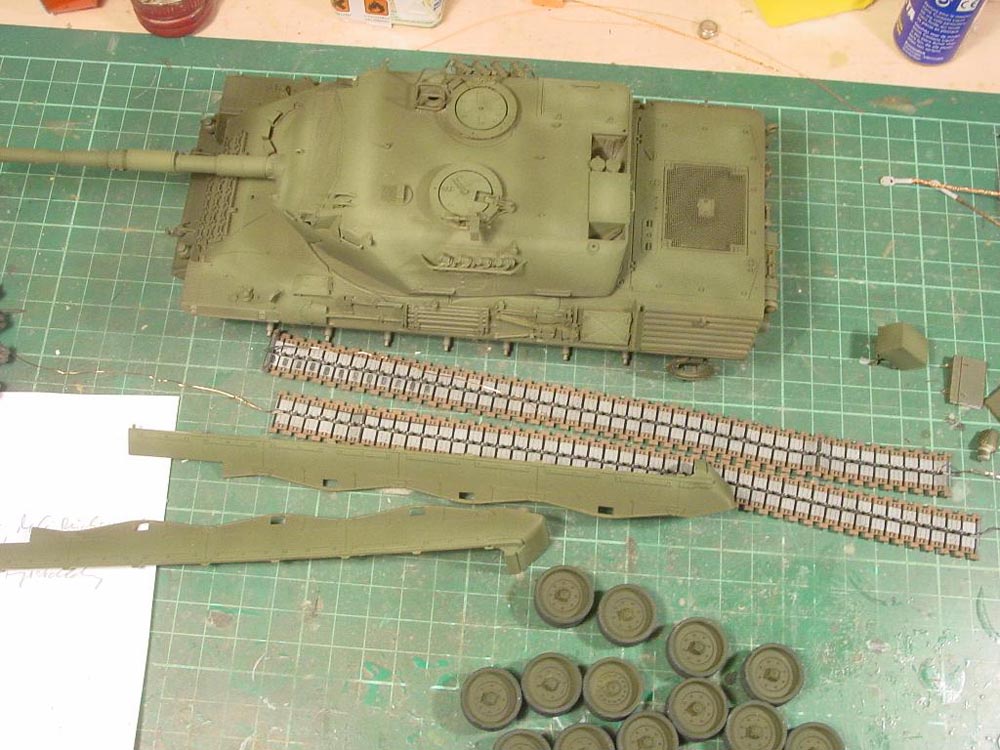
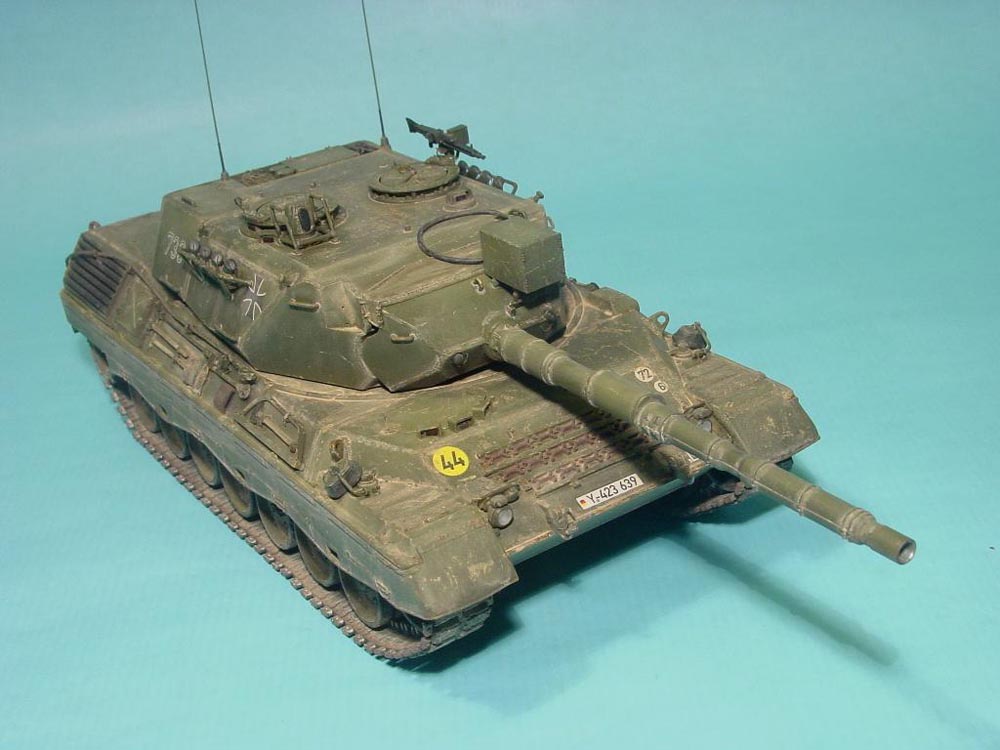
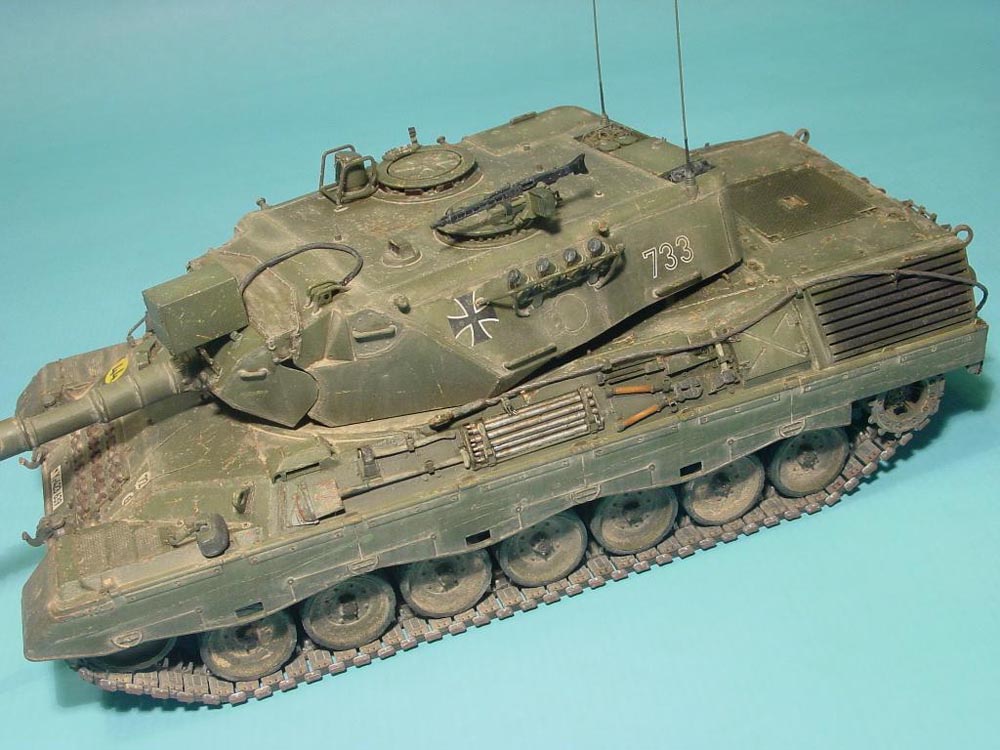
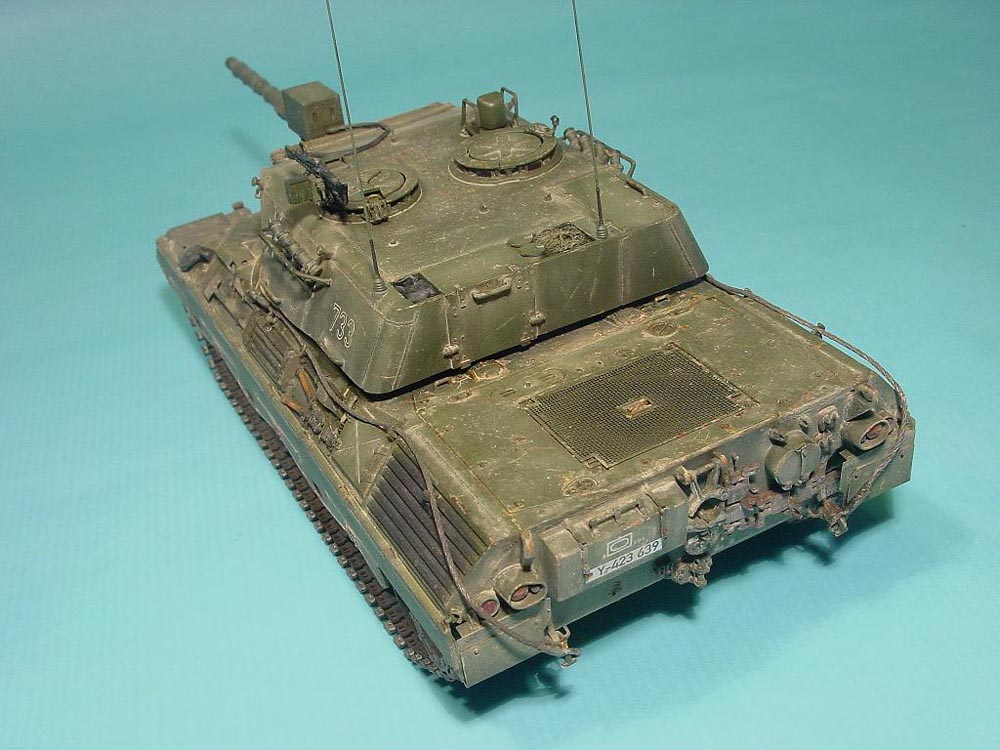
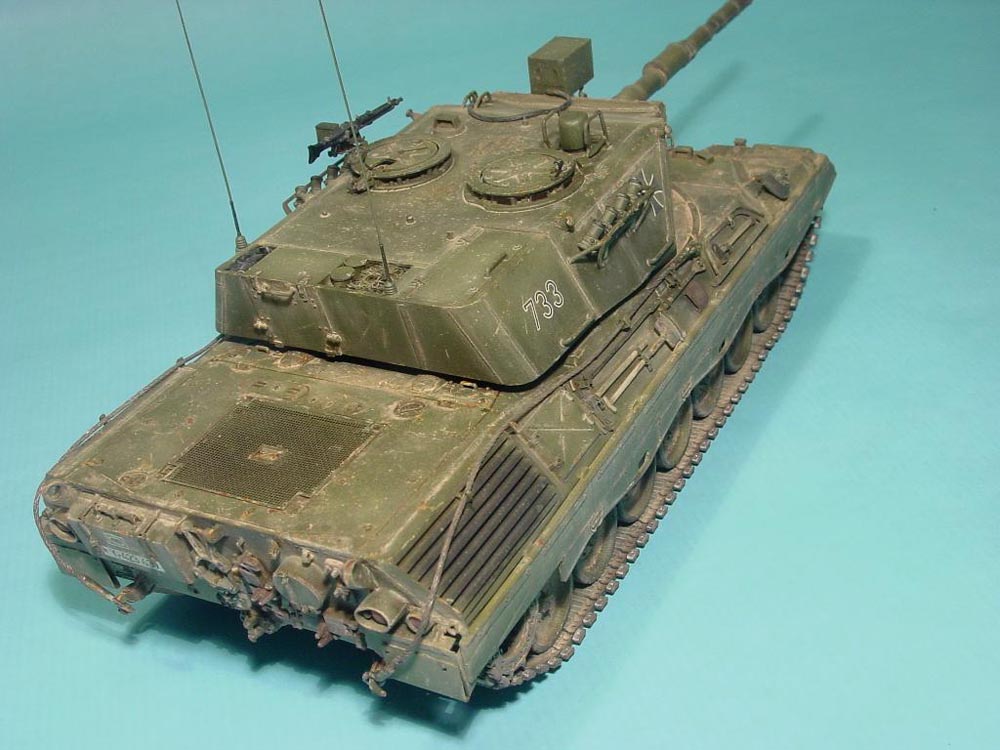
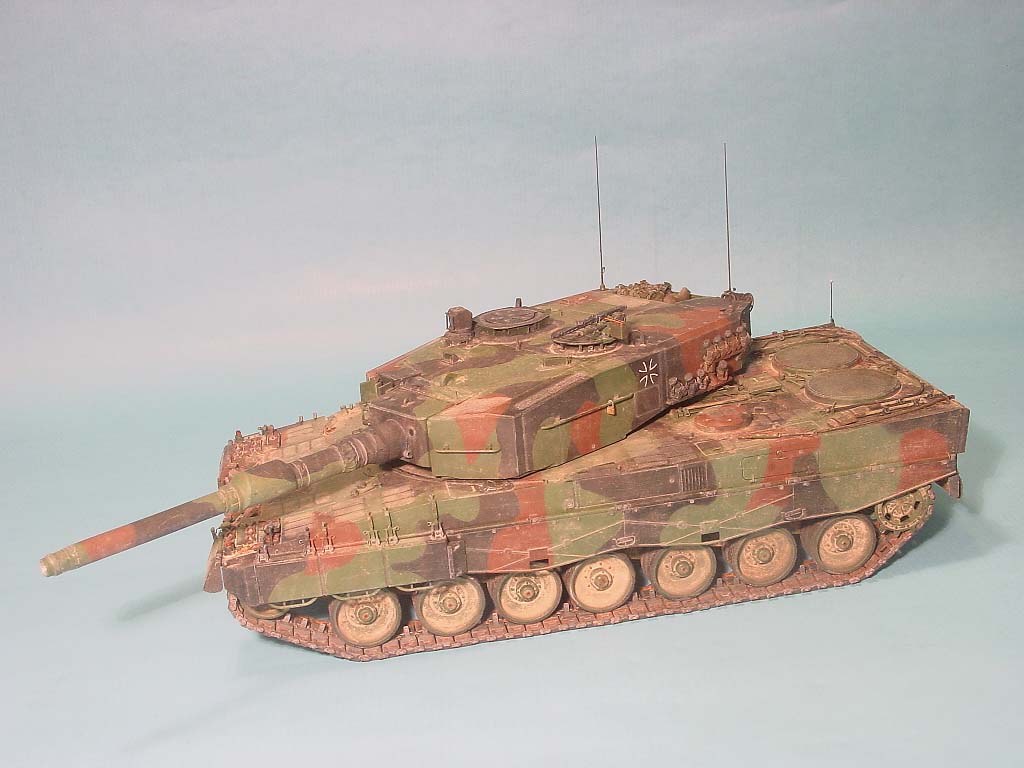
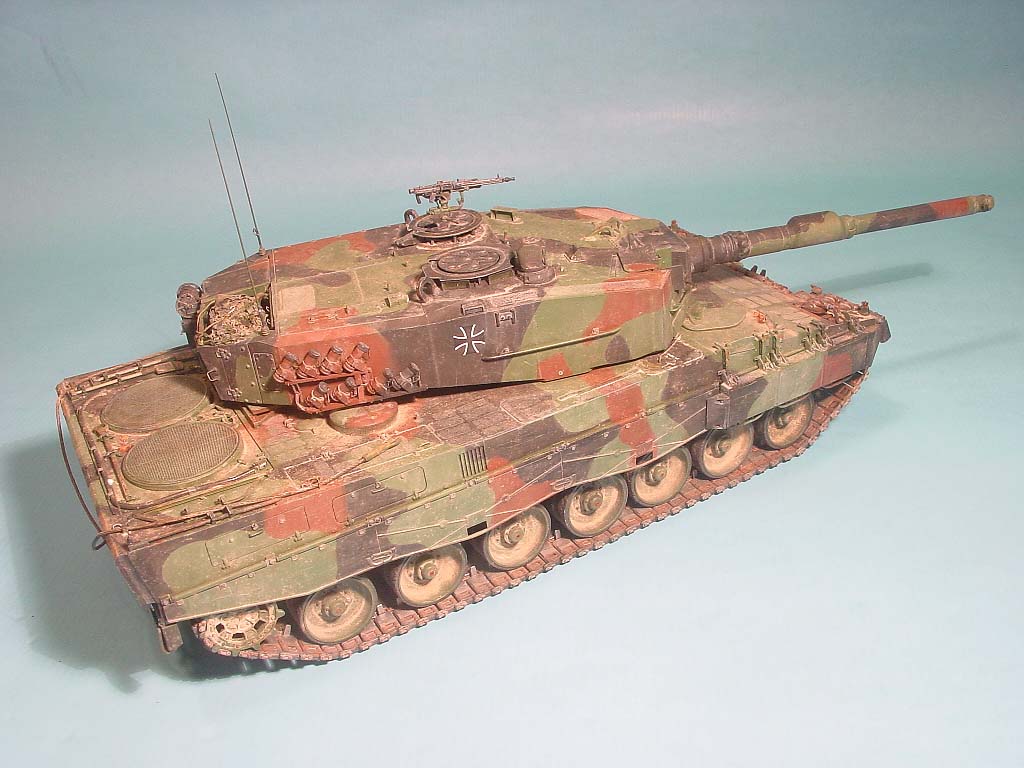
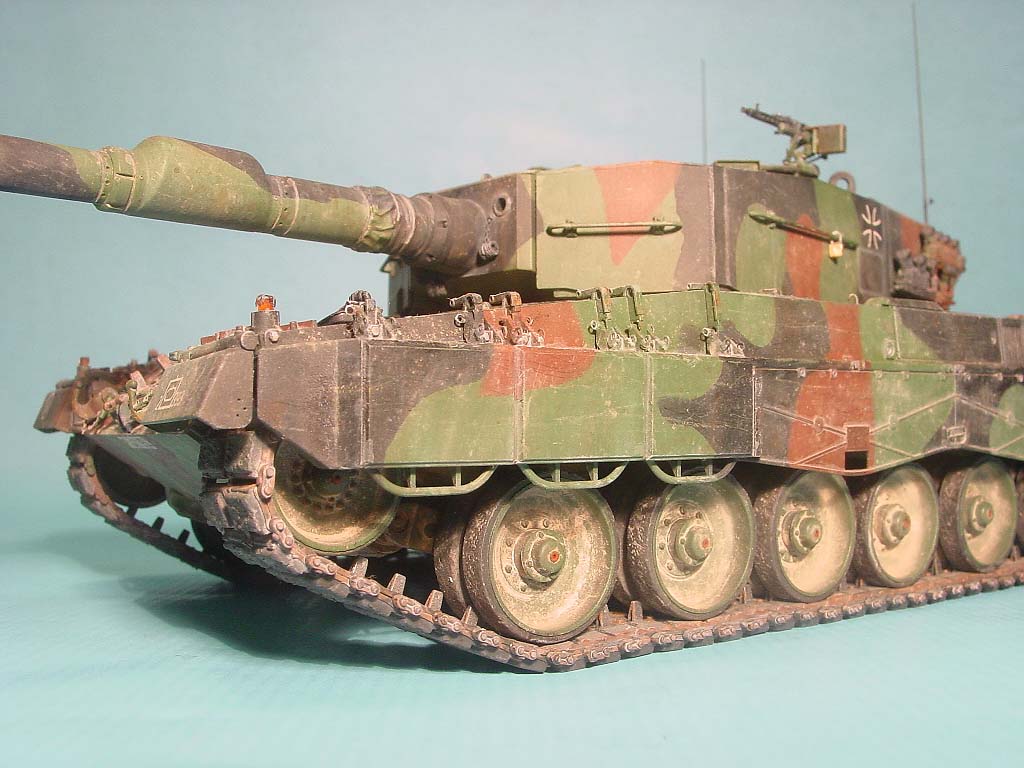
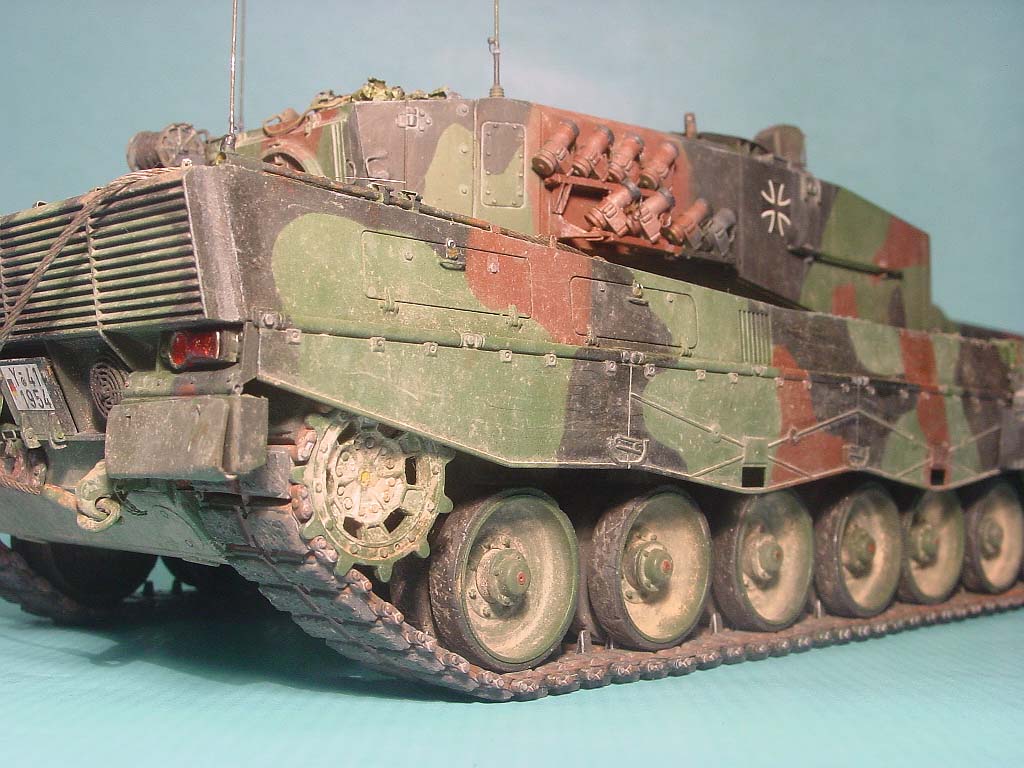
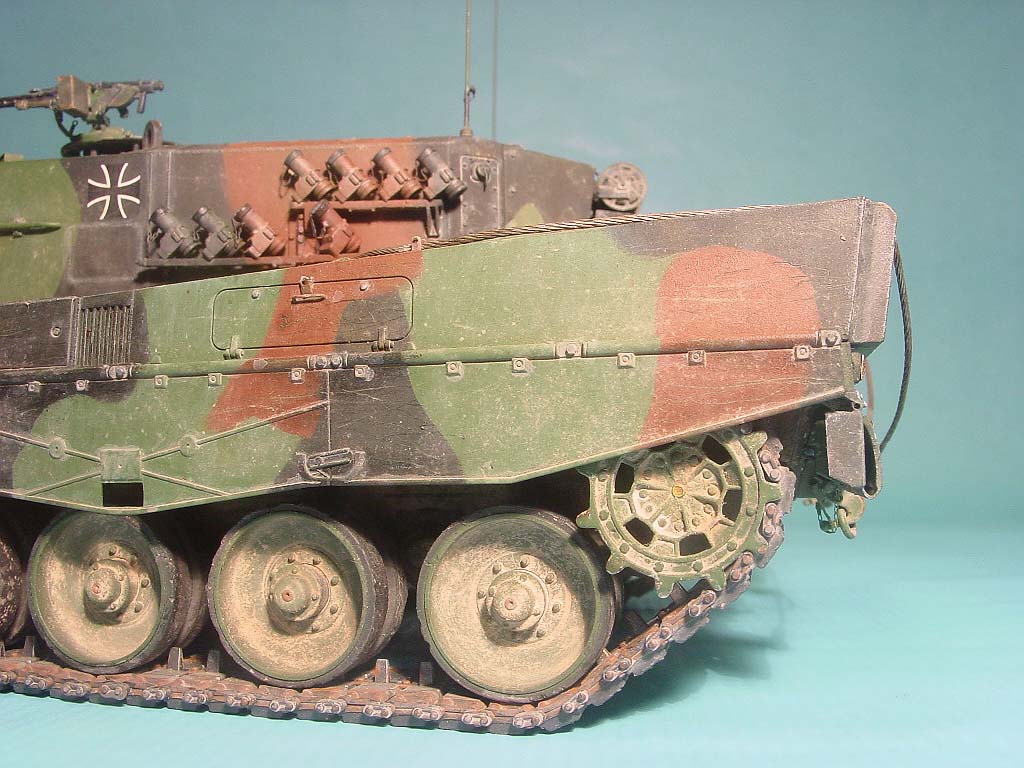
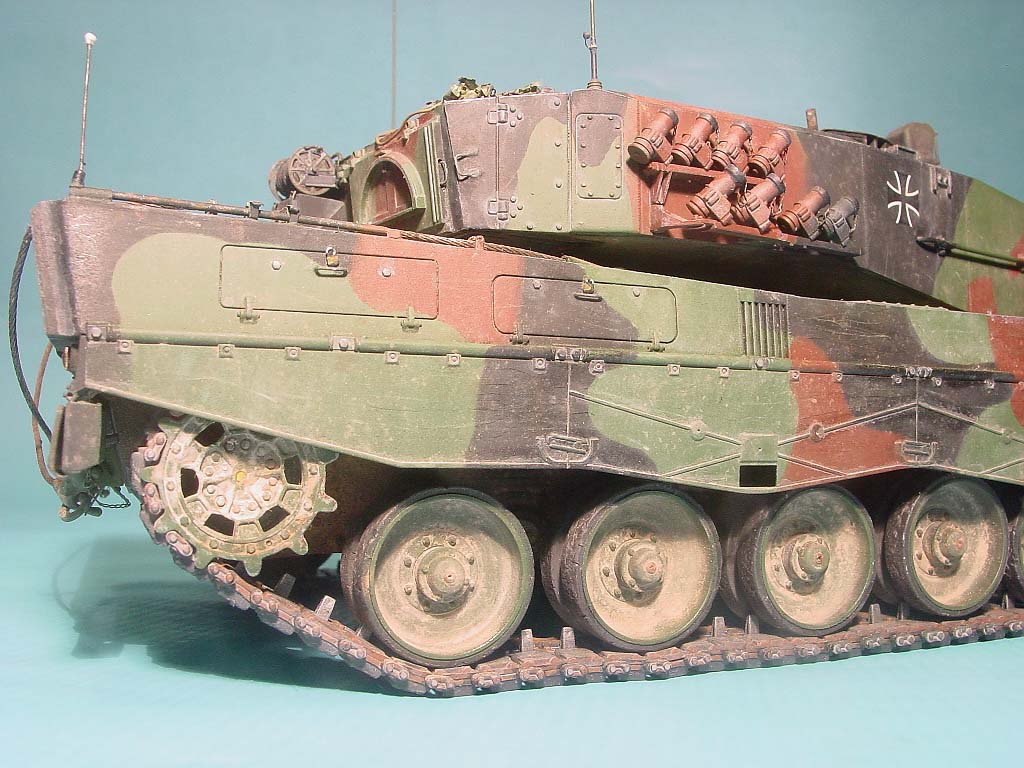
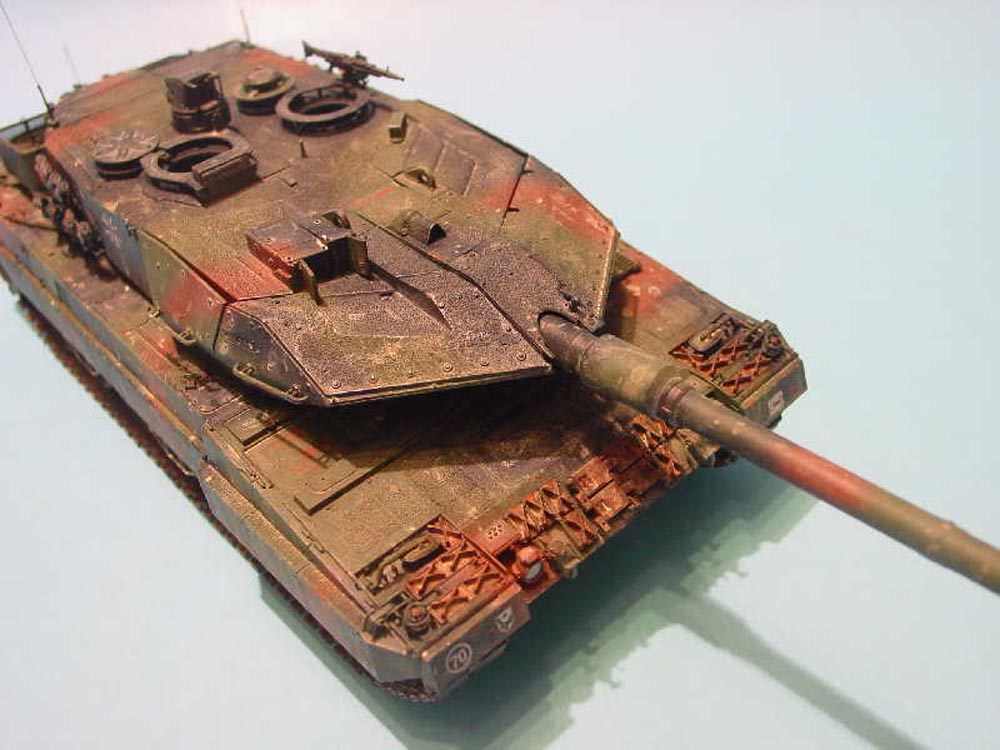
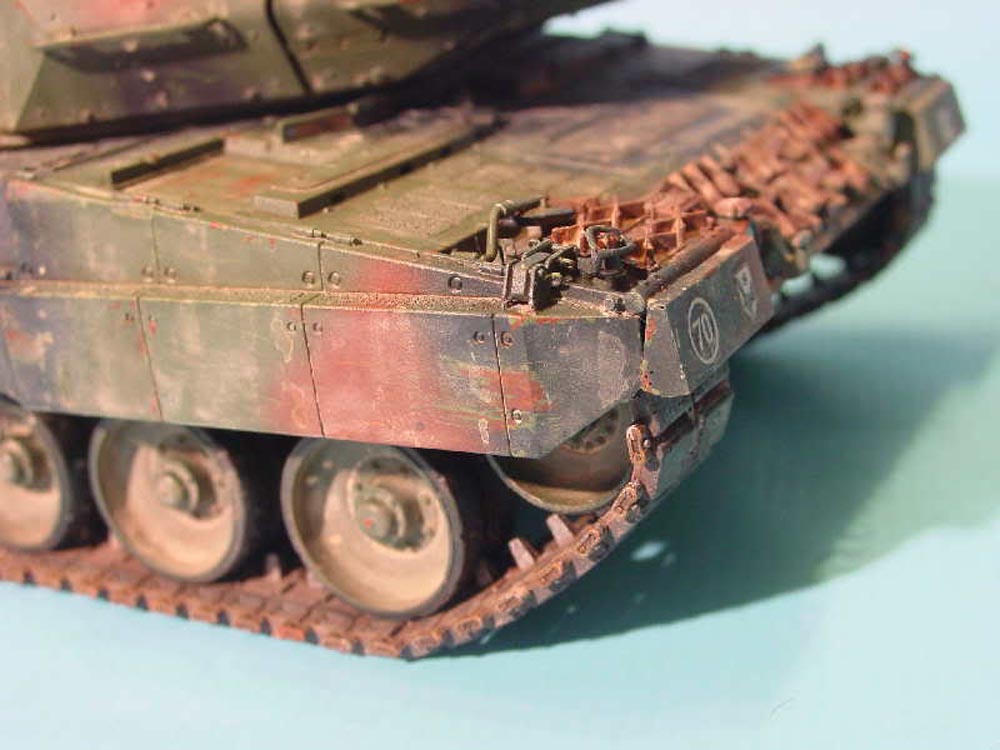
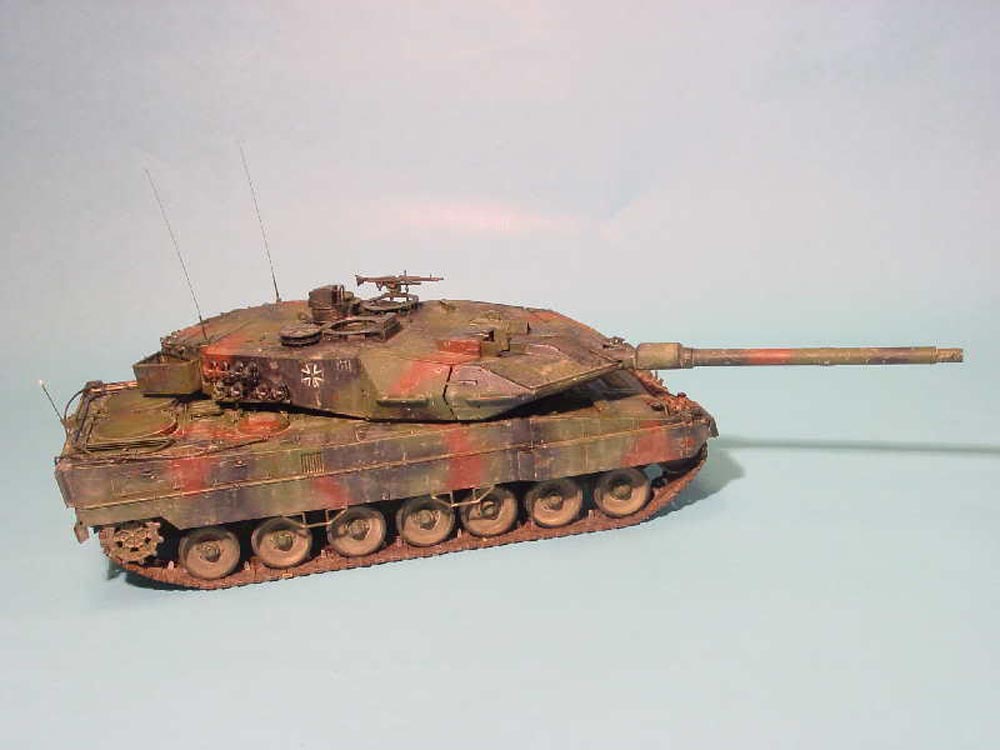
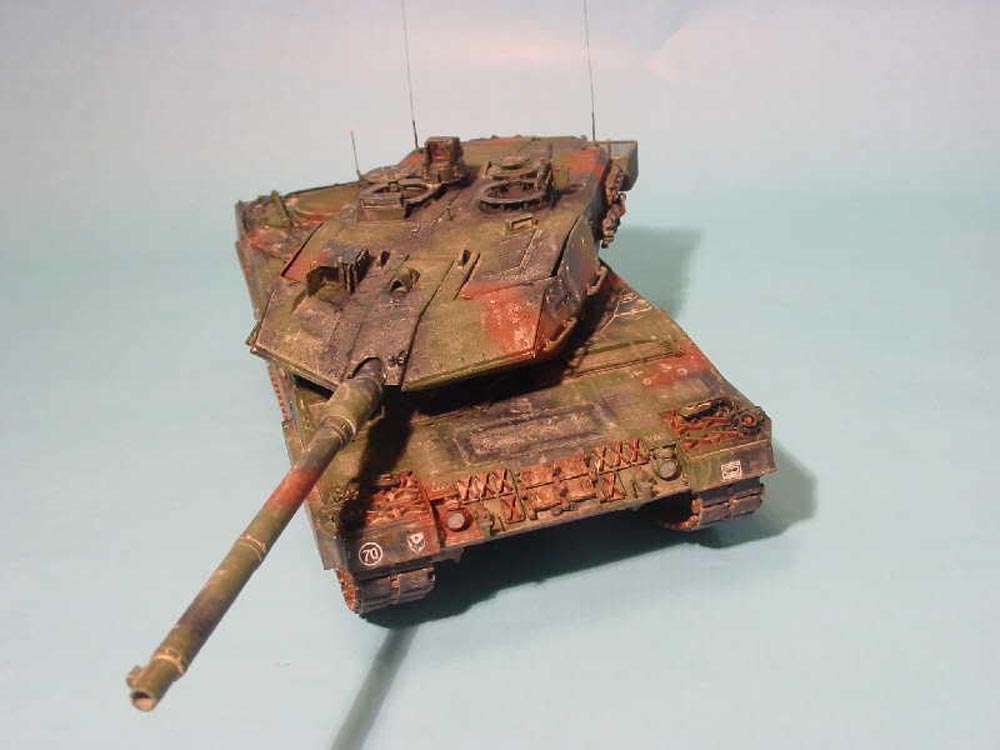
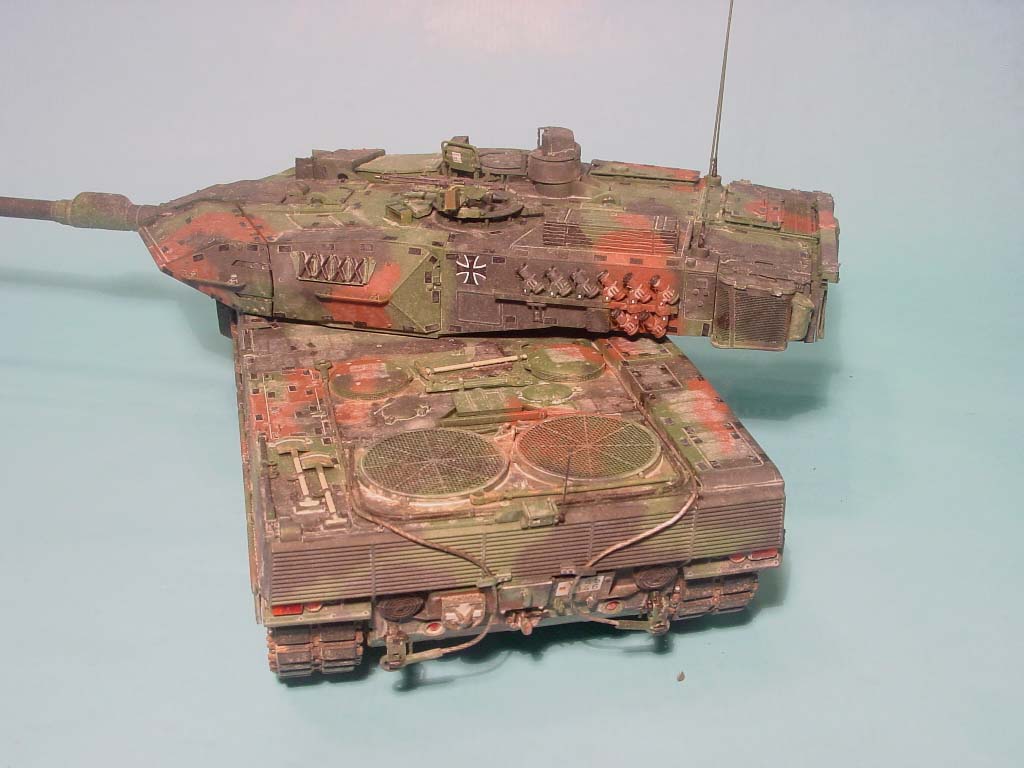
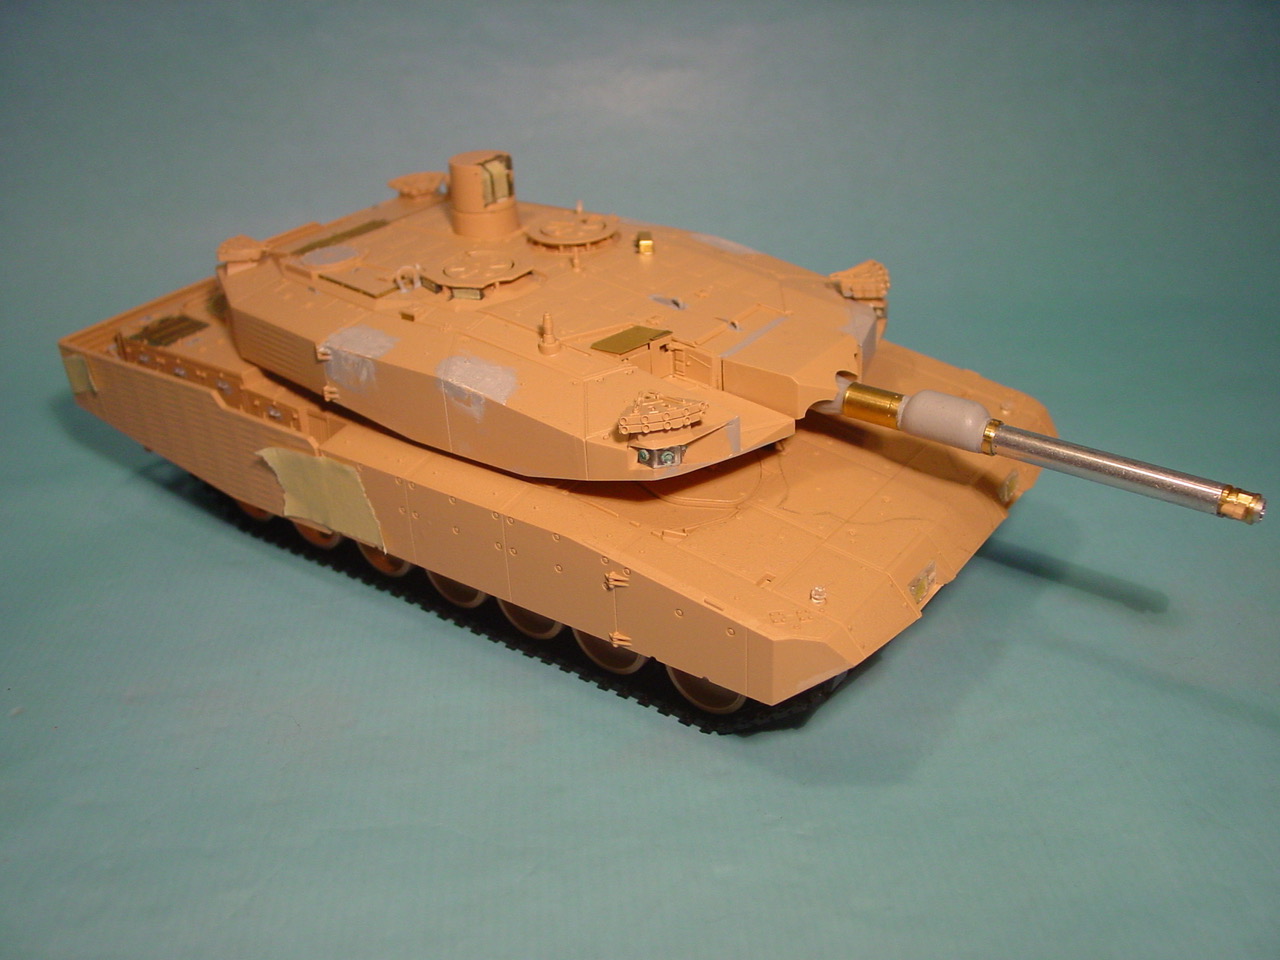
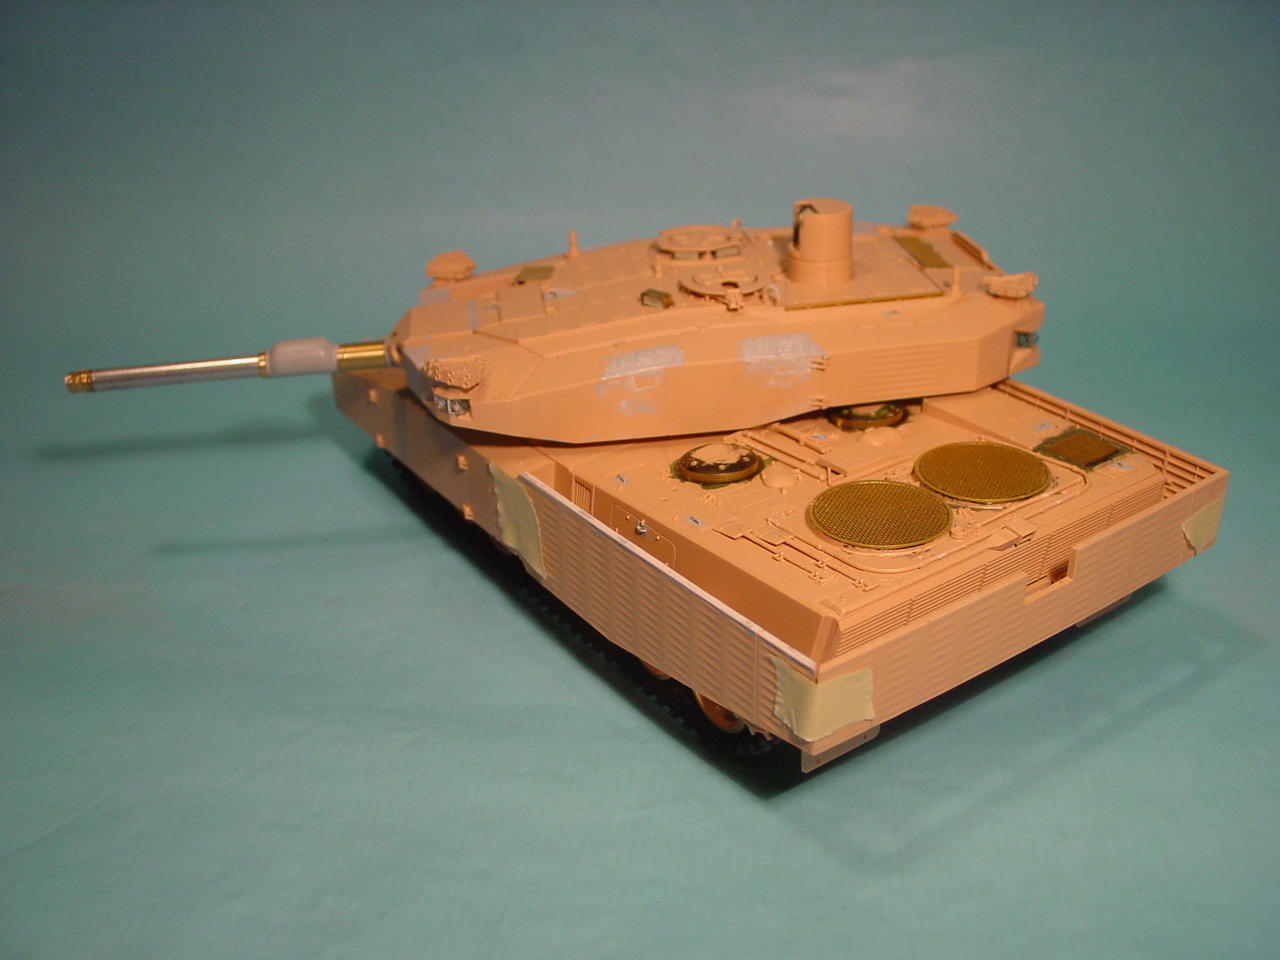
NOT Meng but the MBK/Italeri model. Meng announced theirs when I was almost finished ... talk about Murphy's Law. Nevertheless, an excellent model by Italeri.
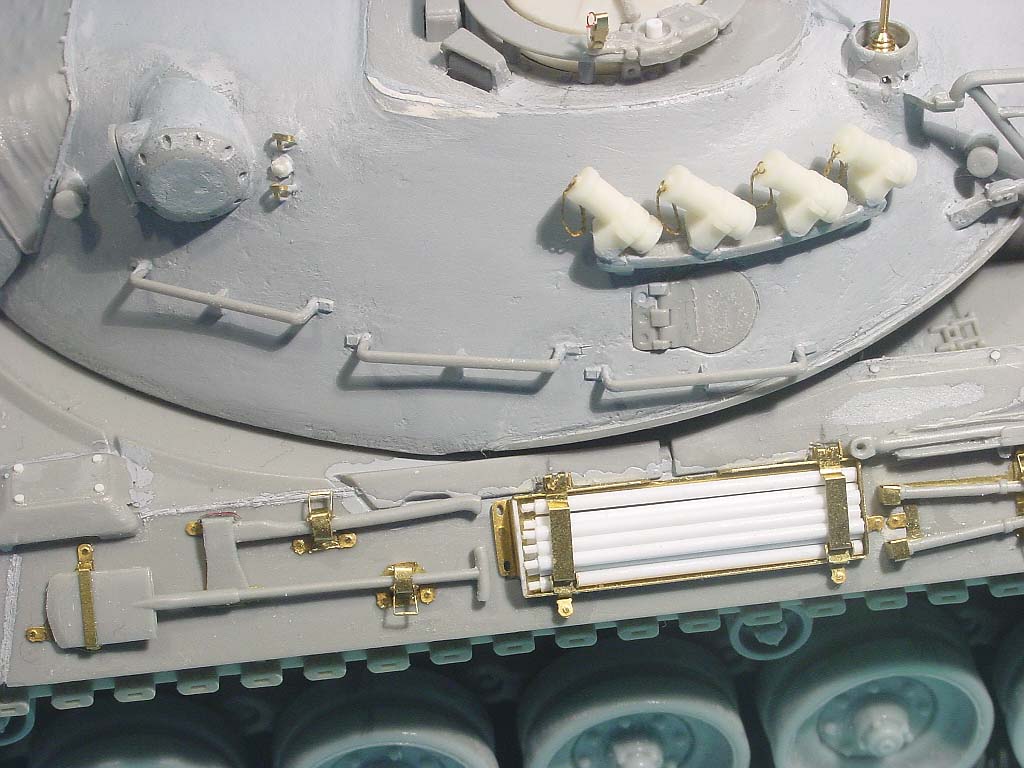
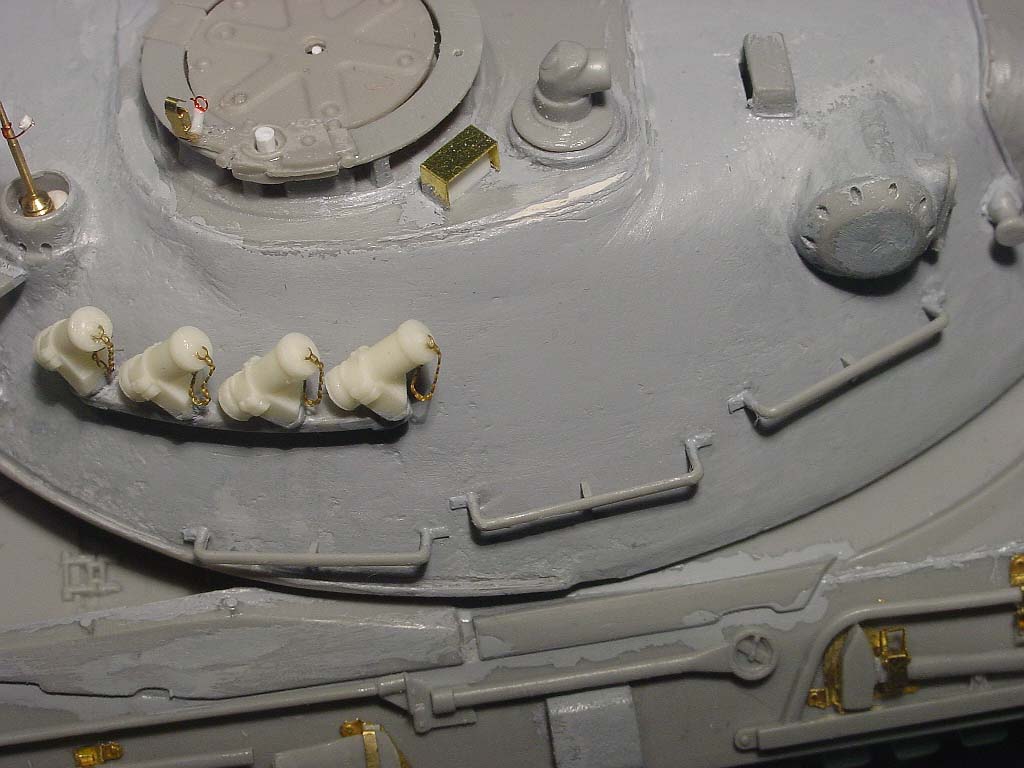
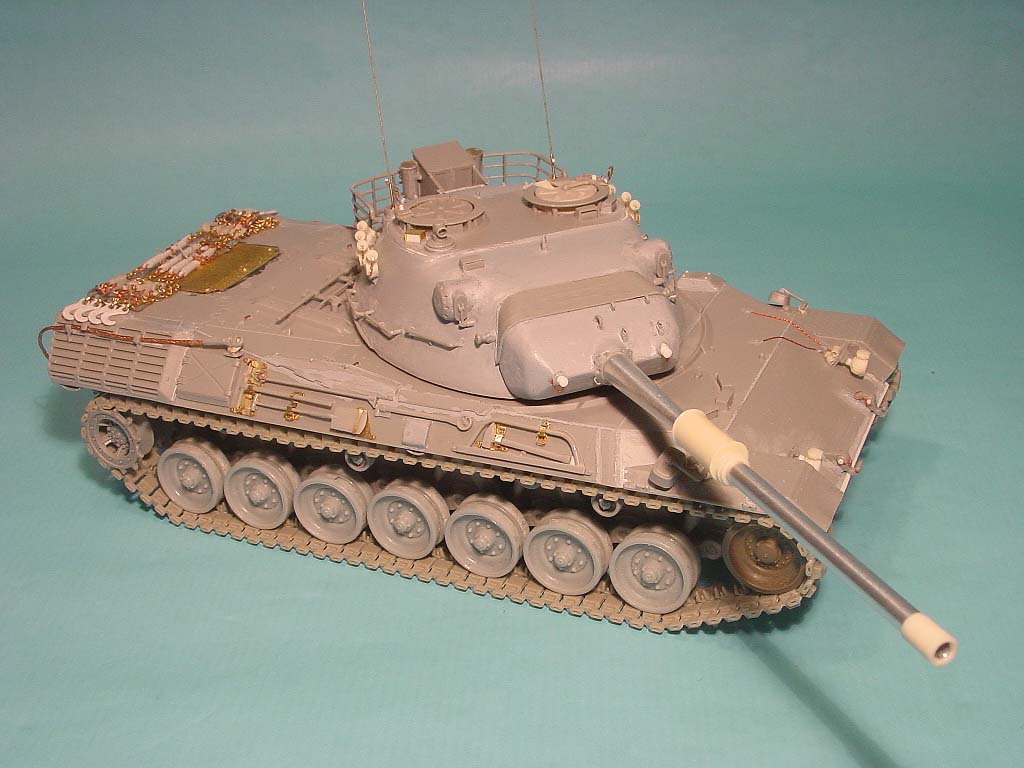
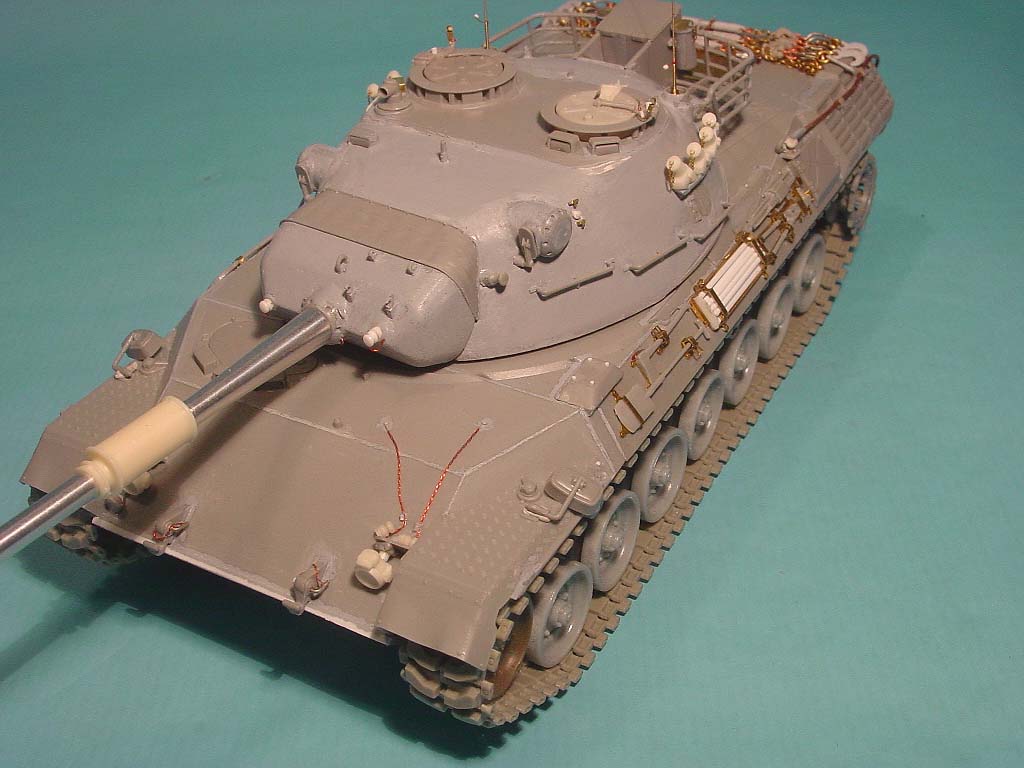
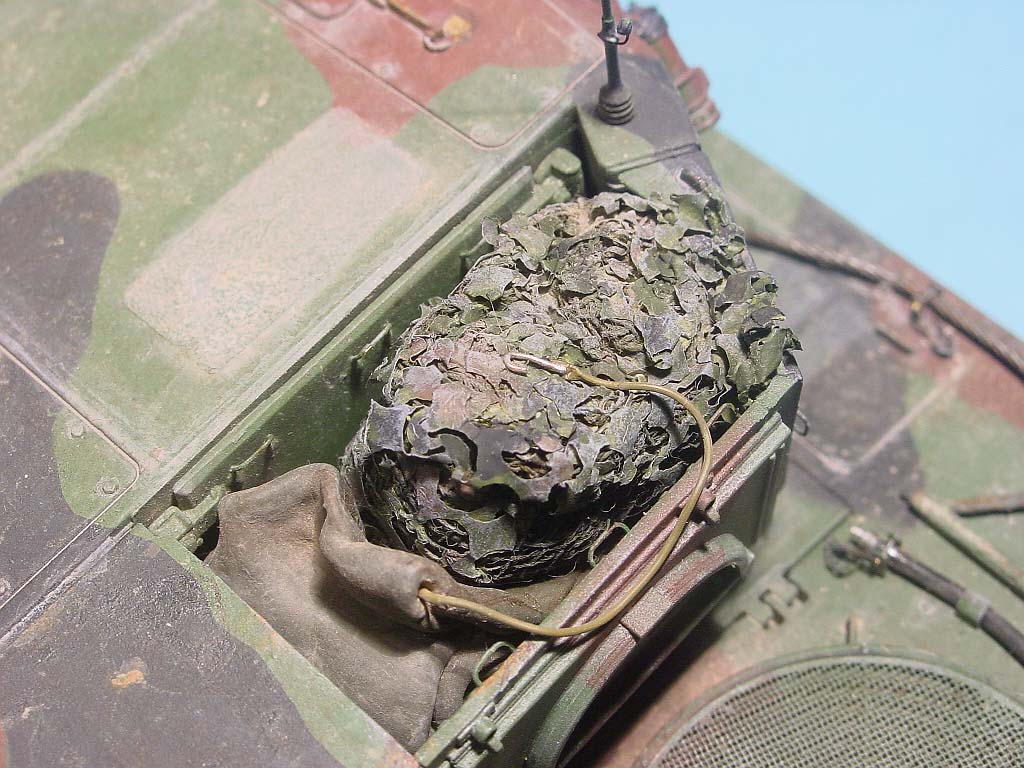
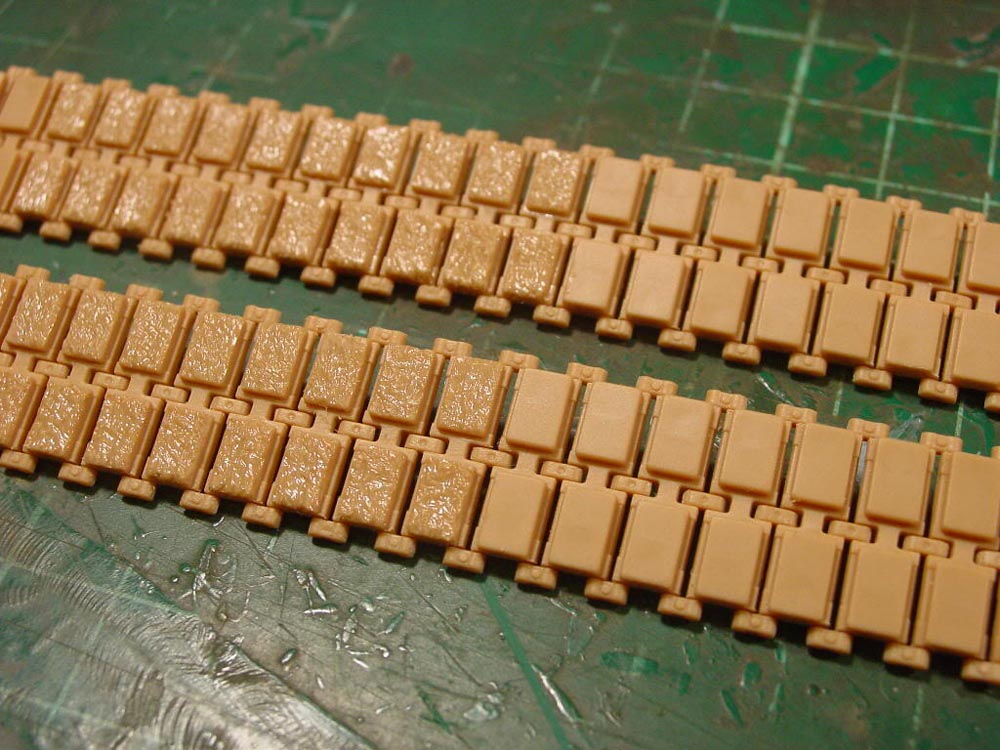
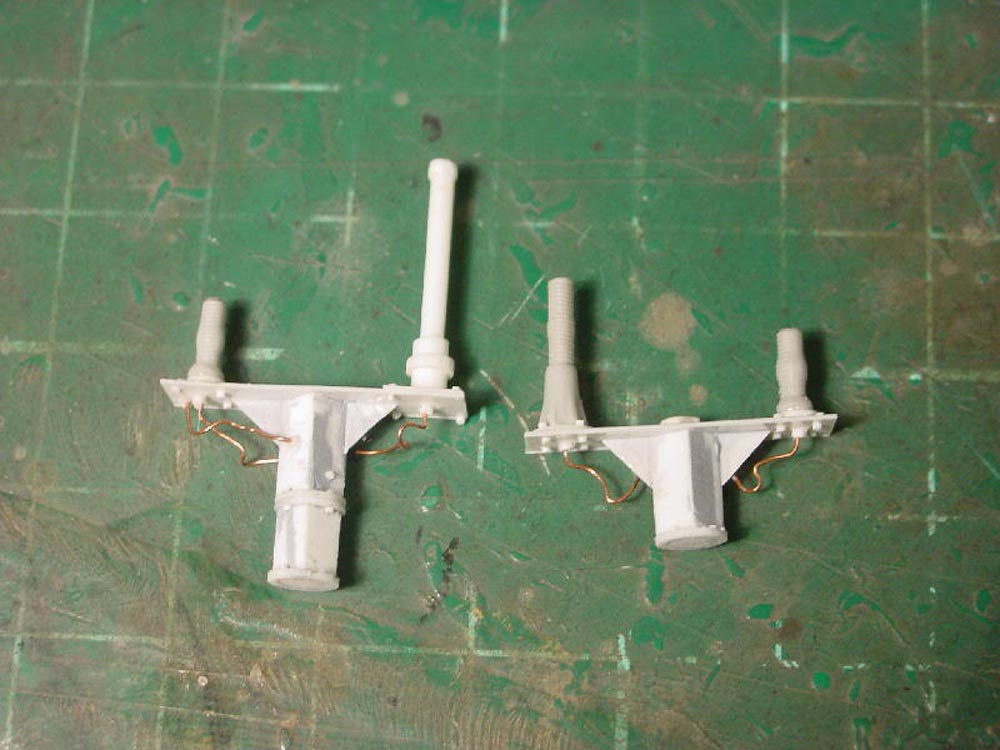
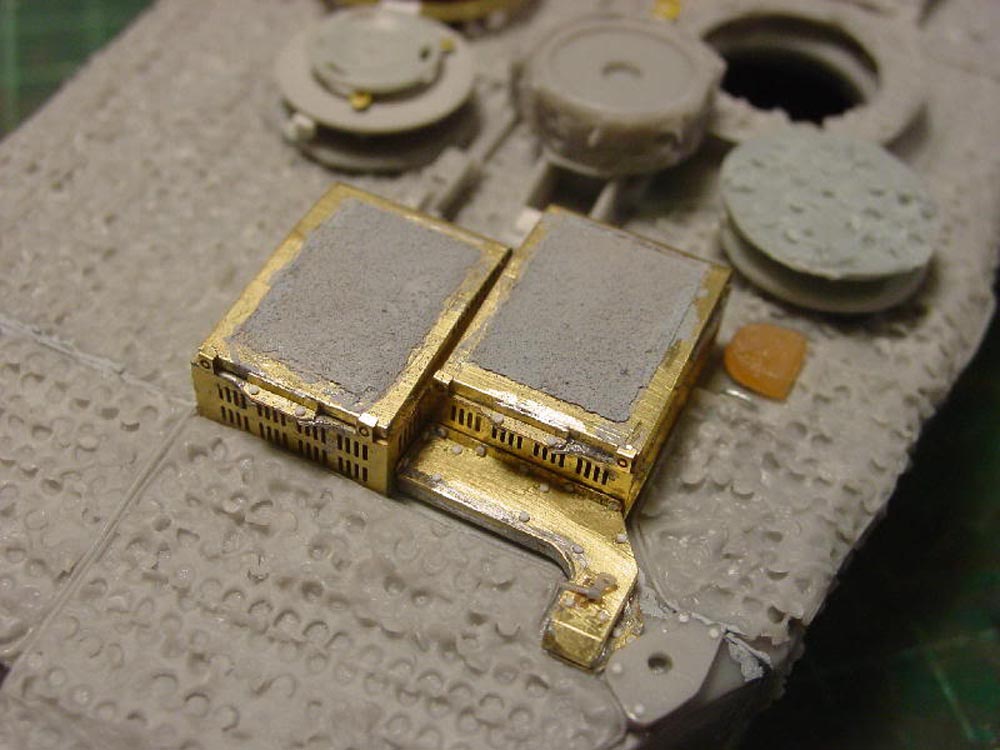
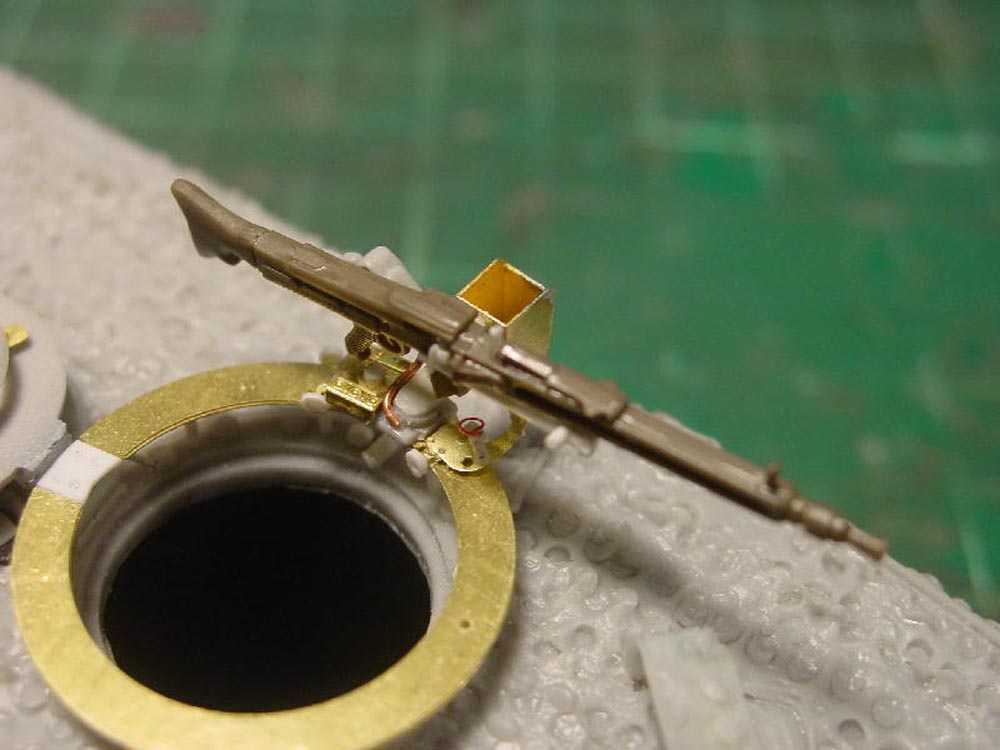
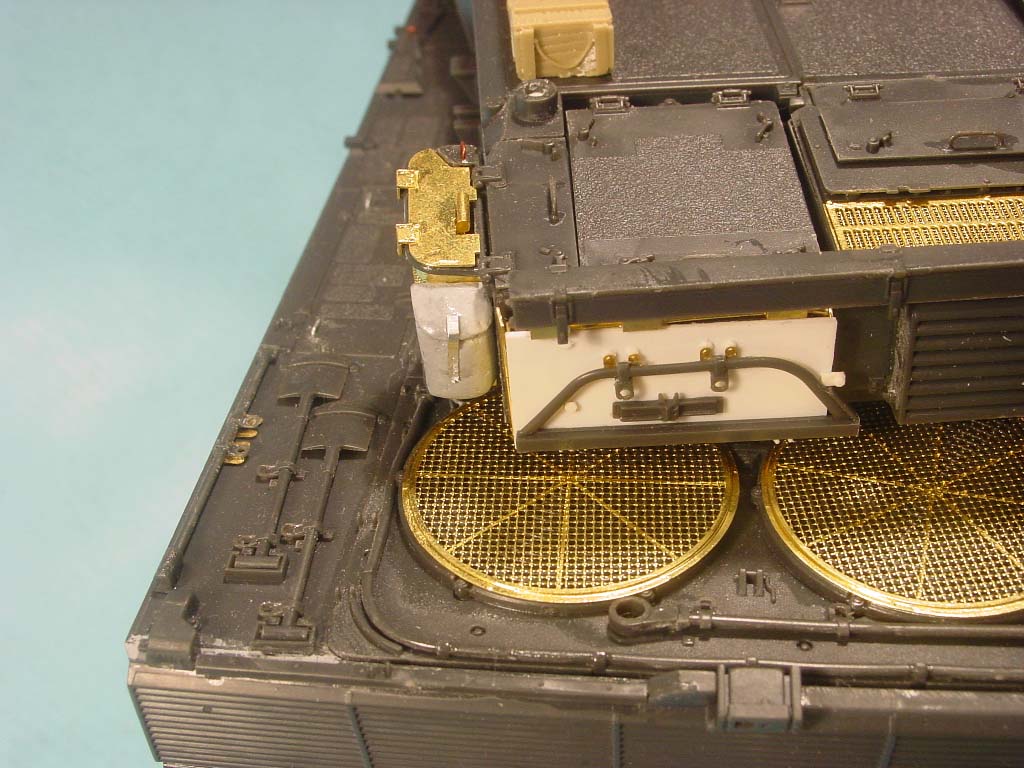
I used Bronco's AS90 Tracks, Eduard PE, SKP-lenses No.193 (UAZ), Schatton antennae.
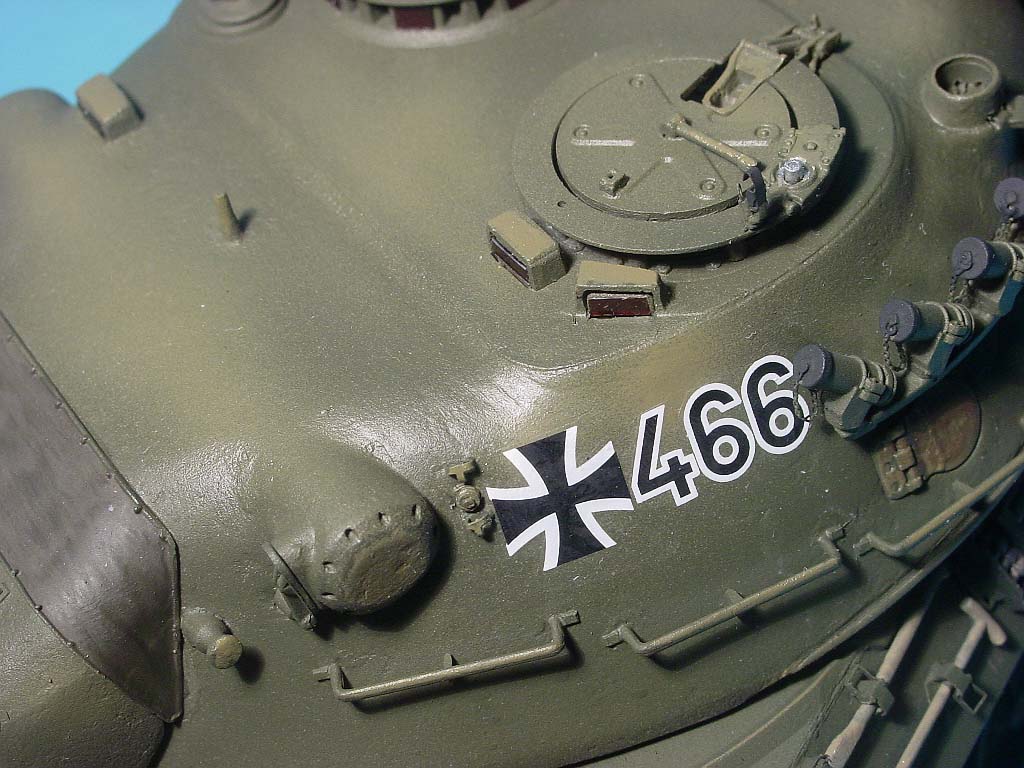
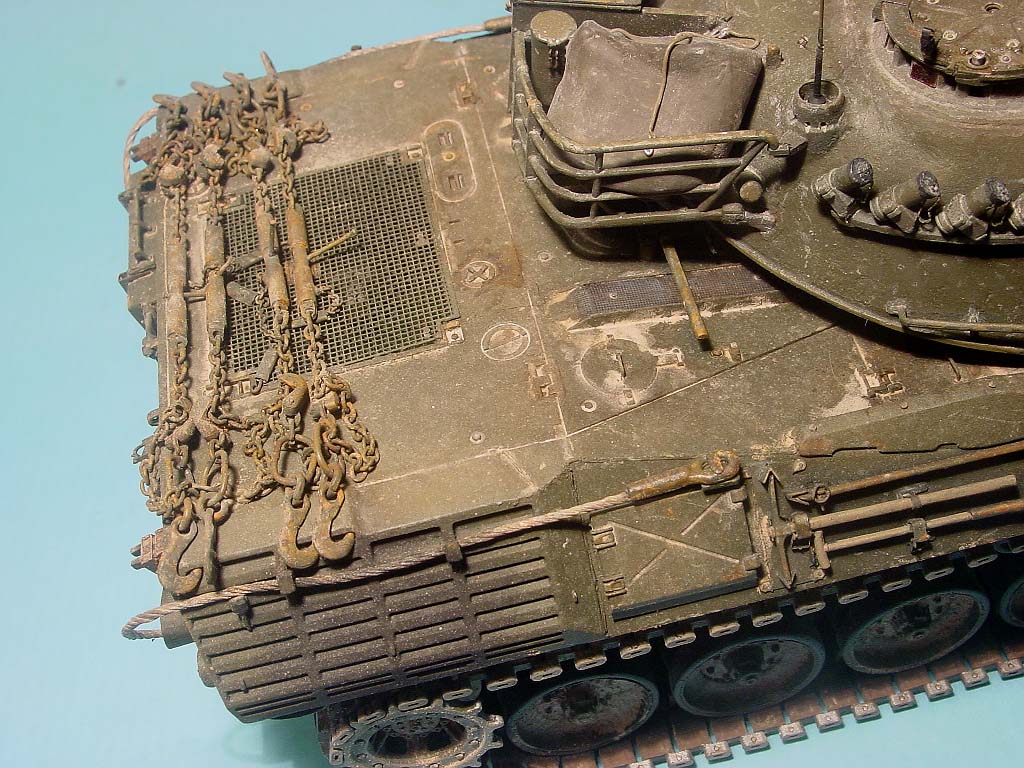
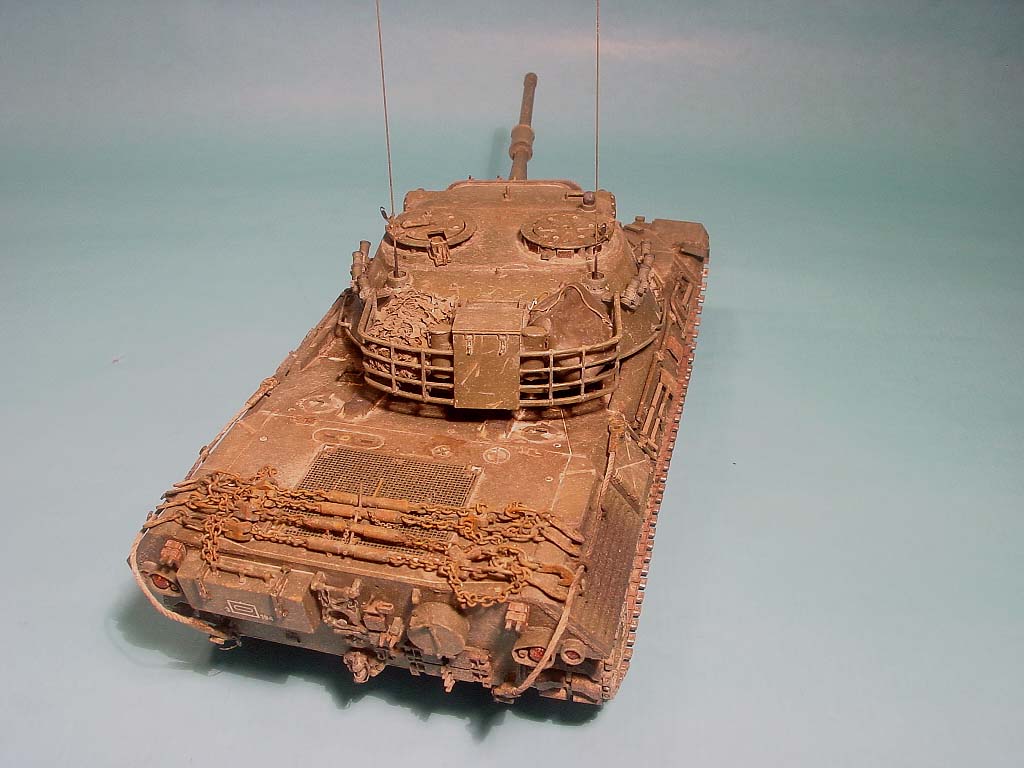
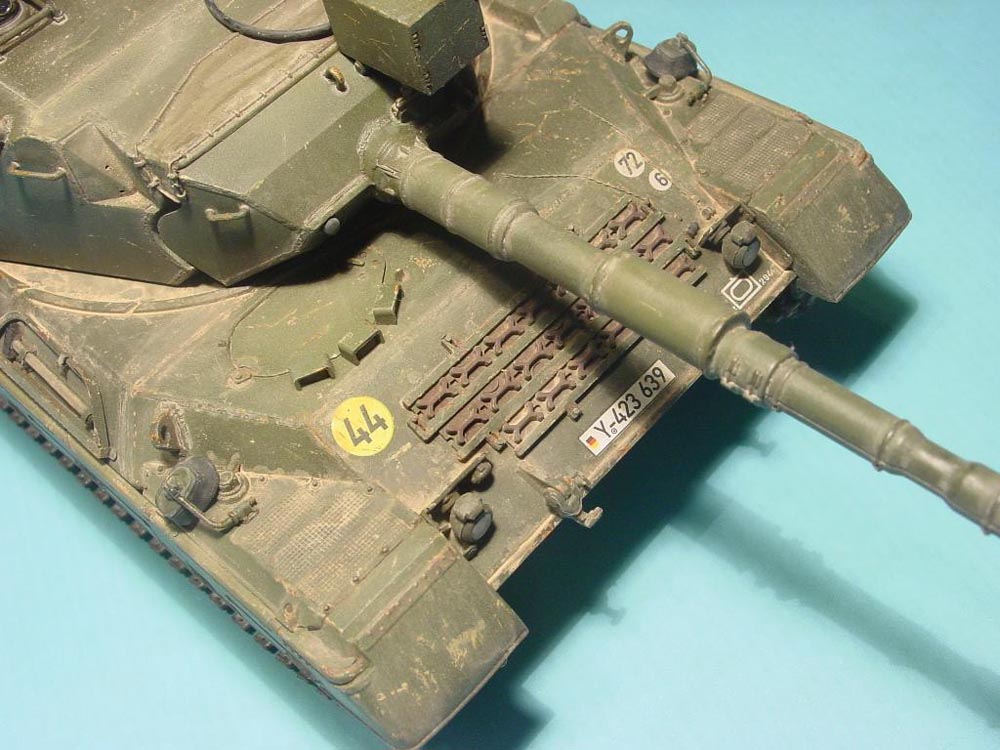
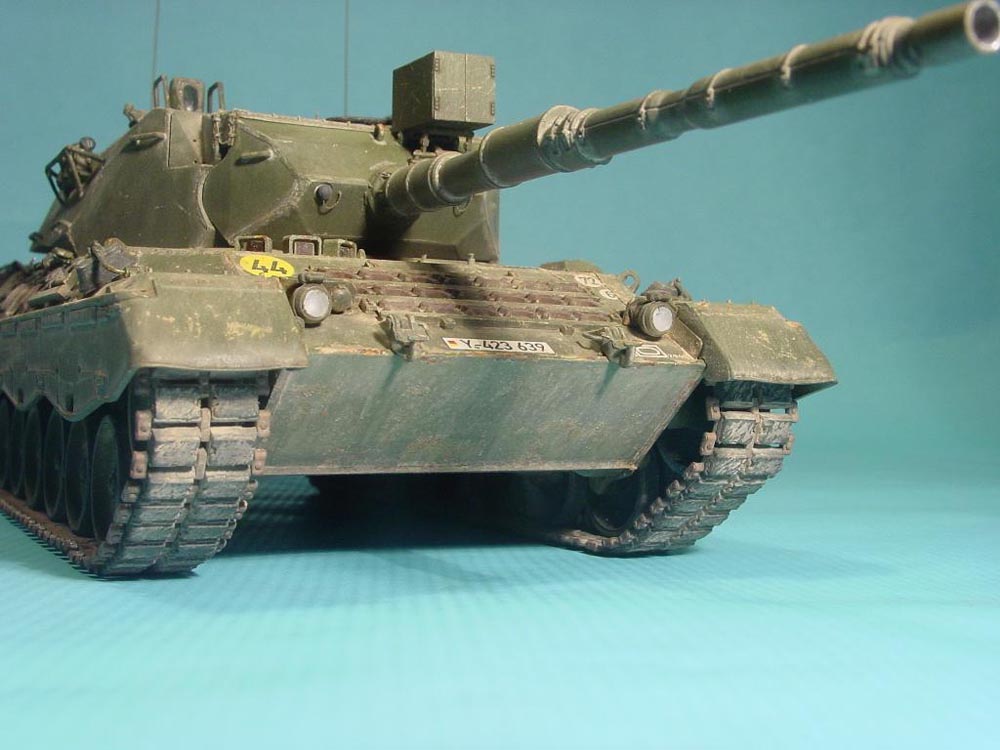
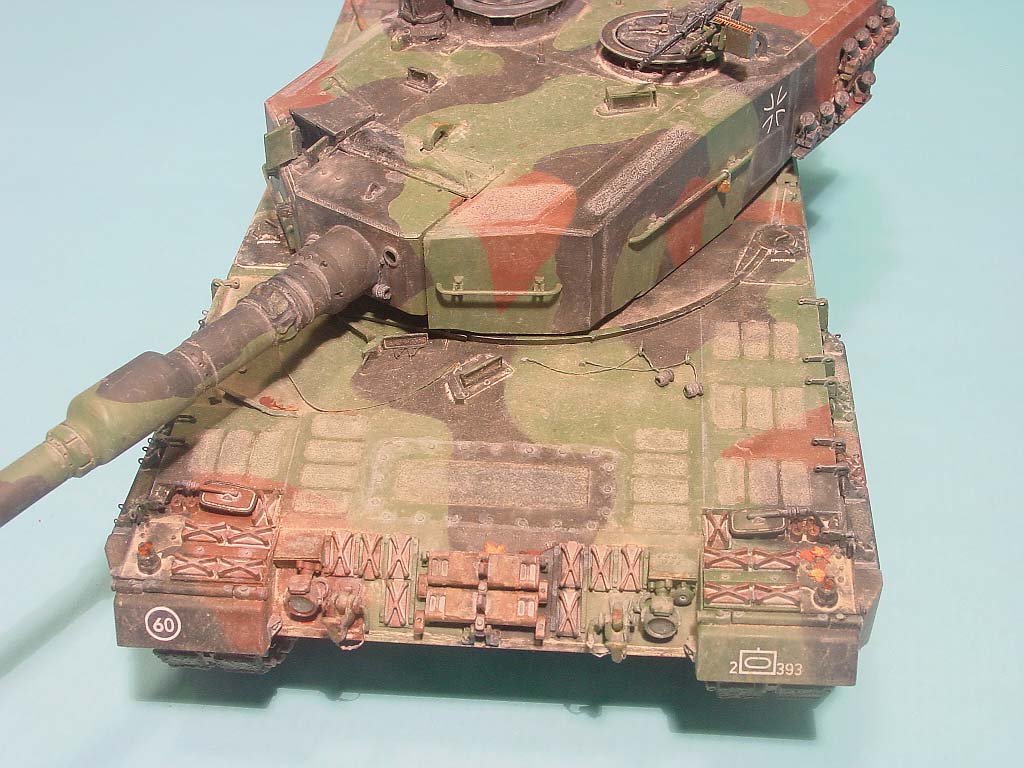
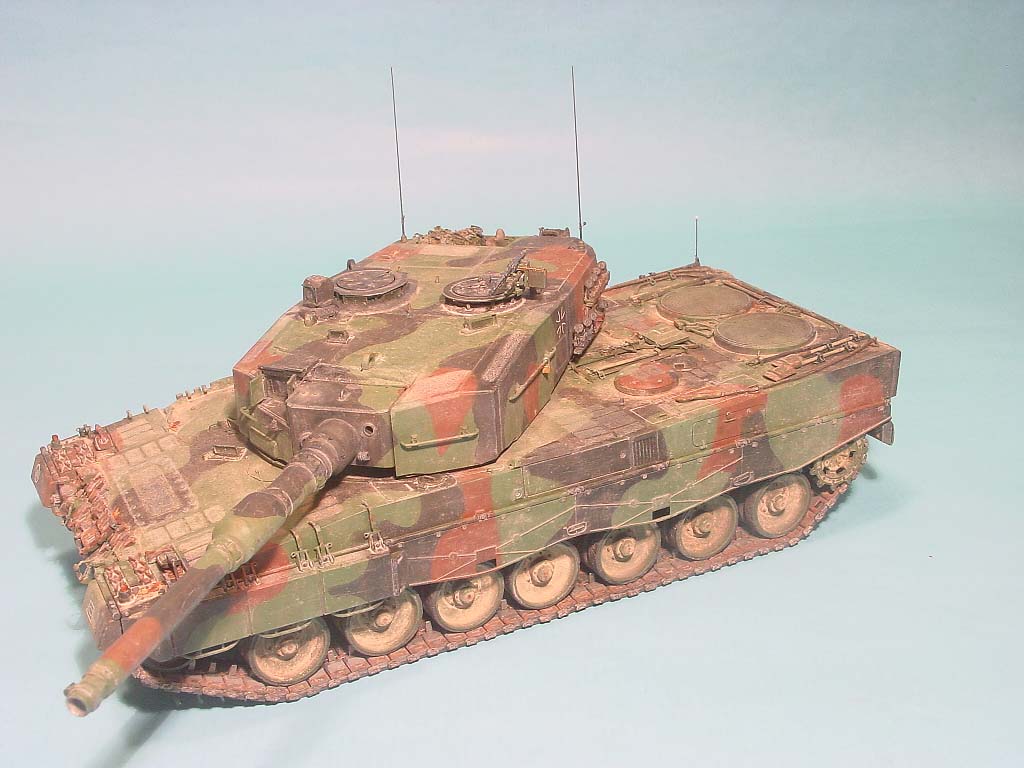
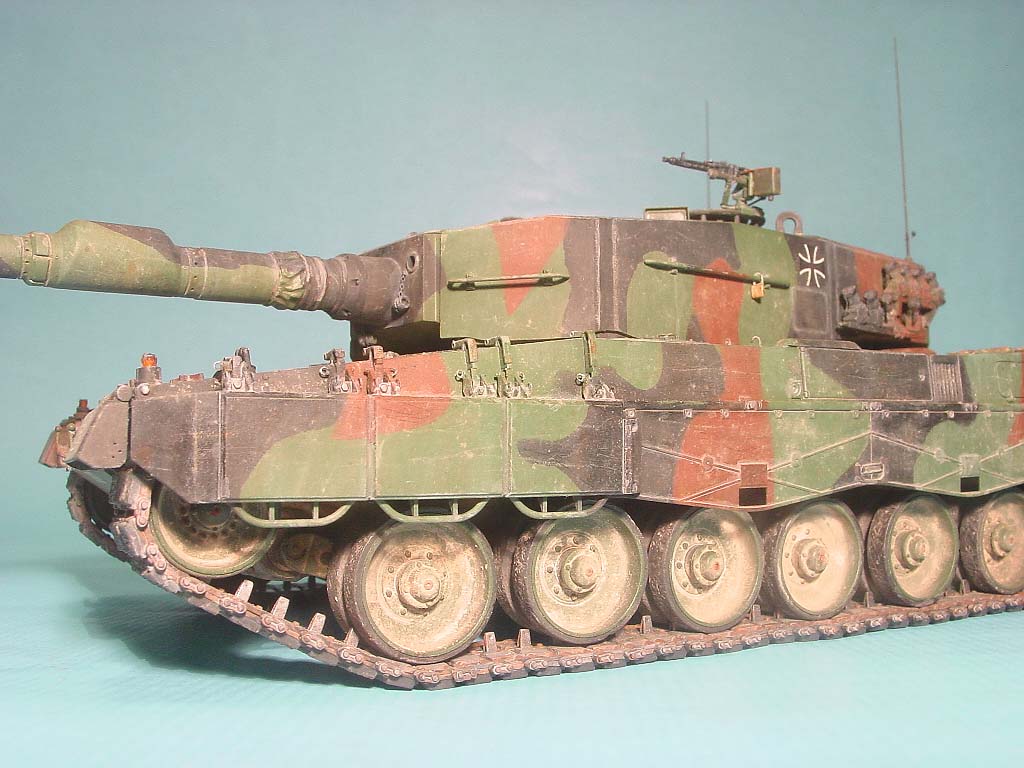
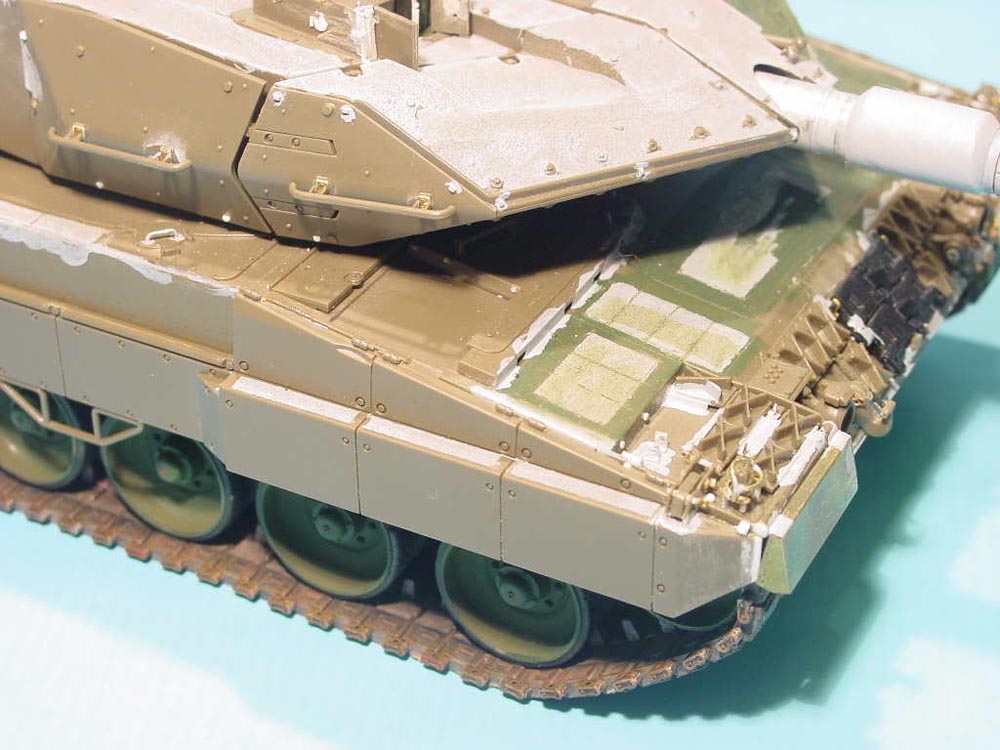
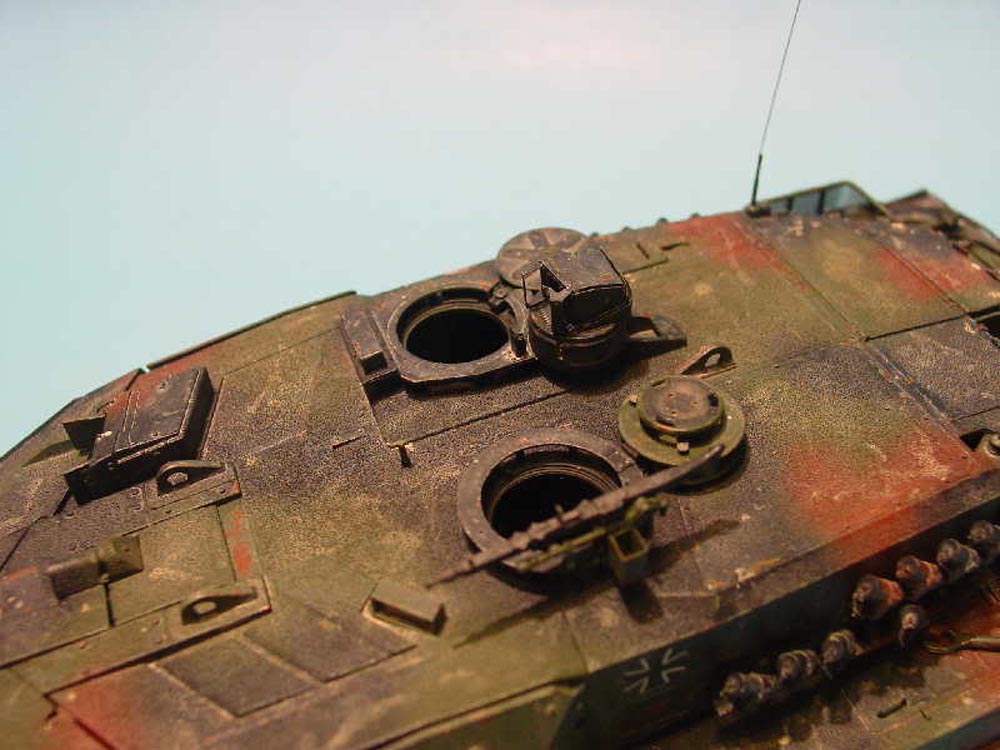
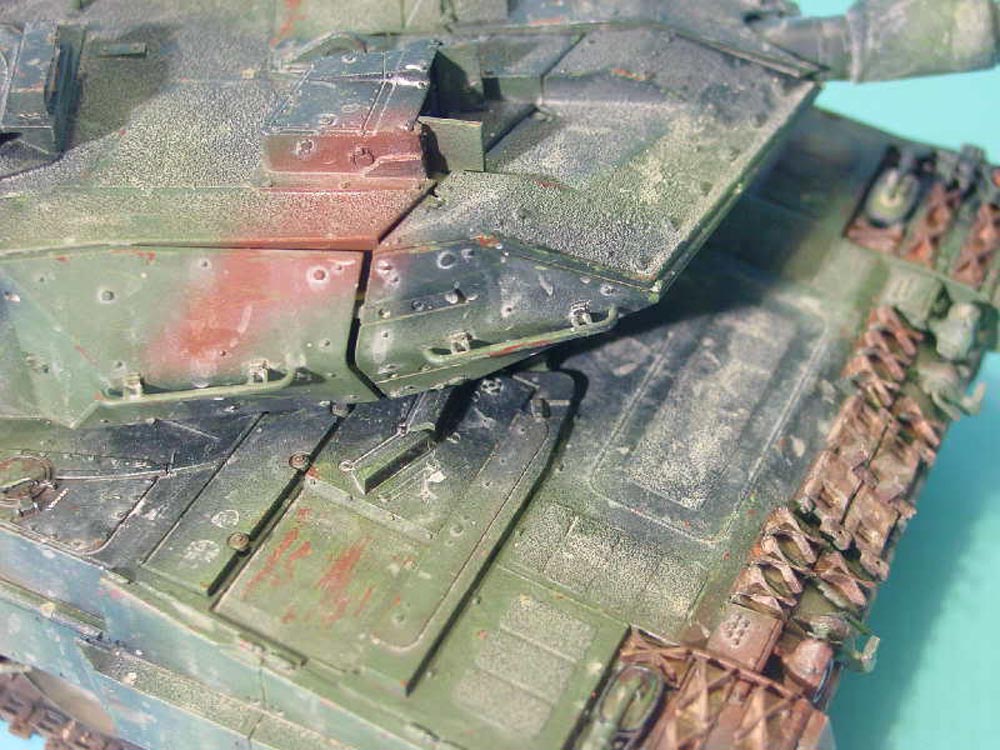
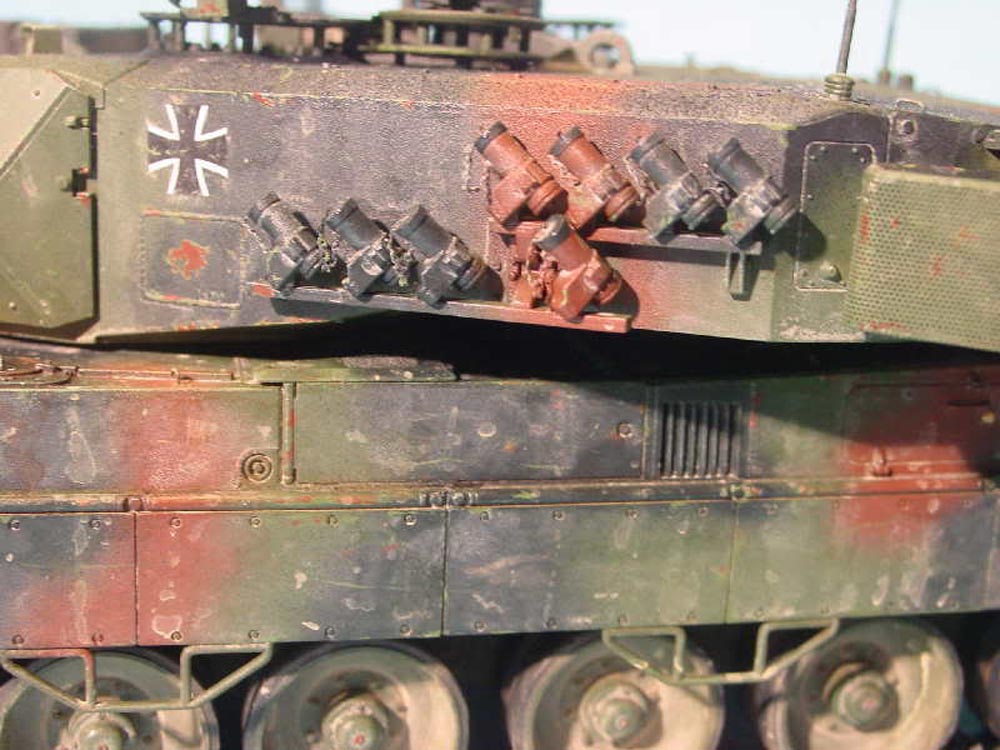
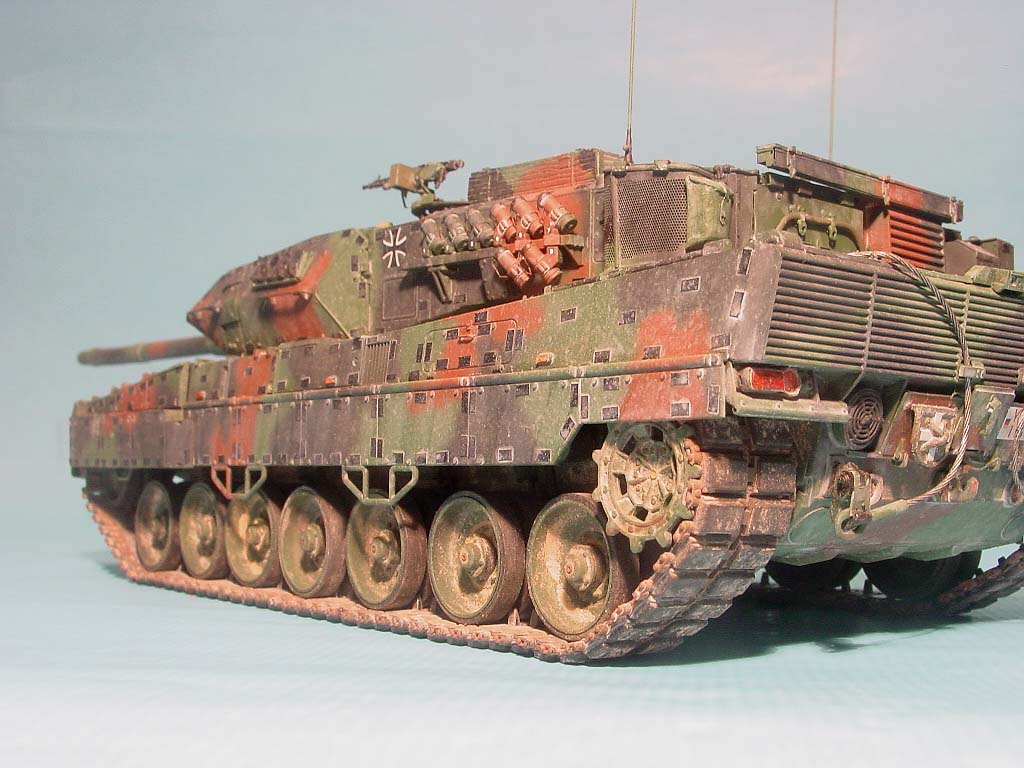
I started by re-doing all weld beads because Italeri has most of them recessed (especially on the turret) while they are prominent on the real thing. Except for the missing commander's vision block, which I added, the build was straight-forward with only minor details improved.
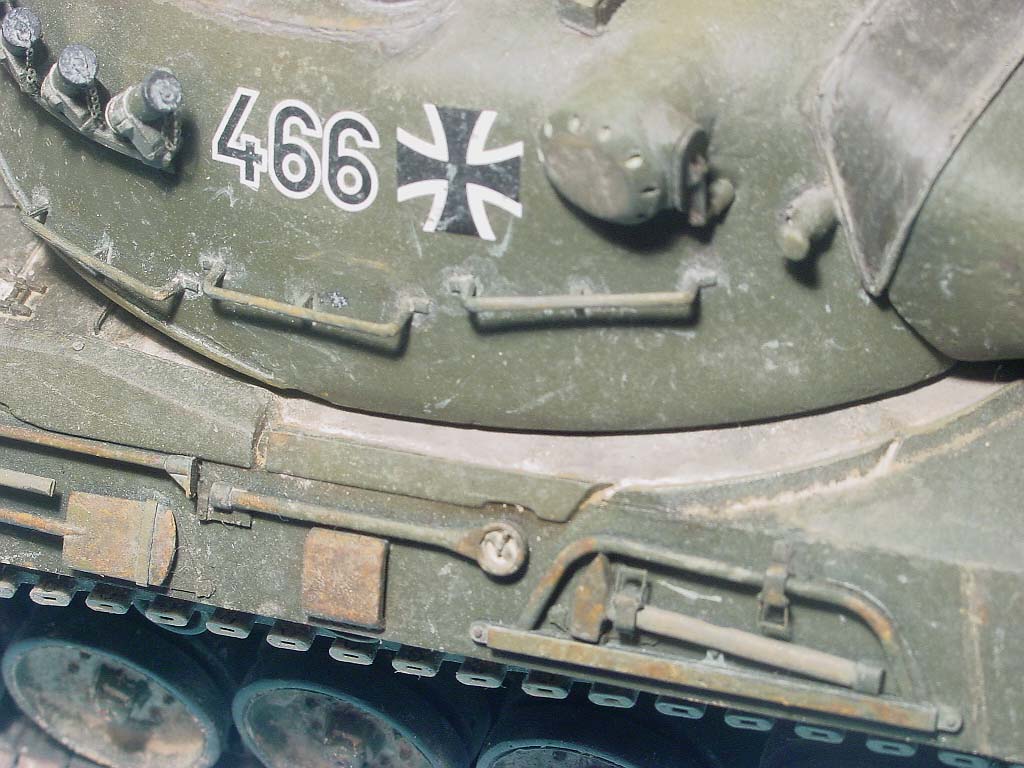
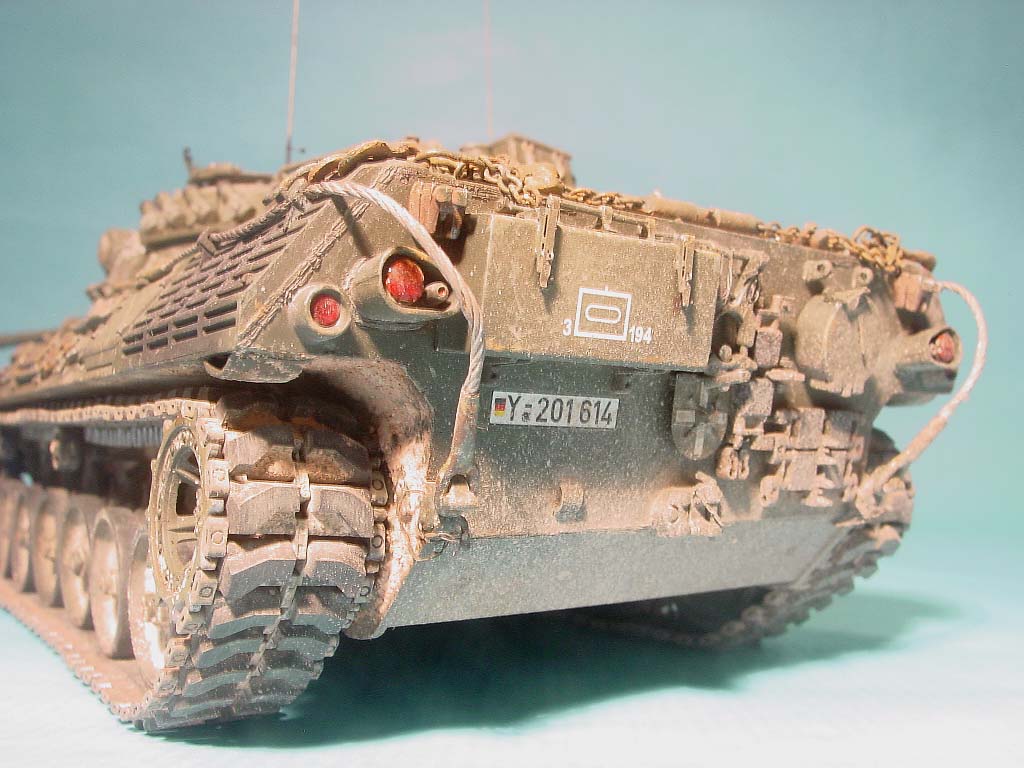
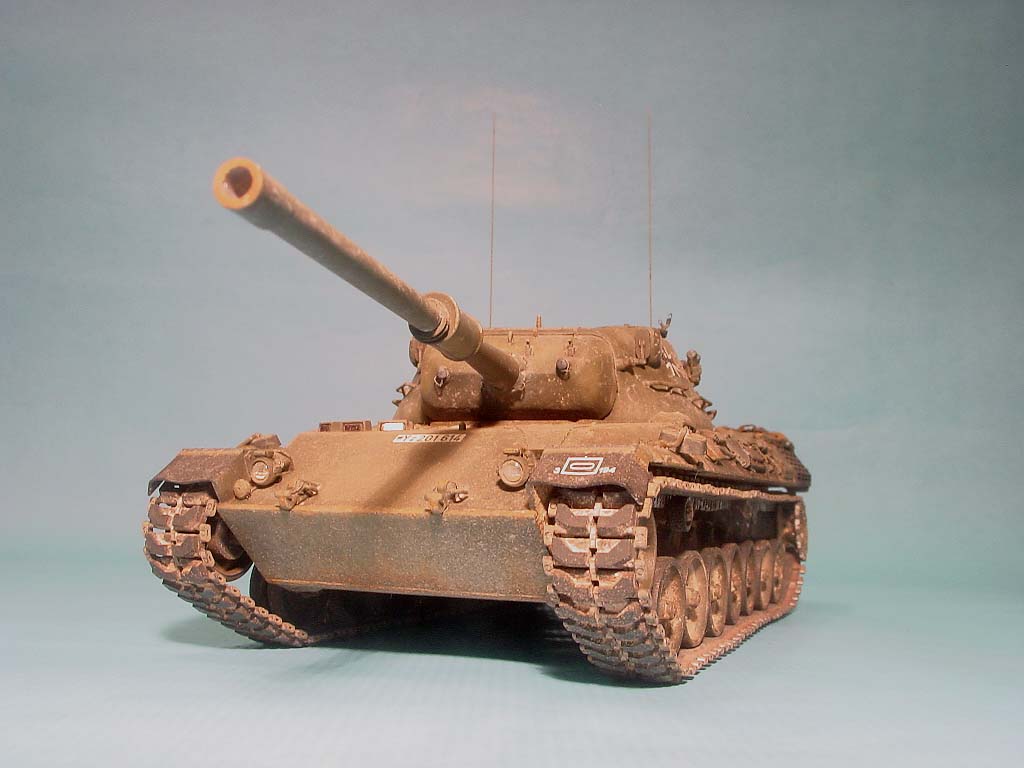
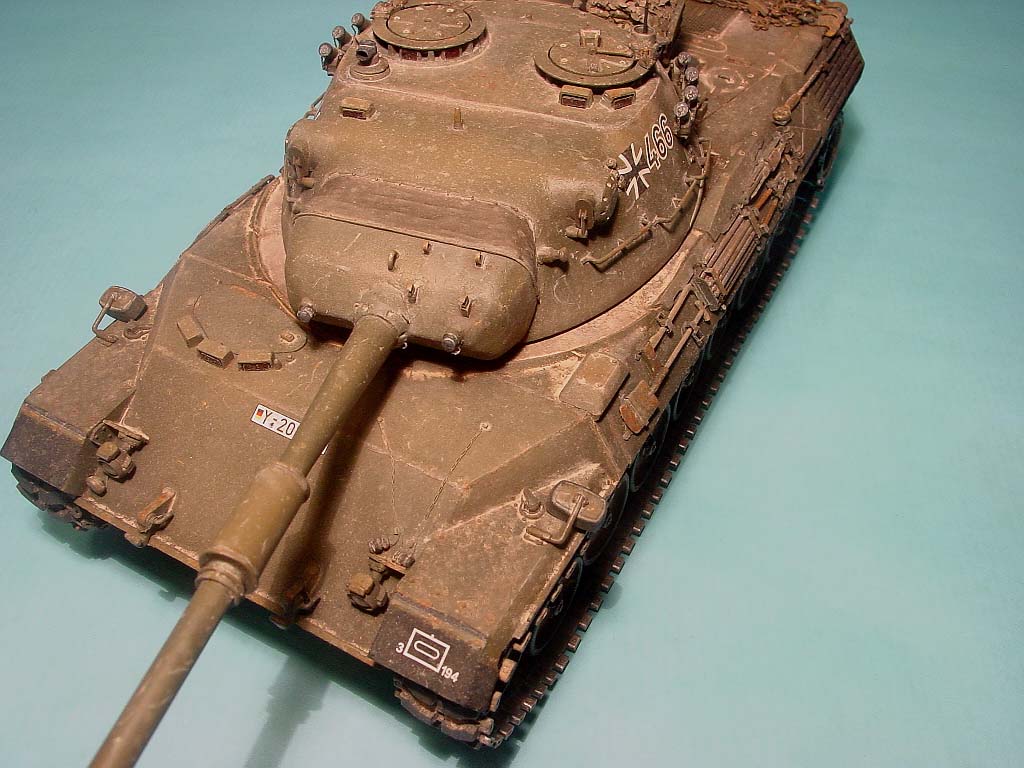
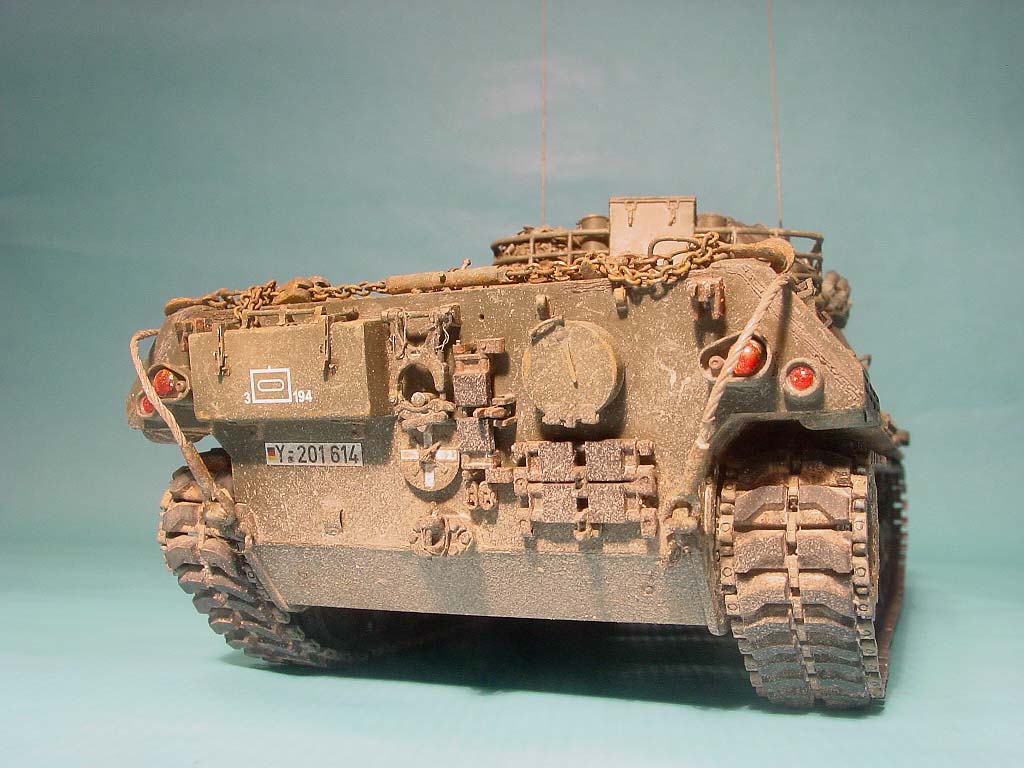
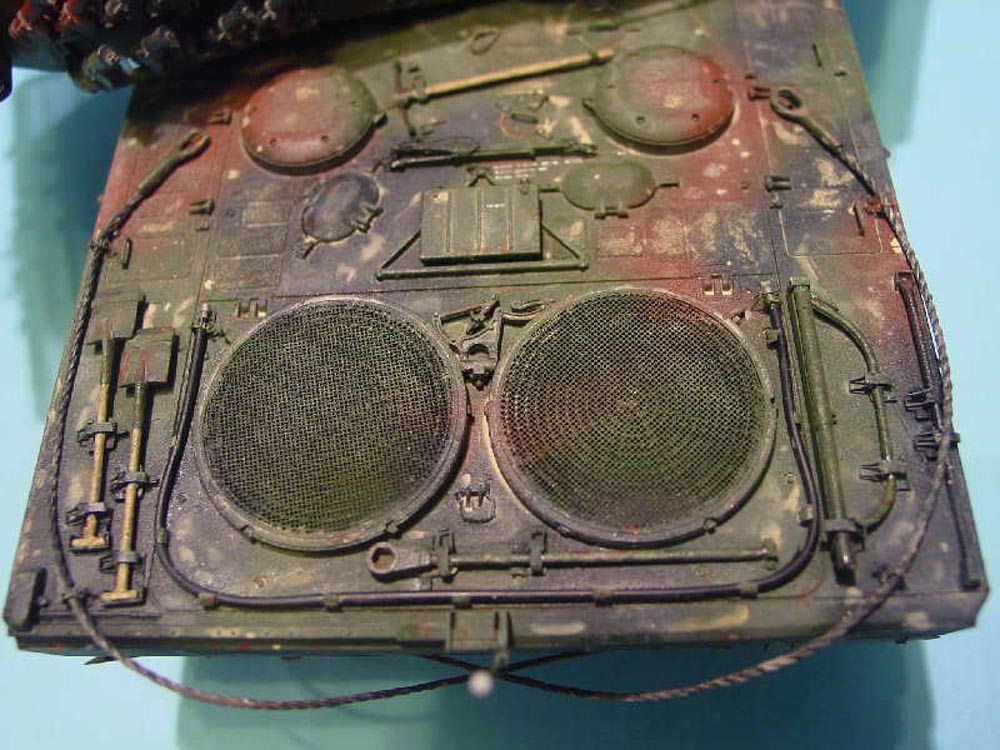
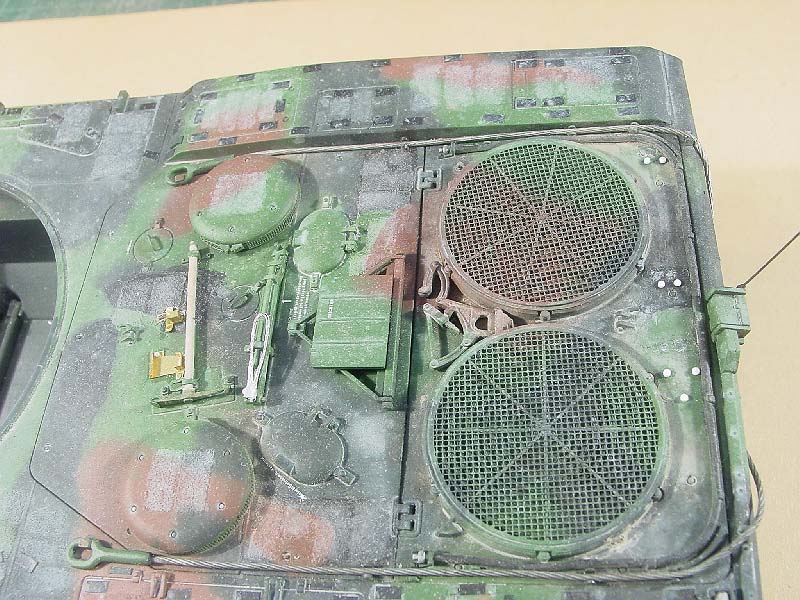
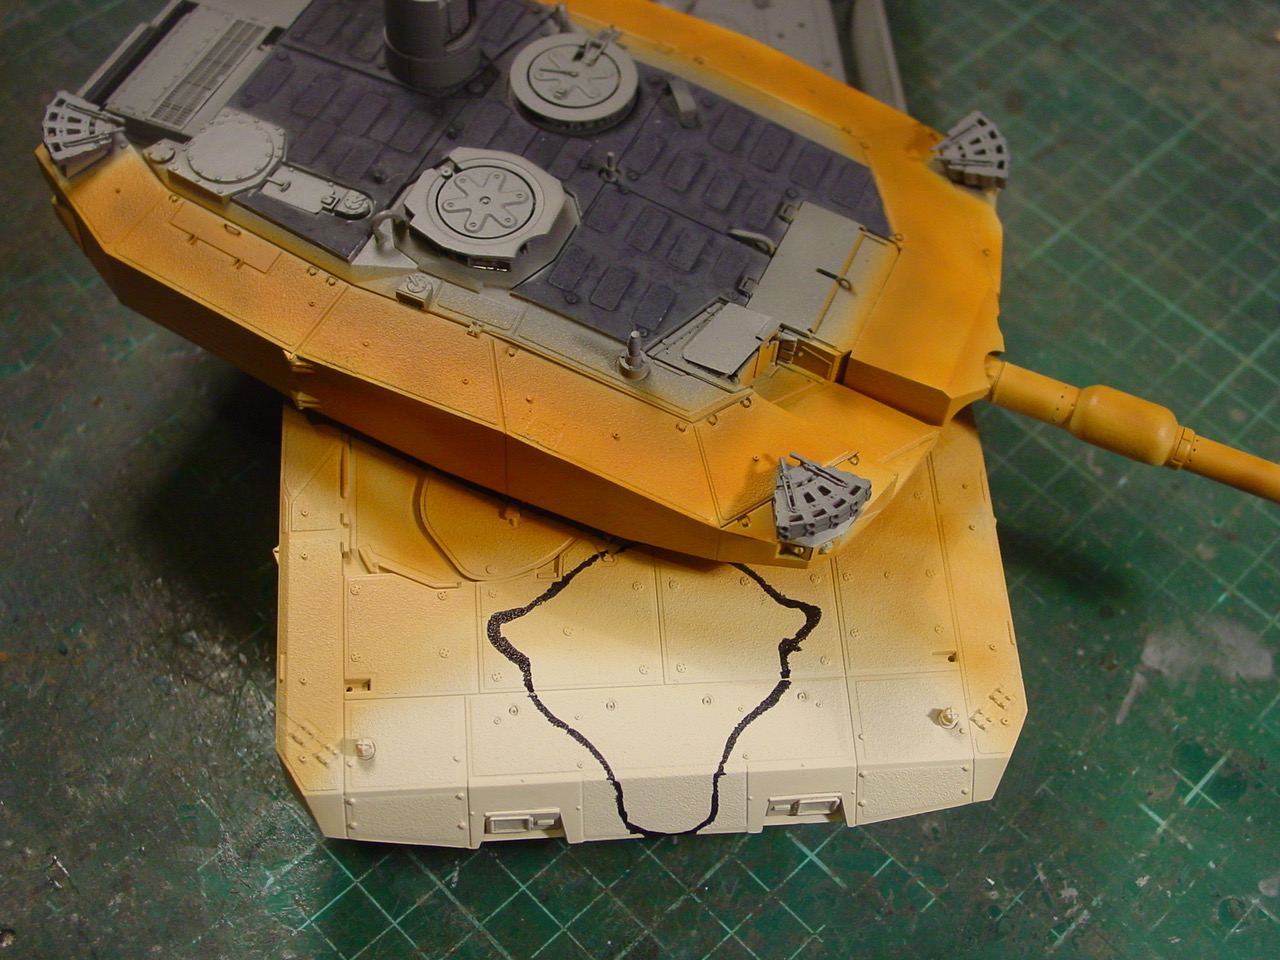
Painting started with Revell 42 Gelboliv, which was highlighted in selected spots. The pics show a few rusty spots, may be too many, but on the model itself they are more subdued, so this is a photo-thing.
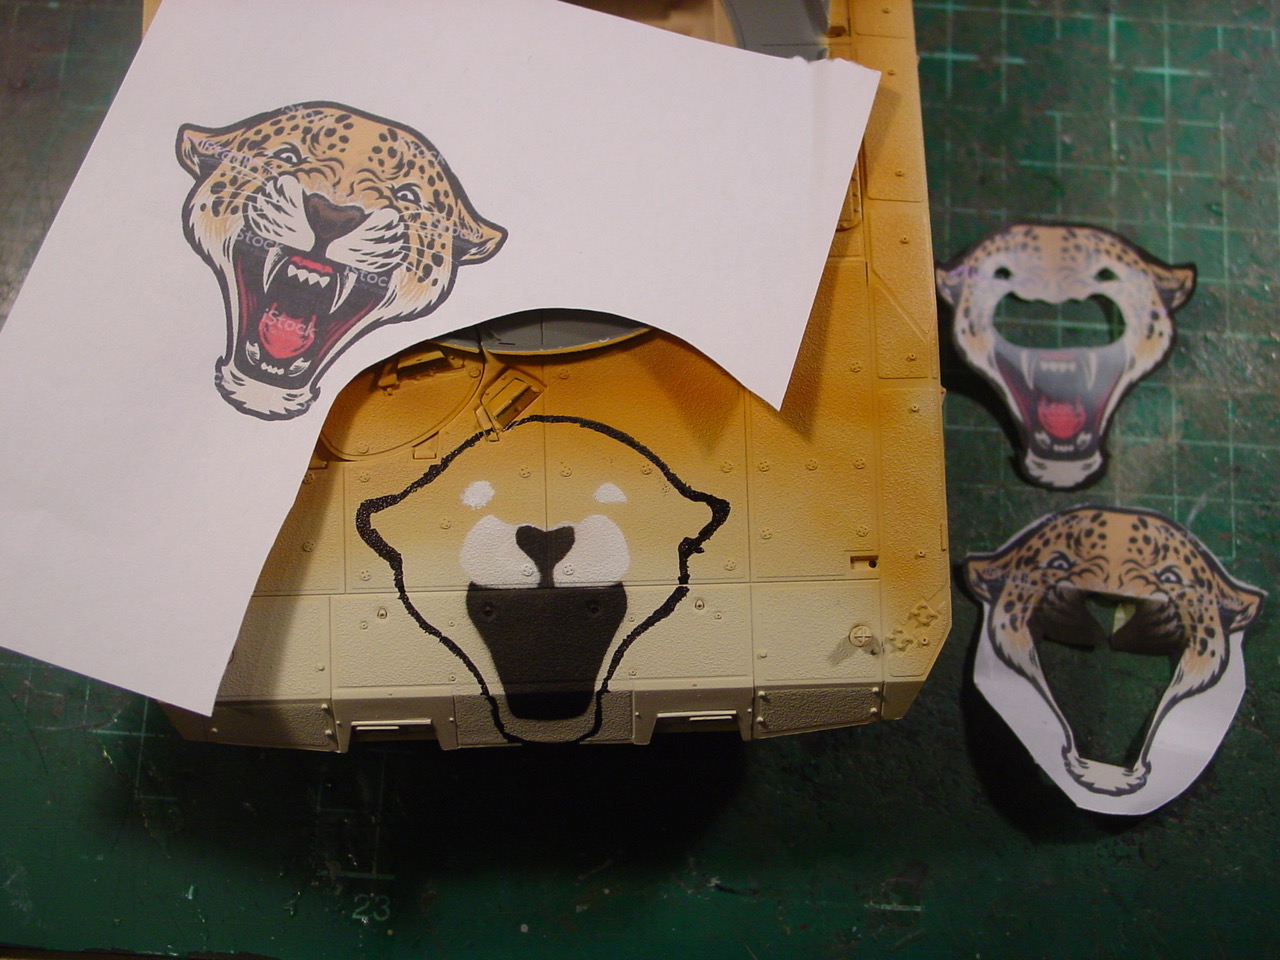
The dust was added with a light pin-wash with Revell 89 Sand and I also tried applying a wash with diluted pigments (it works...). Next was the normal way of applying pigments with a brush. All scratches were done with a sheet of paper with a cut, which I painted over with a stiff brush - needs some practice but you can achieve very nice results.
You take a sheet of paper and make a cut in it, hold or tape it to the model and paint over the cut. Hope you like it.
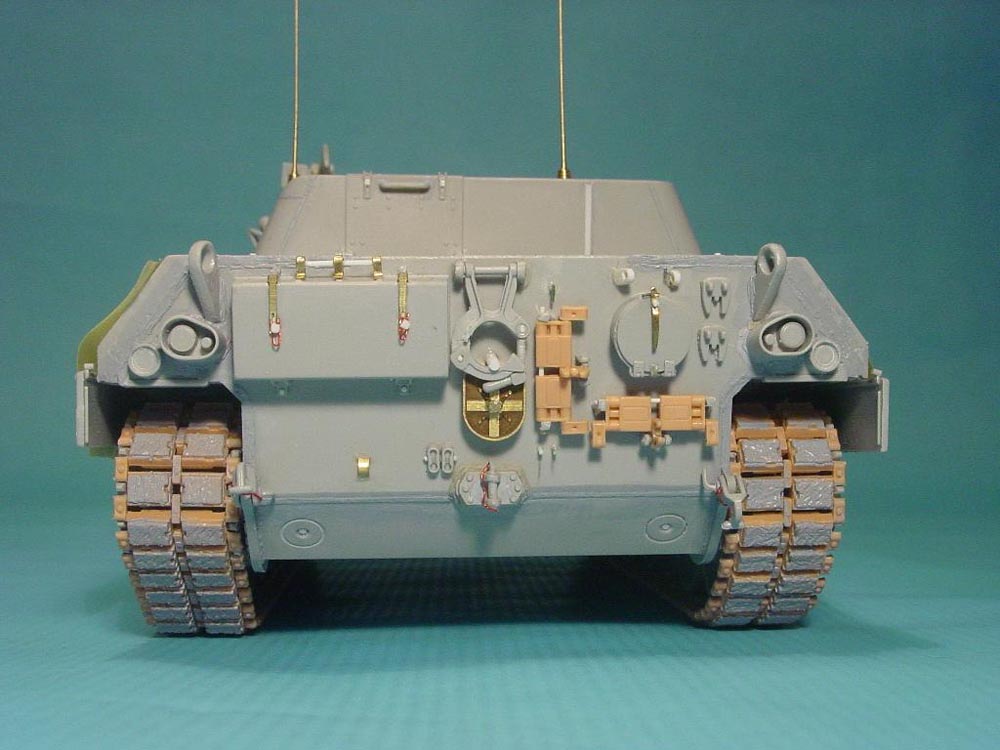
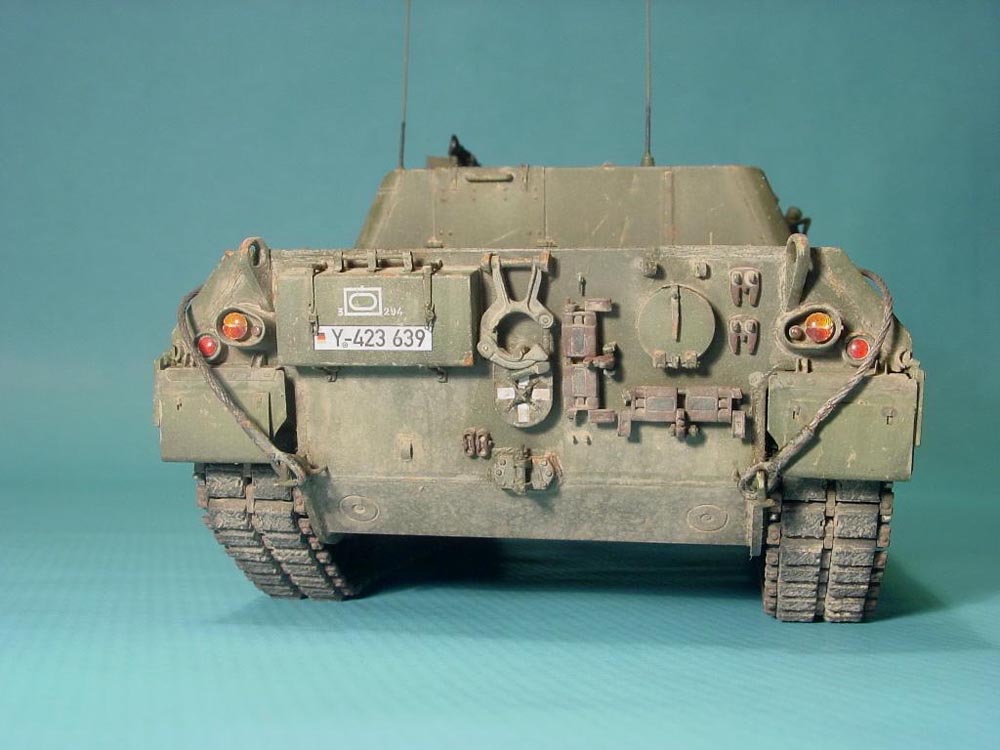
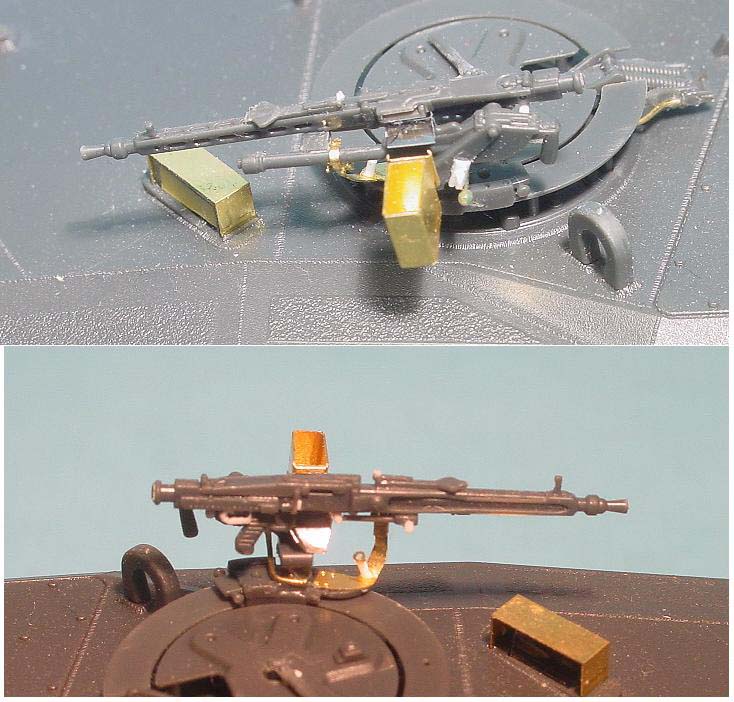
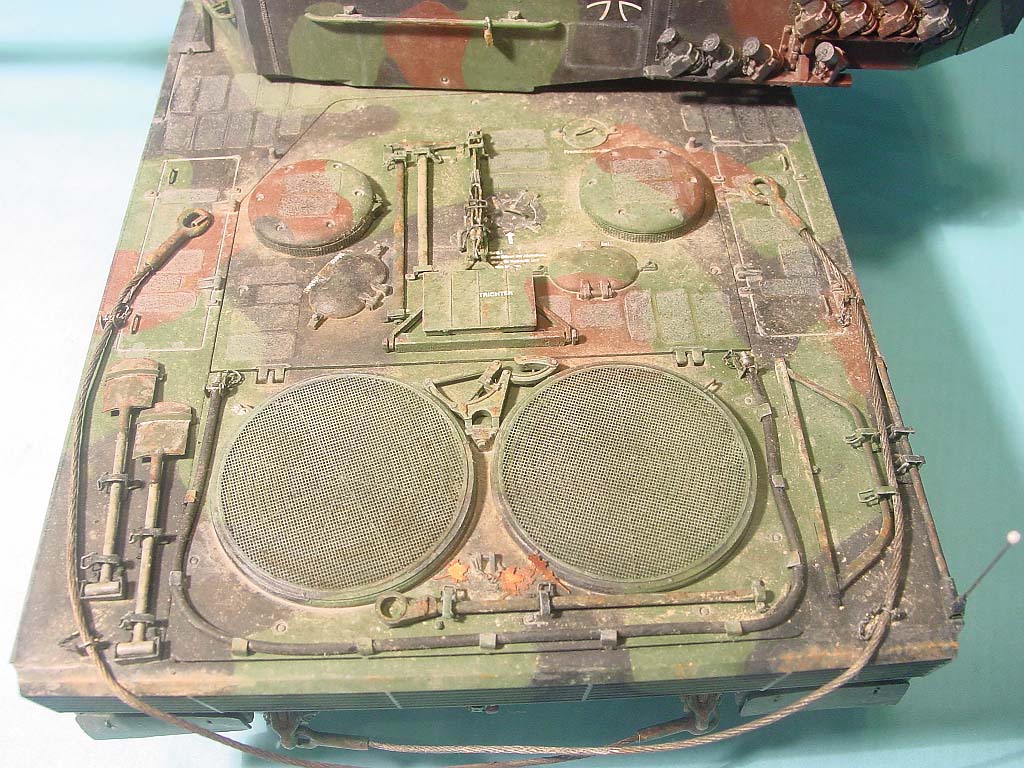
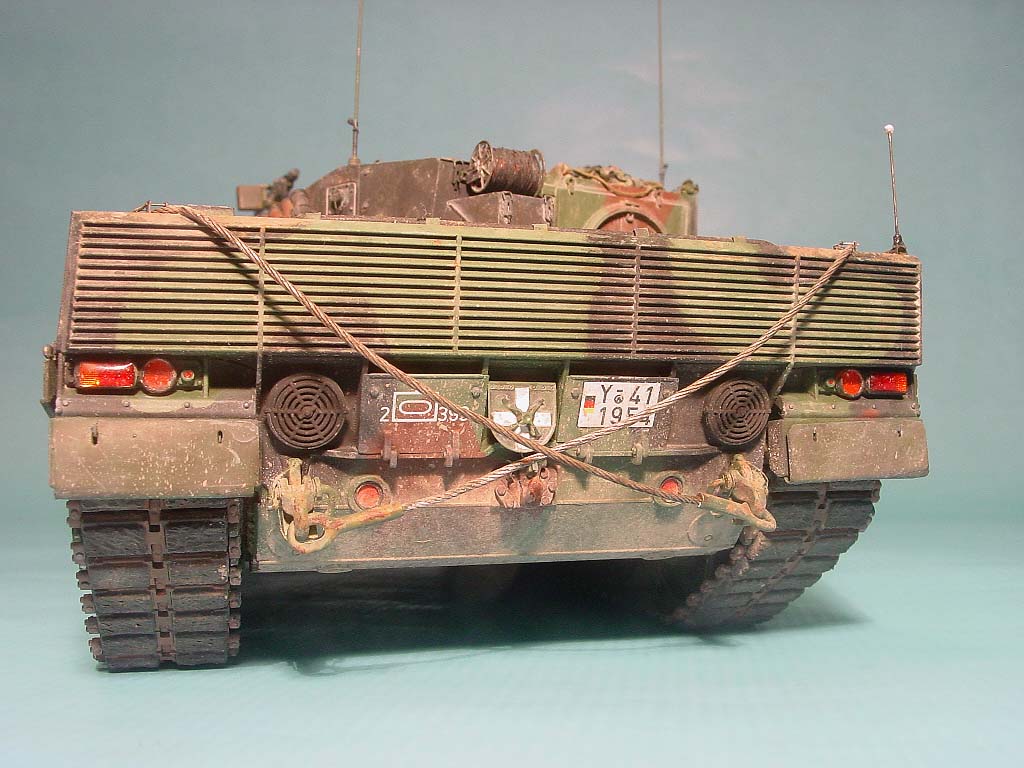
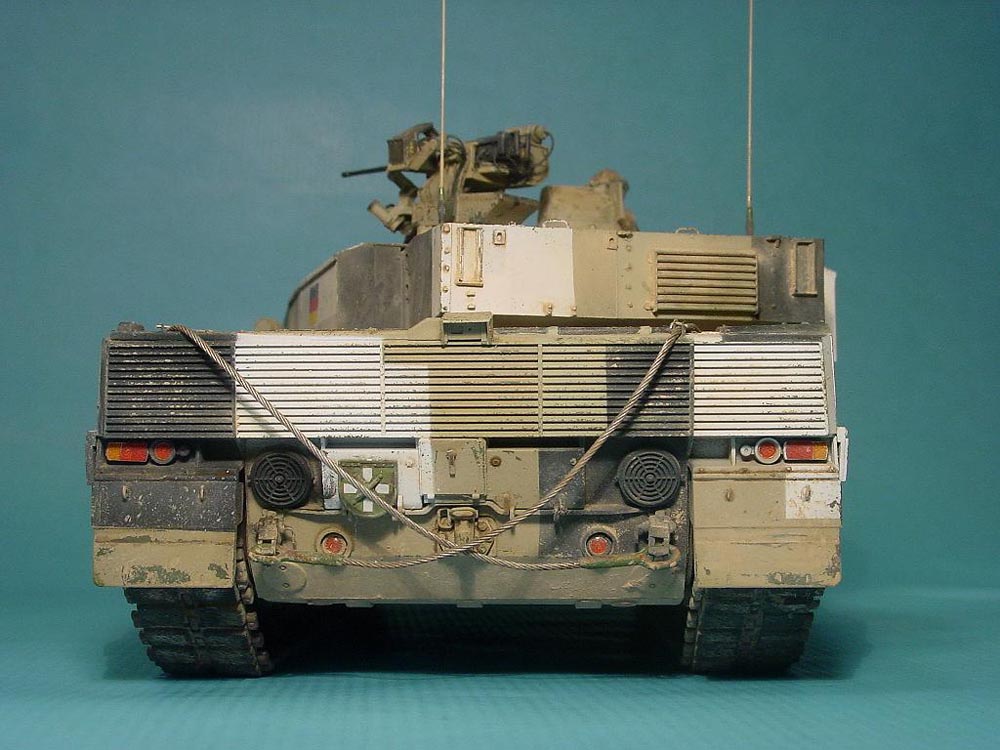
The lights are from the SKP set for the UAZ (No 193). SKP now do a set for Leo 1 but it wasn't available when I built this. I looked through all available SKP sets and found this one. The set for the DANA also has orange/red rear lights, but they are a little bit too large - the UAZ light fit is OK.
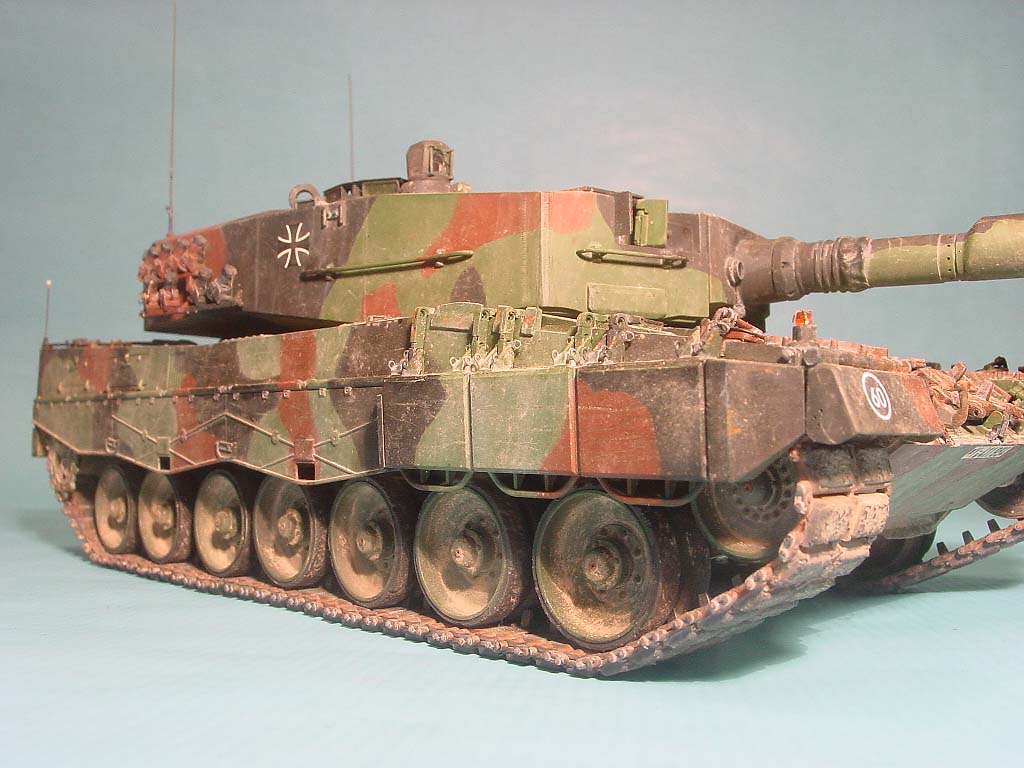
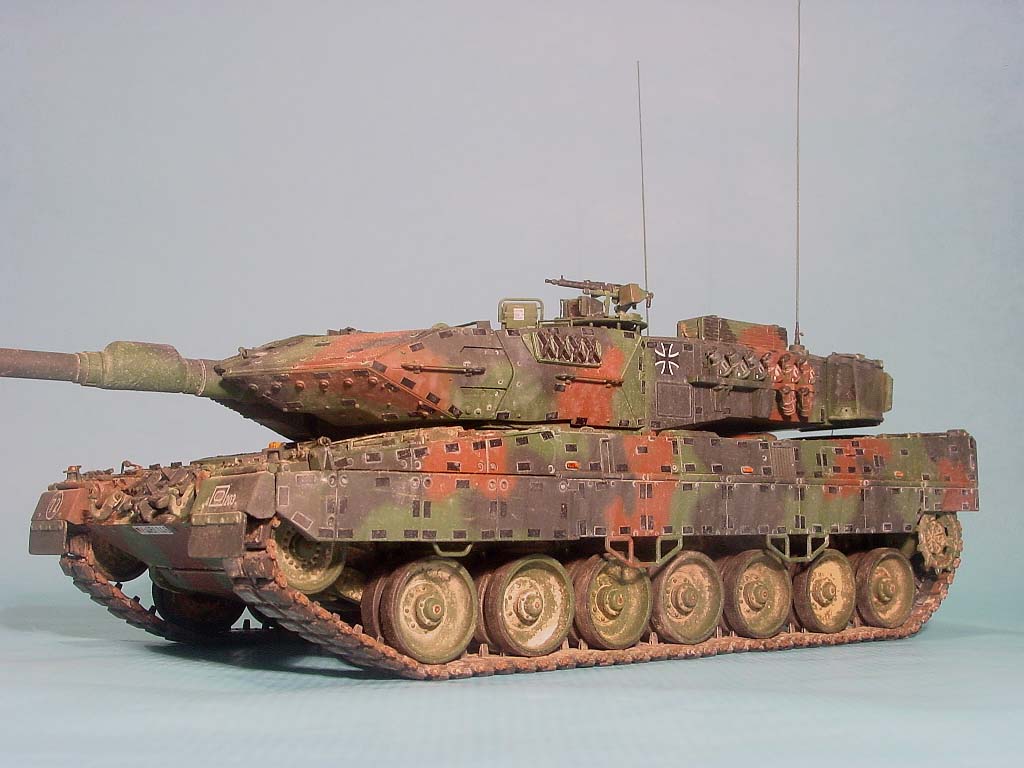
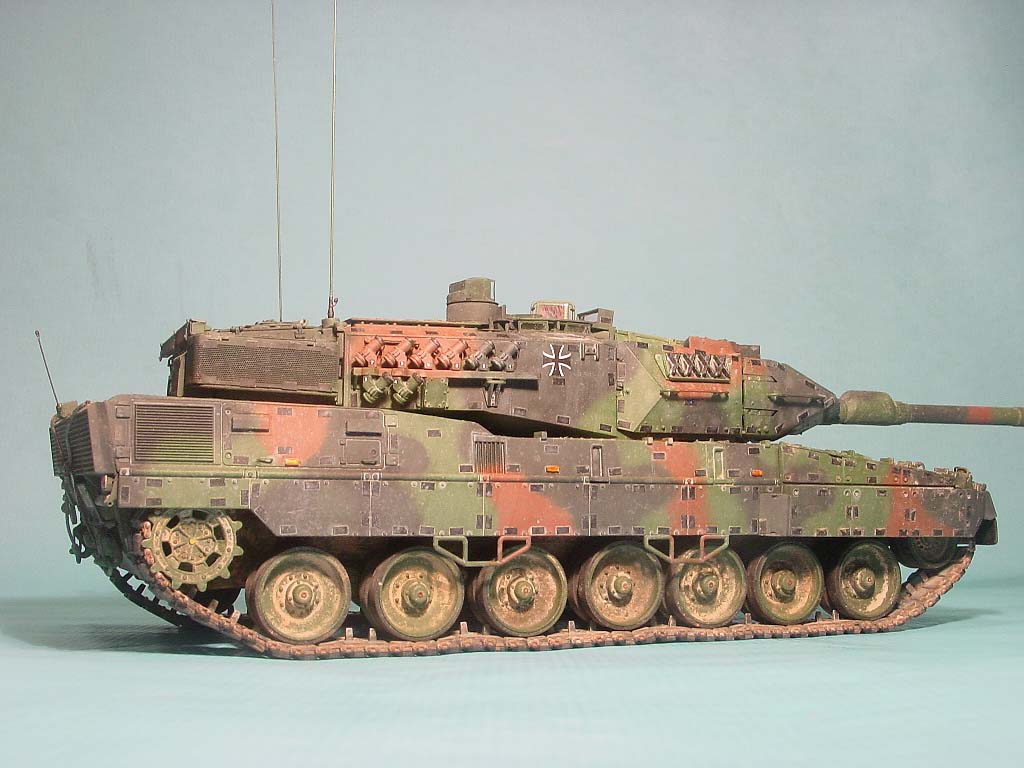
This specific tank was commanded by me 20+ years ago.
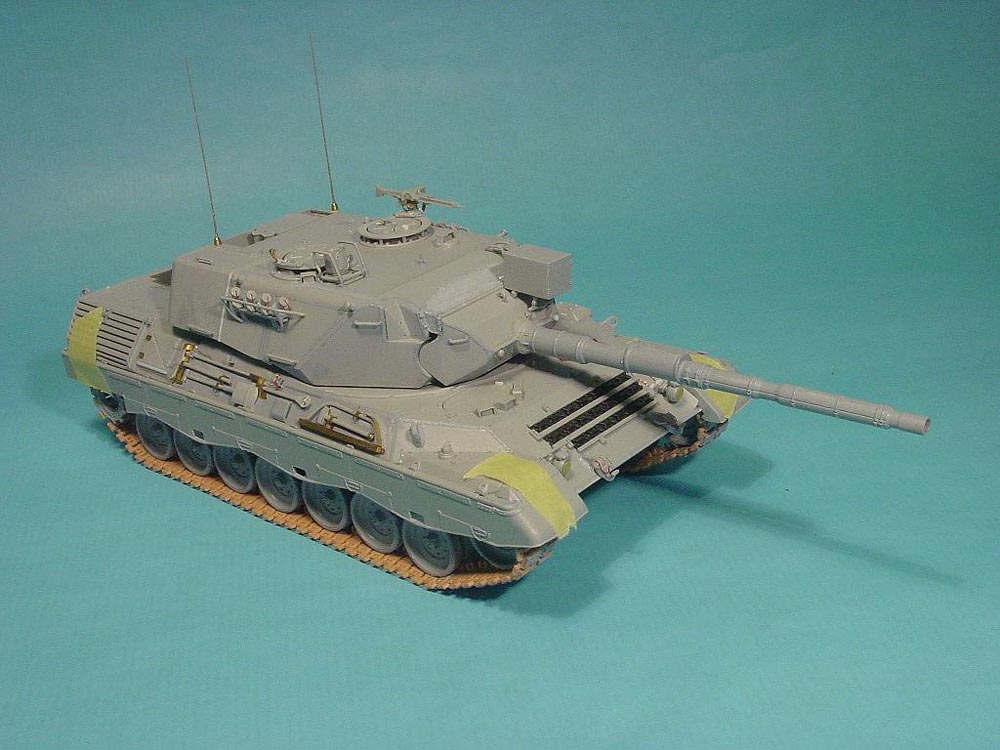
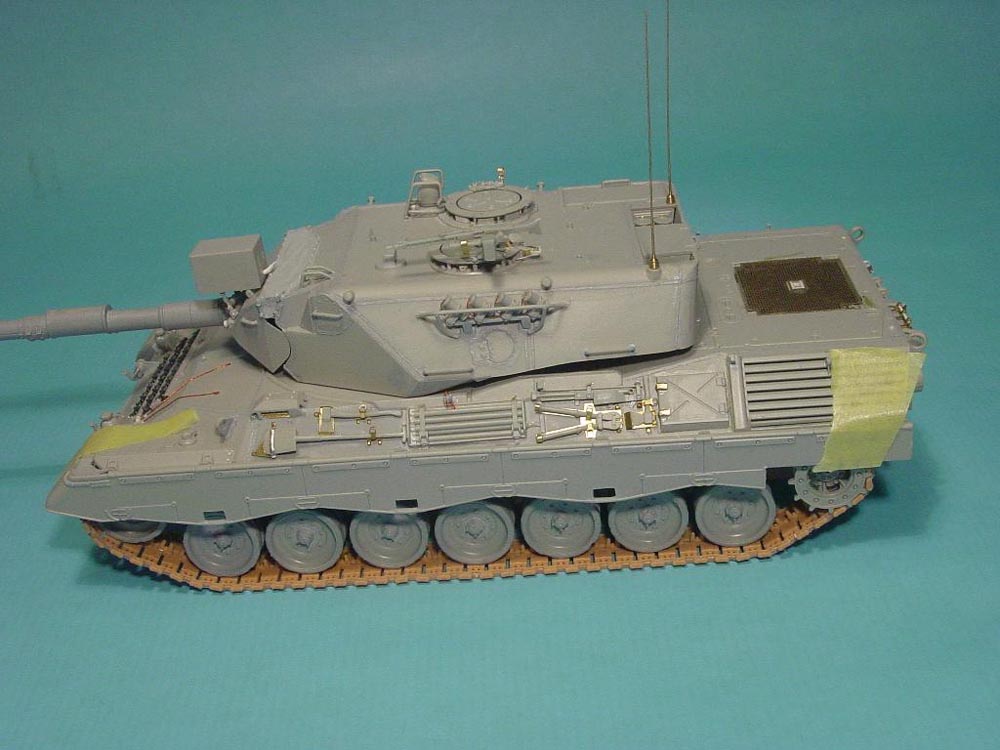
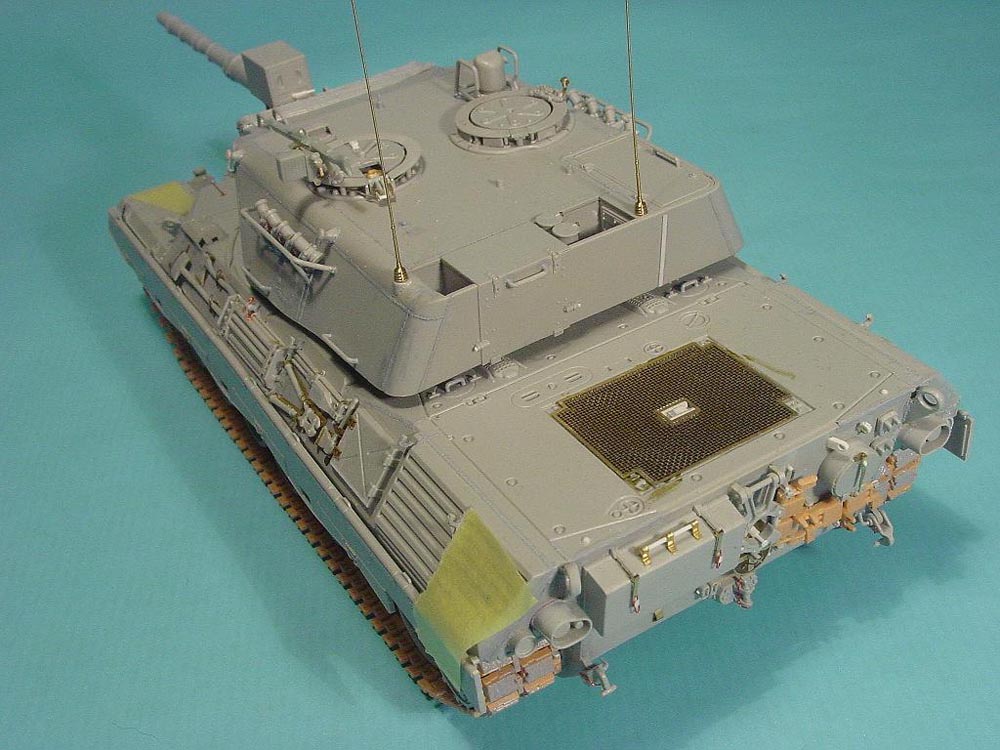
I added Voyager photo-etch, Perfect Scale Modellbau resin barrel, a few sets from Leopard Workshop, SKP lights, Schatton antennae and a few other things.
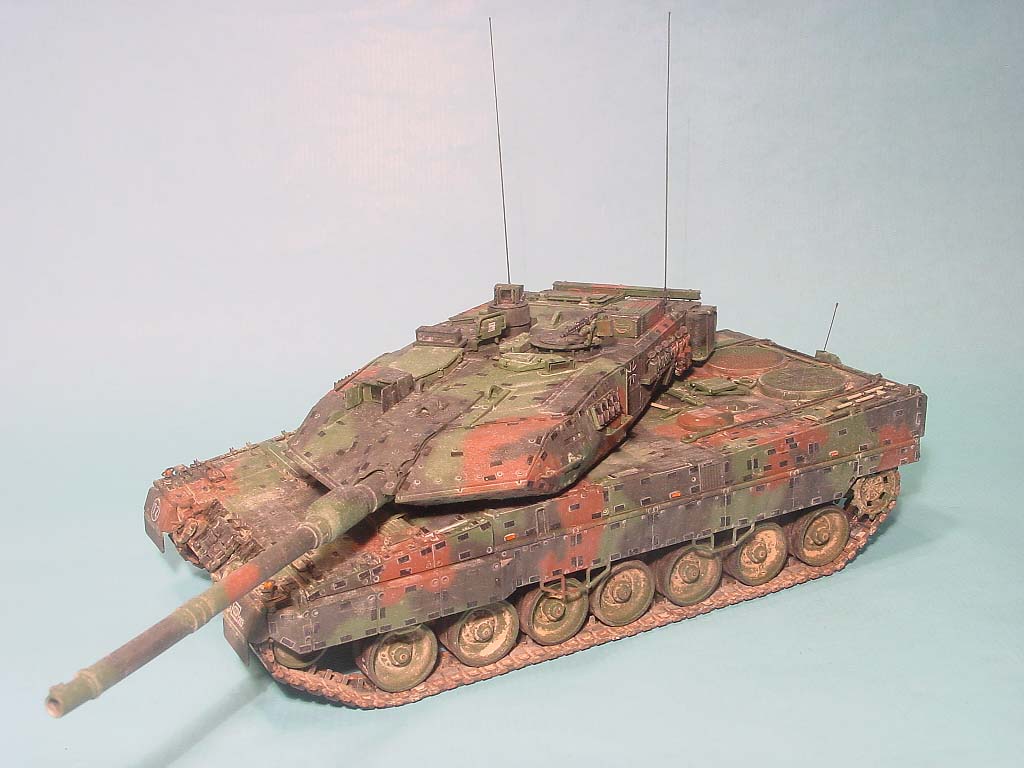
Meng~s model is almost perfect and the basic build goes rather fast - so I took the time to detail it a bit.
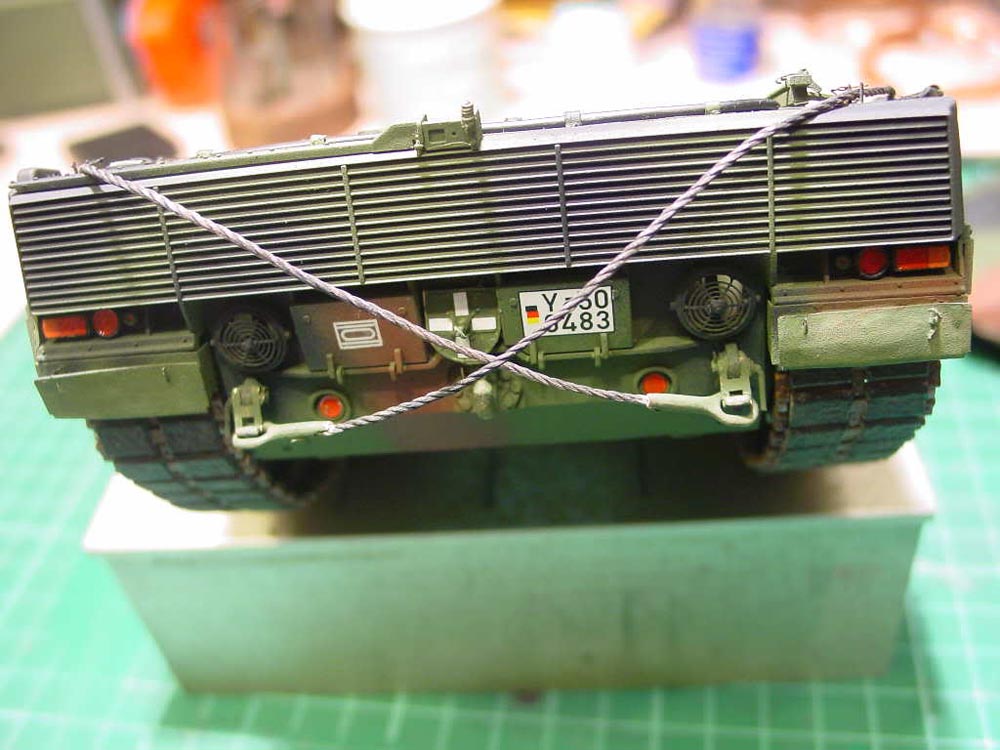
Camouflage was done with Vallejo Bronze Green and Tamiya NATO Brown and Black. Decals are from Meng and Revell (stencilling on the rear hull and license).
Weathering was done mostly with oils and pigments.
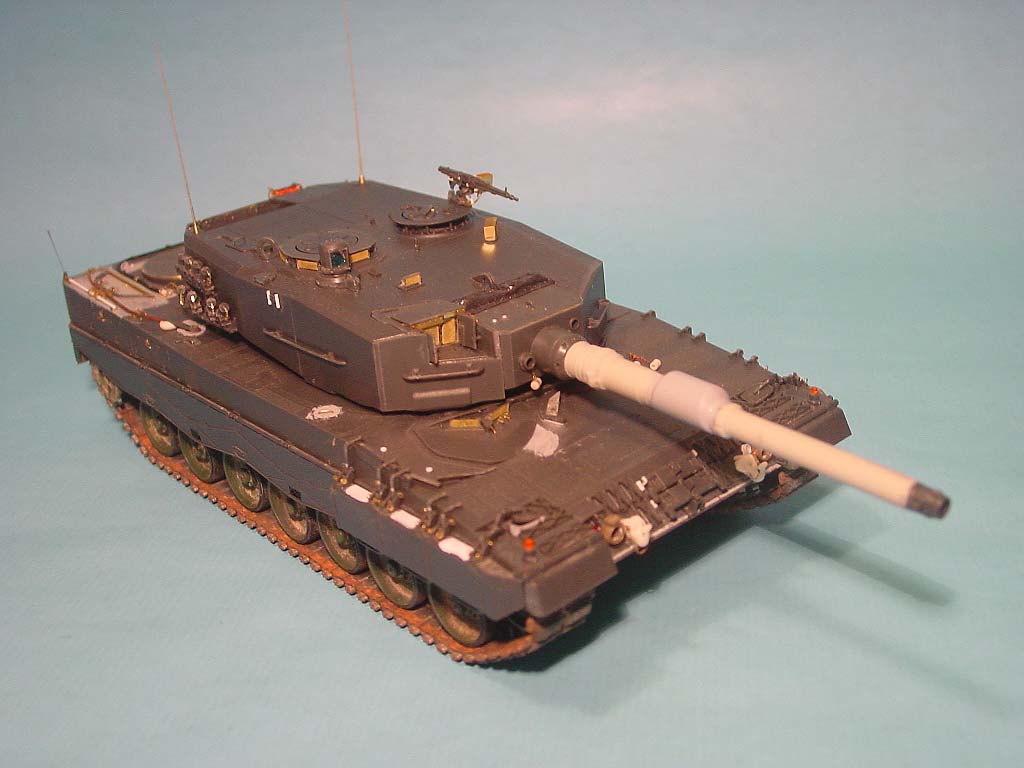


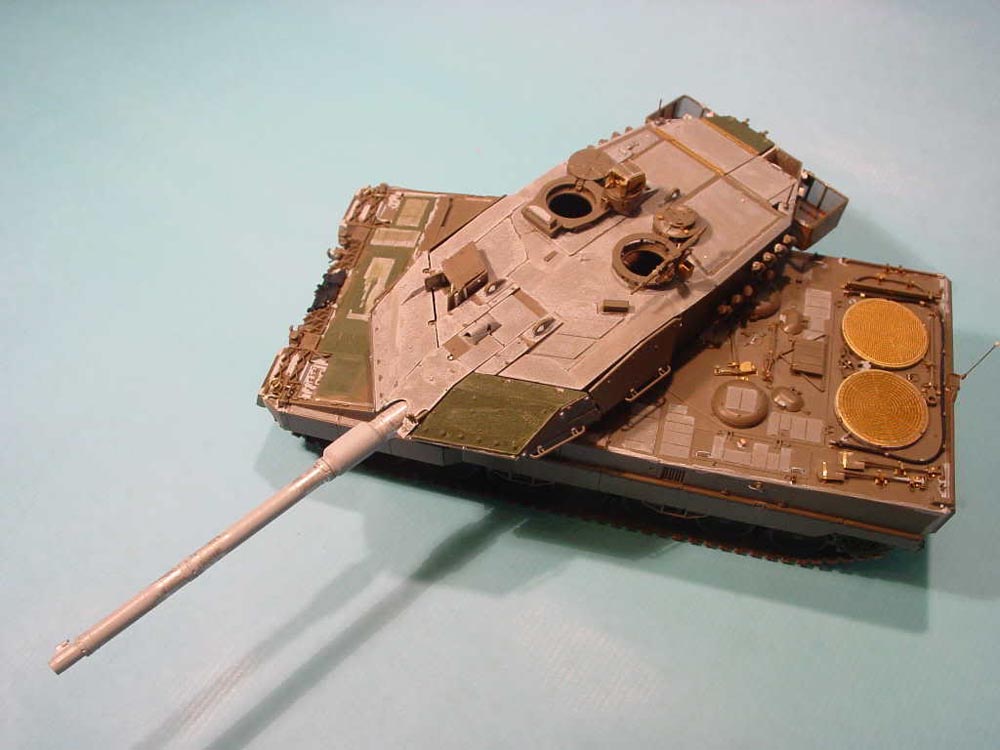
This is my Tamiya Leopard 2A6 with Voyager PE, AFV tracks and a Barrel Depot gun.
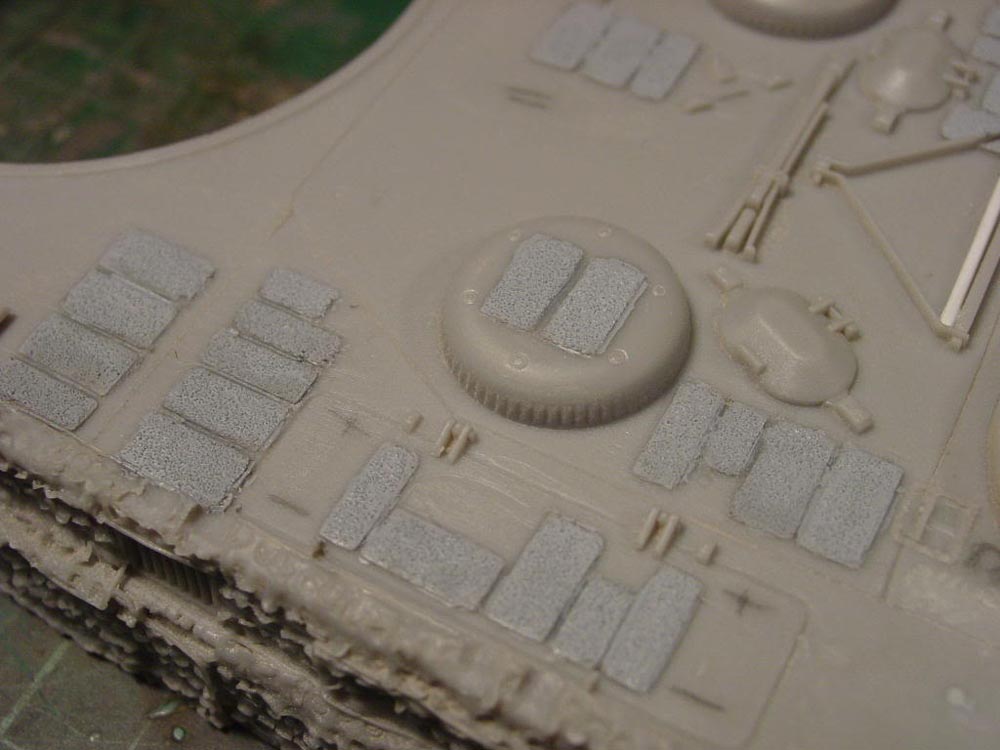
Anti-slip coating was done with Mr Surfacer 1000 and Cast-a-Coat.
I finished my Leo with enamel and acrylic washes, dry-brushing and pigments.


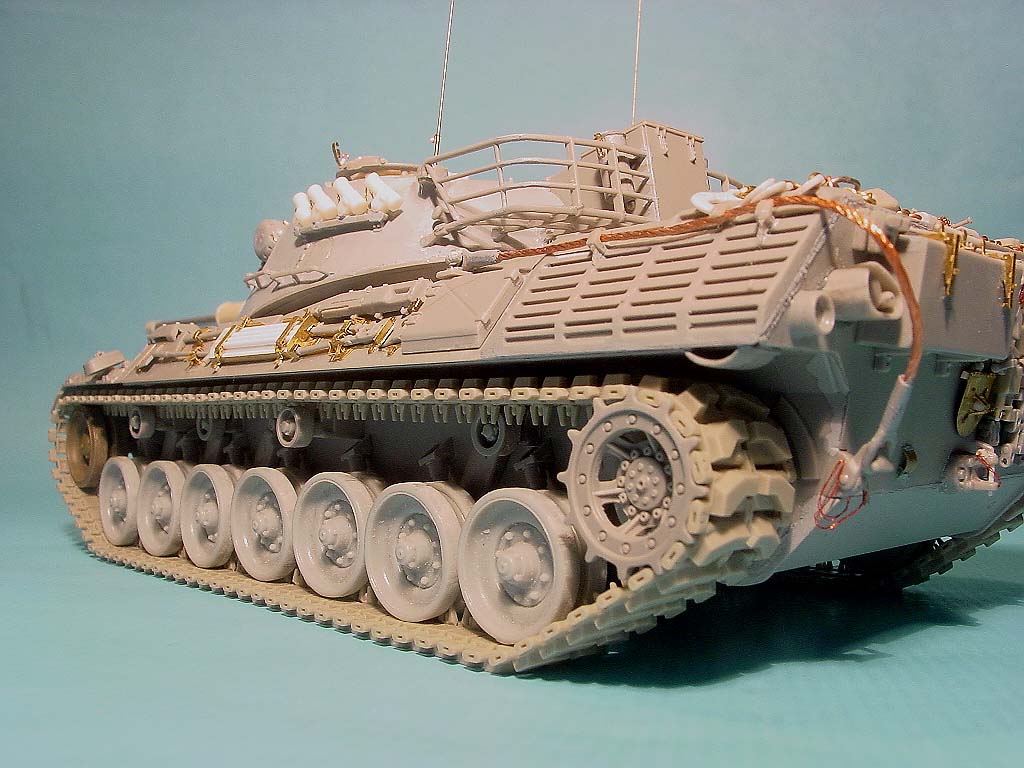
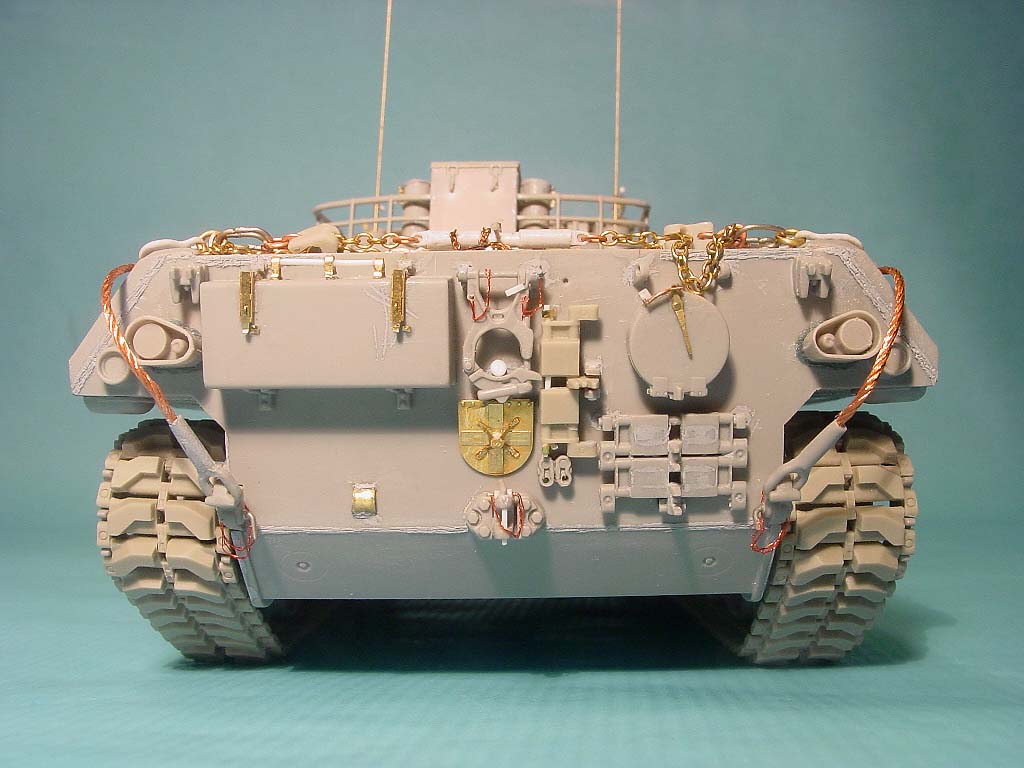
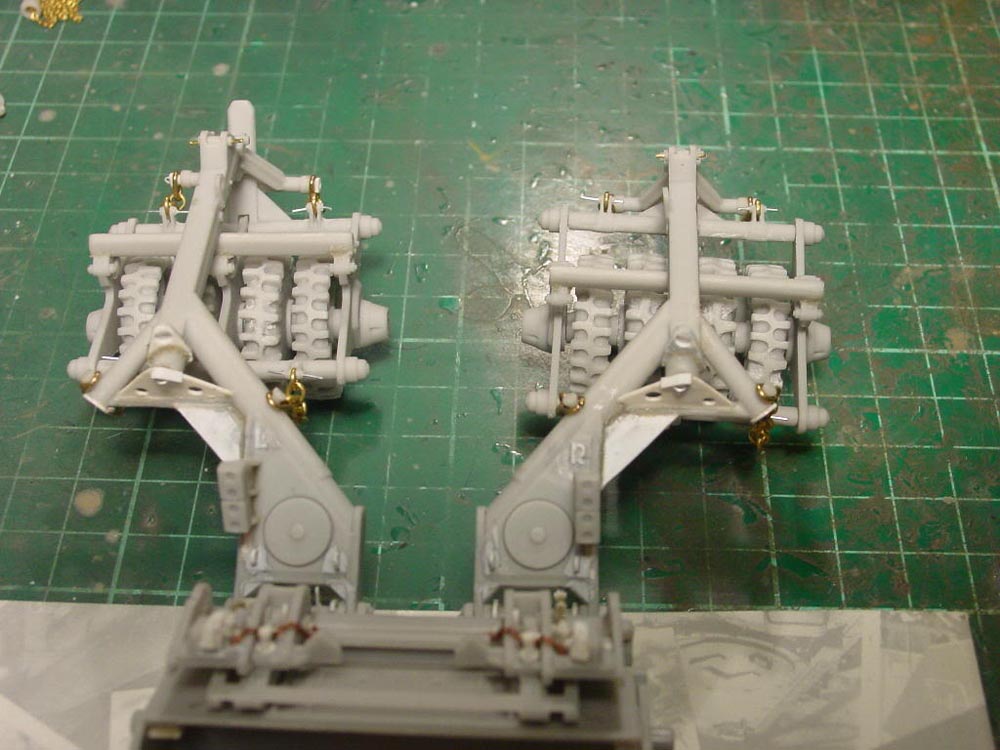
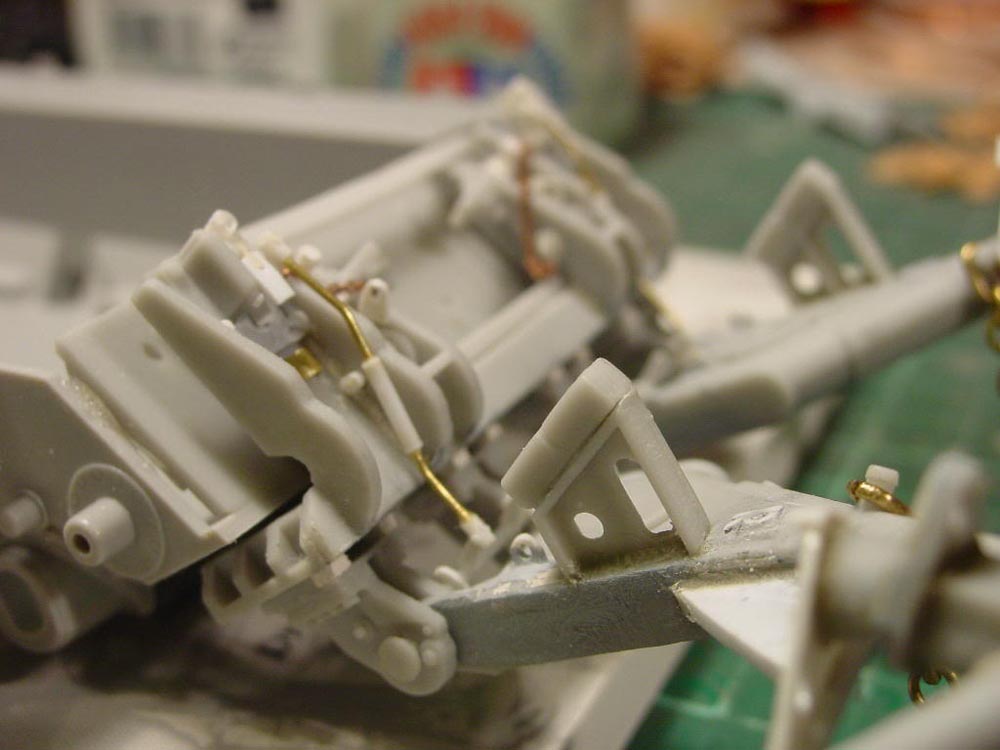
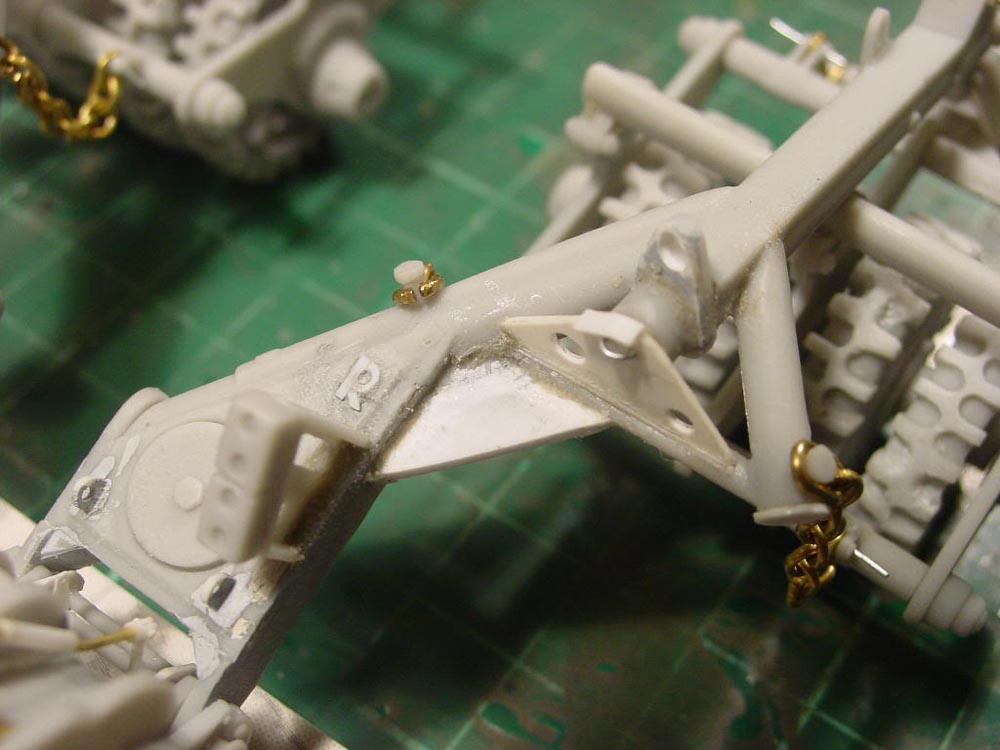
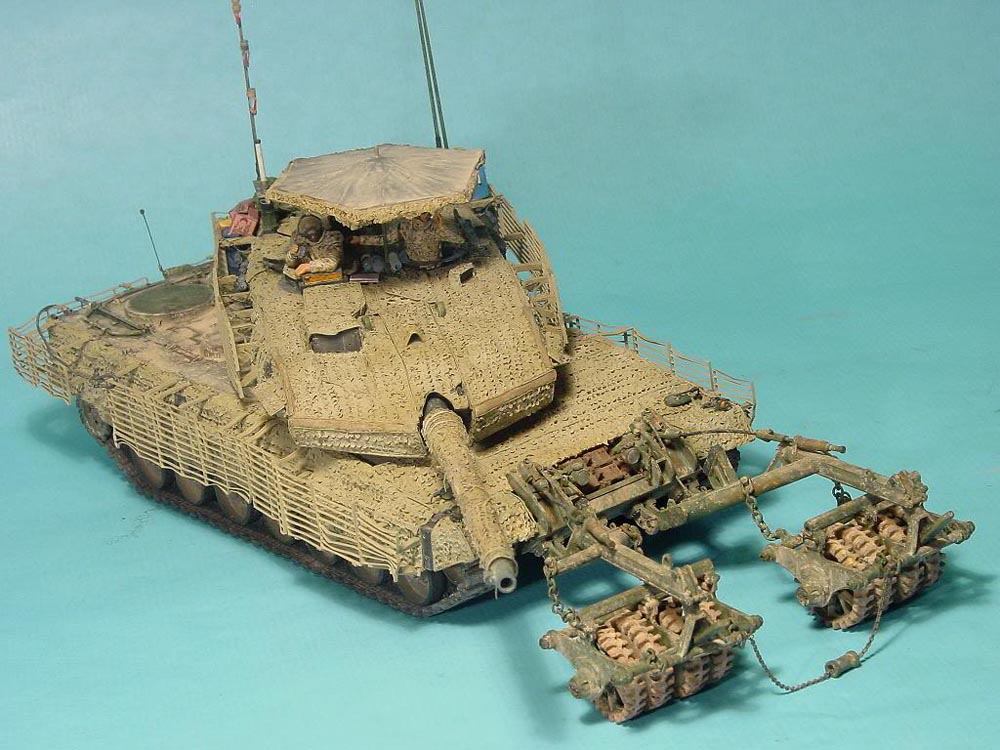
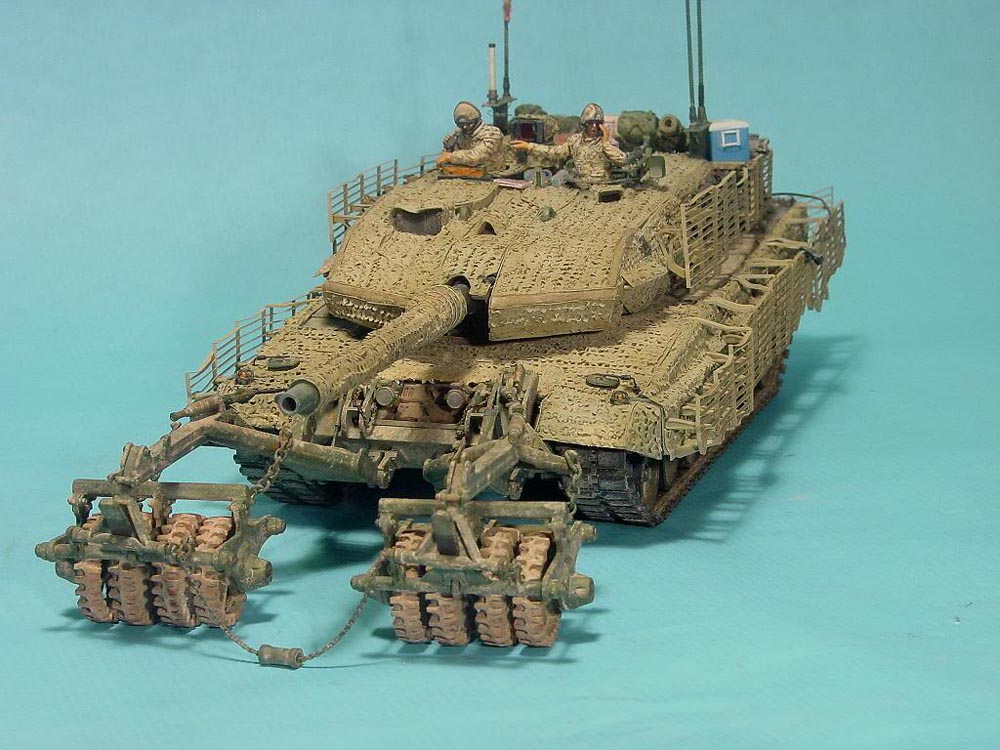
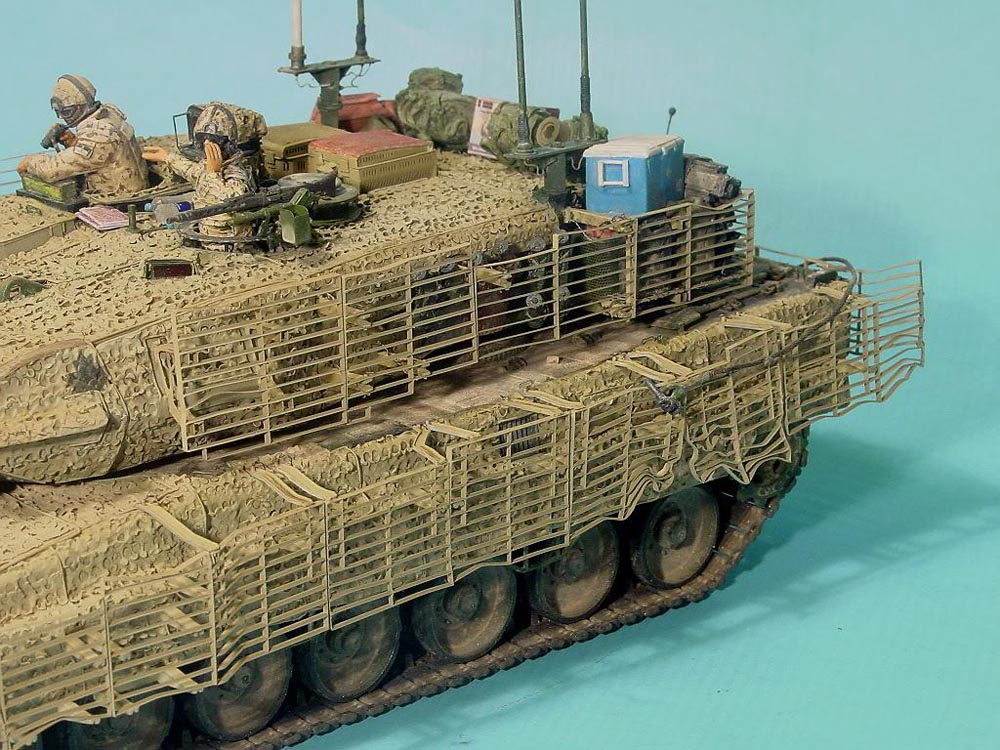
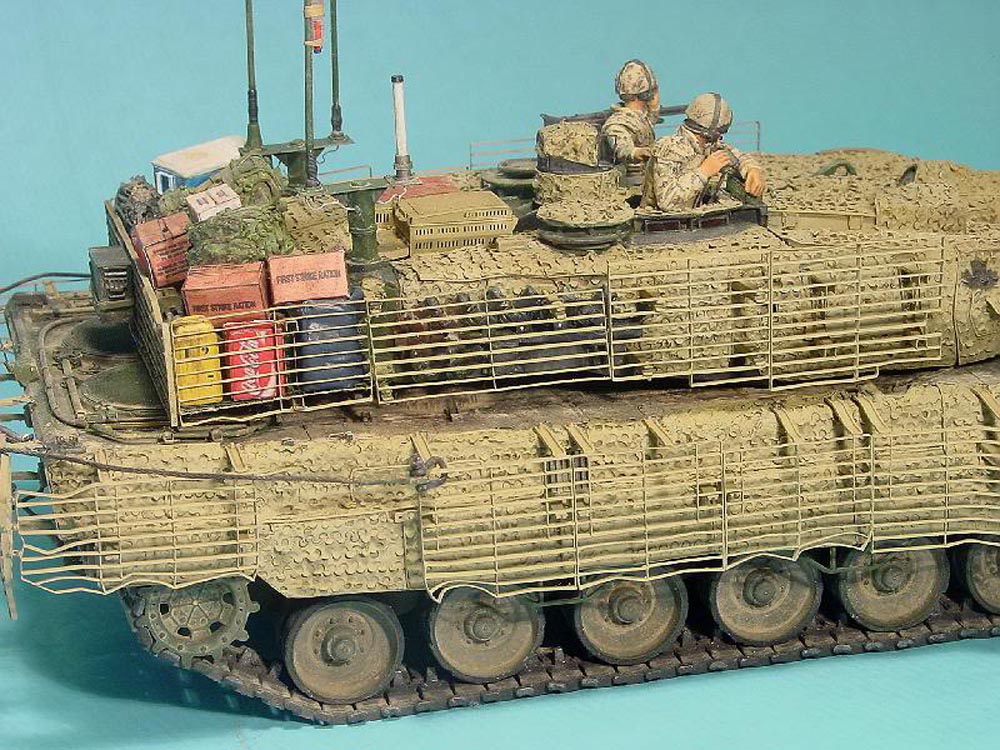
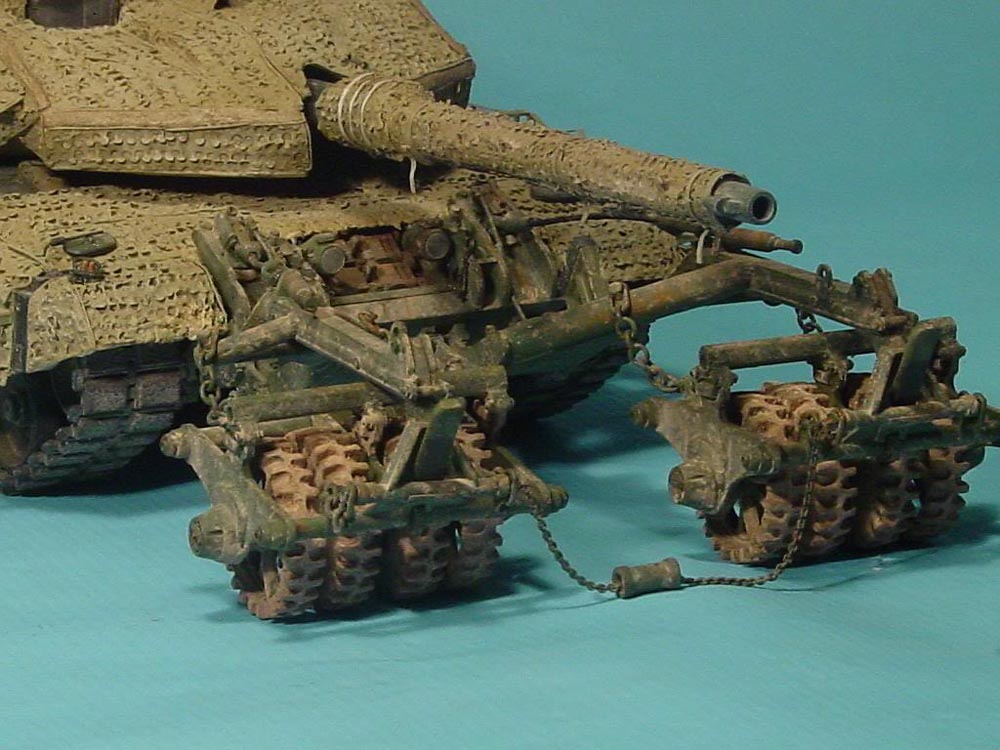
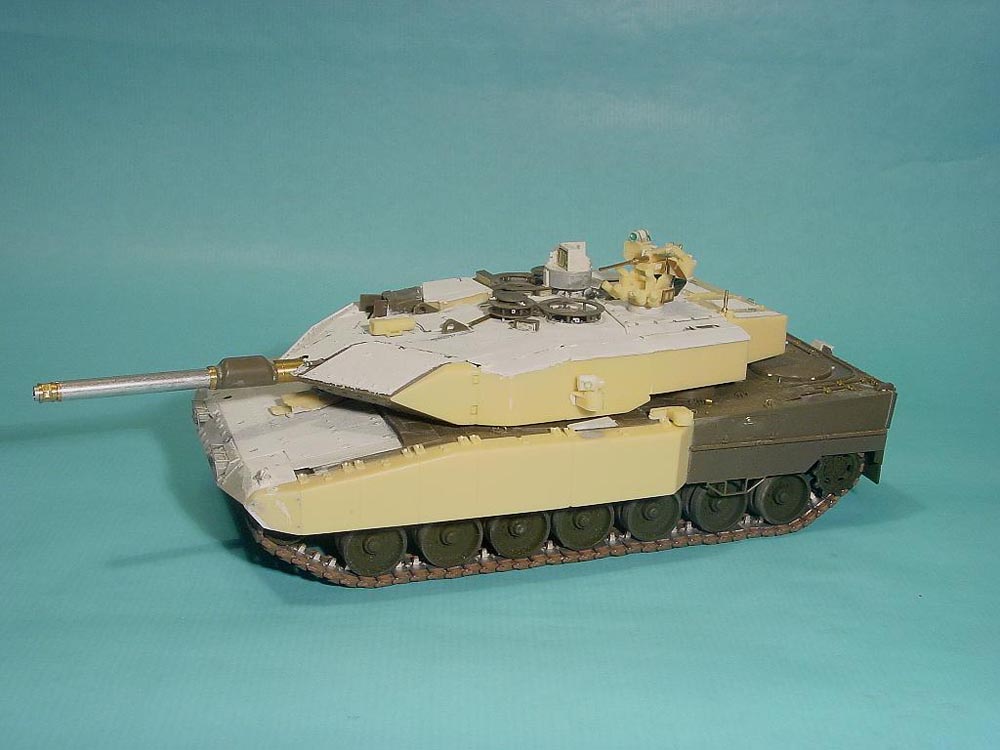
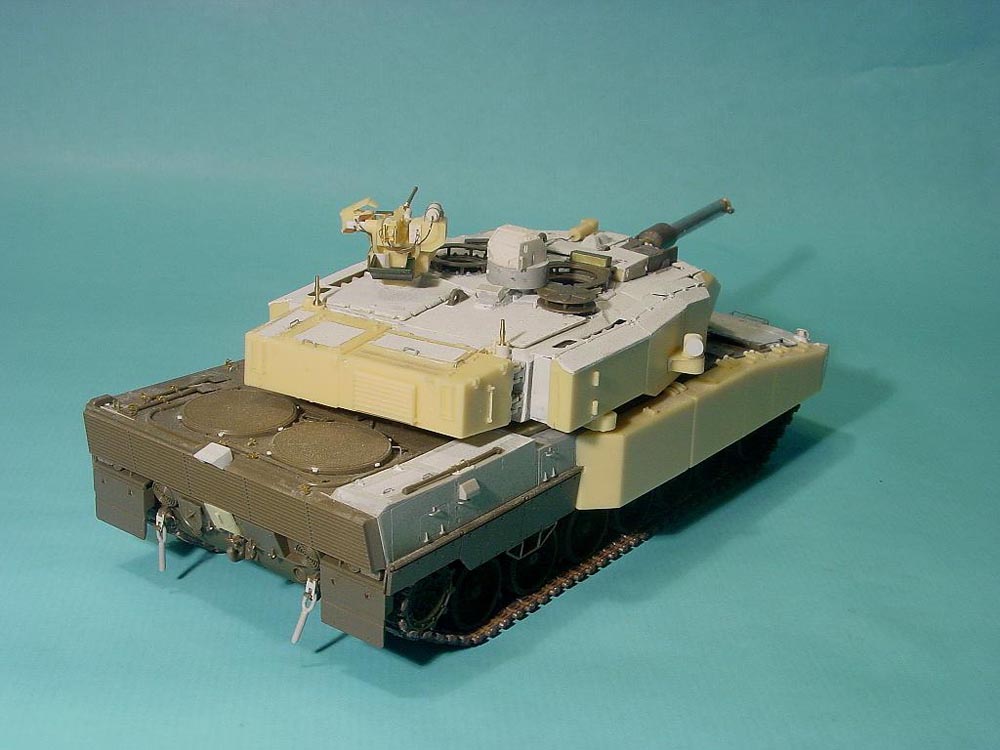
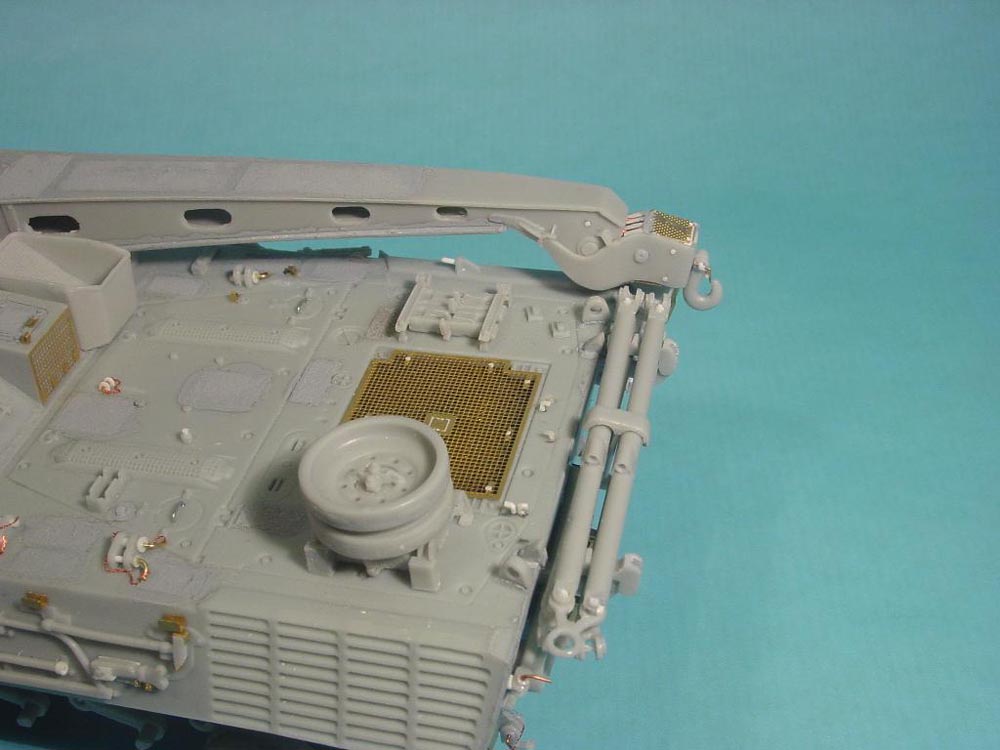
The mine-roller set is, of course, from Perfect Scale, fitted to the Hobby Boss Leopard 2A6M CAN updated with the Perfect Scale Barracuda update set.
I used Tankograd's Leo 2A6M CAN volume as the reference for the mineroller. IMHO this should be sufficient.
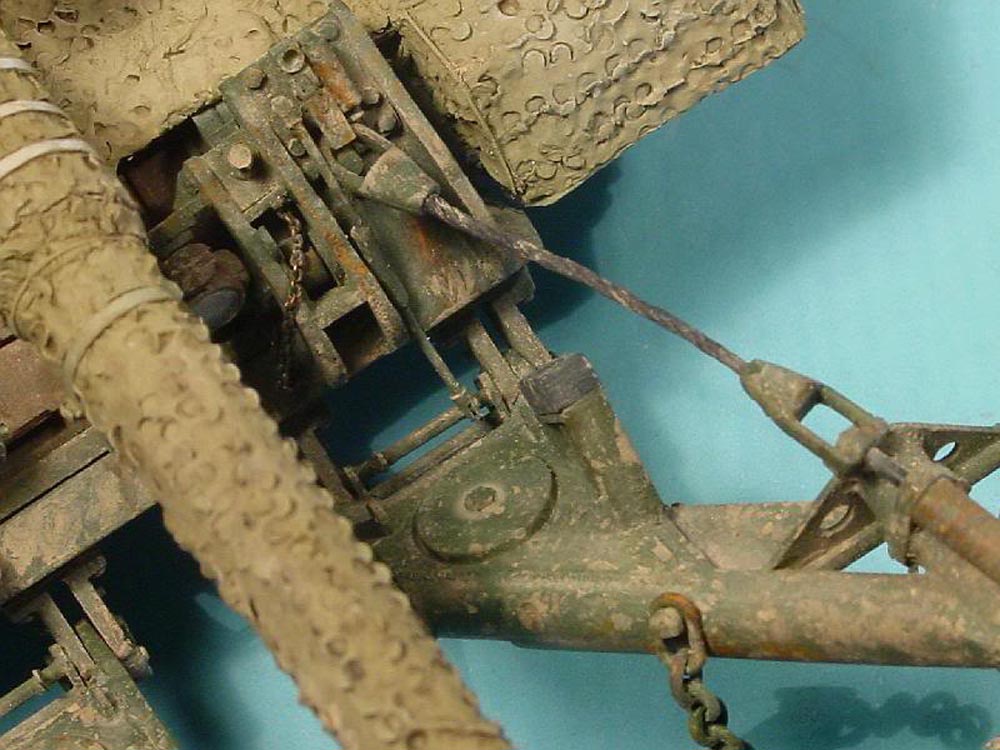
The mine-roller set looks quite good in the beginning, but the more you compare the set with the photos of the original, the more simplifications and omissions you see. I tried to fix the most of it to the best of my abilities. A few parts were left off to be fixed after painting and installing the system to the hull front (cable support, small steel runner between the large rollers). For painting, I disassembled the roller into sub-assemblies which is why there are still protruding wires and so on.
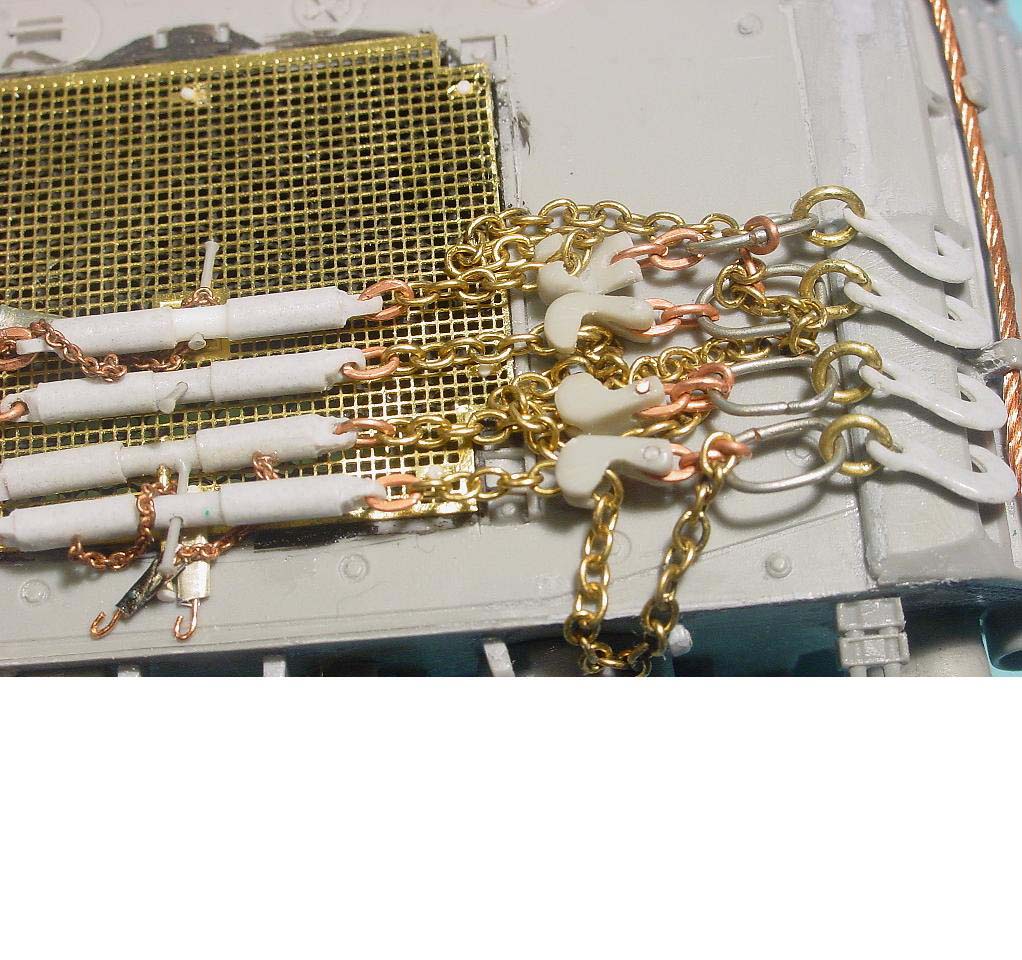
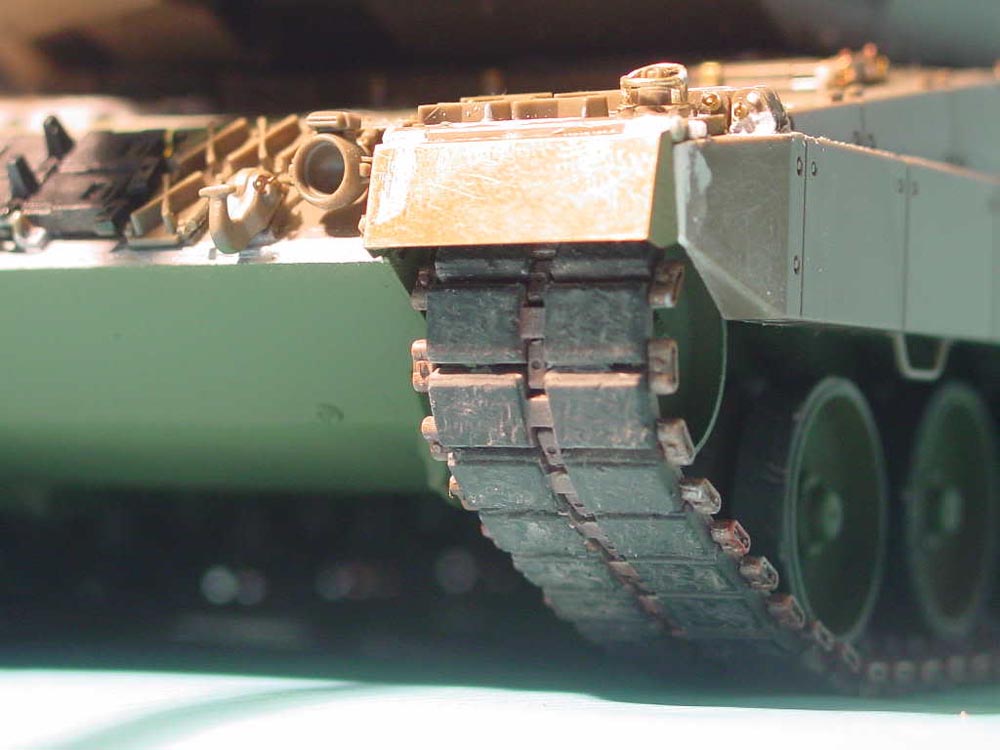
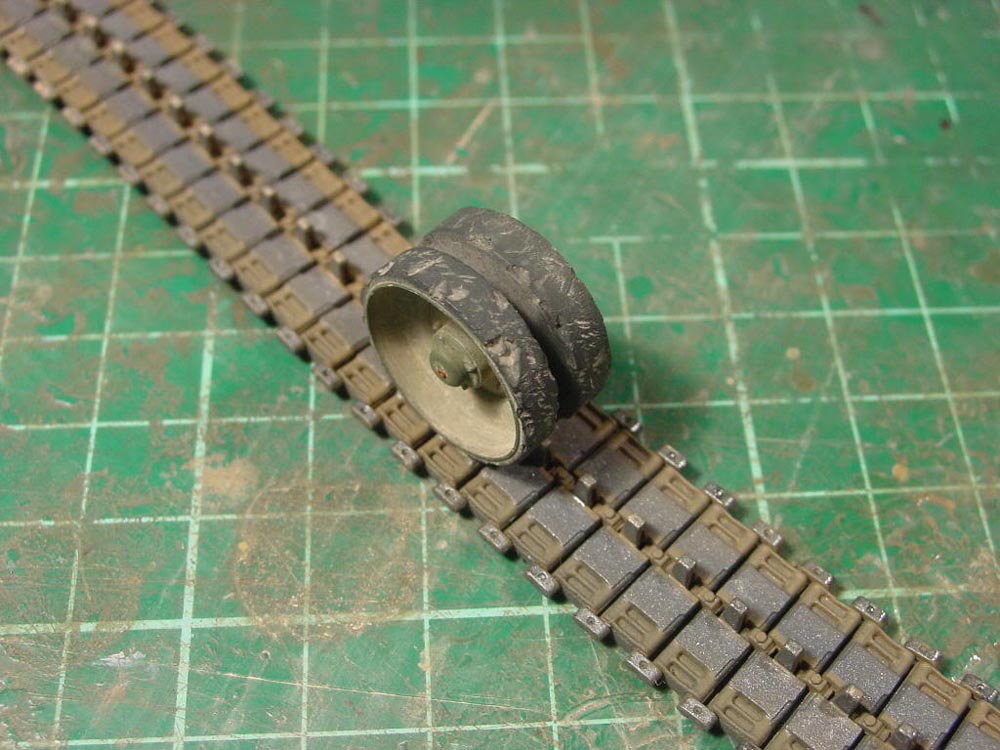
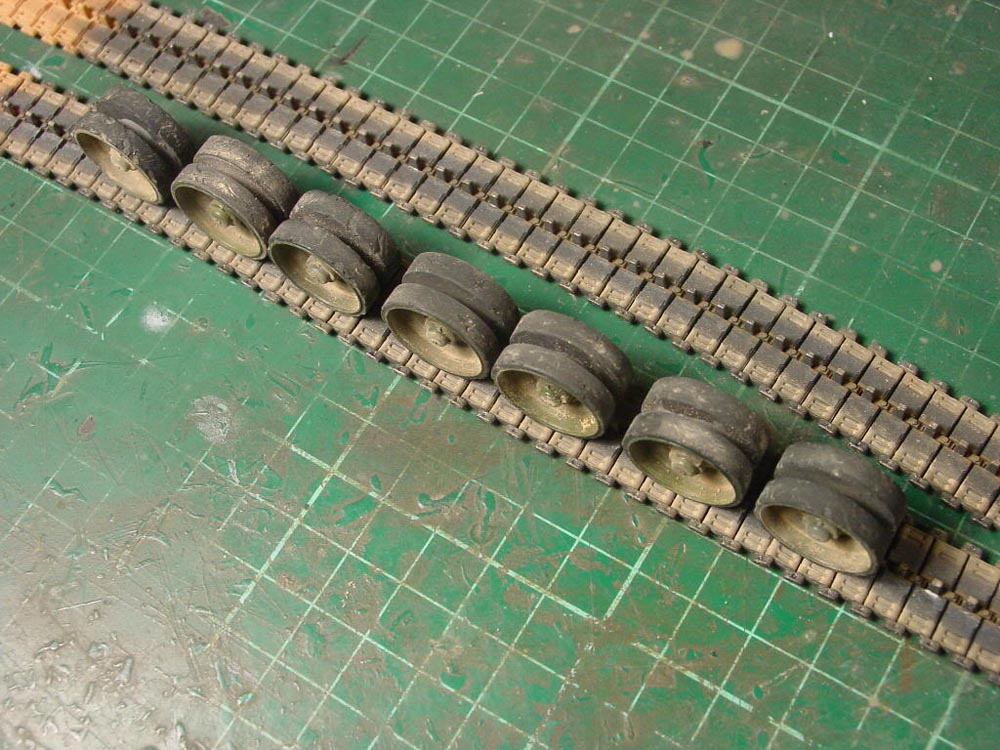
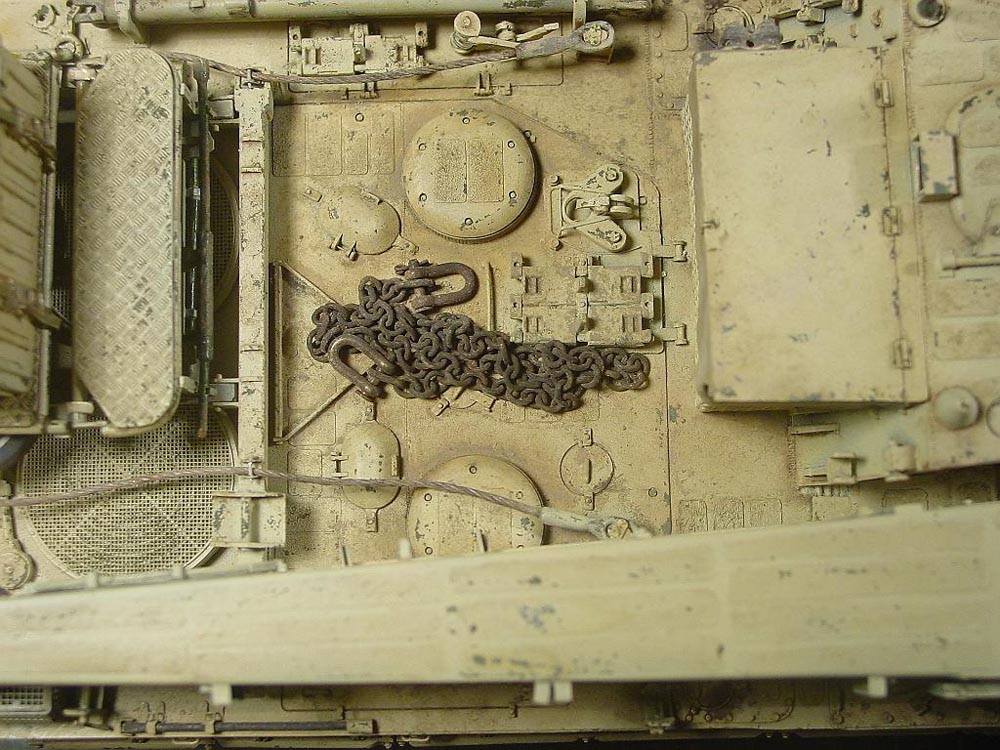
The chains are from Royal (not Royal Model). I ordered No.521 (3.5 mm links) and No.517 (5 mm). I had small chain on hand.
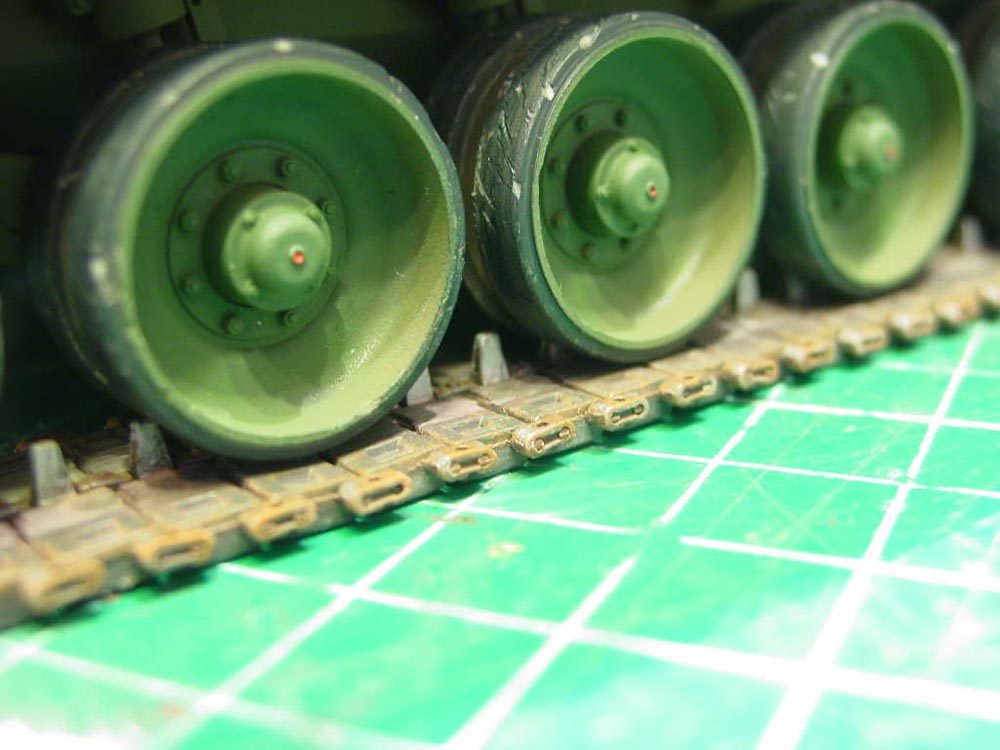
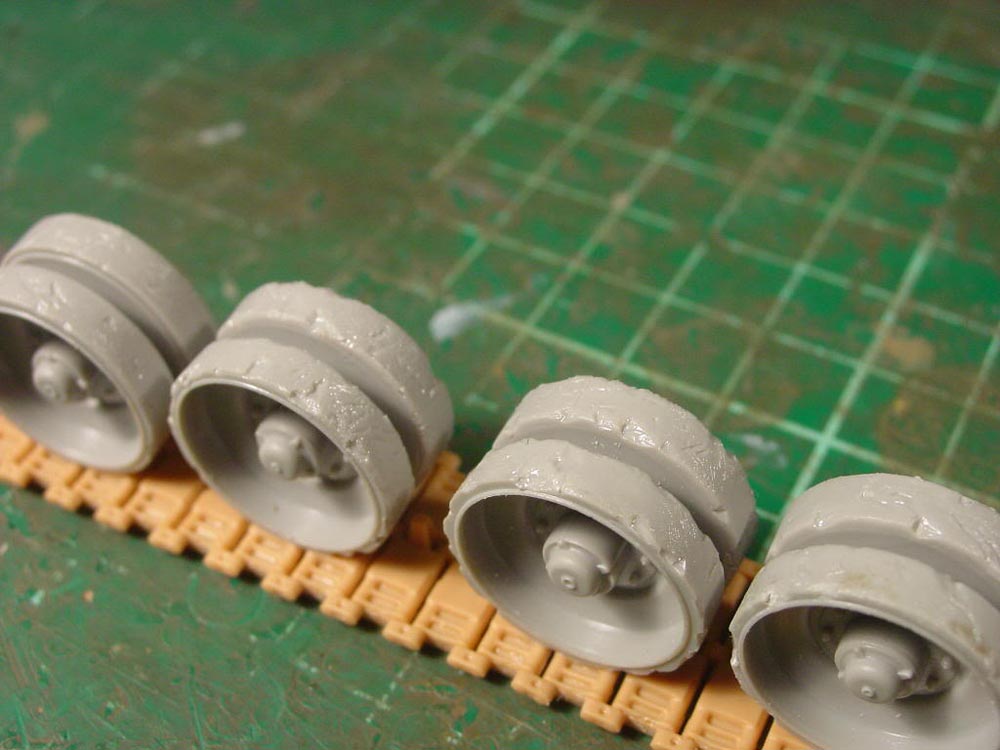
I used Bronco tracks and roughed them up with a drill. The road wheels were damaged with a sharp hobby knife.
For the anti slip coating I used Mr Surfacer and Cast-a-Coat powder which is no longer available.
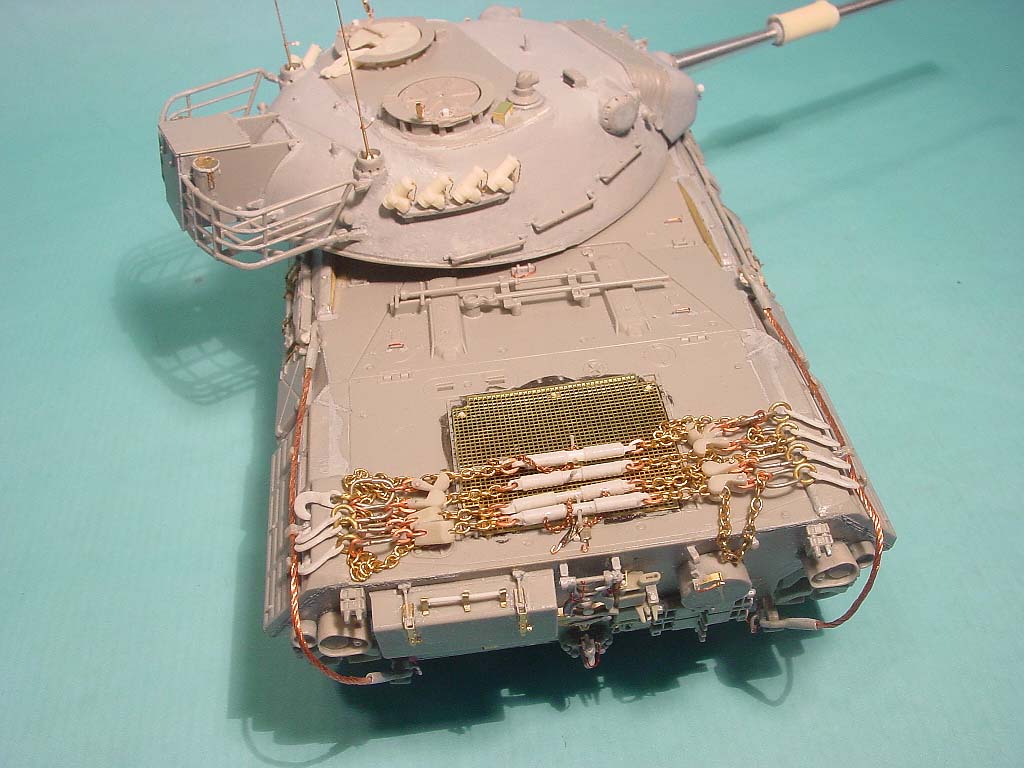
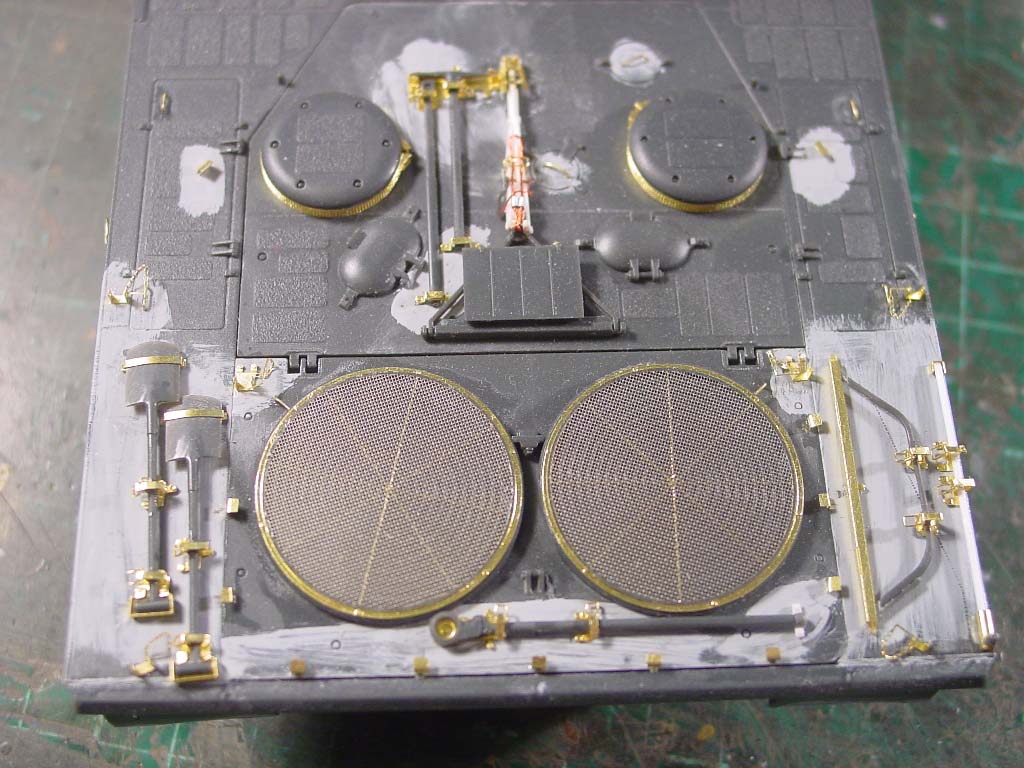
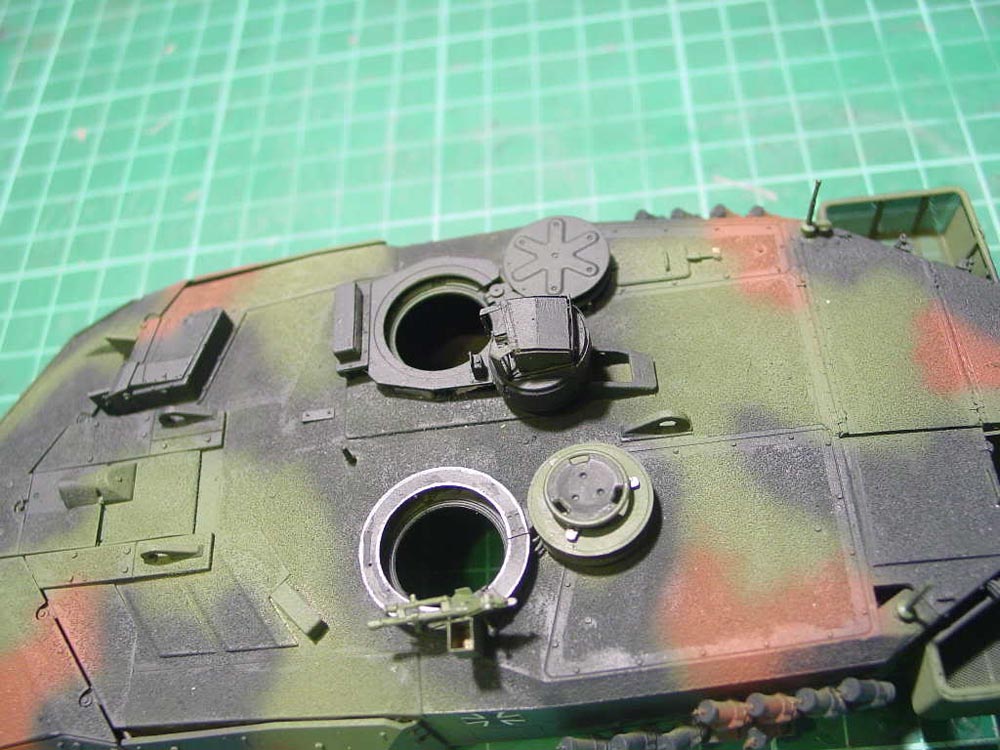
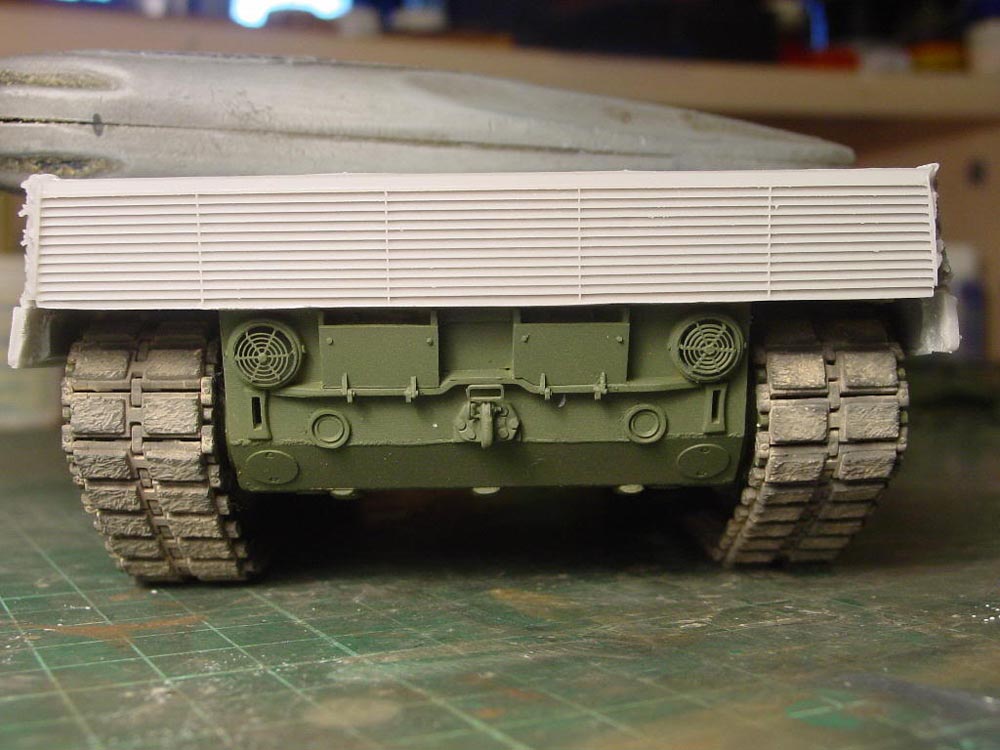
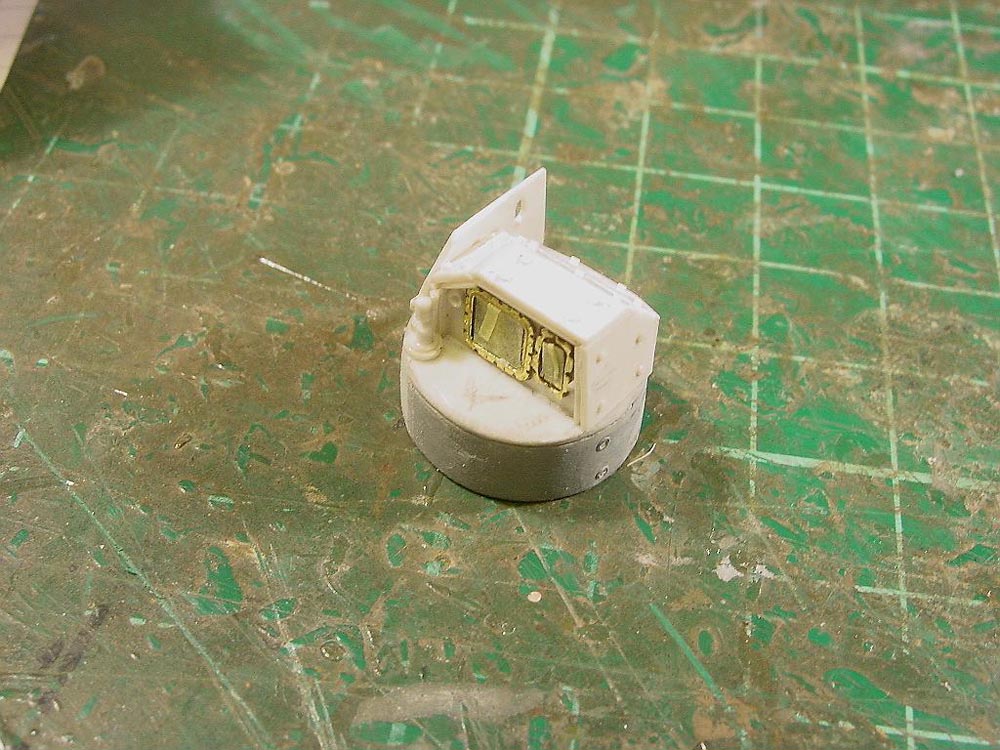
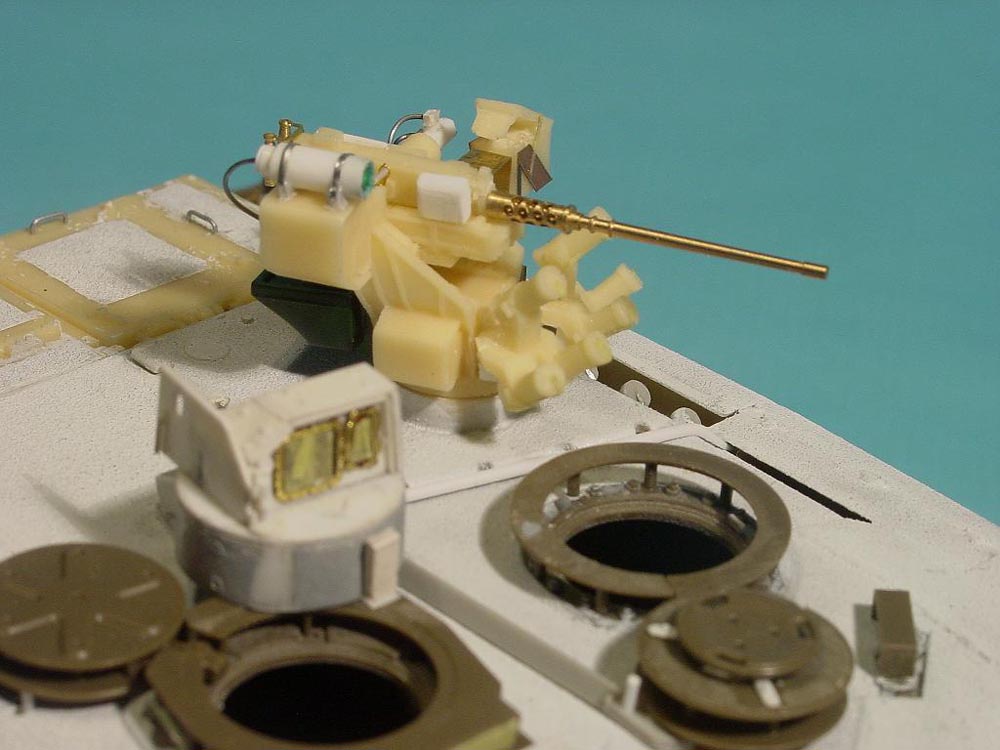
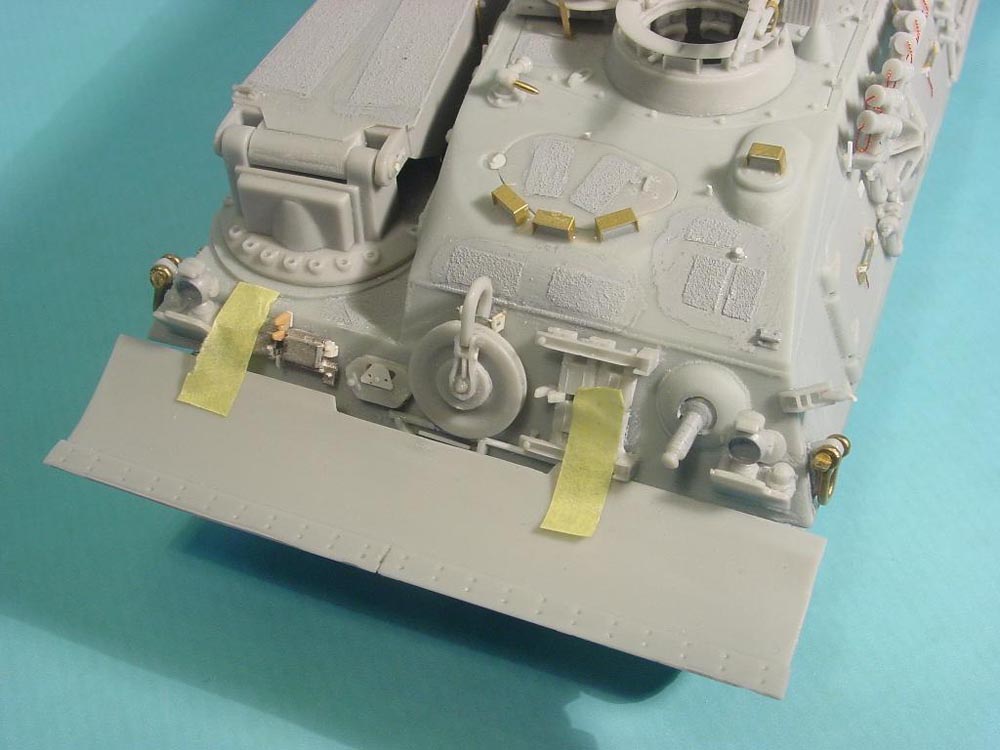
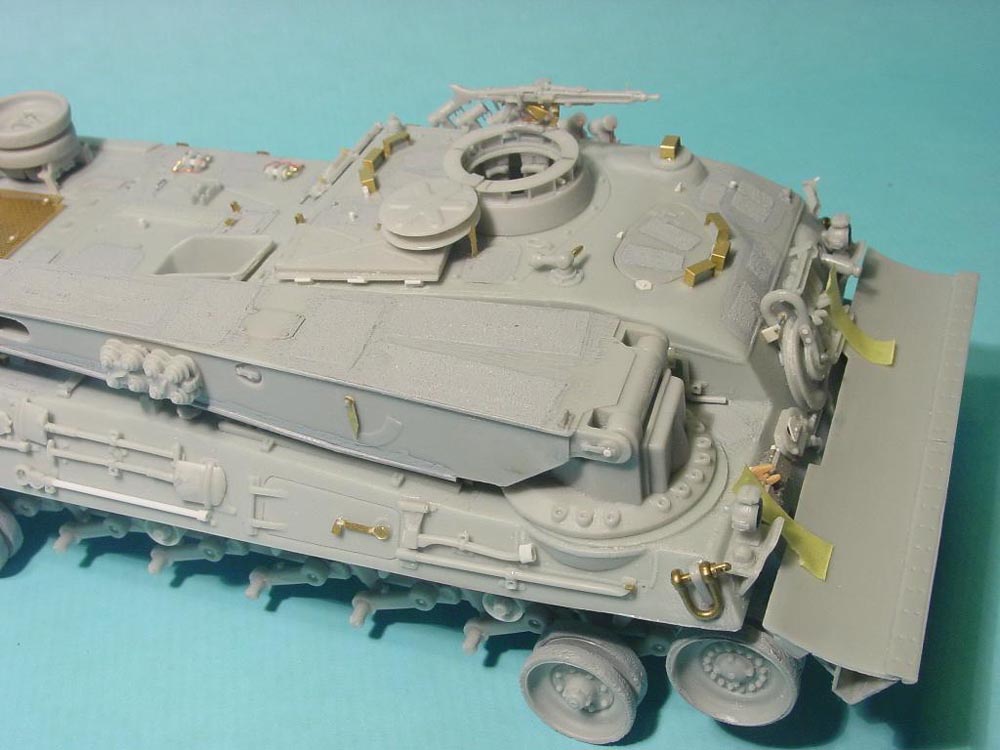
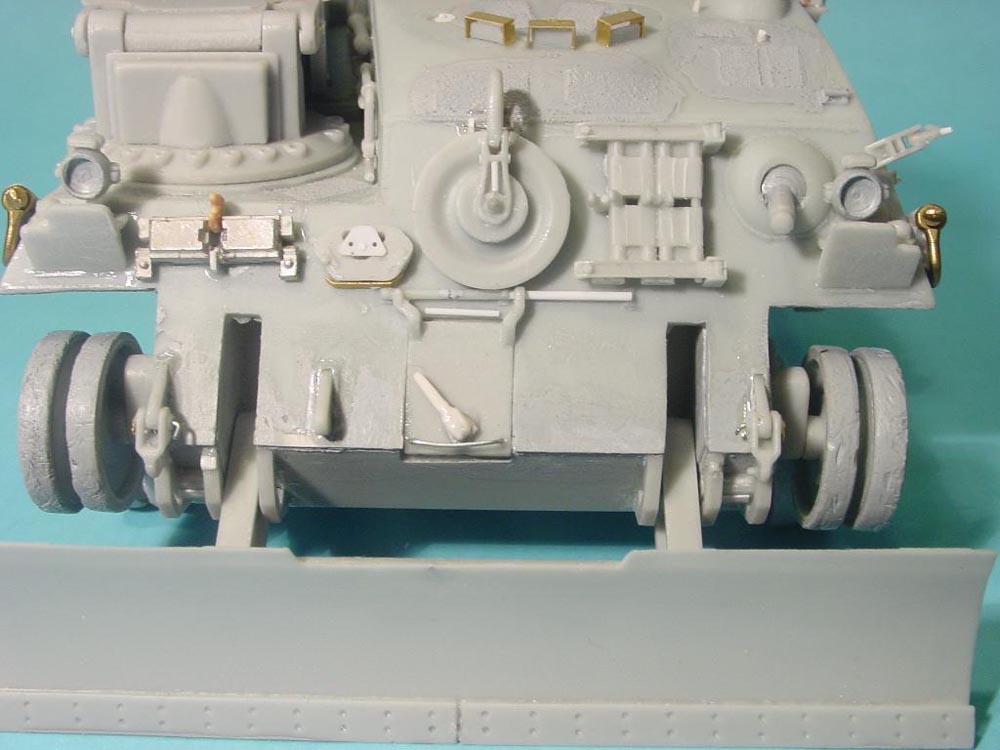
I used Voyager's Leo 2A5 PE set. The box for the refuelling funnel (the white thing in the middle) was scratched because Hobby Boss simply forgot it. The gun travel lock is a resin copy of the Tamiya part.
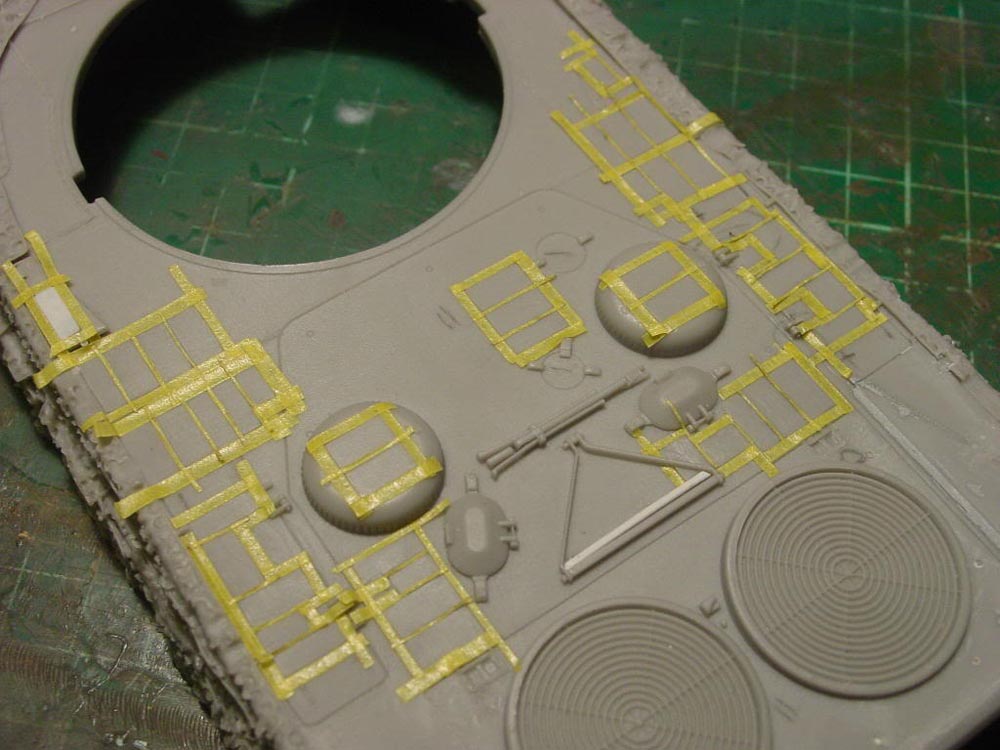
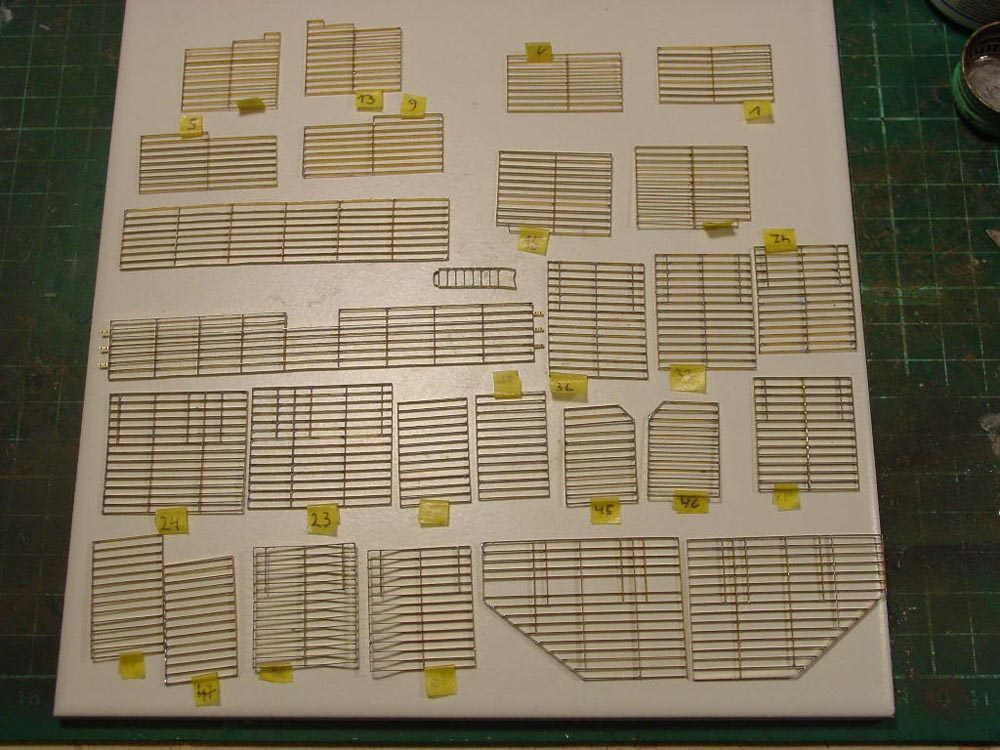
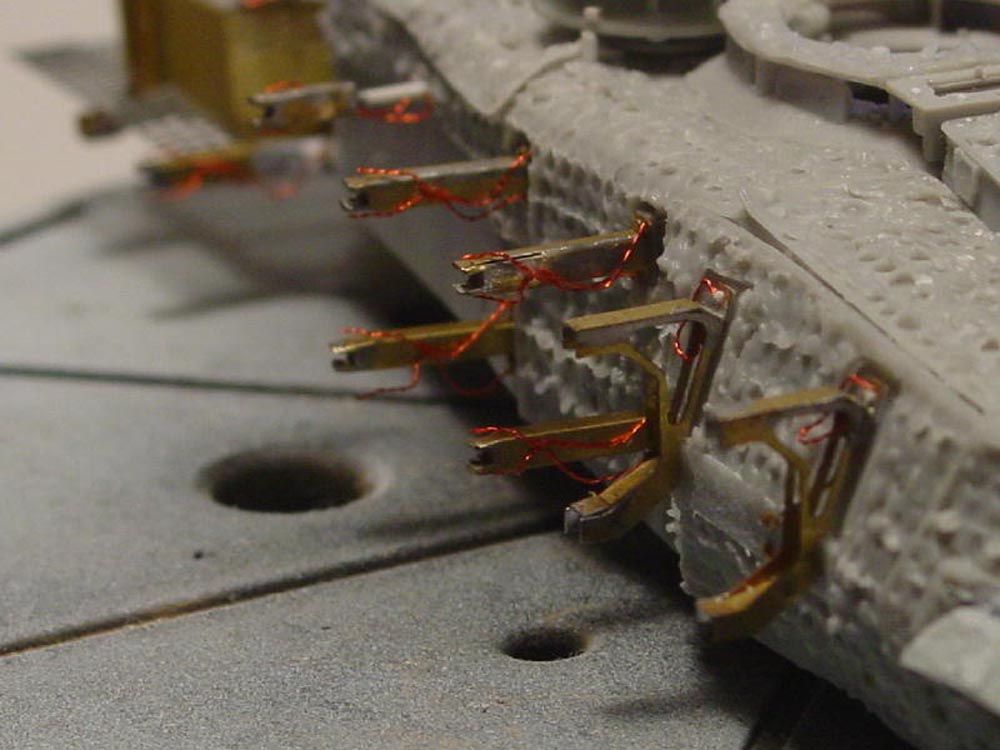
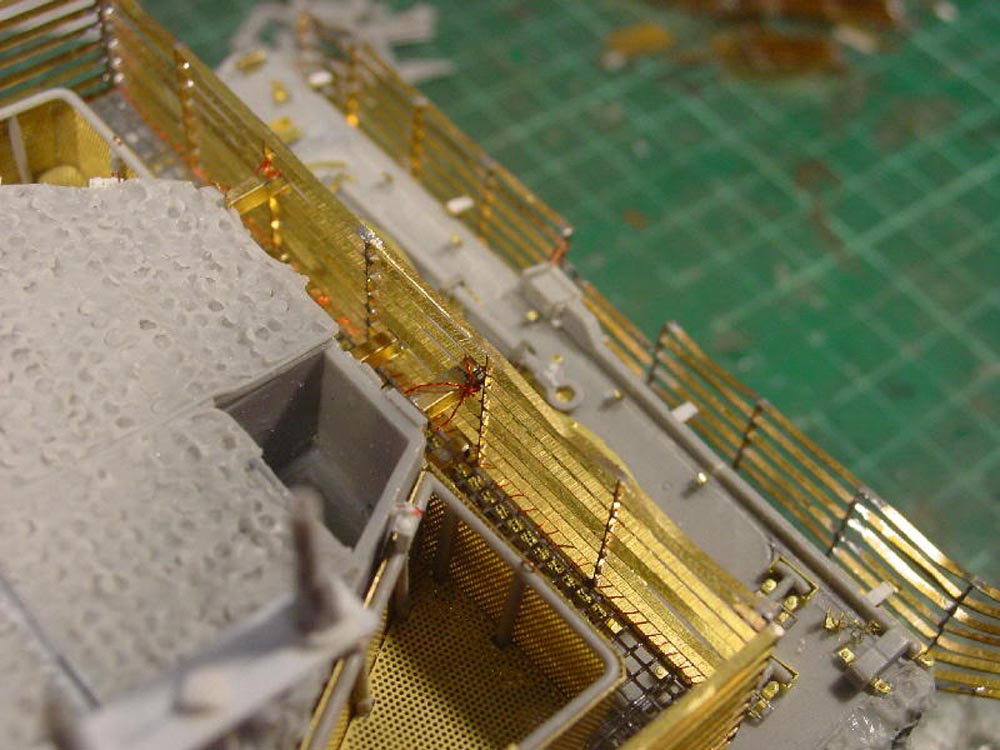
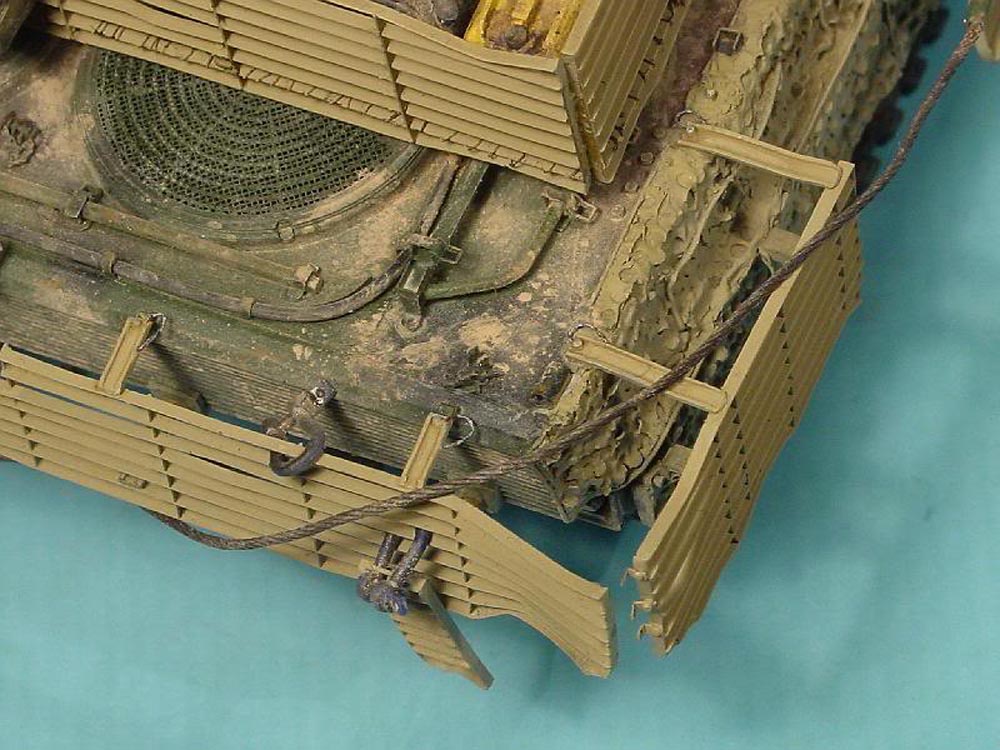
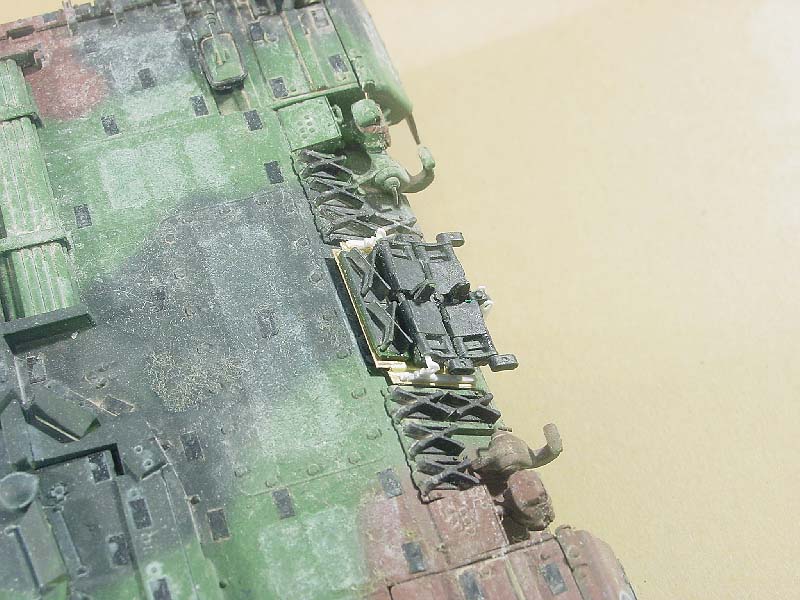
The slats are result of about 8 hours soldering Eduard's slat armour PE. Before gluing them to the tank, I cut off the lower part to get the short slat segments used with the mine-roller version.
This model evolved into the most complex build I've done so far.


This is my Leo 2A7 with a few scratched upgrades. I finished the model just before Perfect Scale Models released their Update set with all the parts I had scratched!!
I used the following upgrade sets:
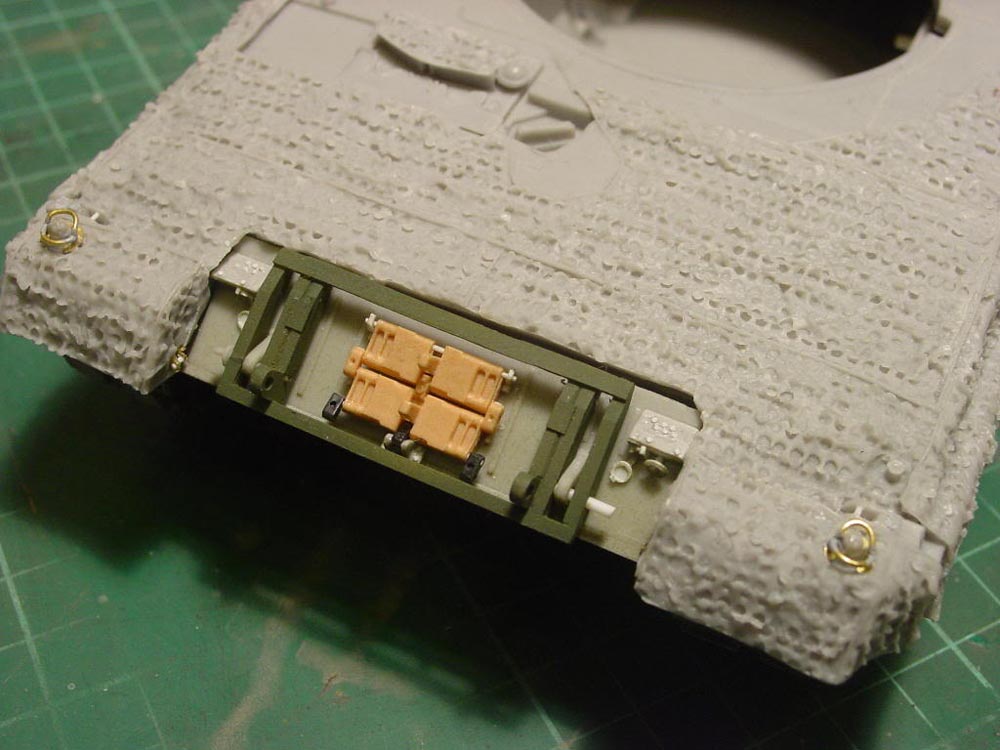
I added or scratched the following items:
Airbrushed with Vallejo colours, weathered with washes and pigments.
I noticed a few of those additions only after the model was almost finished, so I added them during the final phase of weathering and didn~t bother to take new photos. Therefore, you don~t see everything in the WIP pictures.

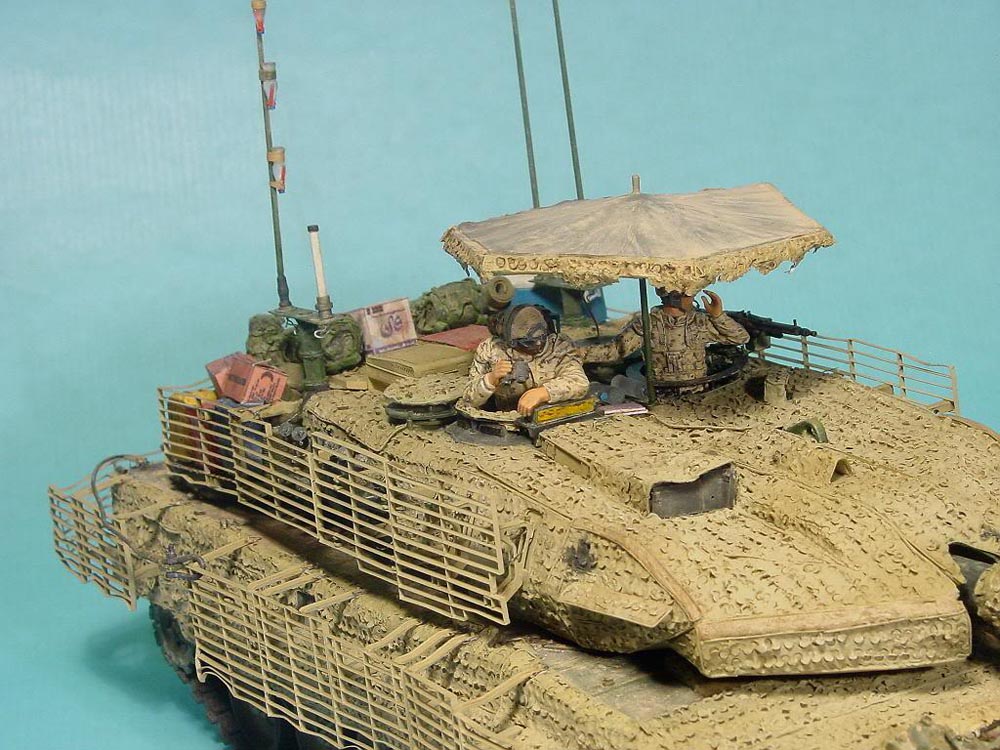
This is my Leopard 2 A7+ Urban Ops. The basic model was Tamiya's Leopard 2A5, upgraded to A7+ with parts from the Hobby Boss Leopard 2A5DK and Y-Modelle's Leopard 2A7+ resin conversion kit. Also added was RB-Models 120 mm L/44 gun, SKP etch lamps and Bronco's tracks.
This version is mostly based on photos from Ralph Zwilling's excellent webpage Tank-Masters.de, and a few pics found via Google.
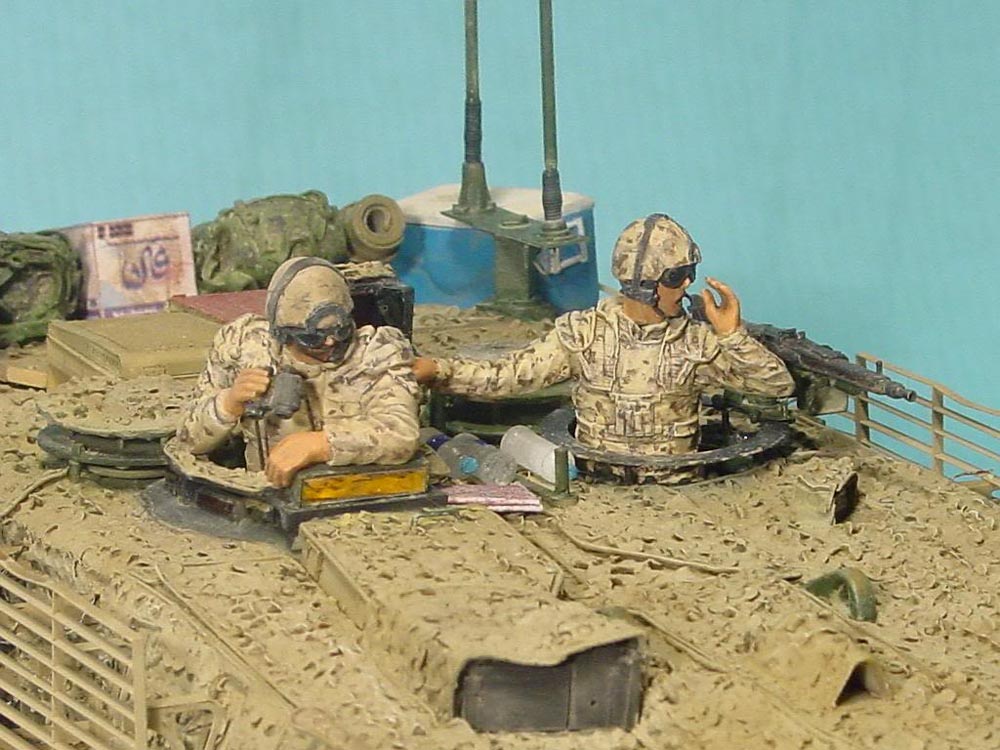
Beside minor additions, I scratch-built a new larger commander's PERI. Anti-slip coating was done with Pro Art Models metal powder and Tamiya acrylic paint as fixing agent. The camouflage is pure fantasy as is the crew with Live Resin heads with ACH/MICH helmets. I know that this is completely unrealistic but they simply look so cool - I had to do it ...
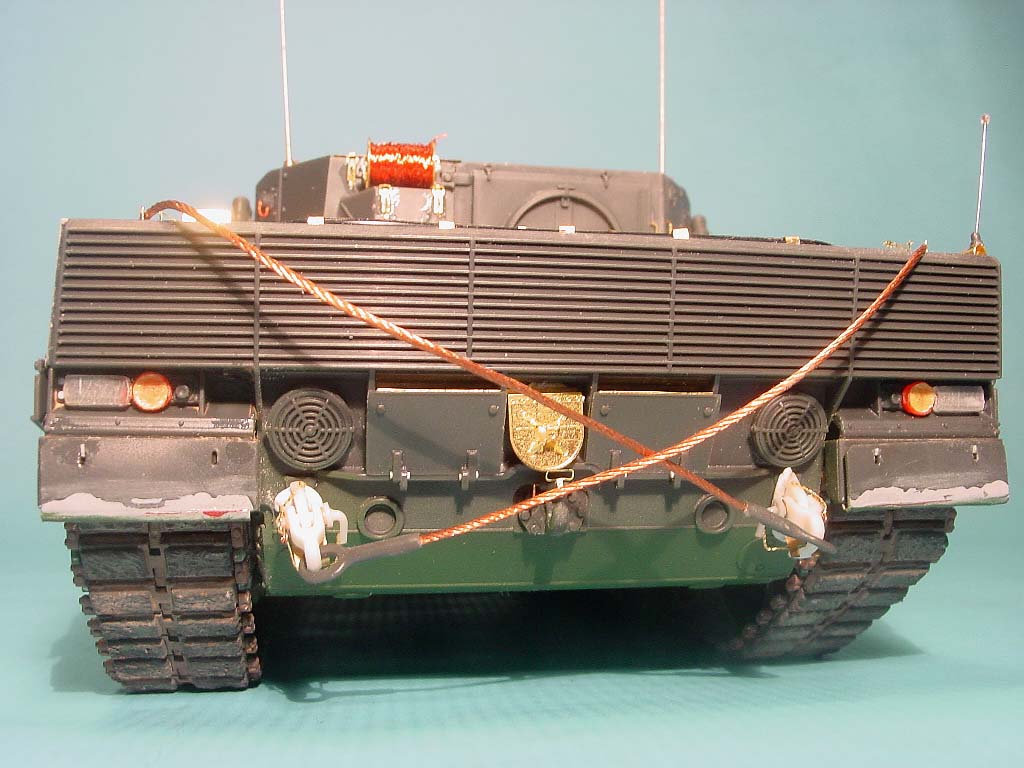
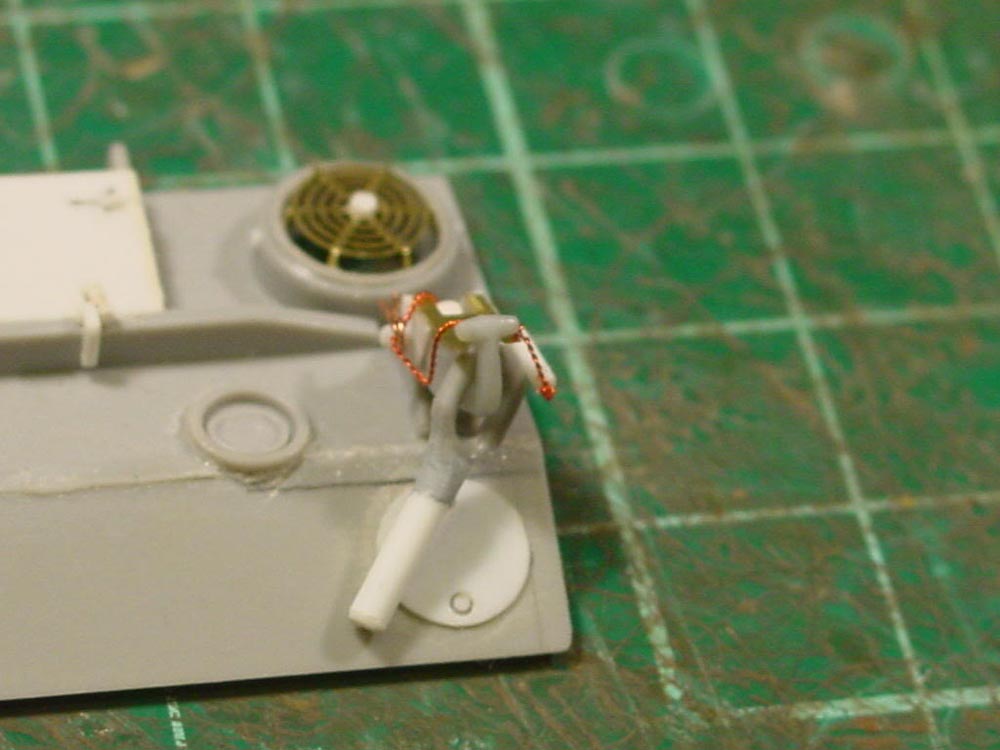
The cables are copper wire from Eureka or Perfect Scale - I'm not 100% sure which. I primed the cables with Revell Aluminium Metallic (No.99 of the Aqua Color series), applied a wash of dark umbra and a bit of sand-coloured pigments.
Hope you like it anyway.
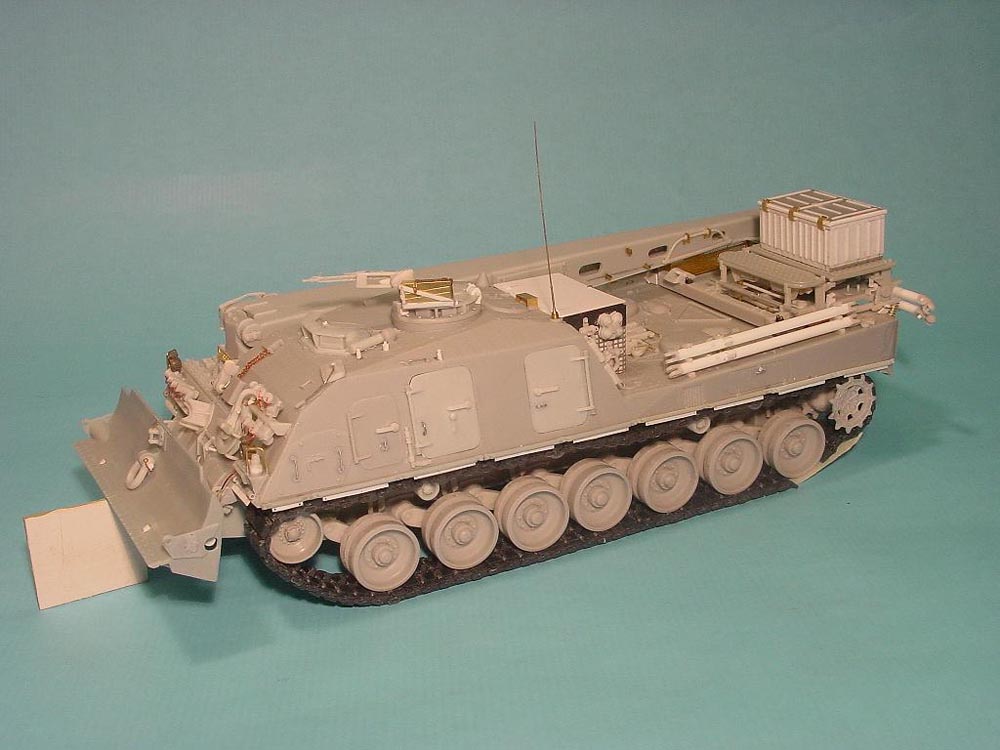
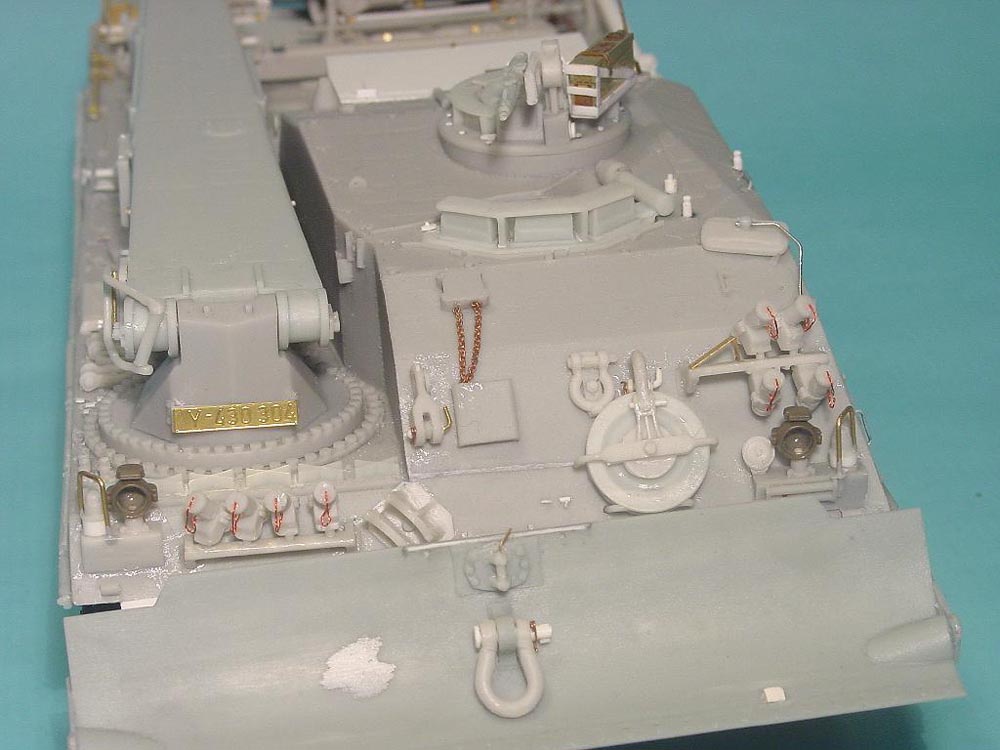
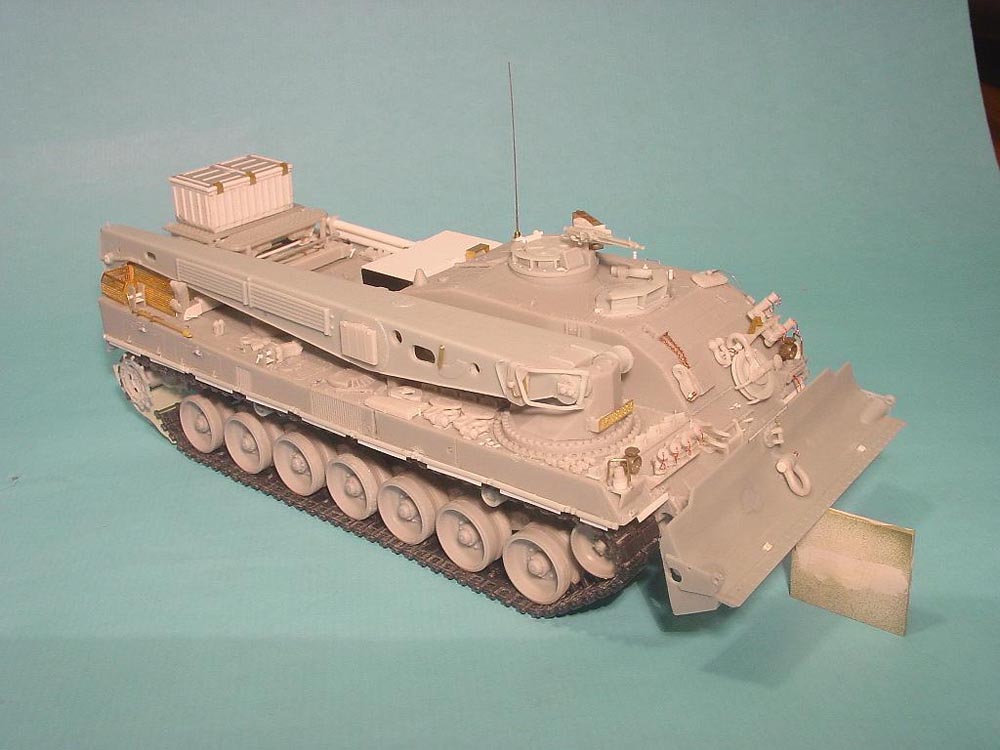
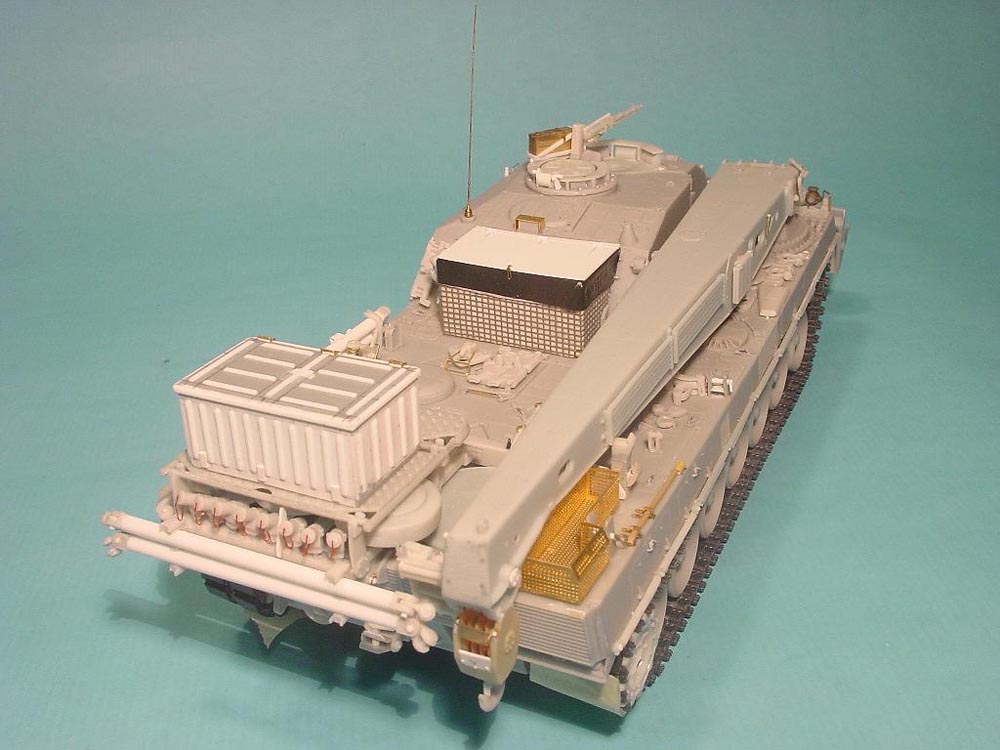
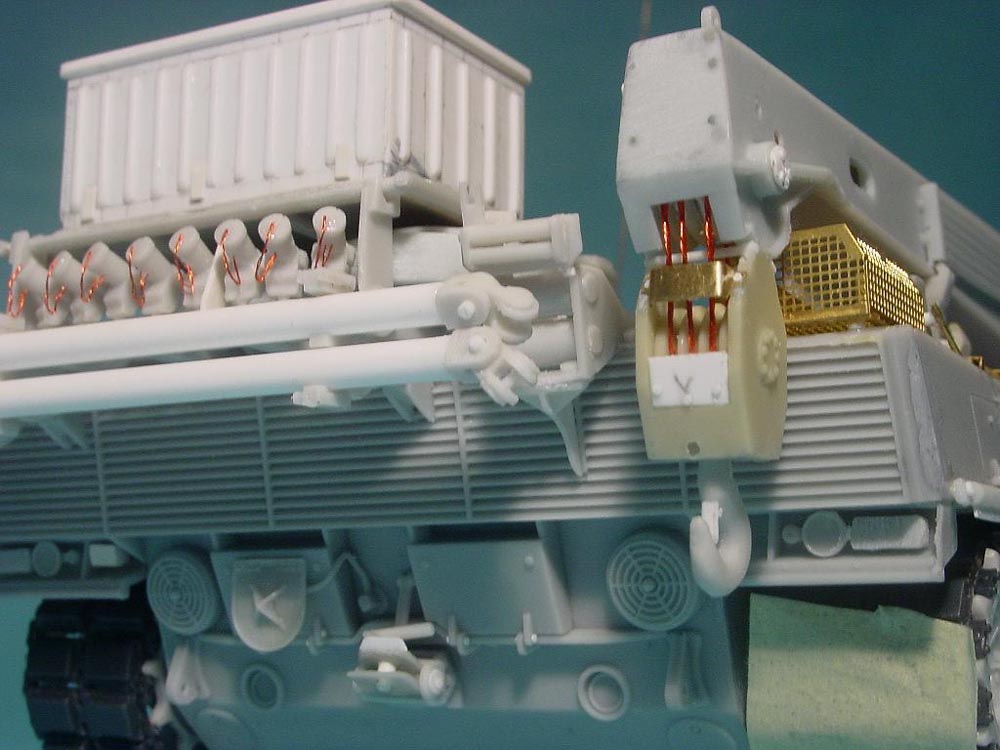
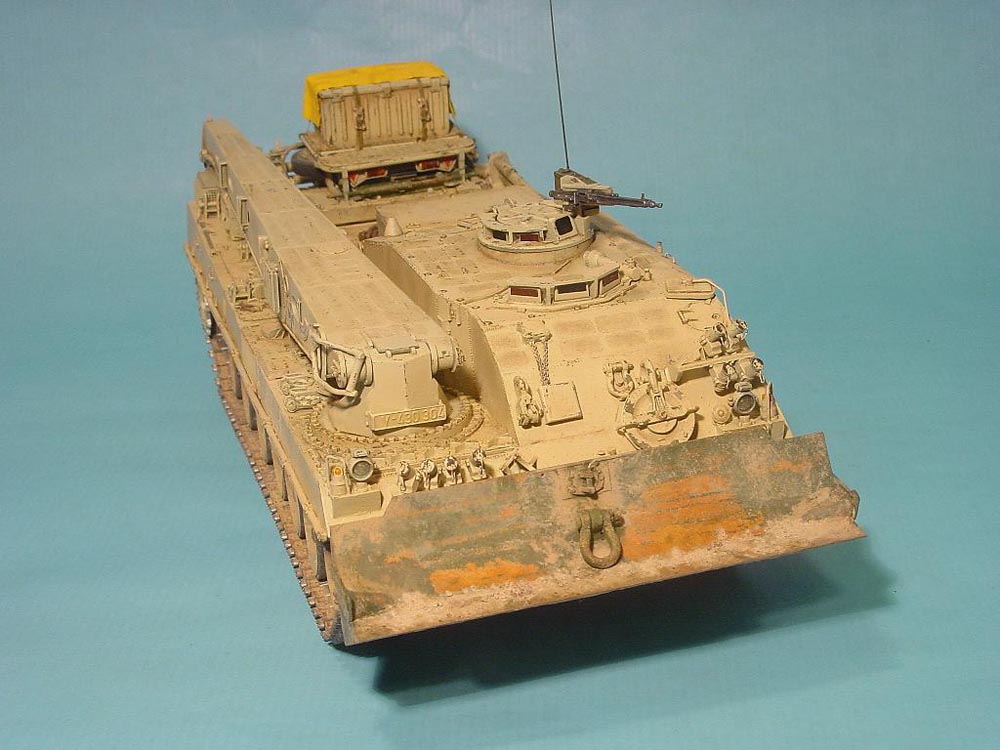
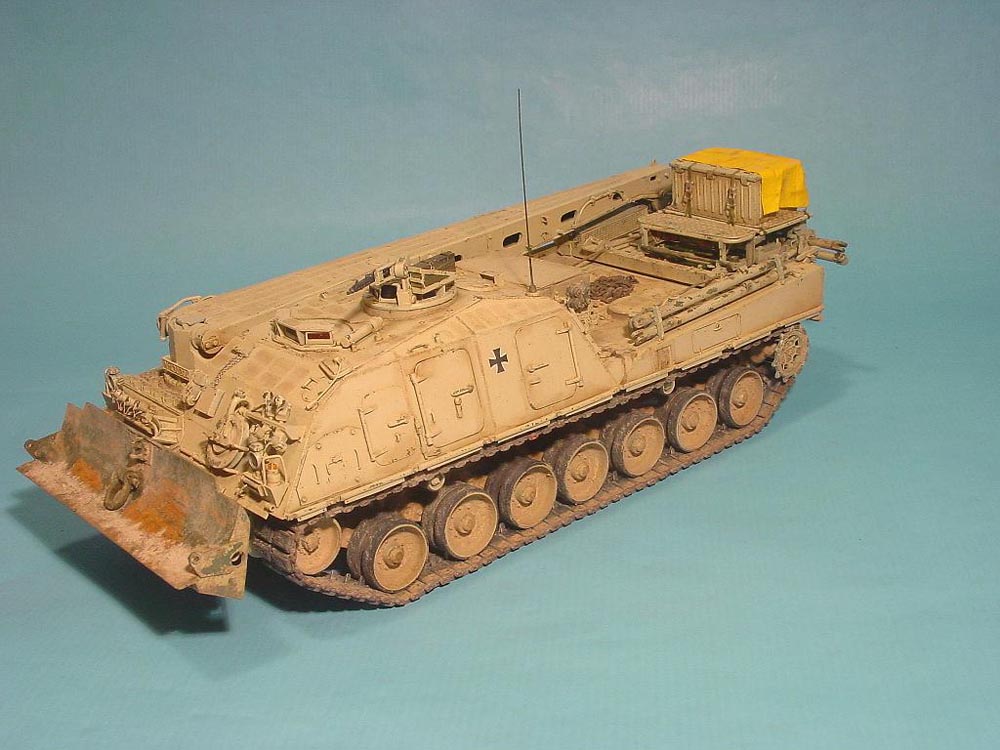
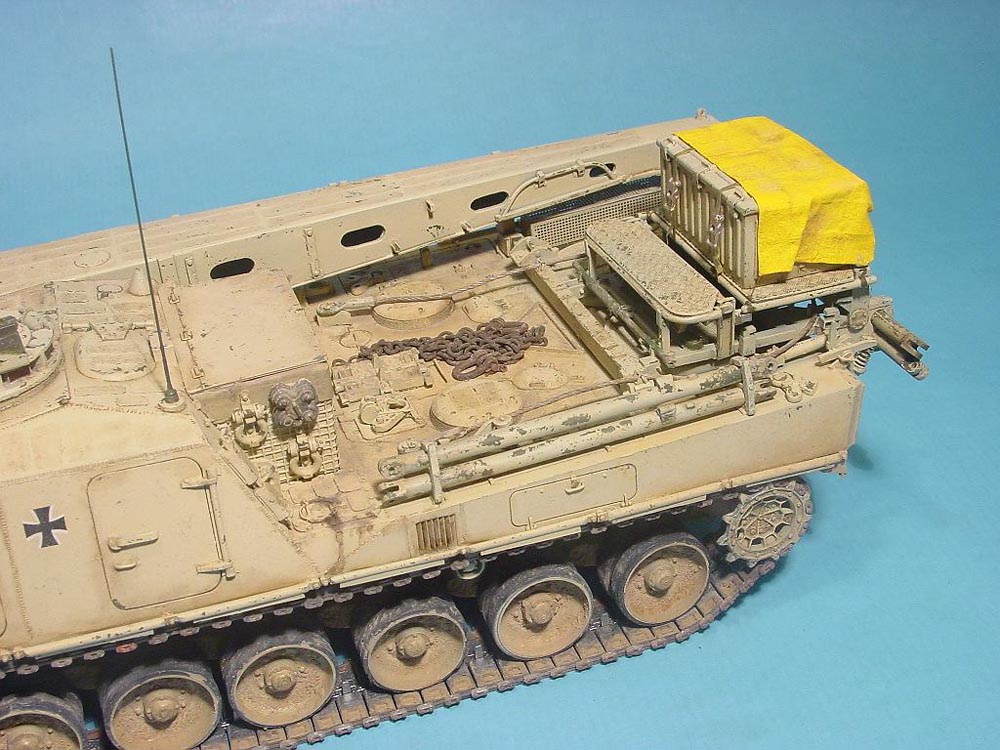
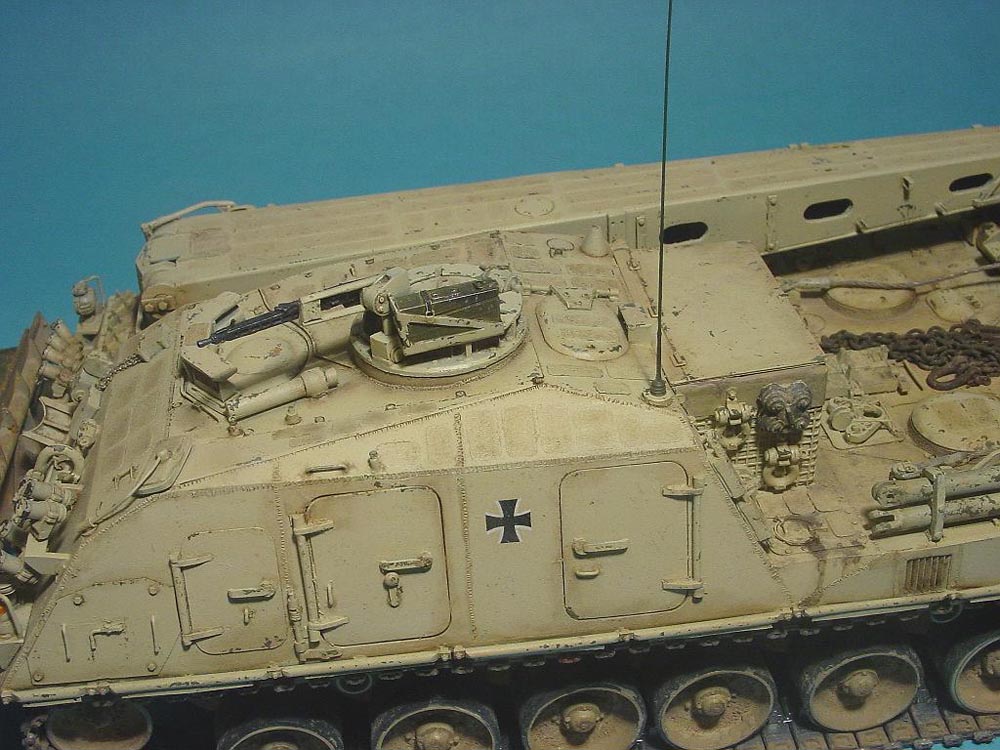
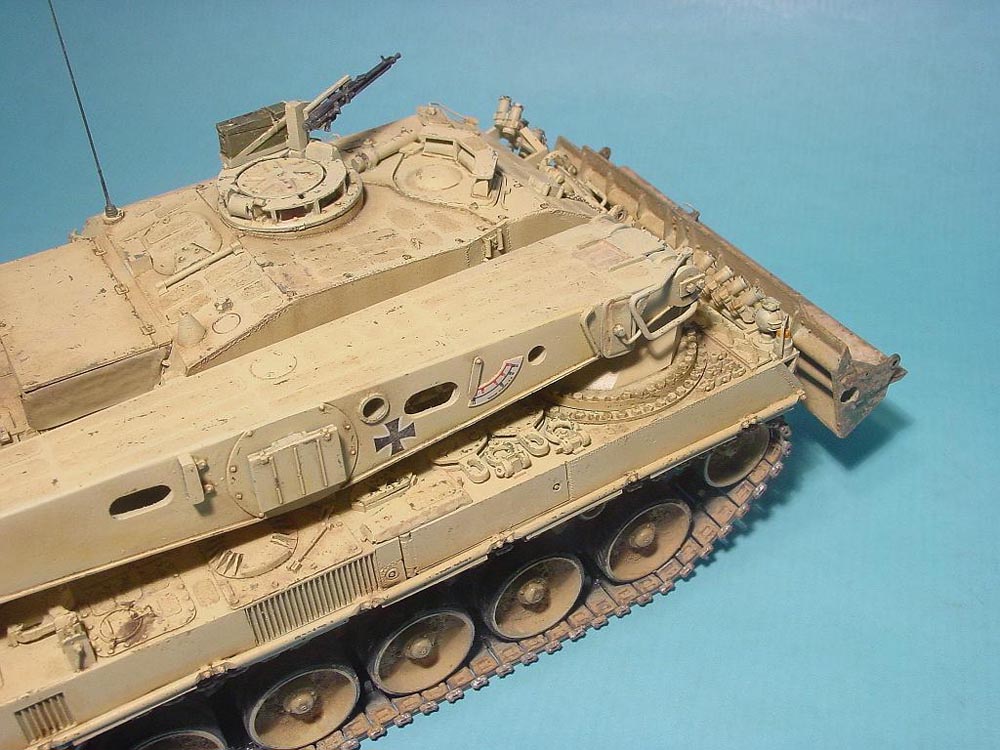
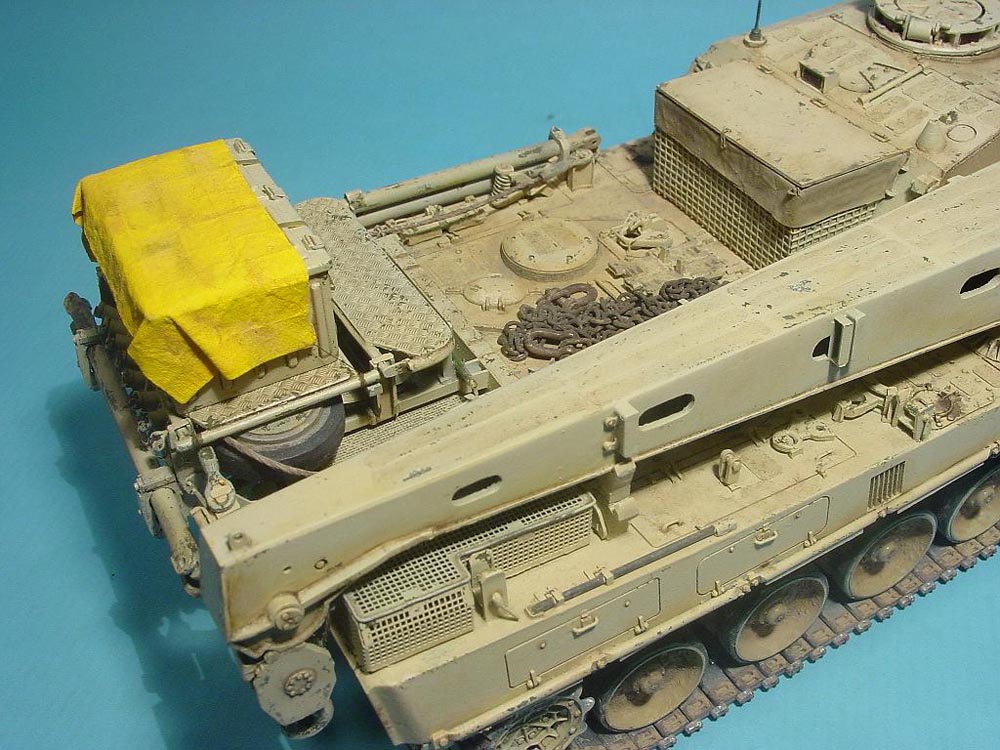
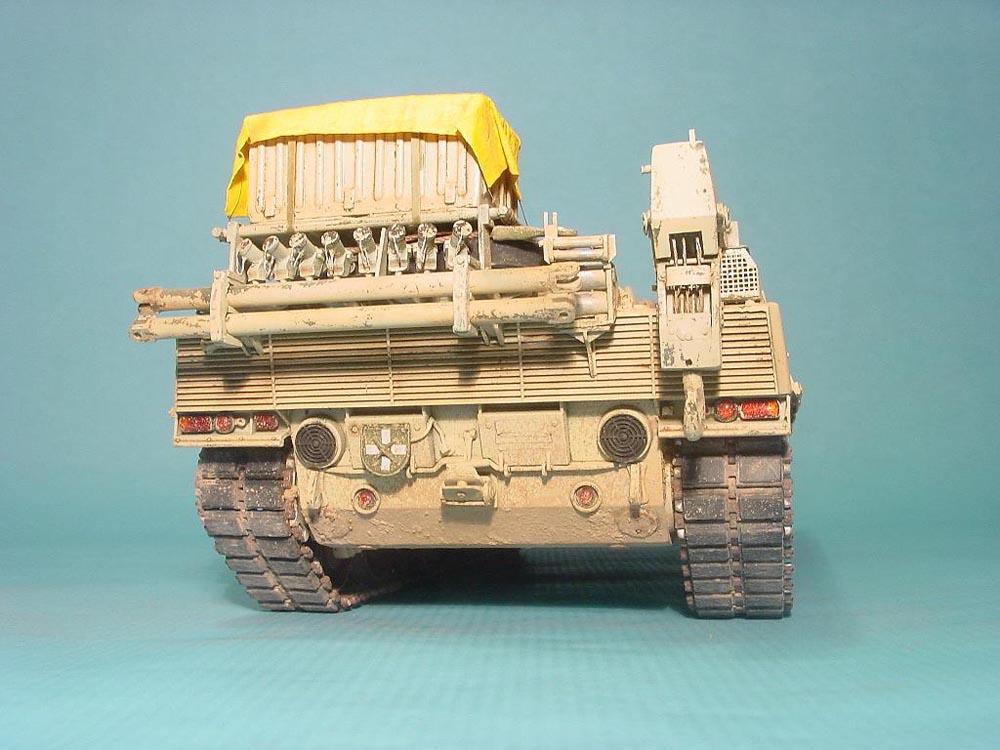
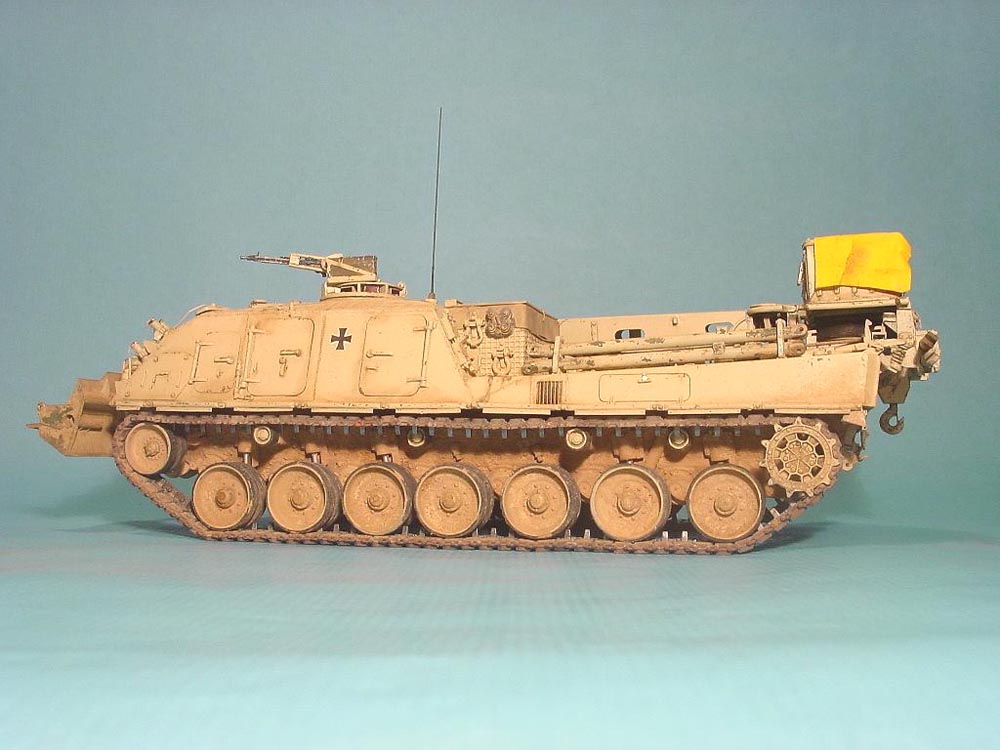
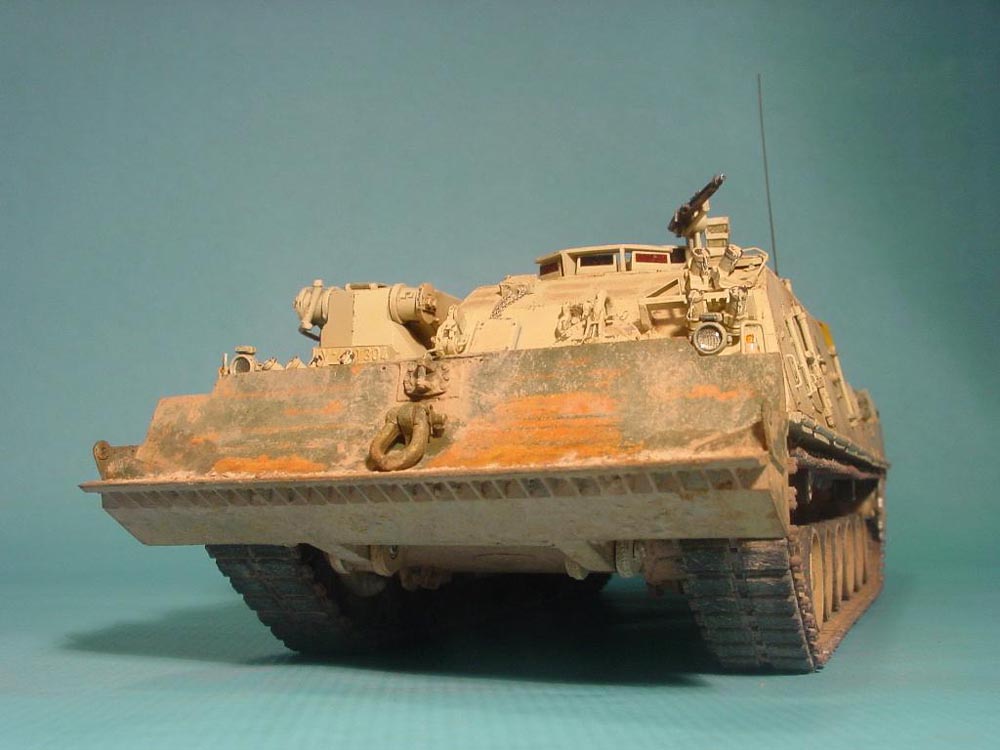
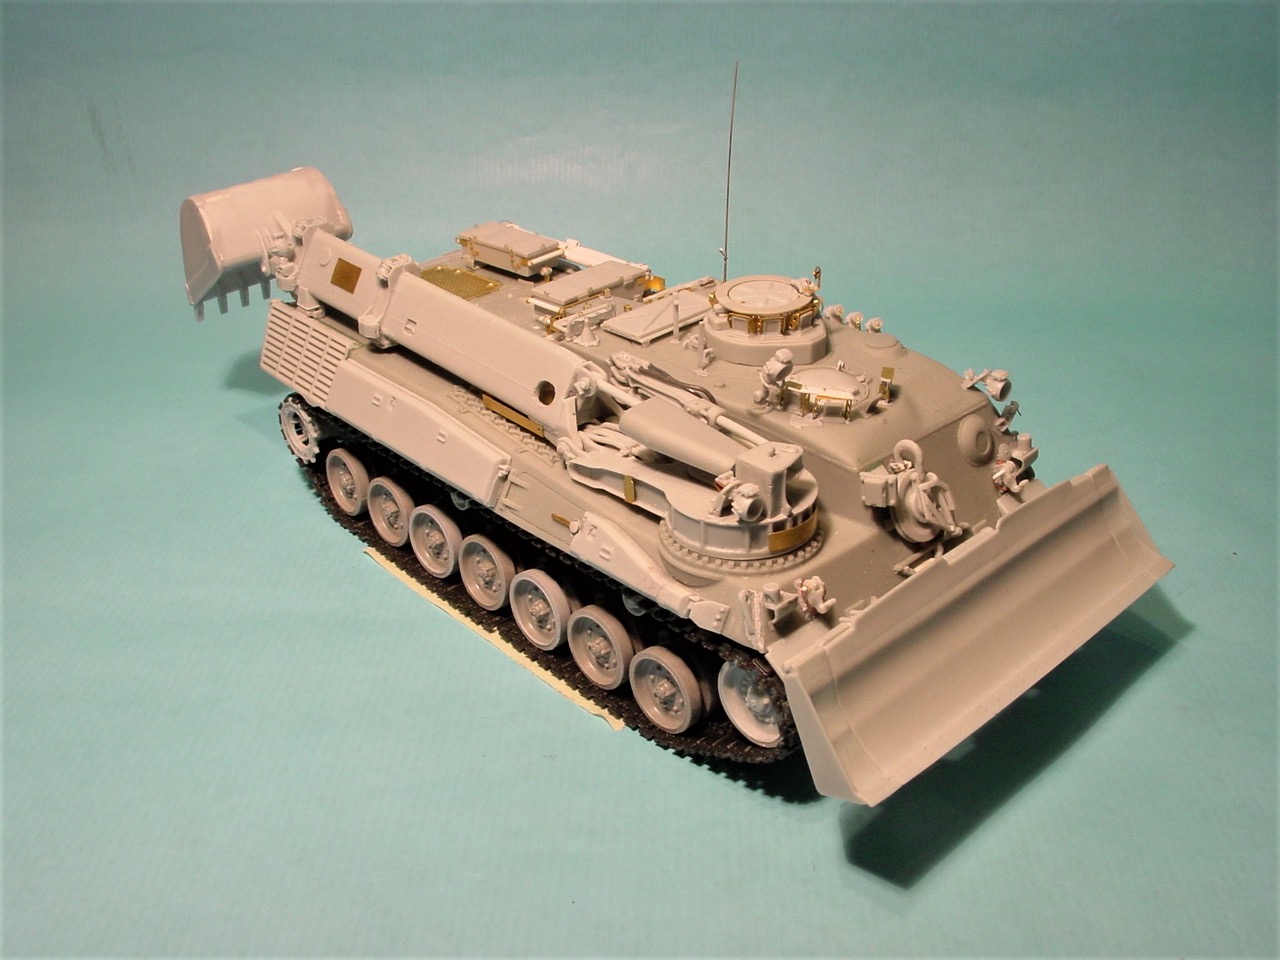
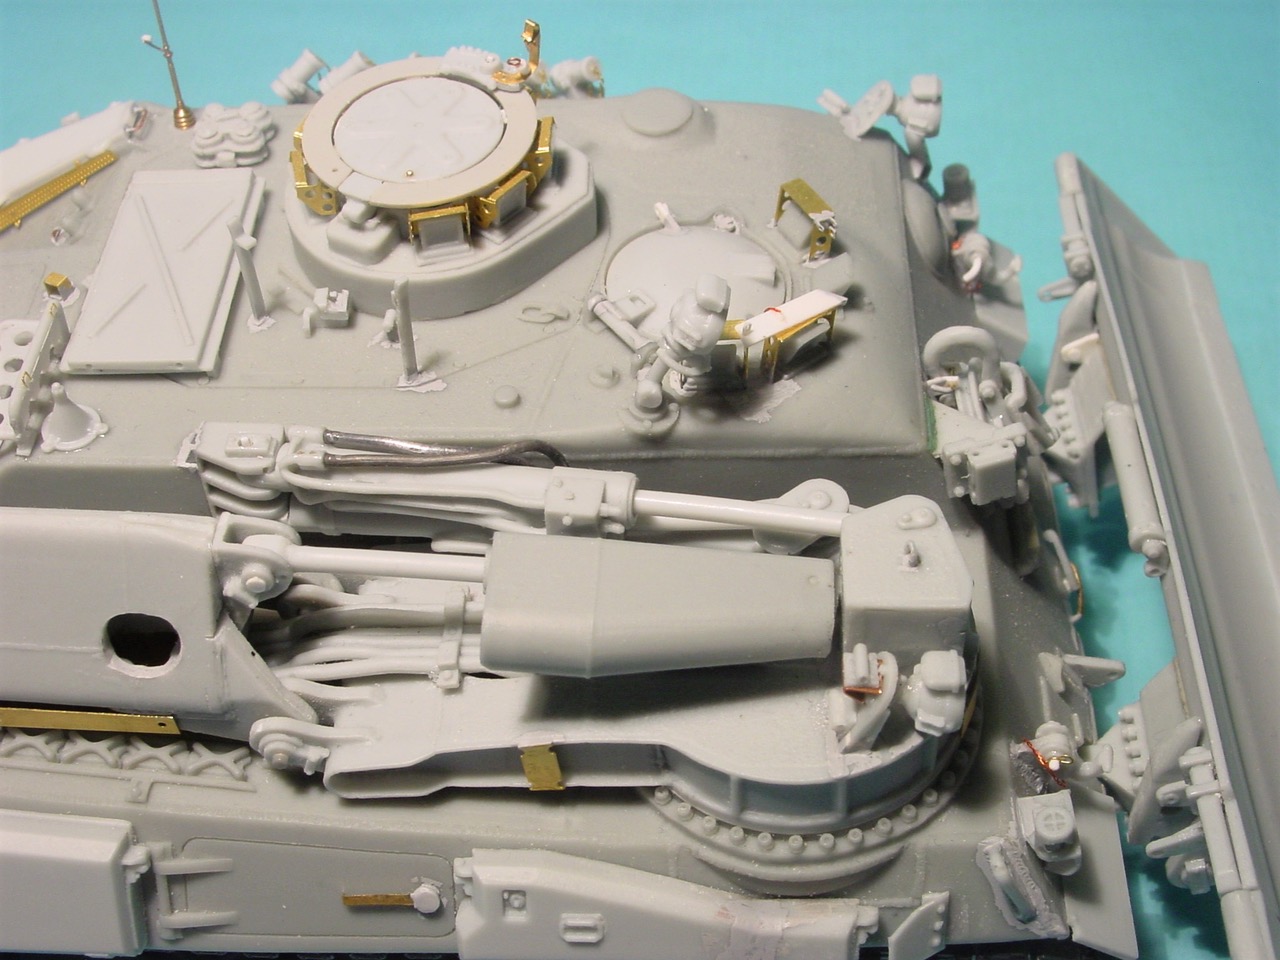
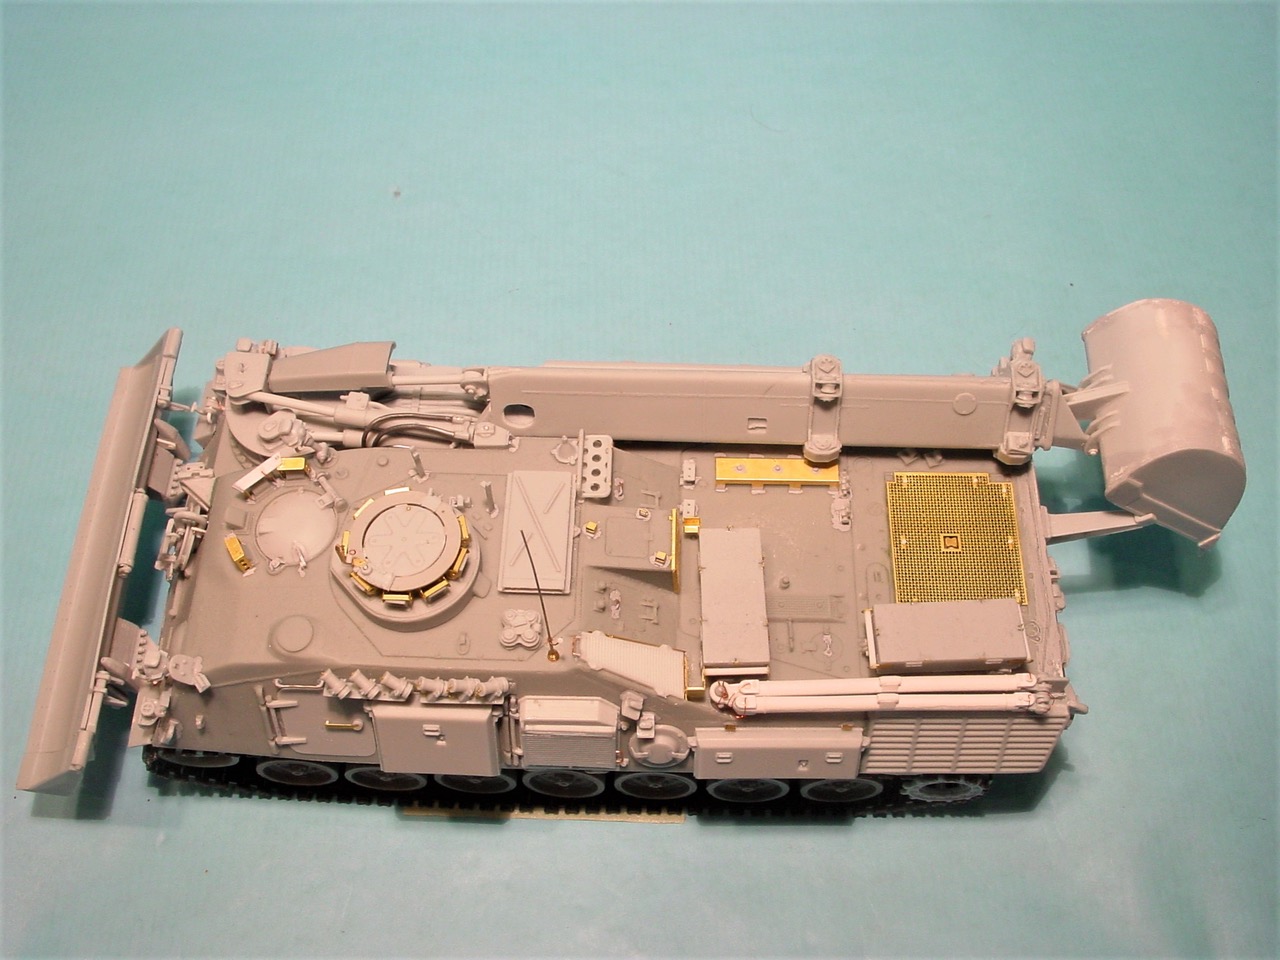
This is the PSM Bergepanzer 2A2 with ISAF camouflage. The model builds quite fast for an all-resin kit. I experienced two major fit problems that needed more filing and sanding than usual. The bow section of the upper body didn't fit very well on the lower hull and the same was true with the rear plate, but these were not insurmountable obstacles. Everything else went together quite well.
I was a little annoyed that the resin tracks had all (and I mean ALL) end connectors mounted the wrong way - bolts to the inside! I wanted to use the new Friul tracks anyway but in case you plan to use the kits tracks, be careful which tracks are delivered with the kit.
The newer PSM Leo 1 AEV seems to have corrected resin tracks. Unfortunately, the Friul tracks were also not the best idea because I could not get the track sag away. Due to the weight of the tracks, the necessary track tension would be so great that the resin mounts of the idler and first/last road wheel would bend or break. So I have to live with it. I will replace the track with some Orochi or Meng plastic tracks.
The crushed bottles are from DEF MODEL's 'Cooler Set with bottles'.

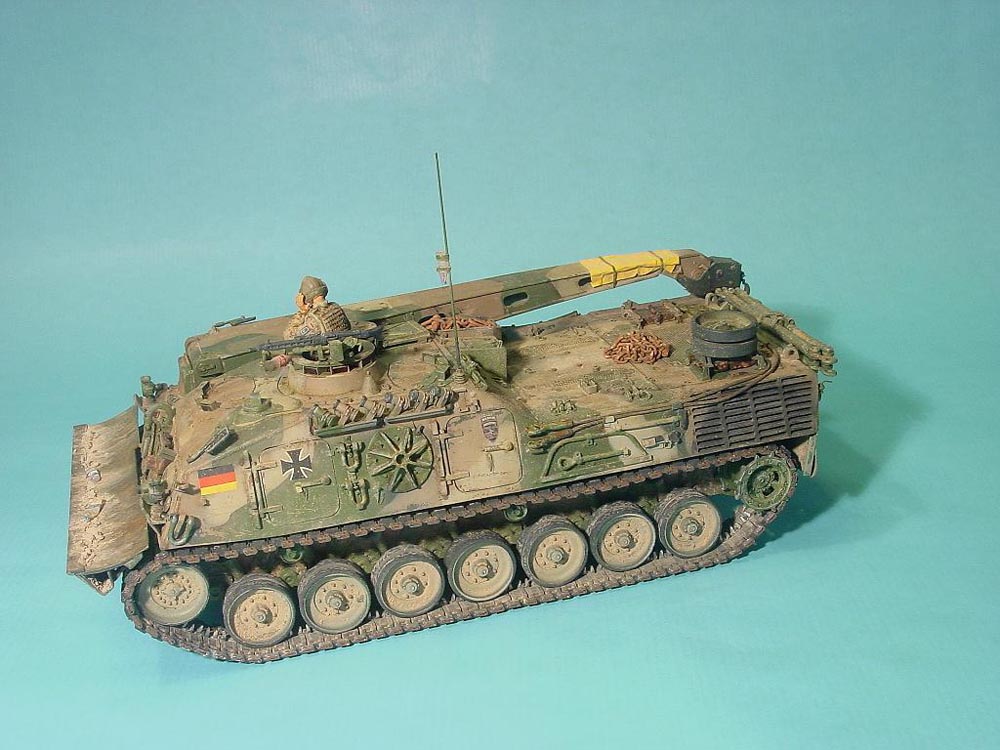
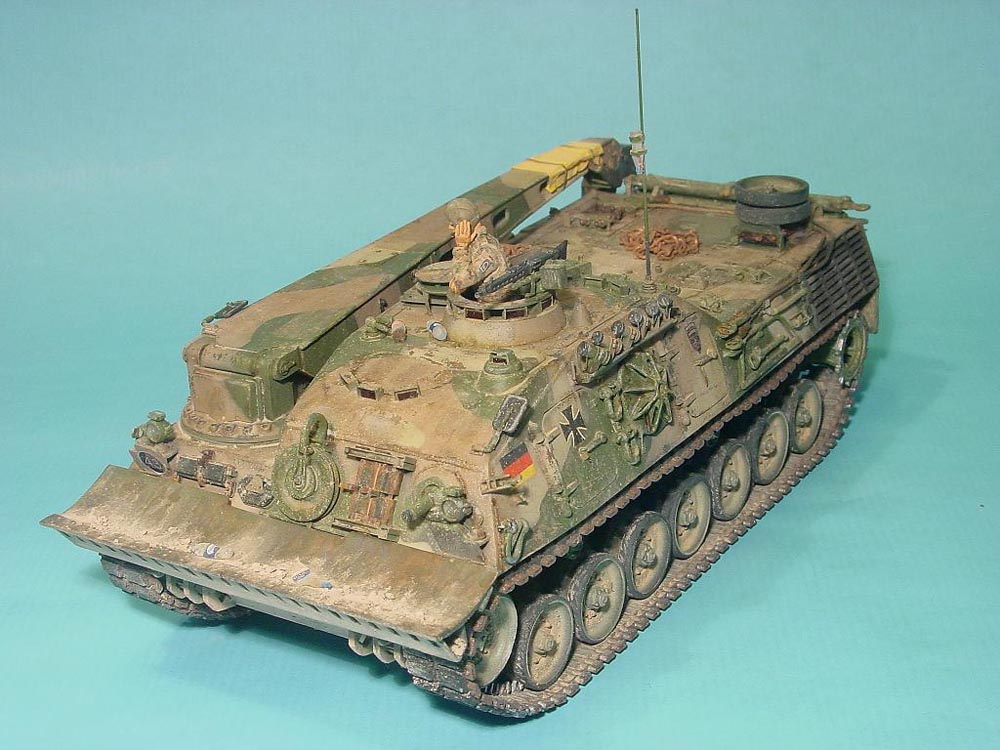
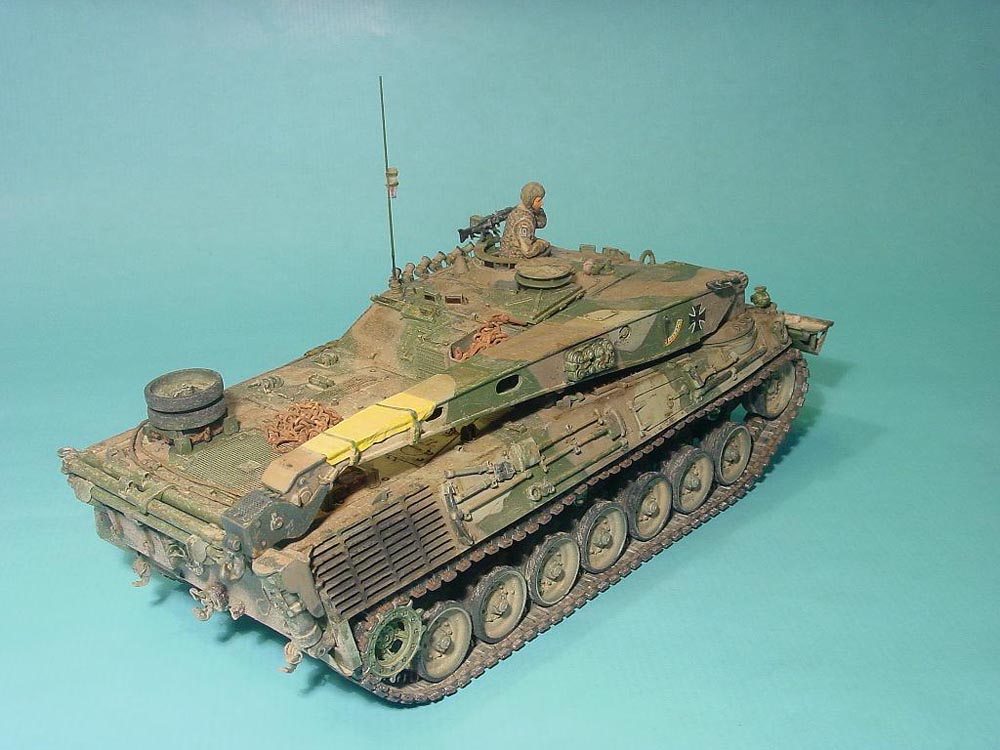
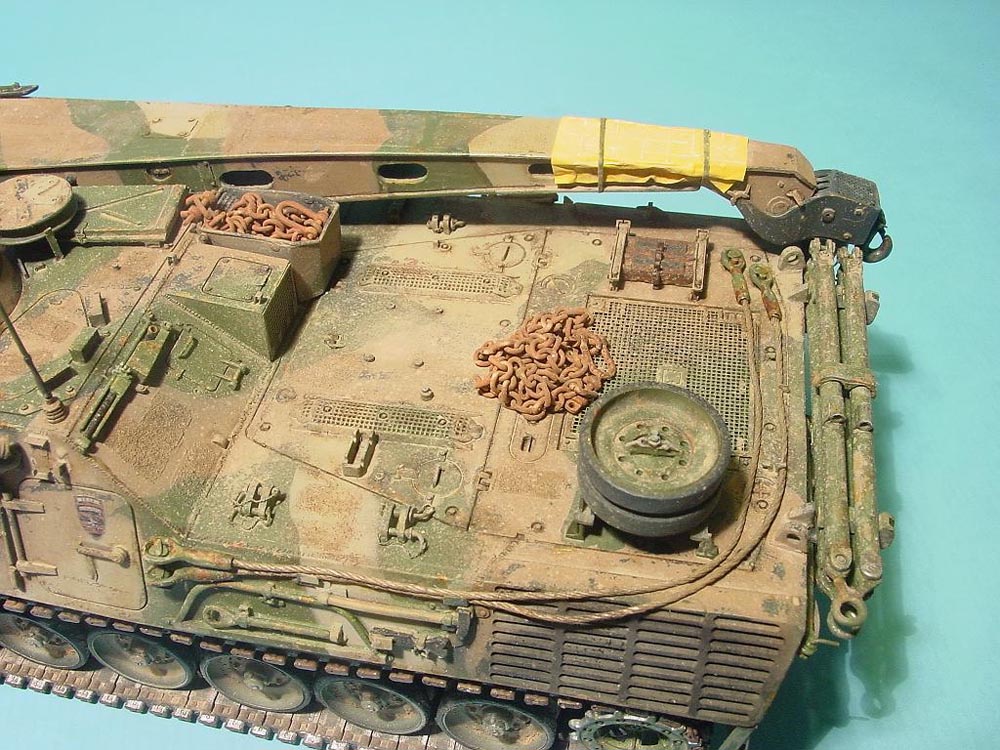
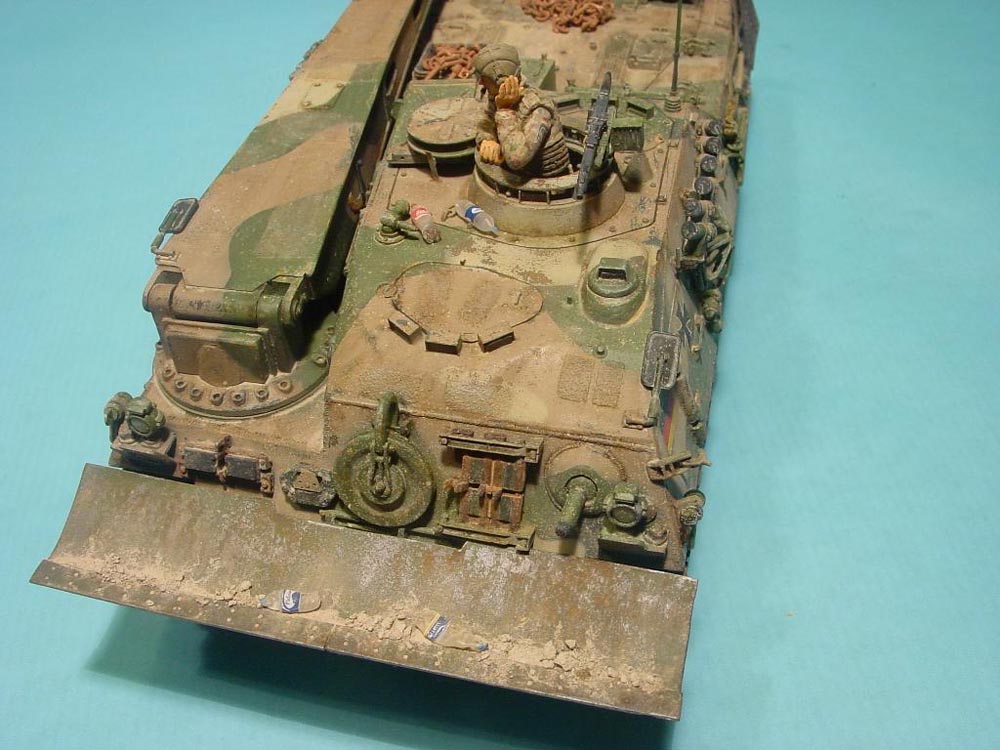
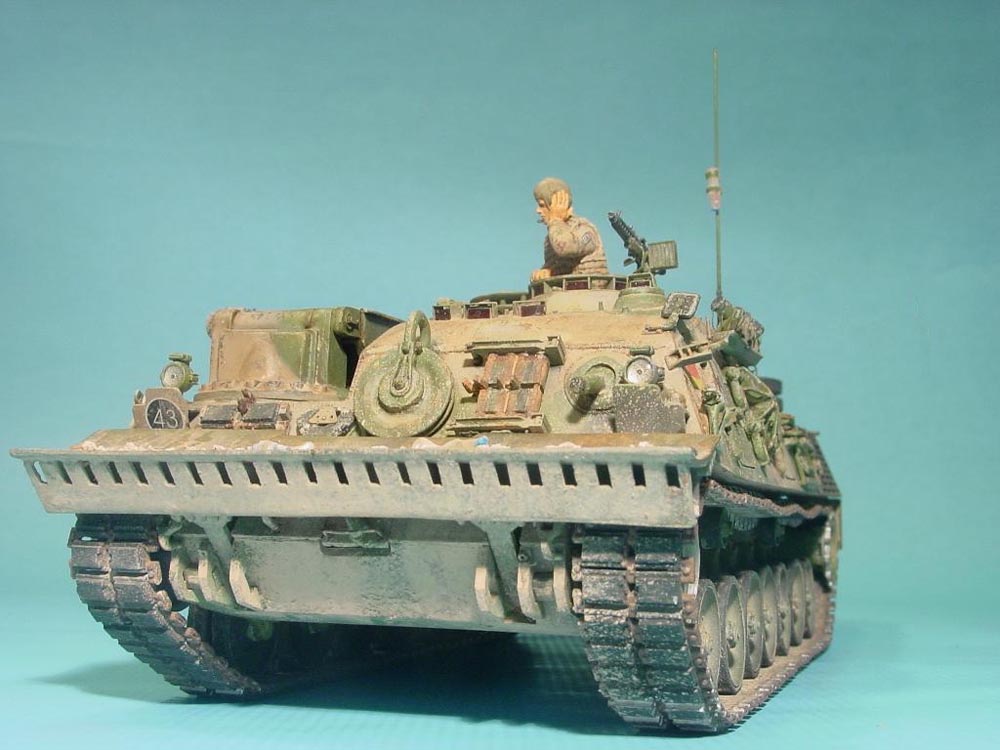
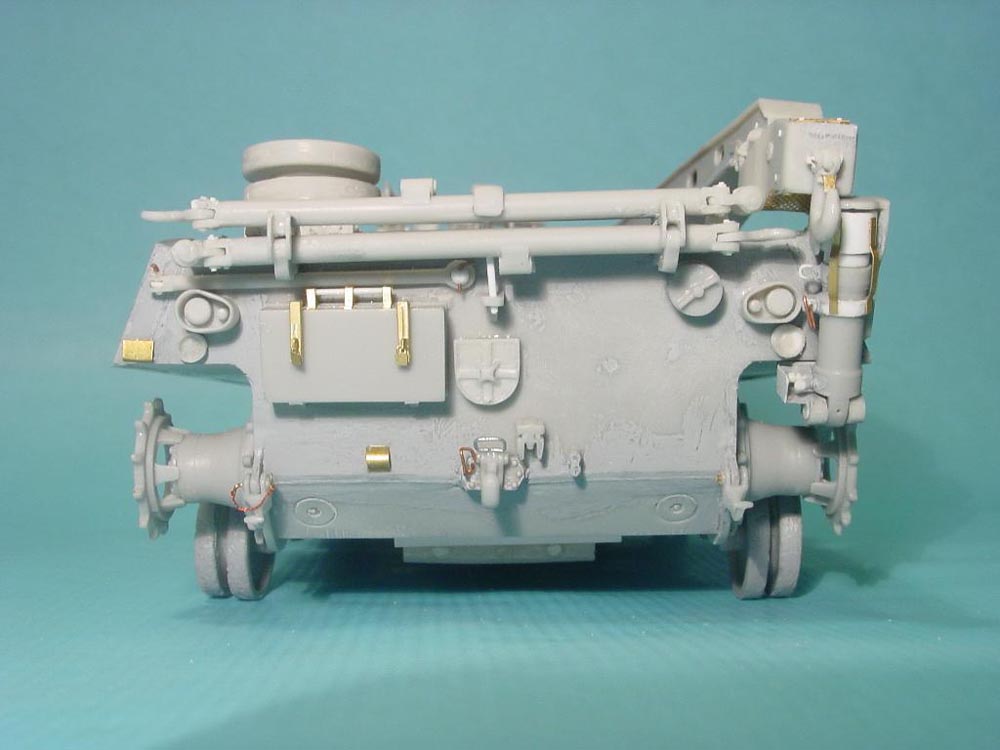
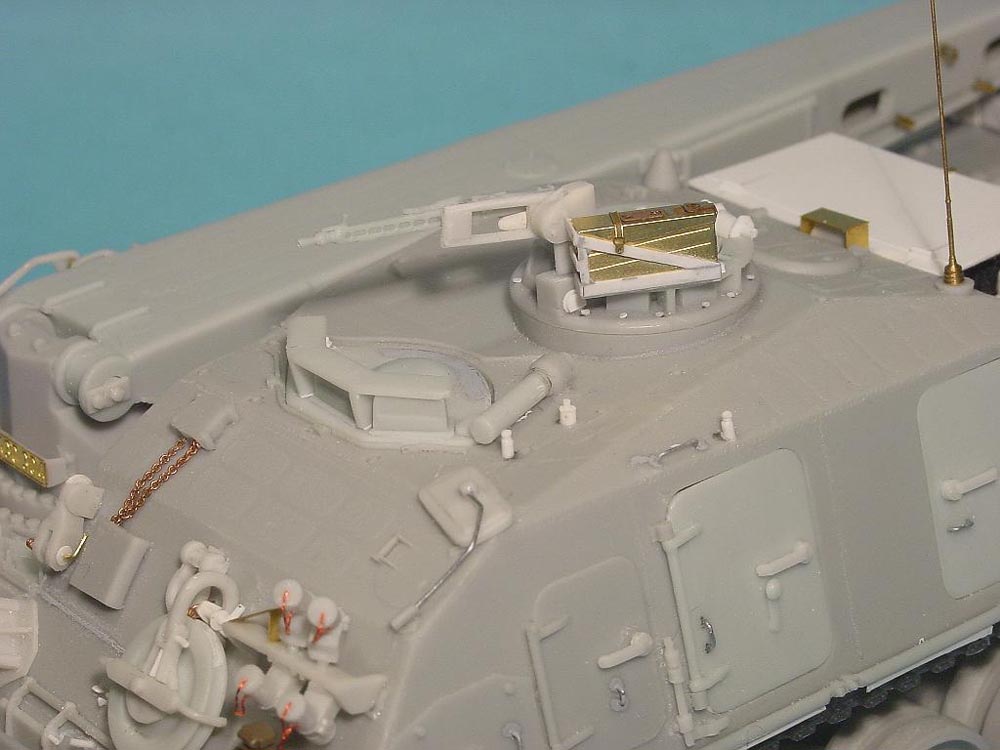
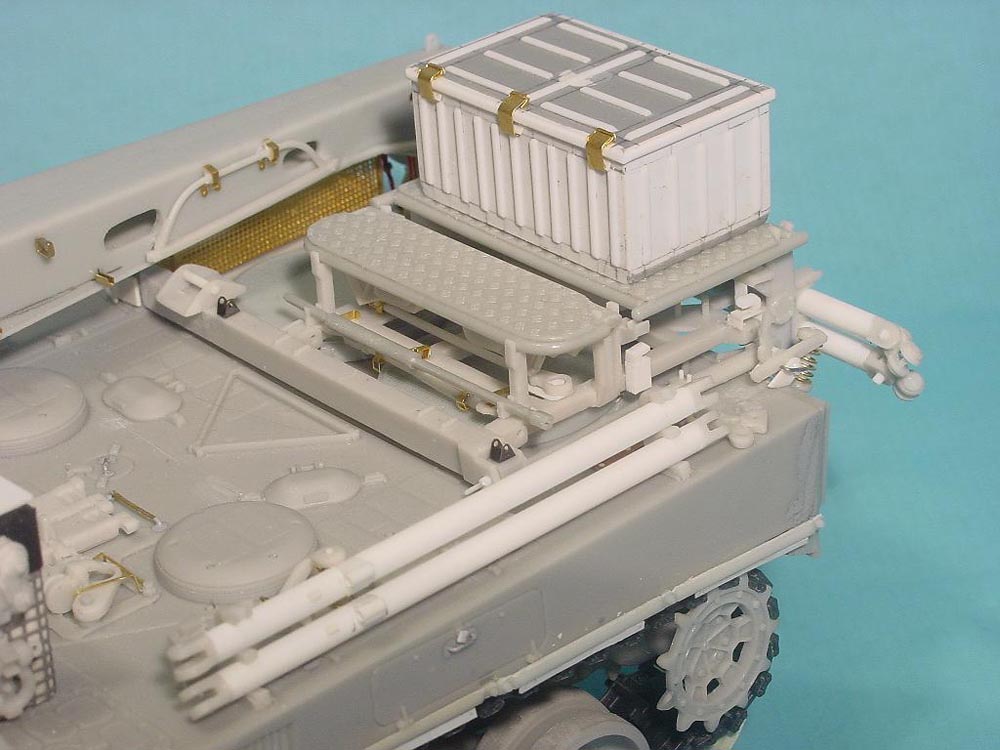
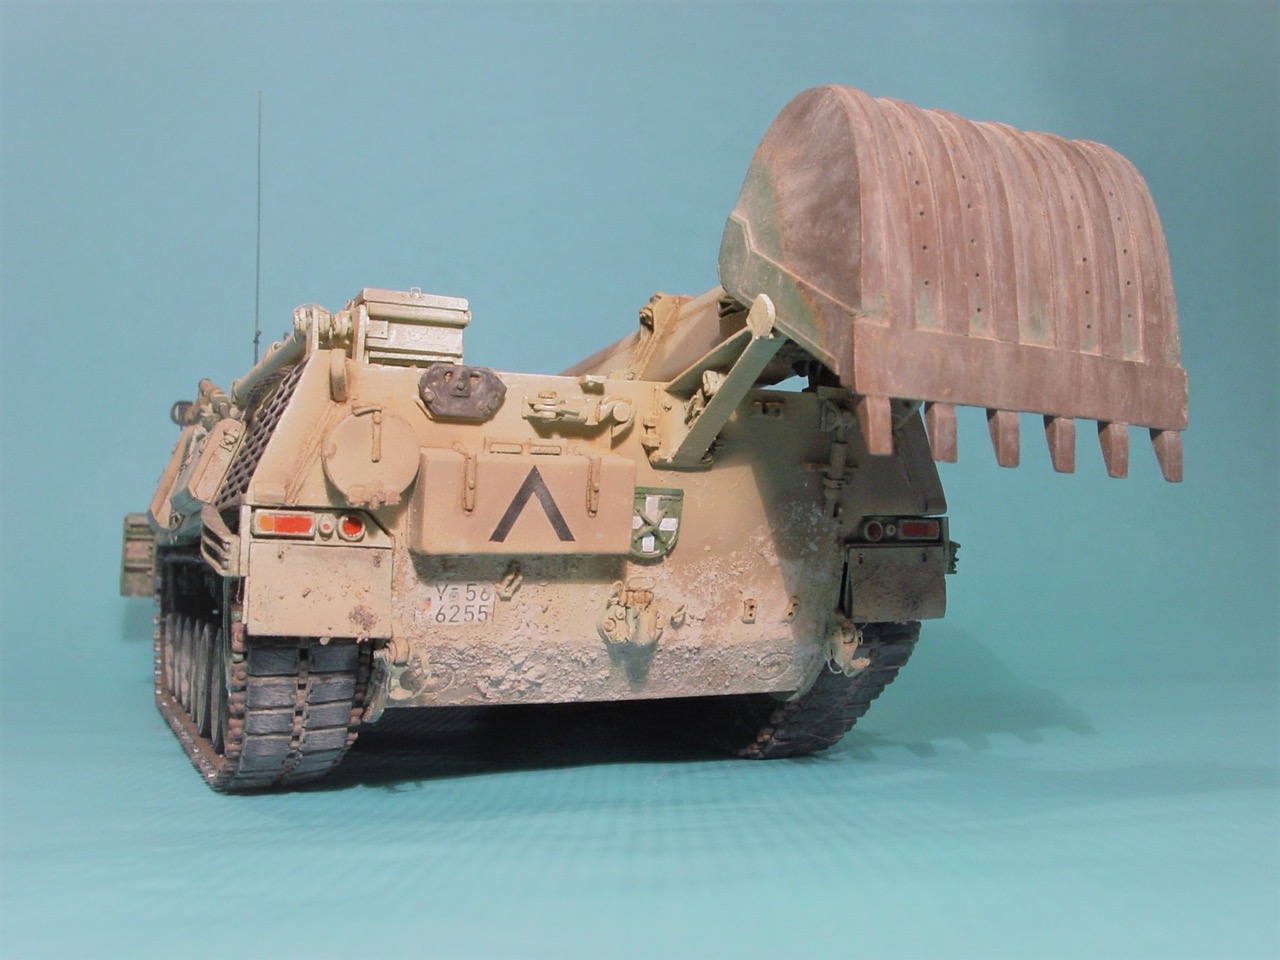
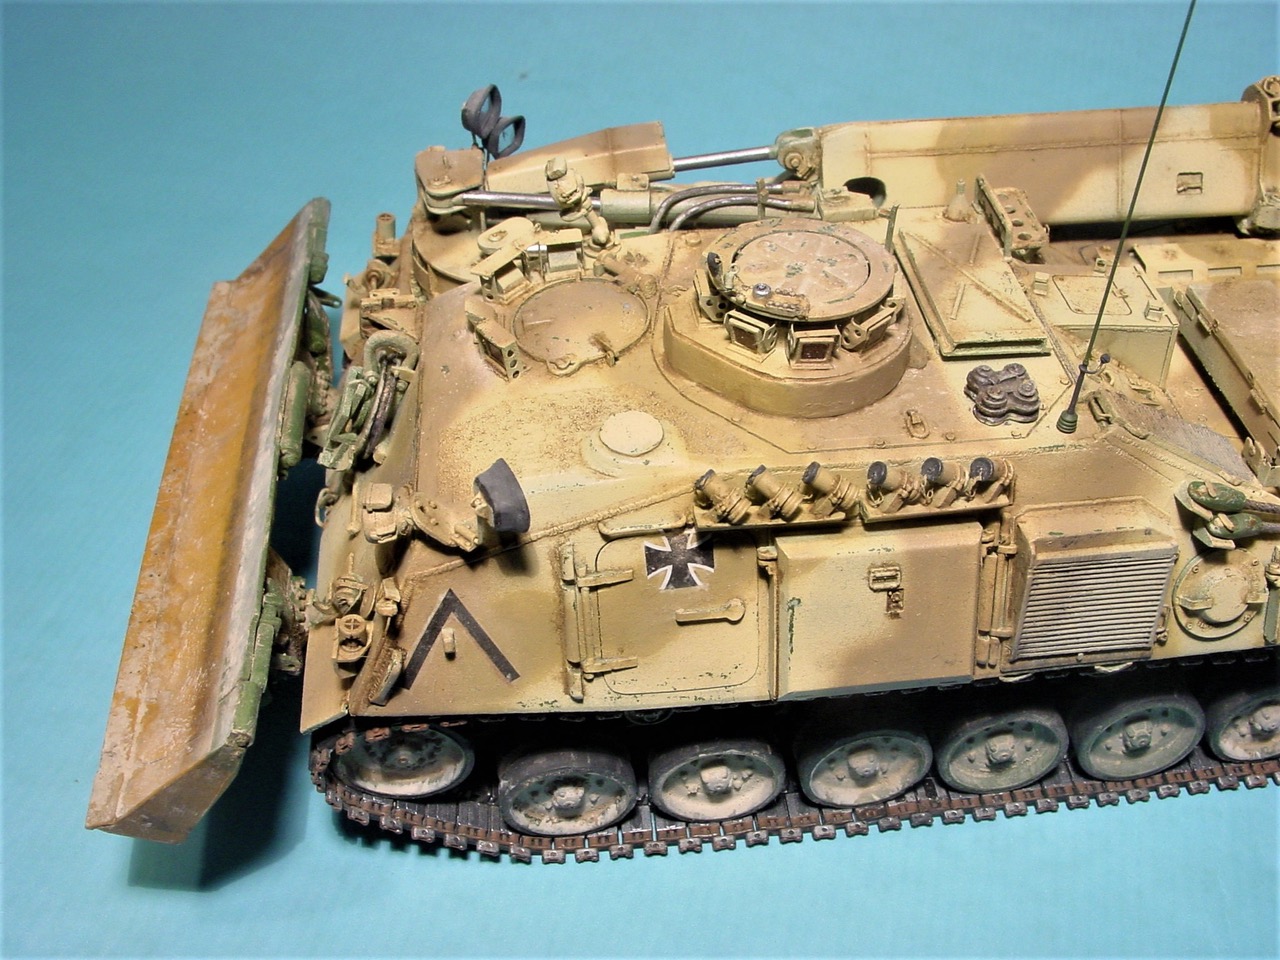
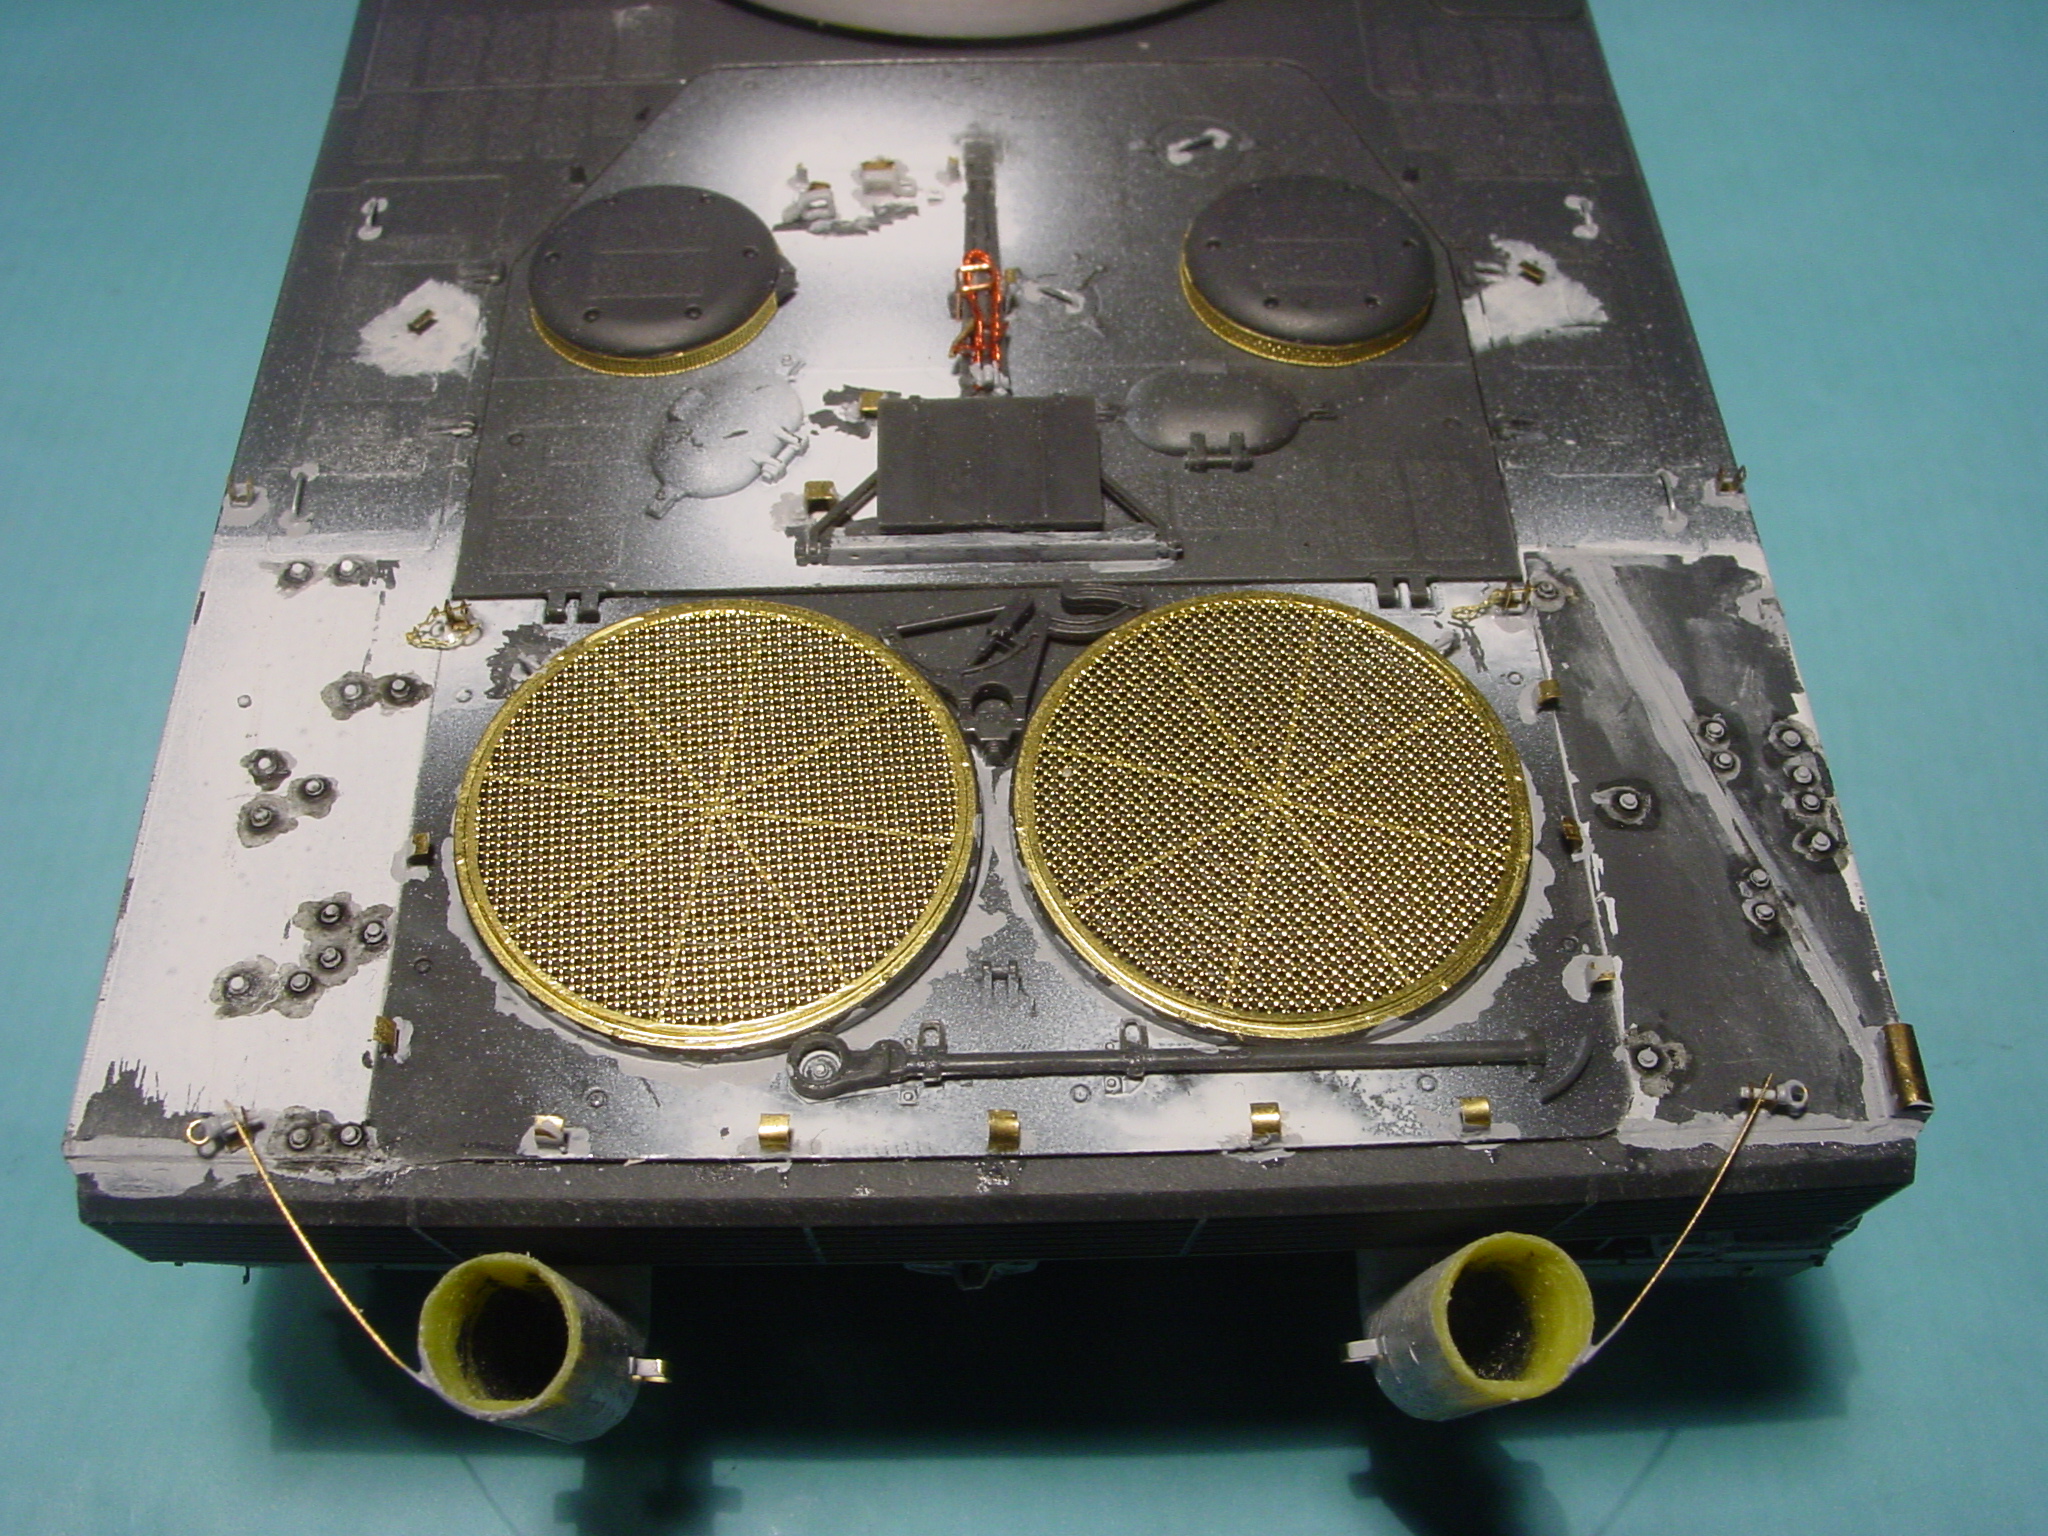
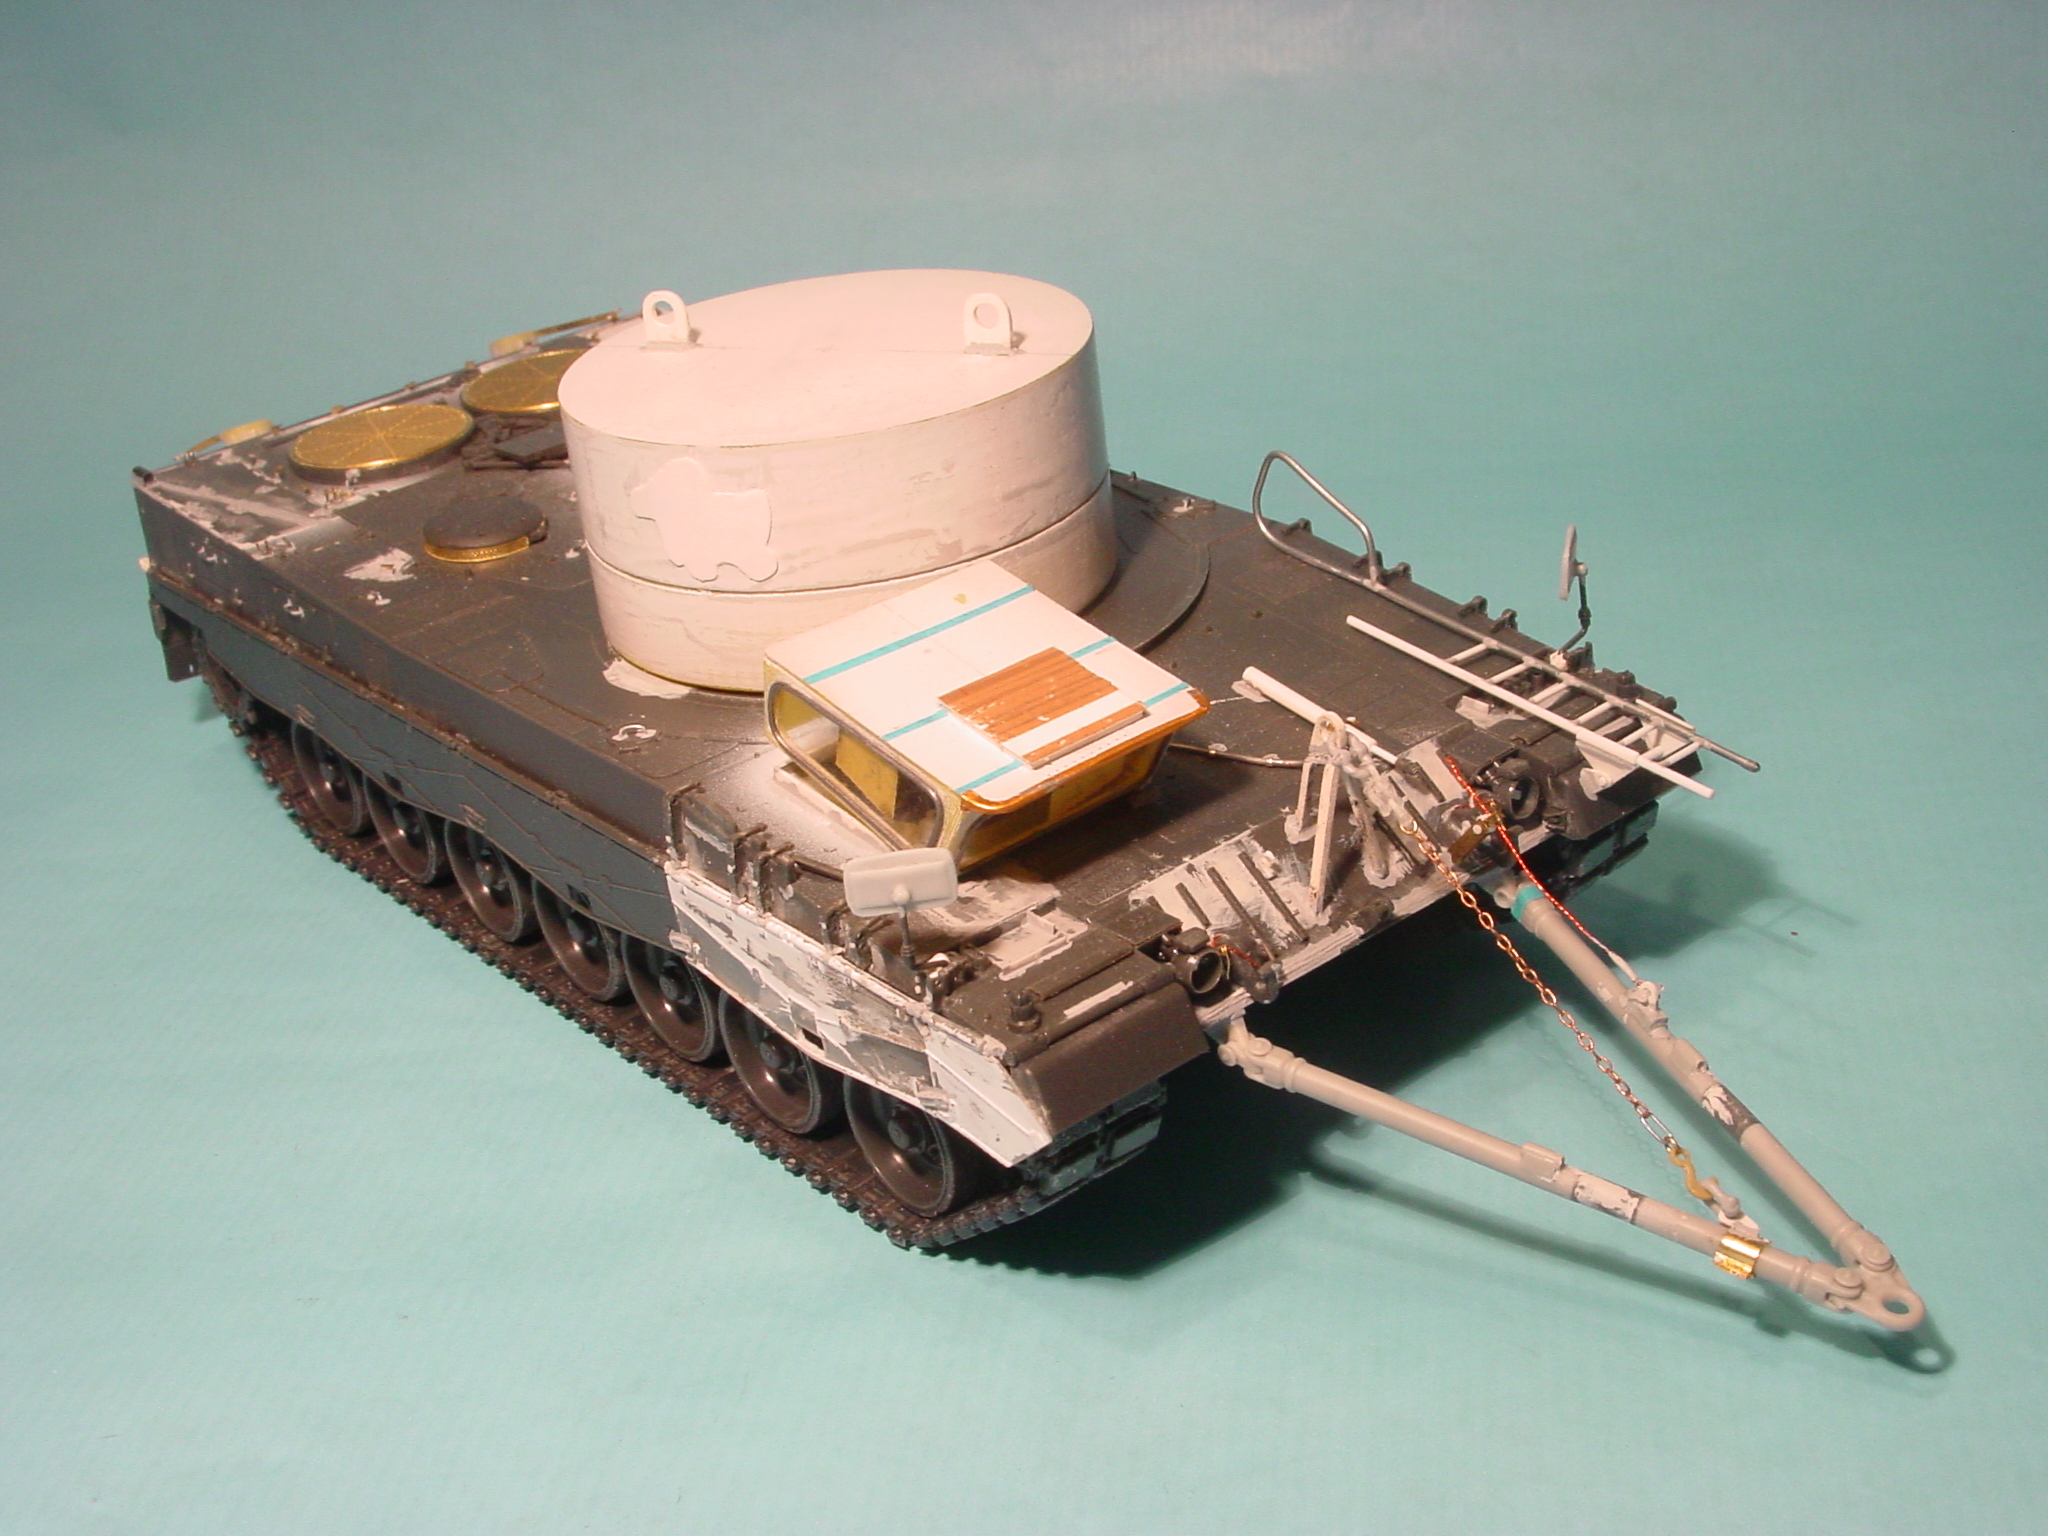
This is my PSM Büffel as it was deployed to Kunduz/AFG to support the PzH 2000. I found only four pics in Tankograd's #5031 (GECON Isaf - Wüstentarung) but all four sides were covered, so I had a good reference to build this specific tank, albeit not down to the last bolt head.
Main changes were the absence of all mudguards (front-side-rear), a large improvised storage bin made from Hescos at the rear of the superstructure, a big metal box on the rear with an aerial recon panel and on the crane the deep fording shaft and the camo net supports were removed making it necessary to drill a bunch of openings. I did this after taking the pre-paint stage pics because I wasn't sure how to get the openings right. In the end, I gave it a try and it went quite well.
The model is excellent. I only replaced the resin link and length tracks with the Meng Leo 2A4 offering. Otherwise, I detailed a bit here and there but not overly excessive. The PE license plate is from Echelon's Boxer set.
Painting was done with Ammo MIG 027 - German Sand beige as base colour after spraying a green primer and Ammo Mig chipping fluid. Because the ARV was not used in combat and stayed mostly on base, there was no heavy chipping visible. I kept this at a minimum and weathered with oils and pigments concentrating on dust and mud.

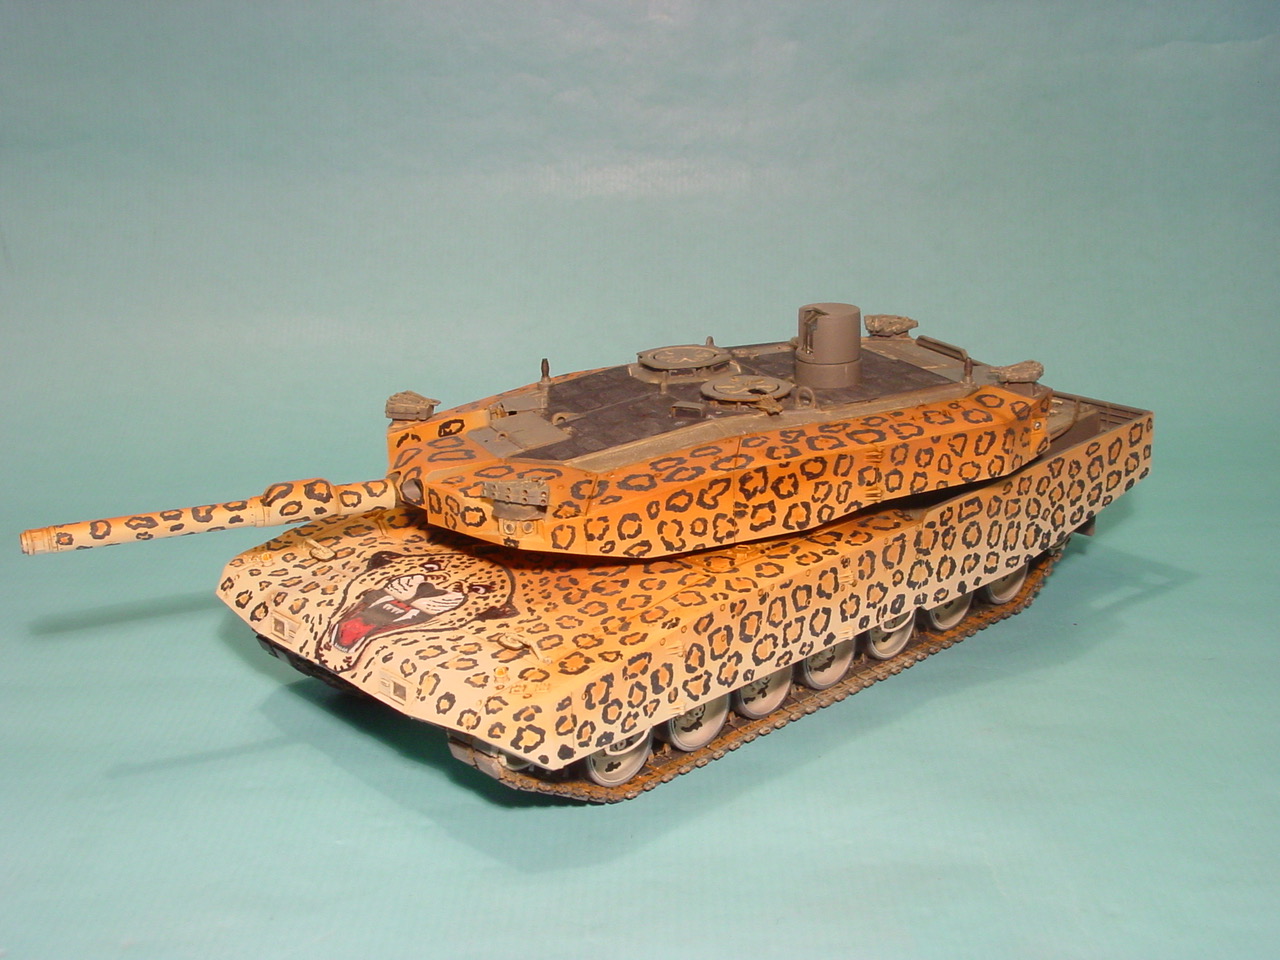
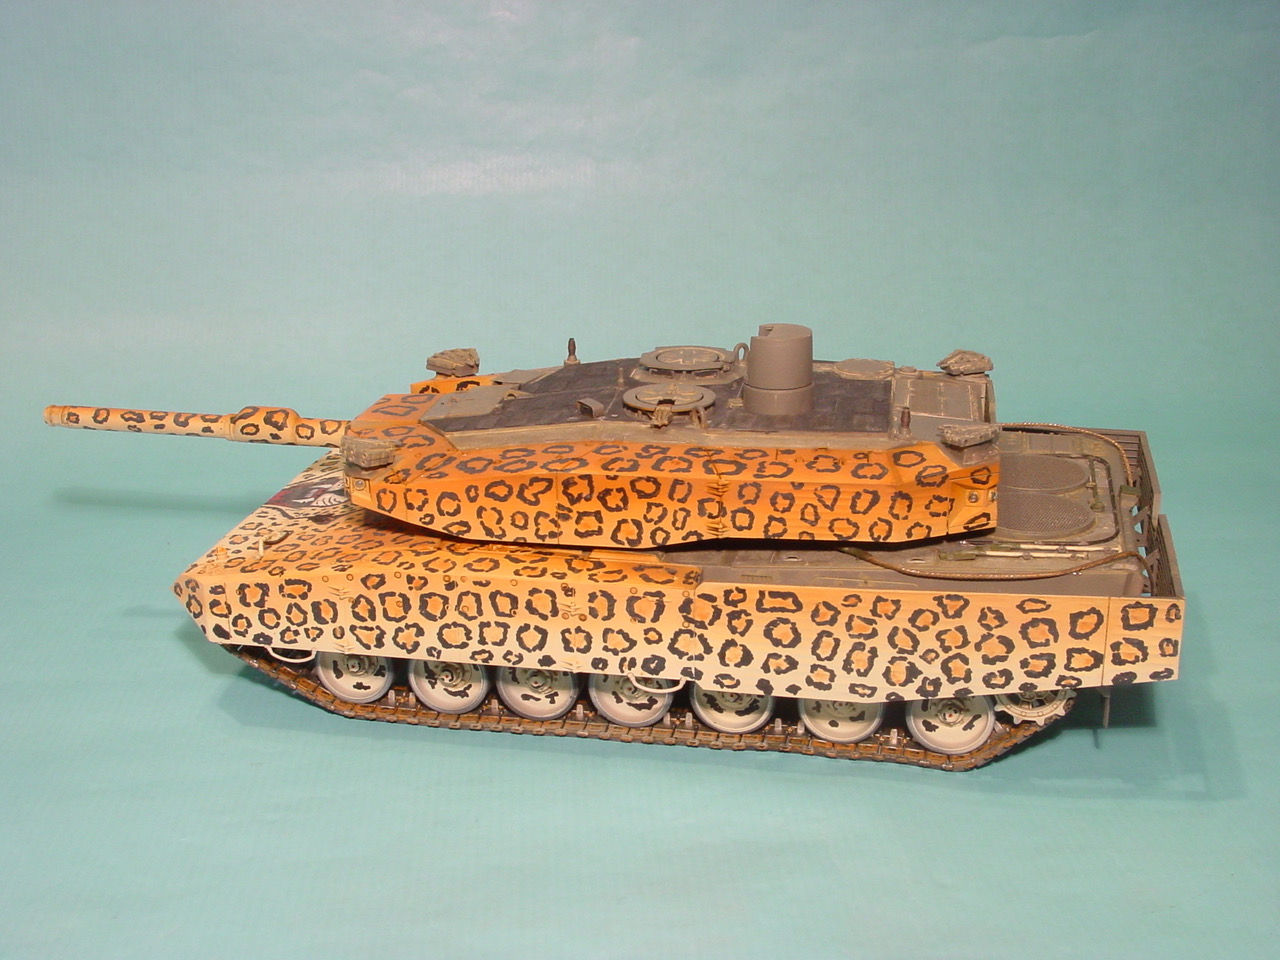
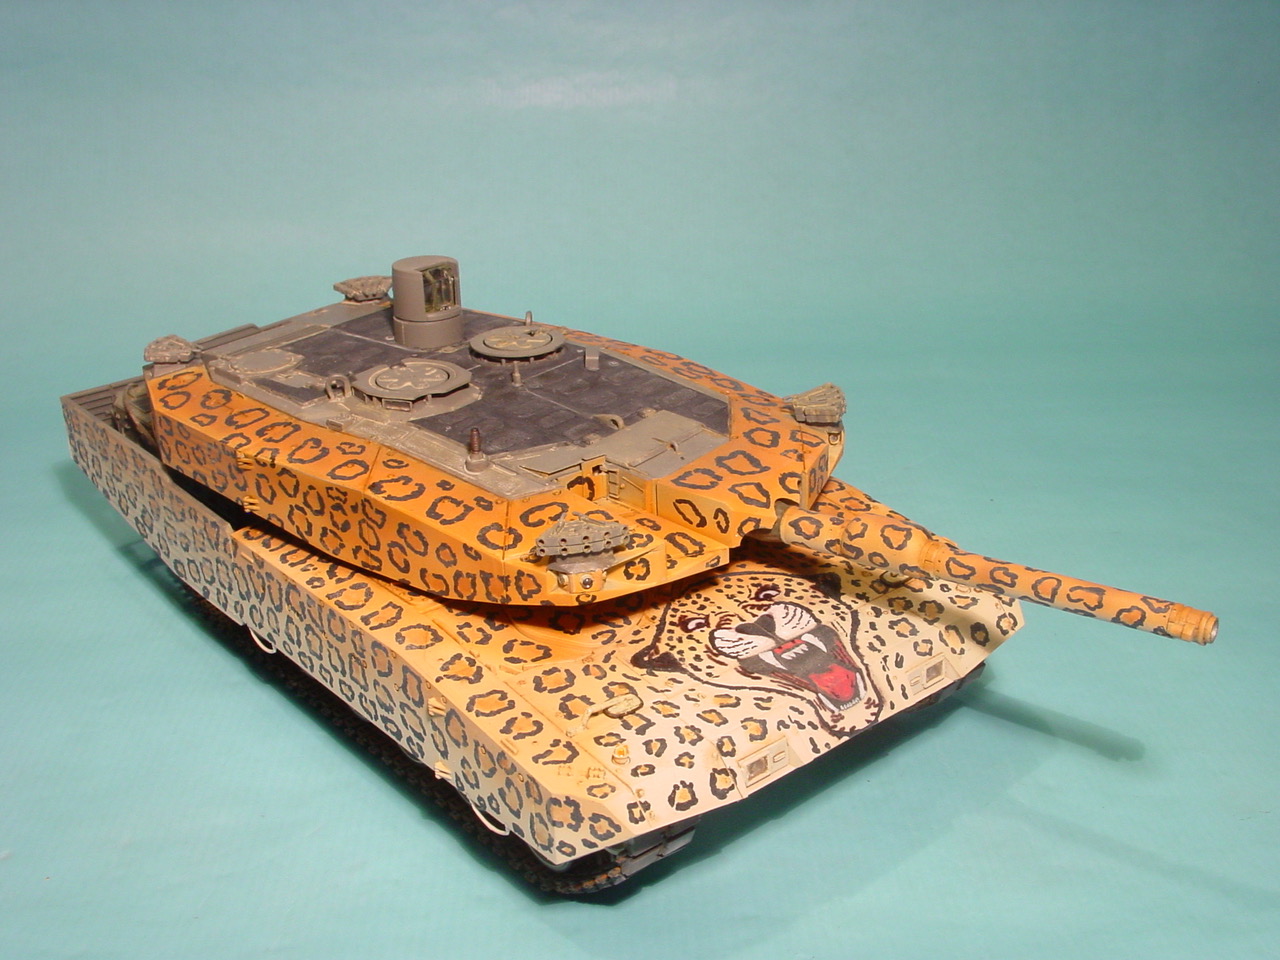
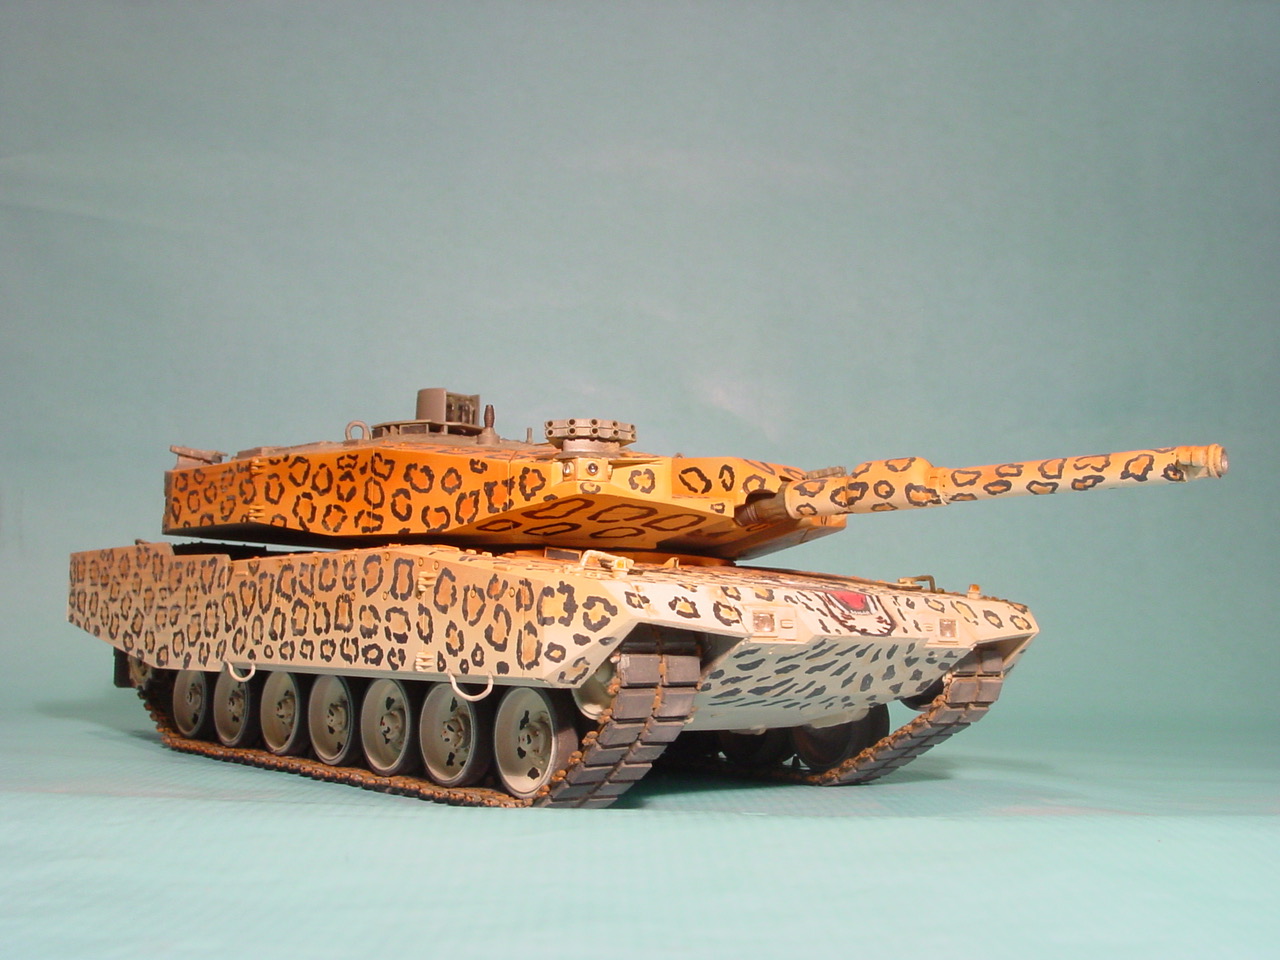
This is my Tiger Models Leo 2 A4 Revolution. The build was straight forward with almost no aftermarket detailling. Because the original color was a boring overall green, I wanted to paint it a little bit different and challenge myself ... with a true fictional camo. The black circles and details of the Leopard head were drawn with a black permanent felt tip ("Edding"), everything else was spraypainted with Ammo MIG acrylics.
This is my full resin DACHS AEV by Perfect Scale Models. Besides using MENG's Leo 1 tracks instead of the resin link and length I added only minor details. Camo is an ISAF vehicle pictured in Tankograd's ISAF volumes (No 5031+5041). I used Vallejo and MIG acrylics. Weathering with oils and pastels.

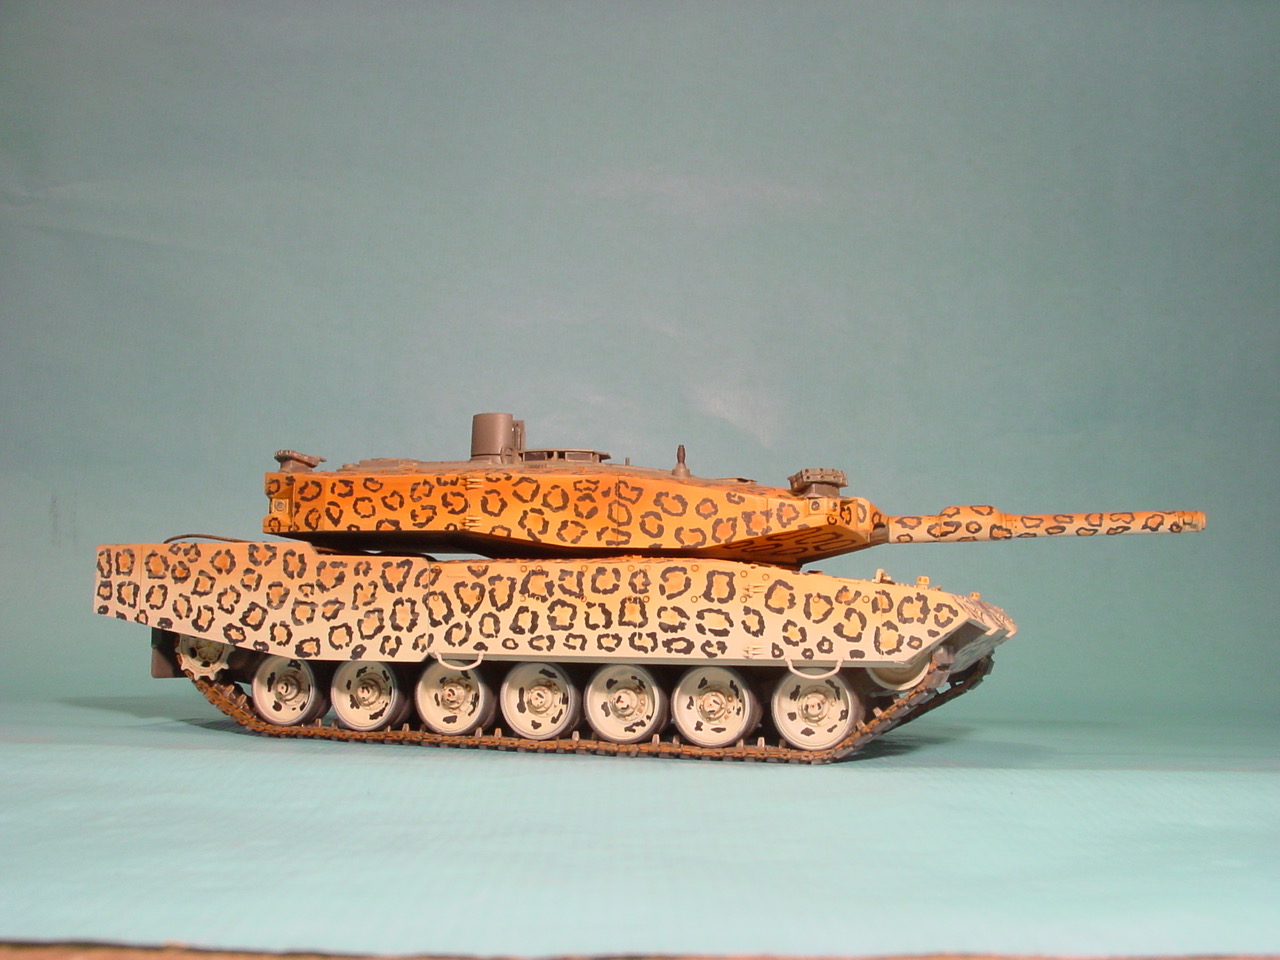
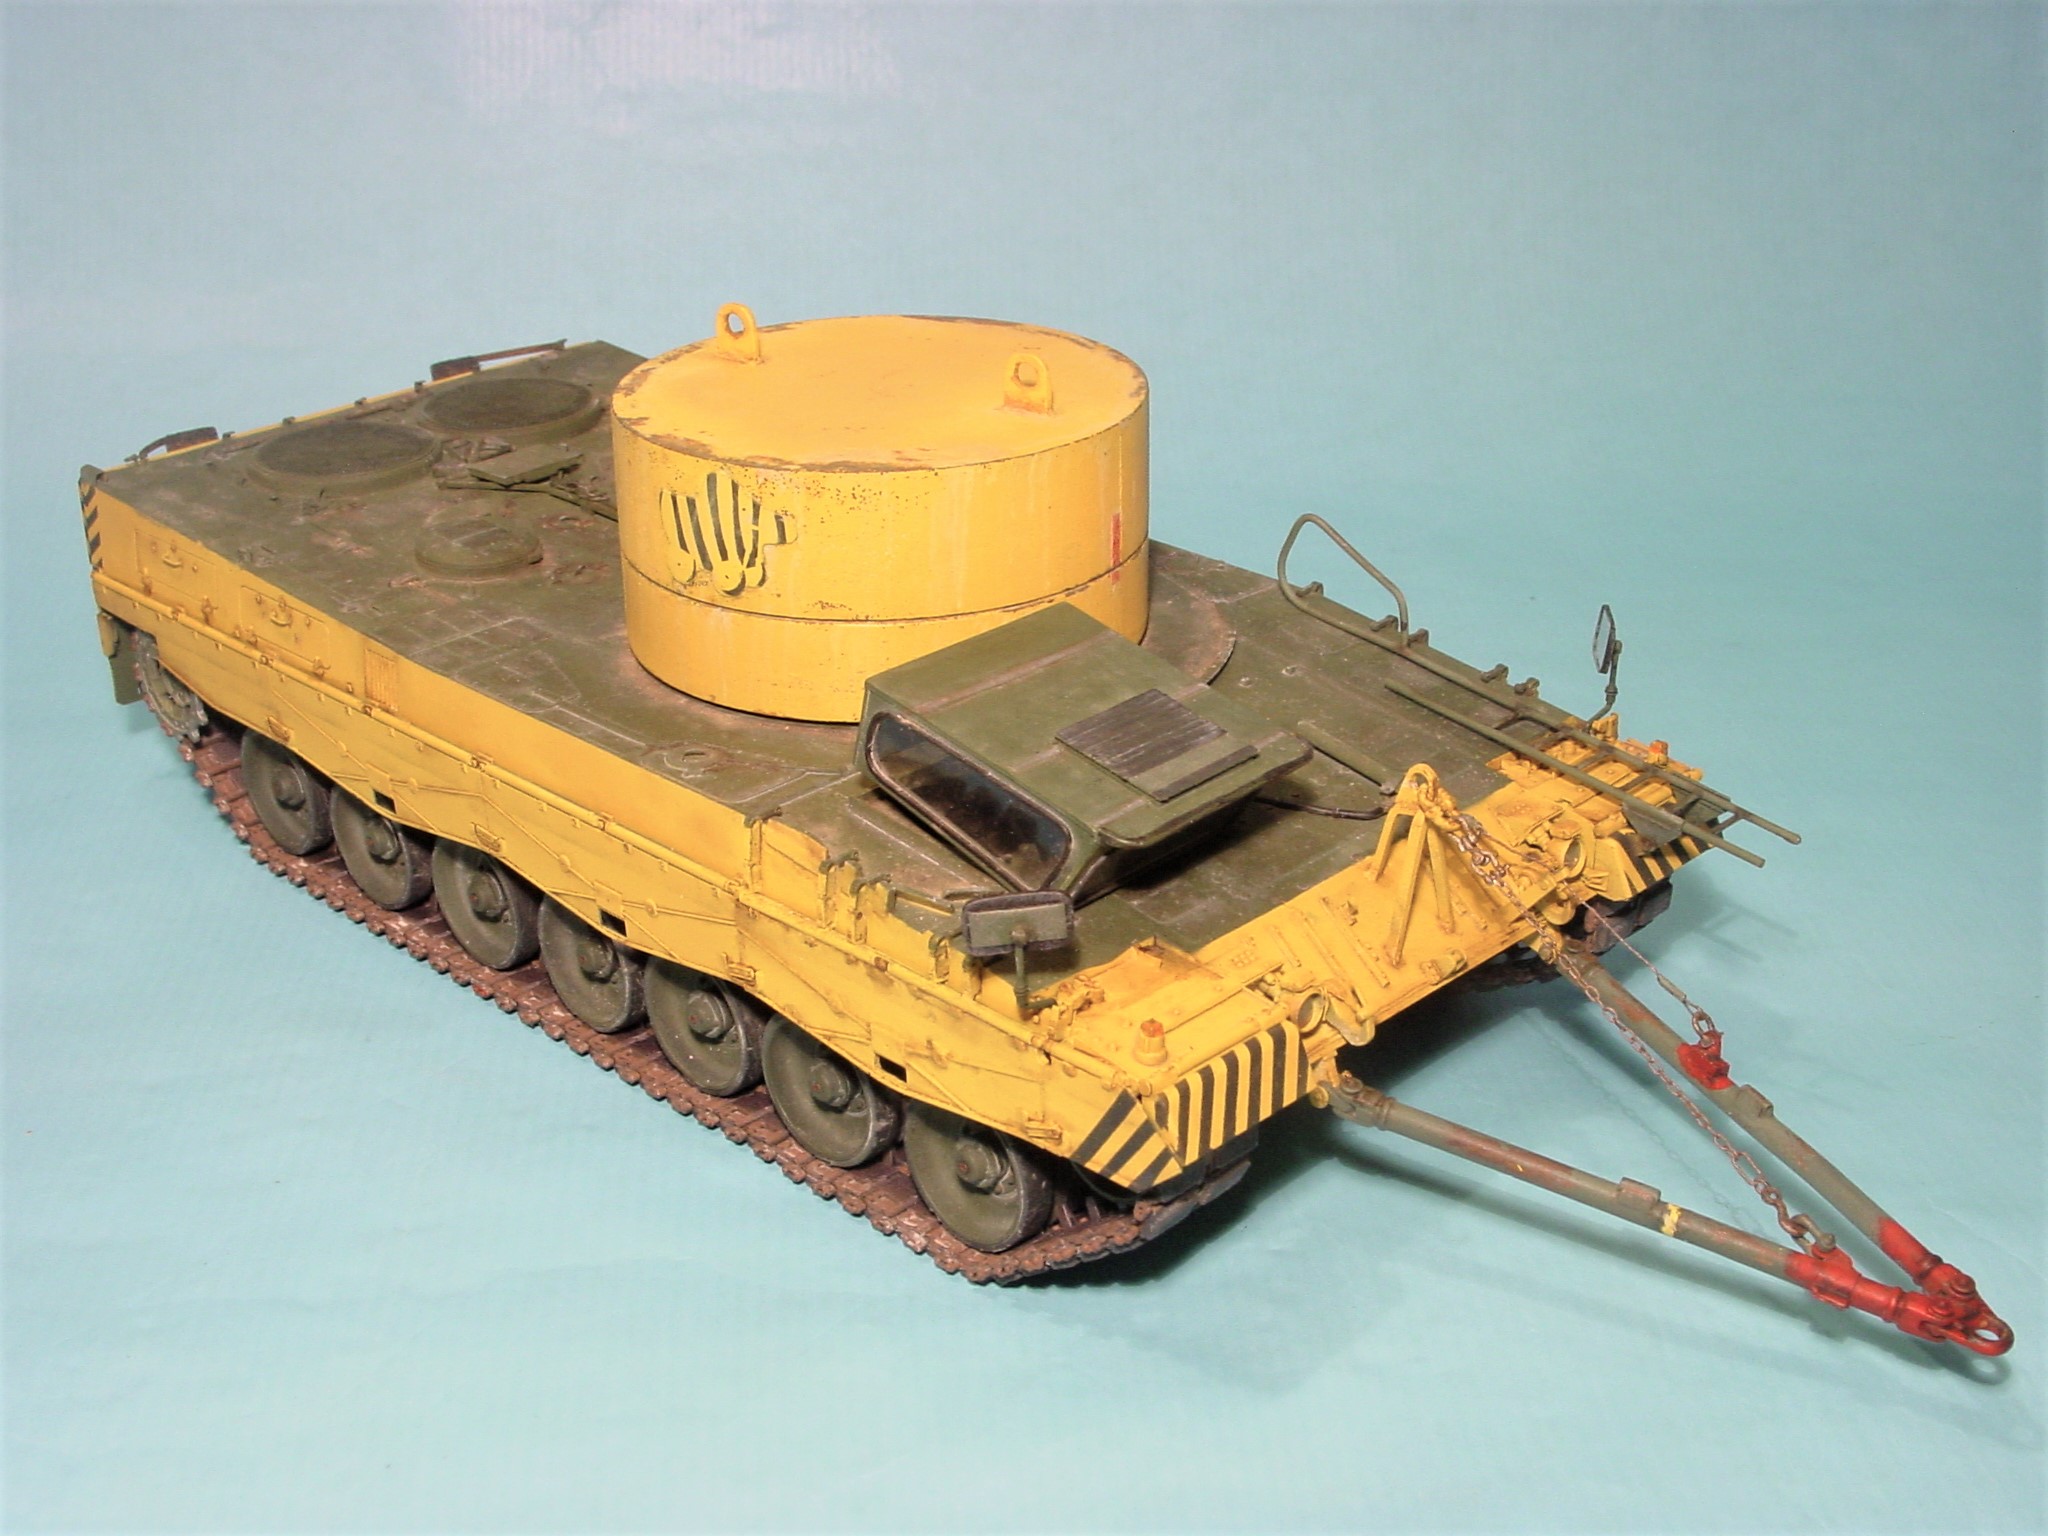
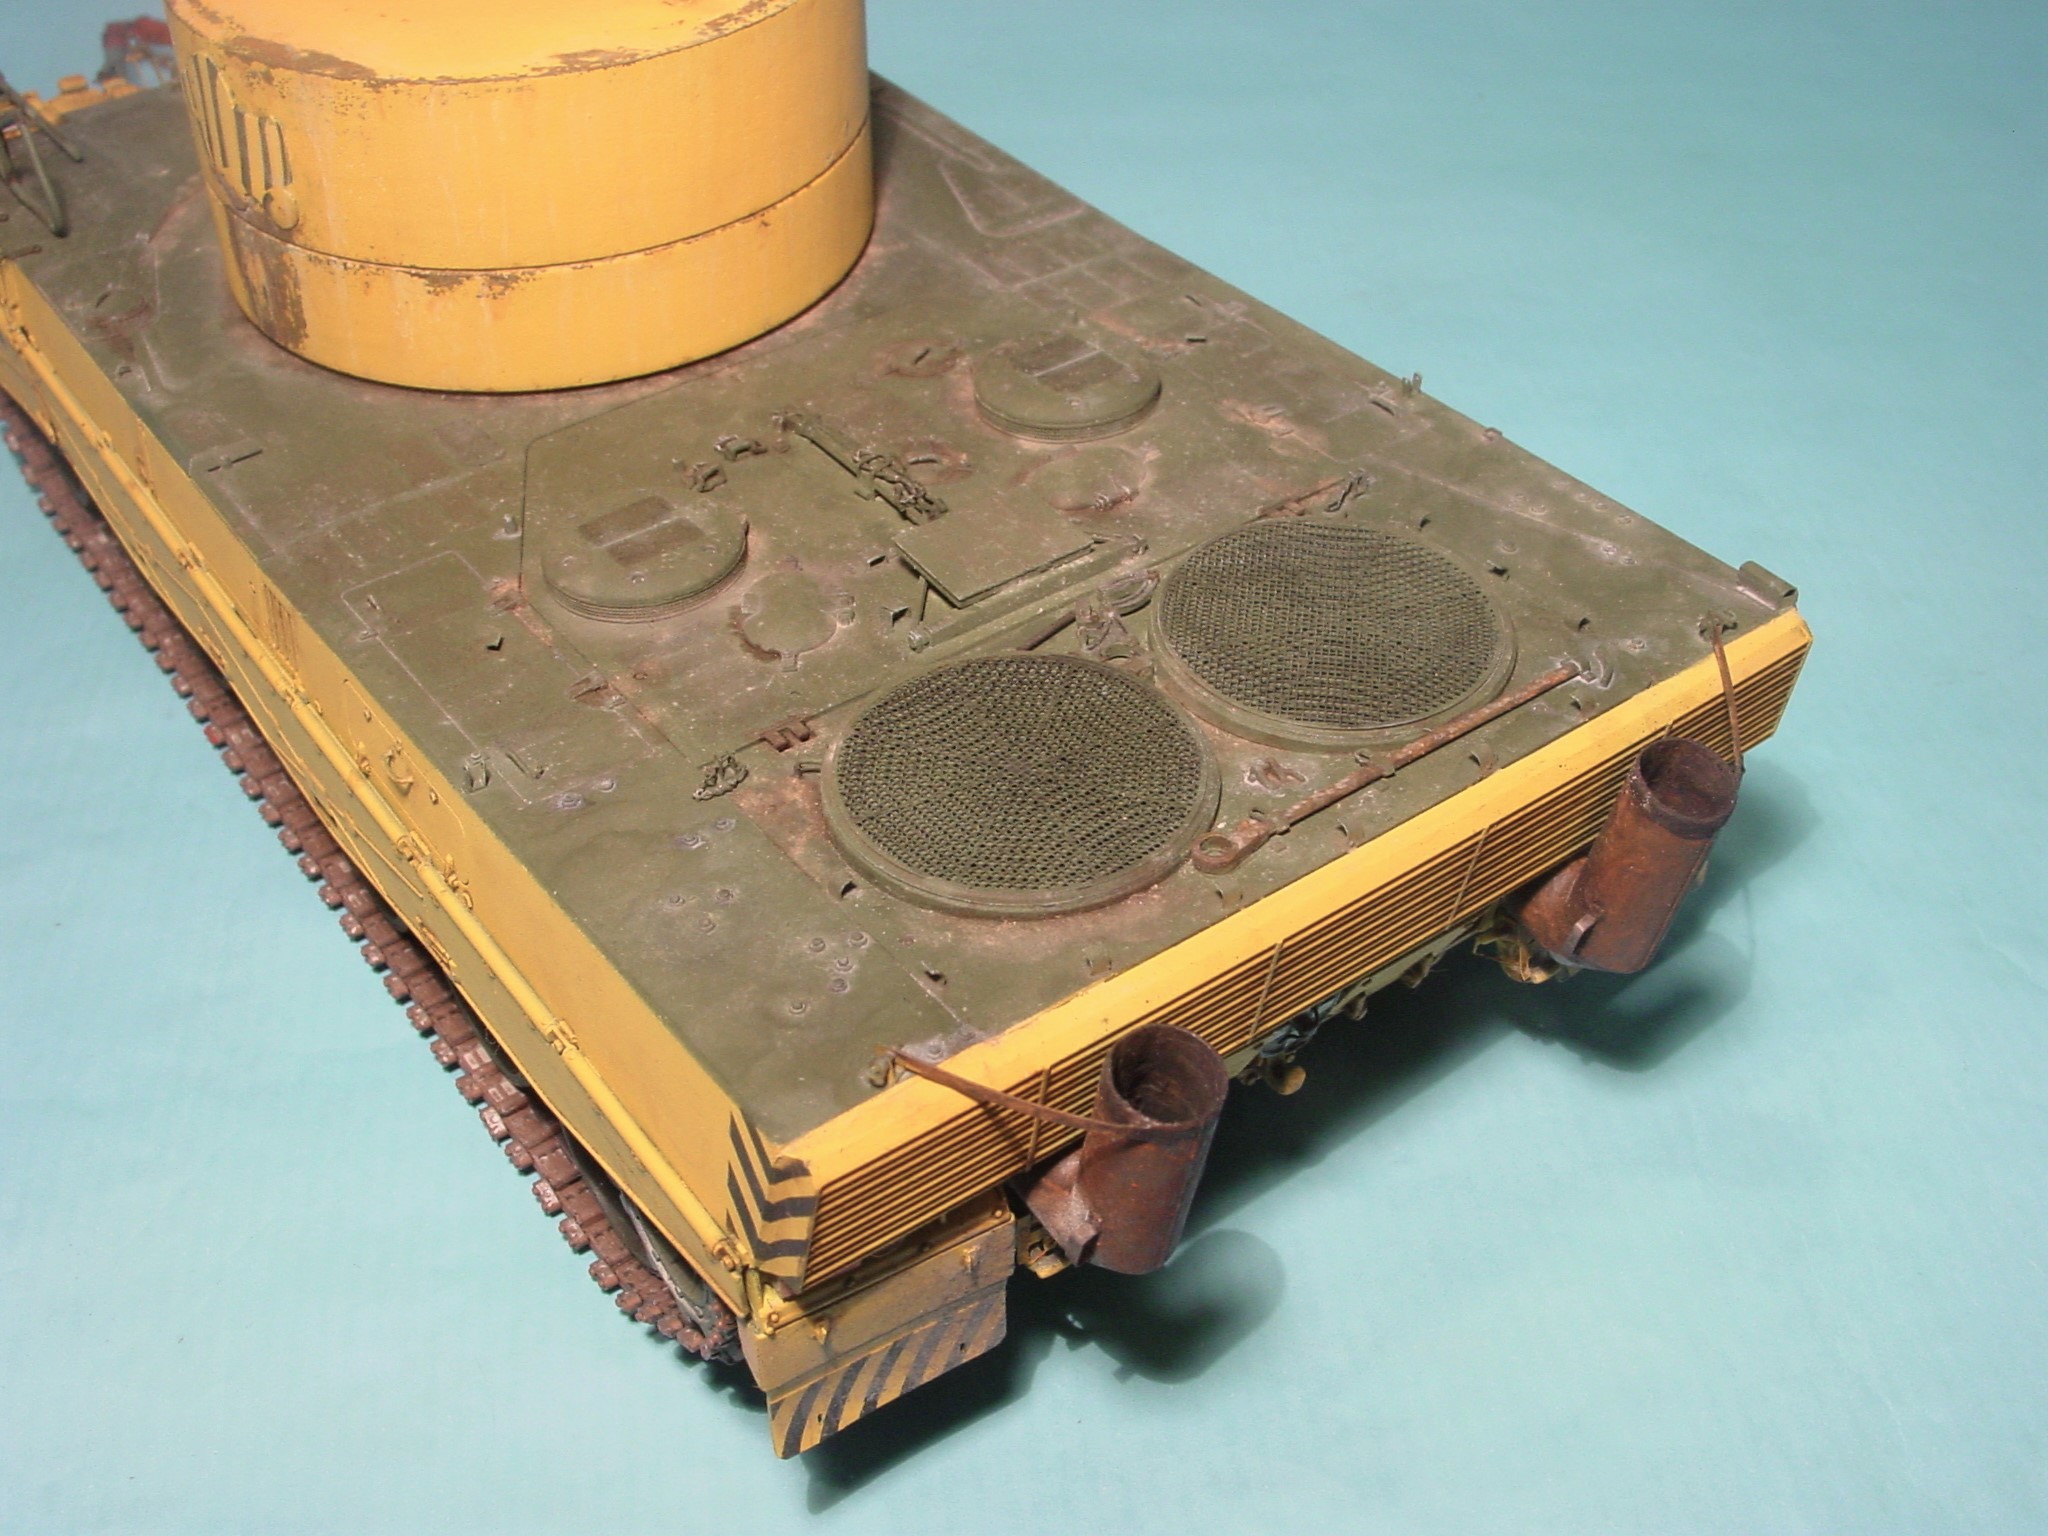
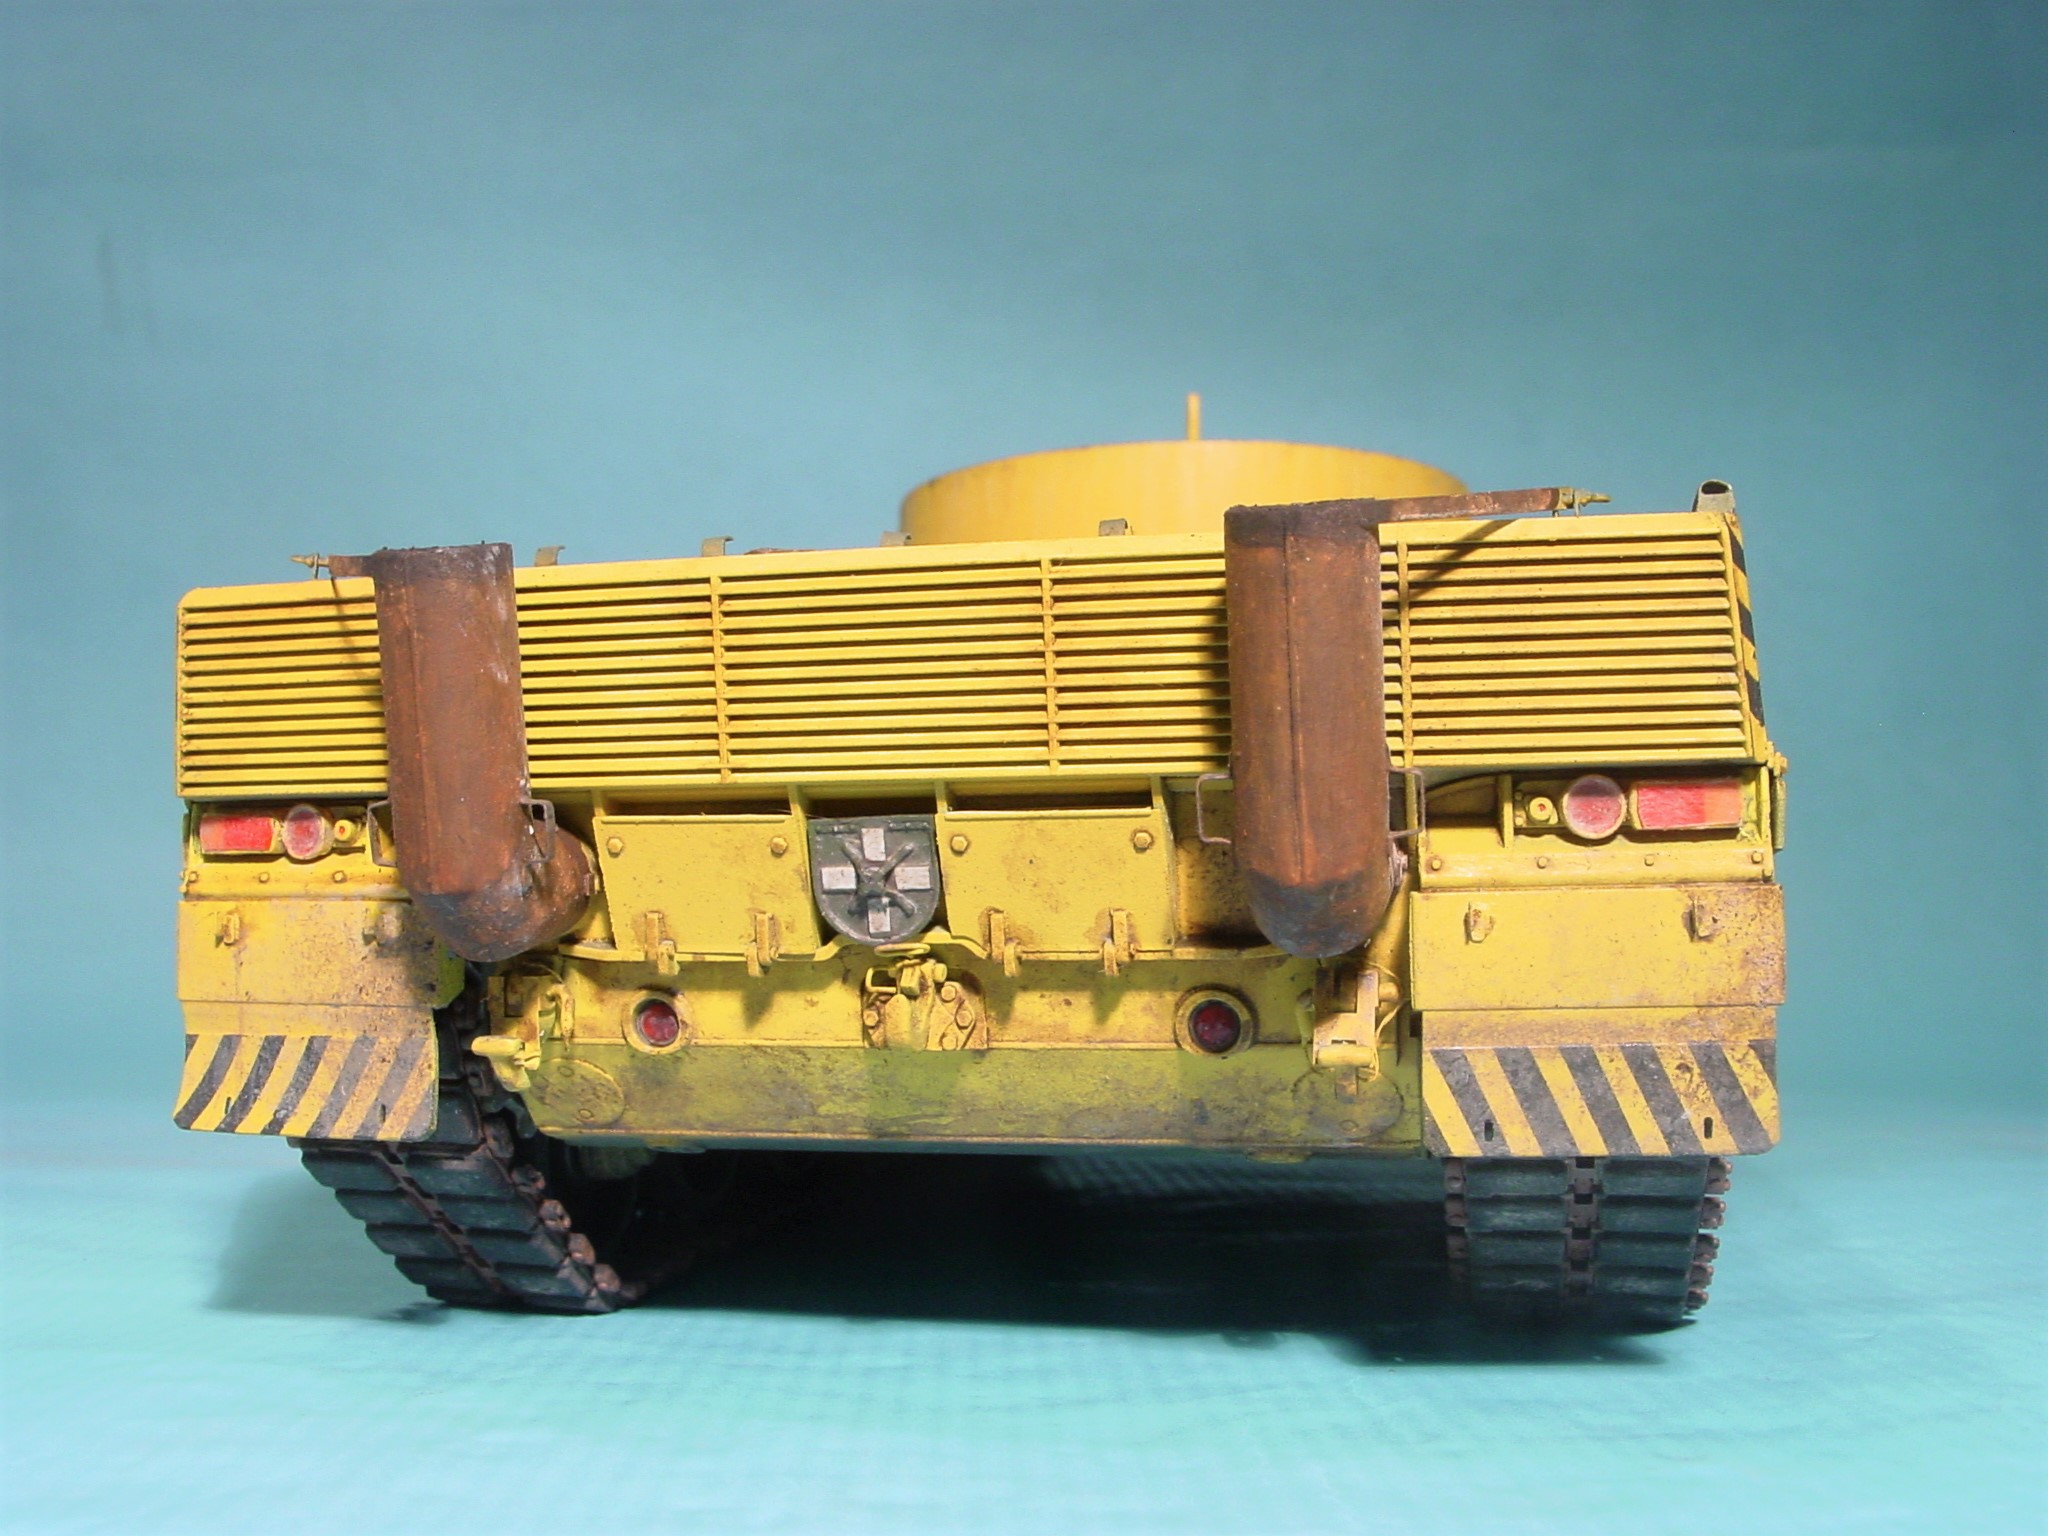
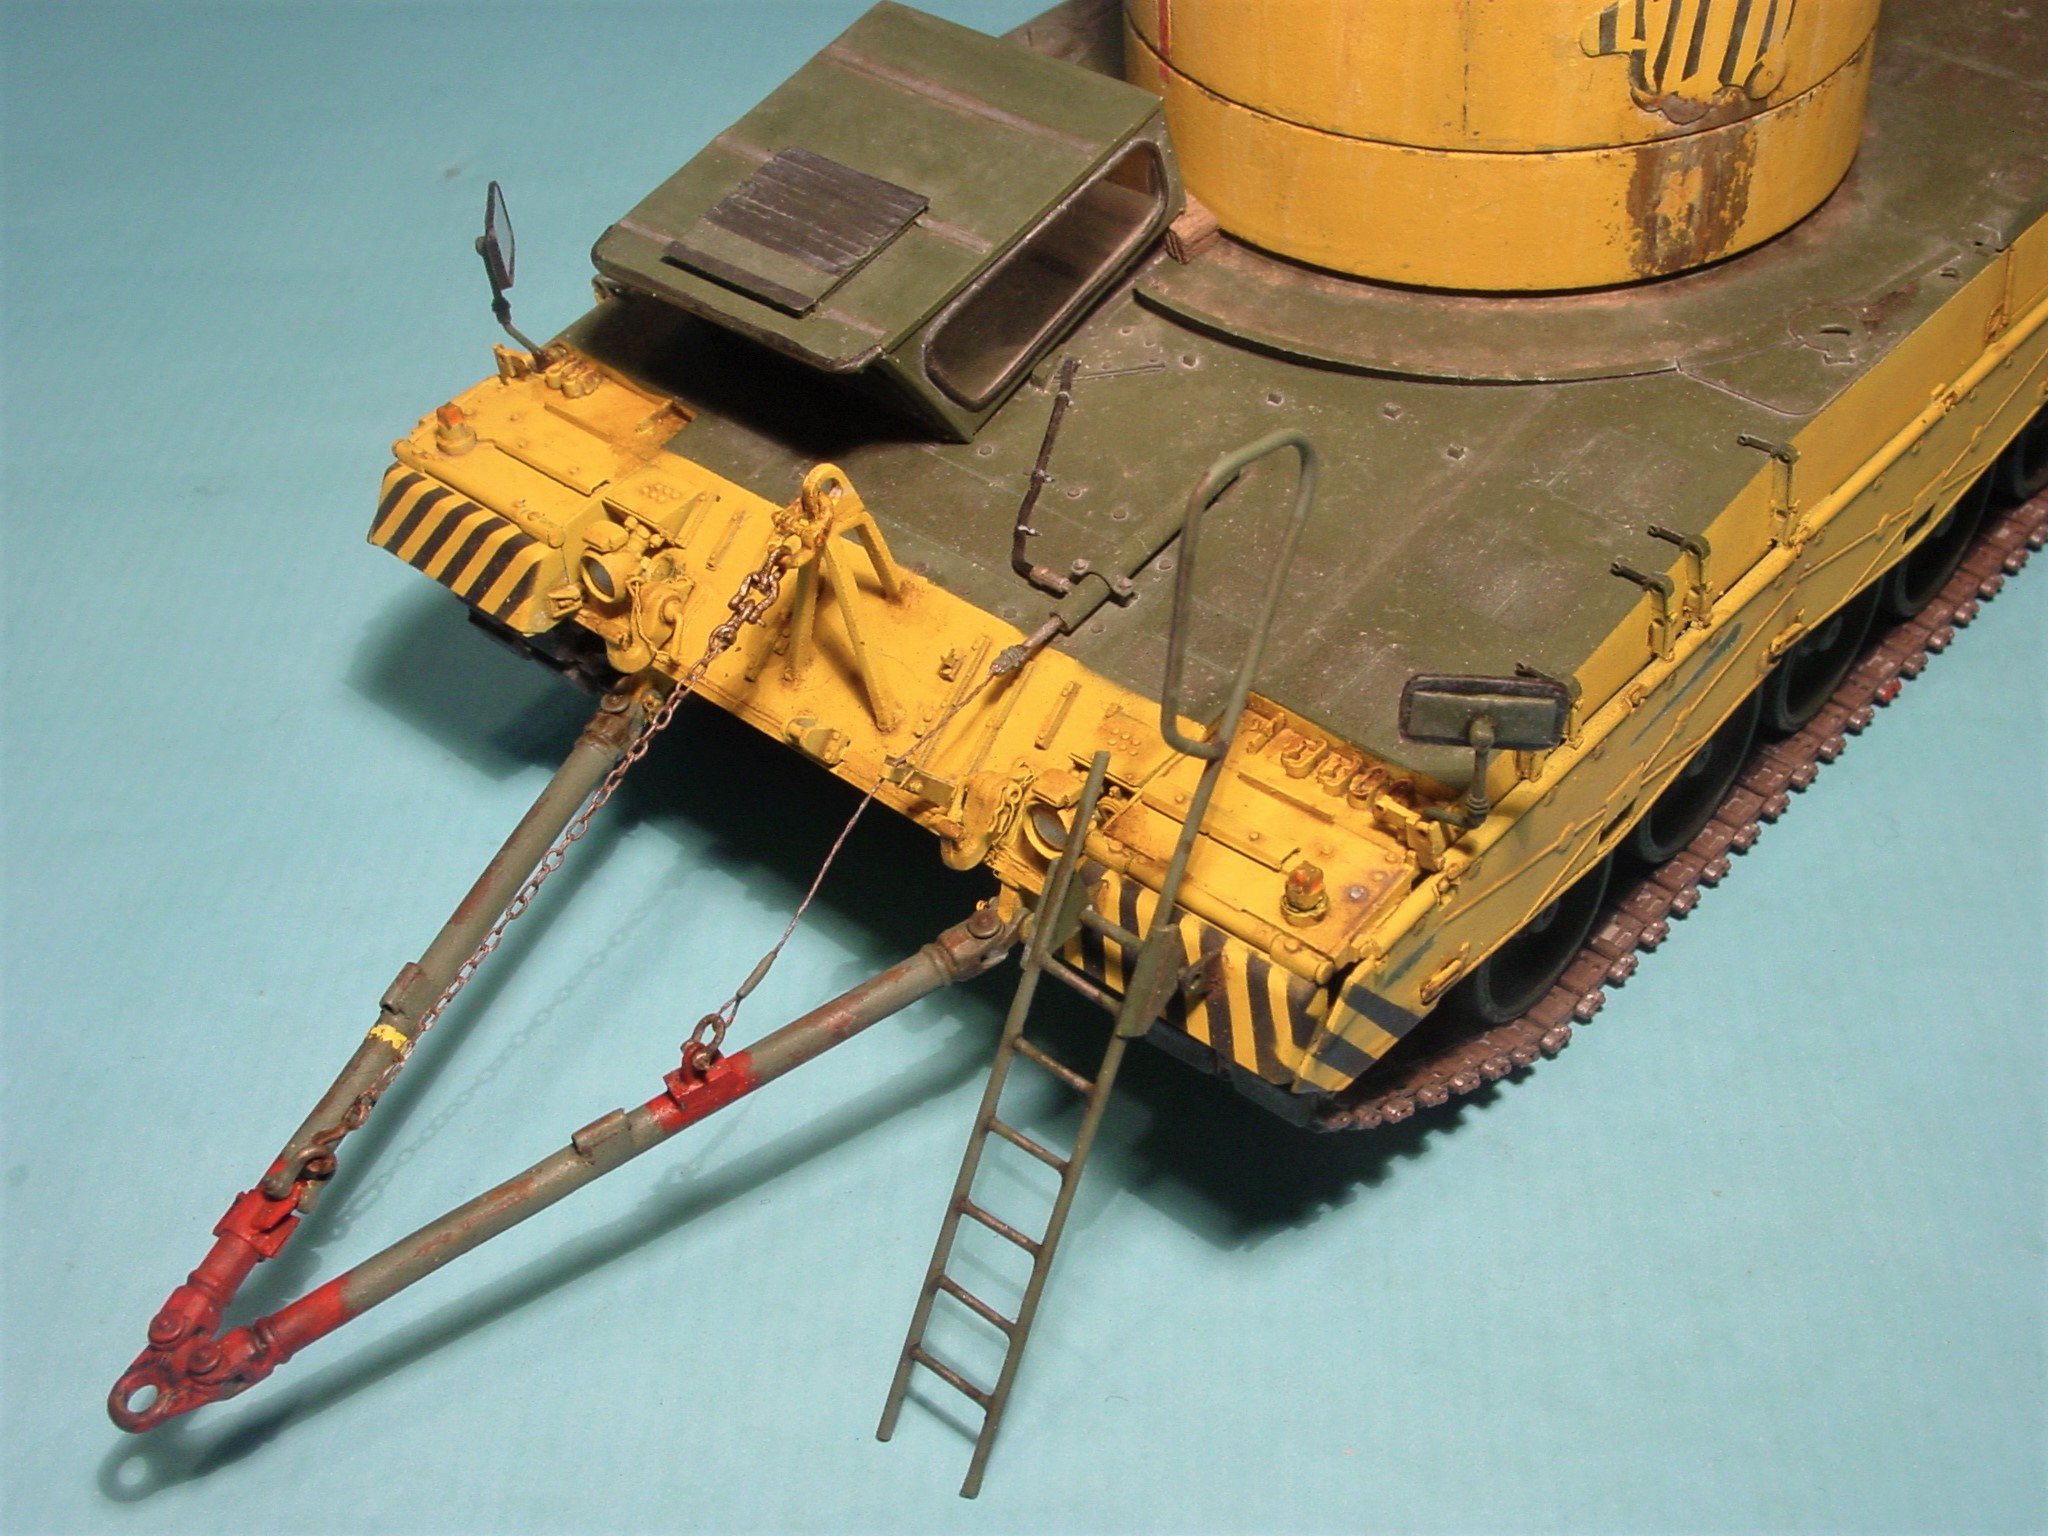
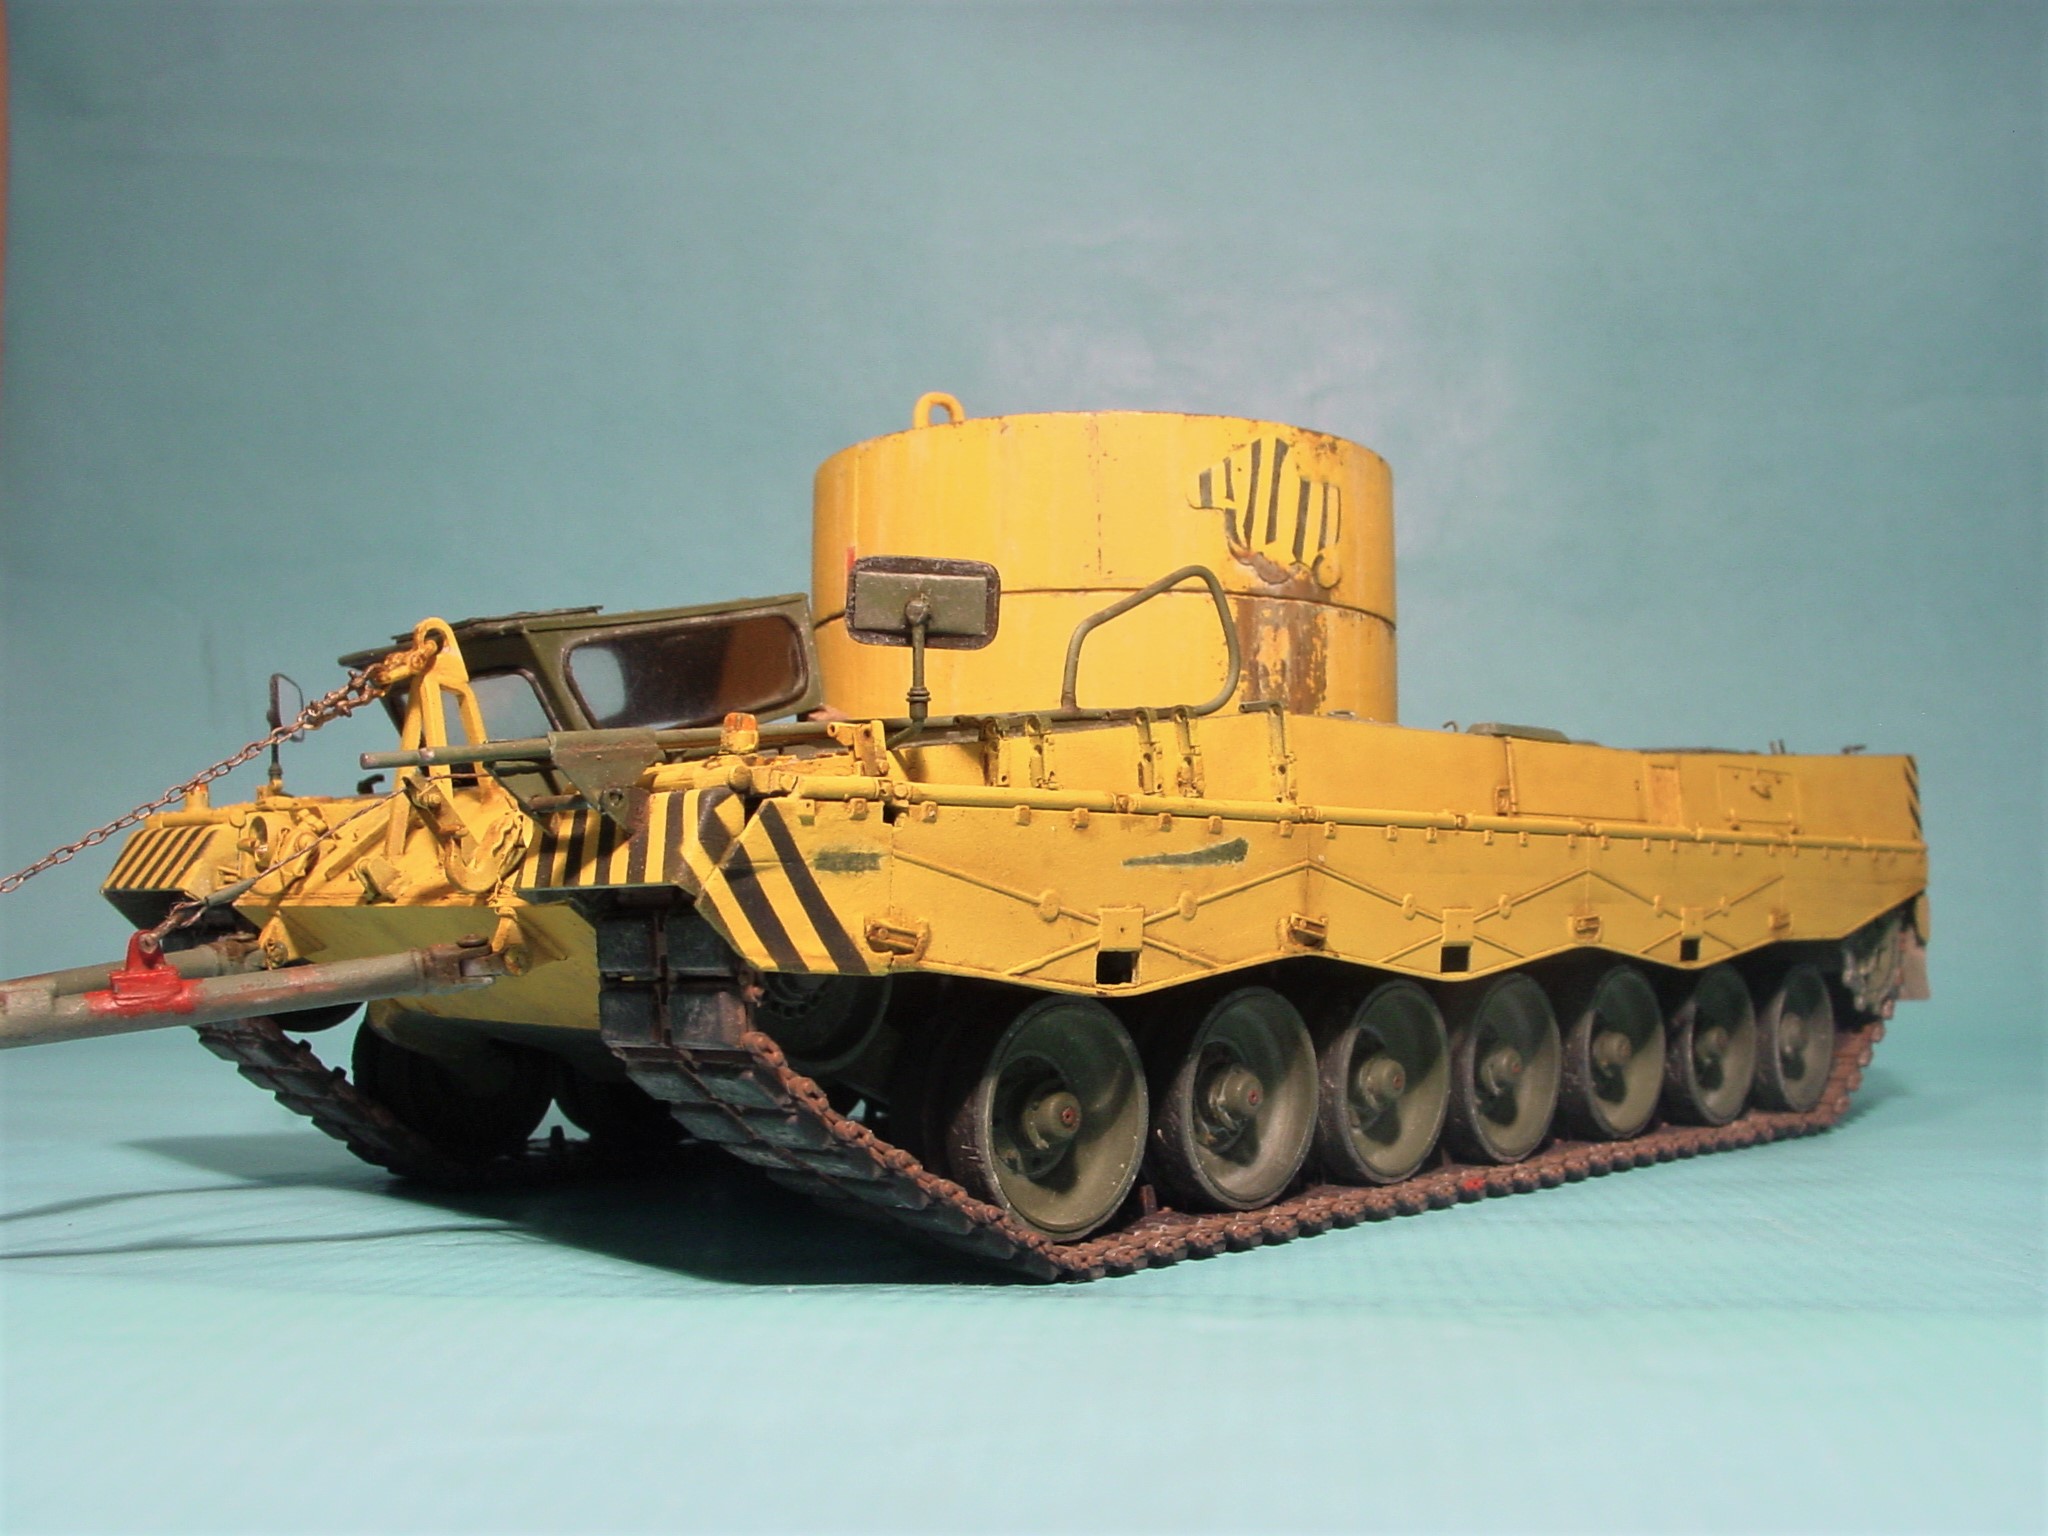
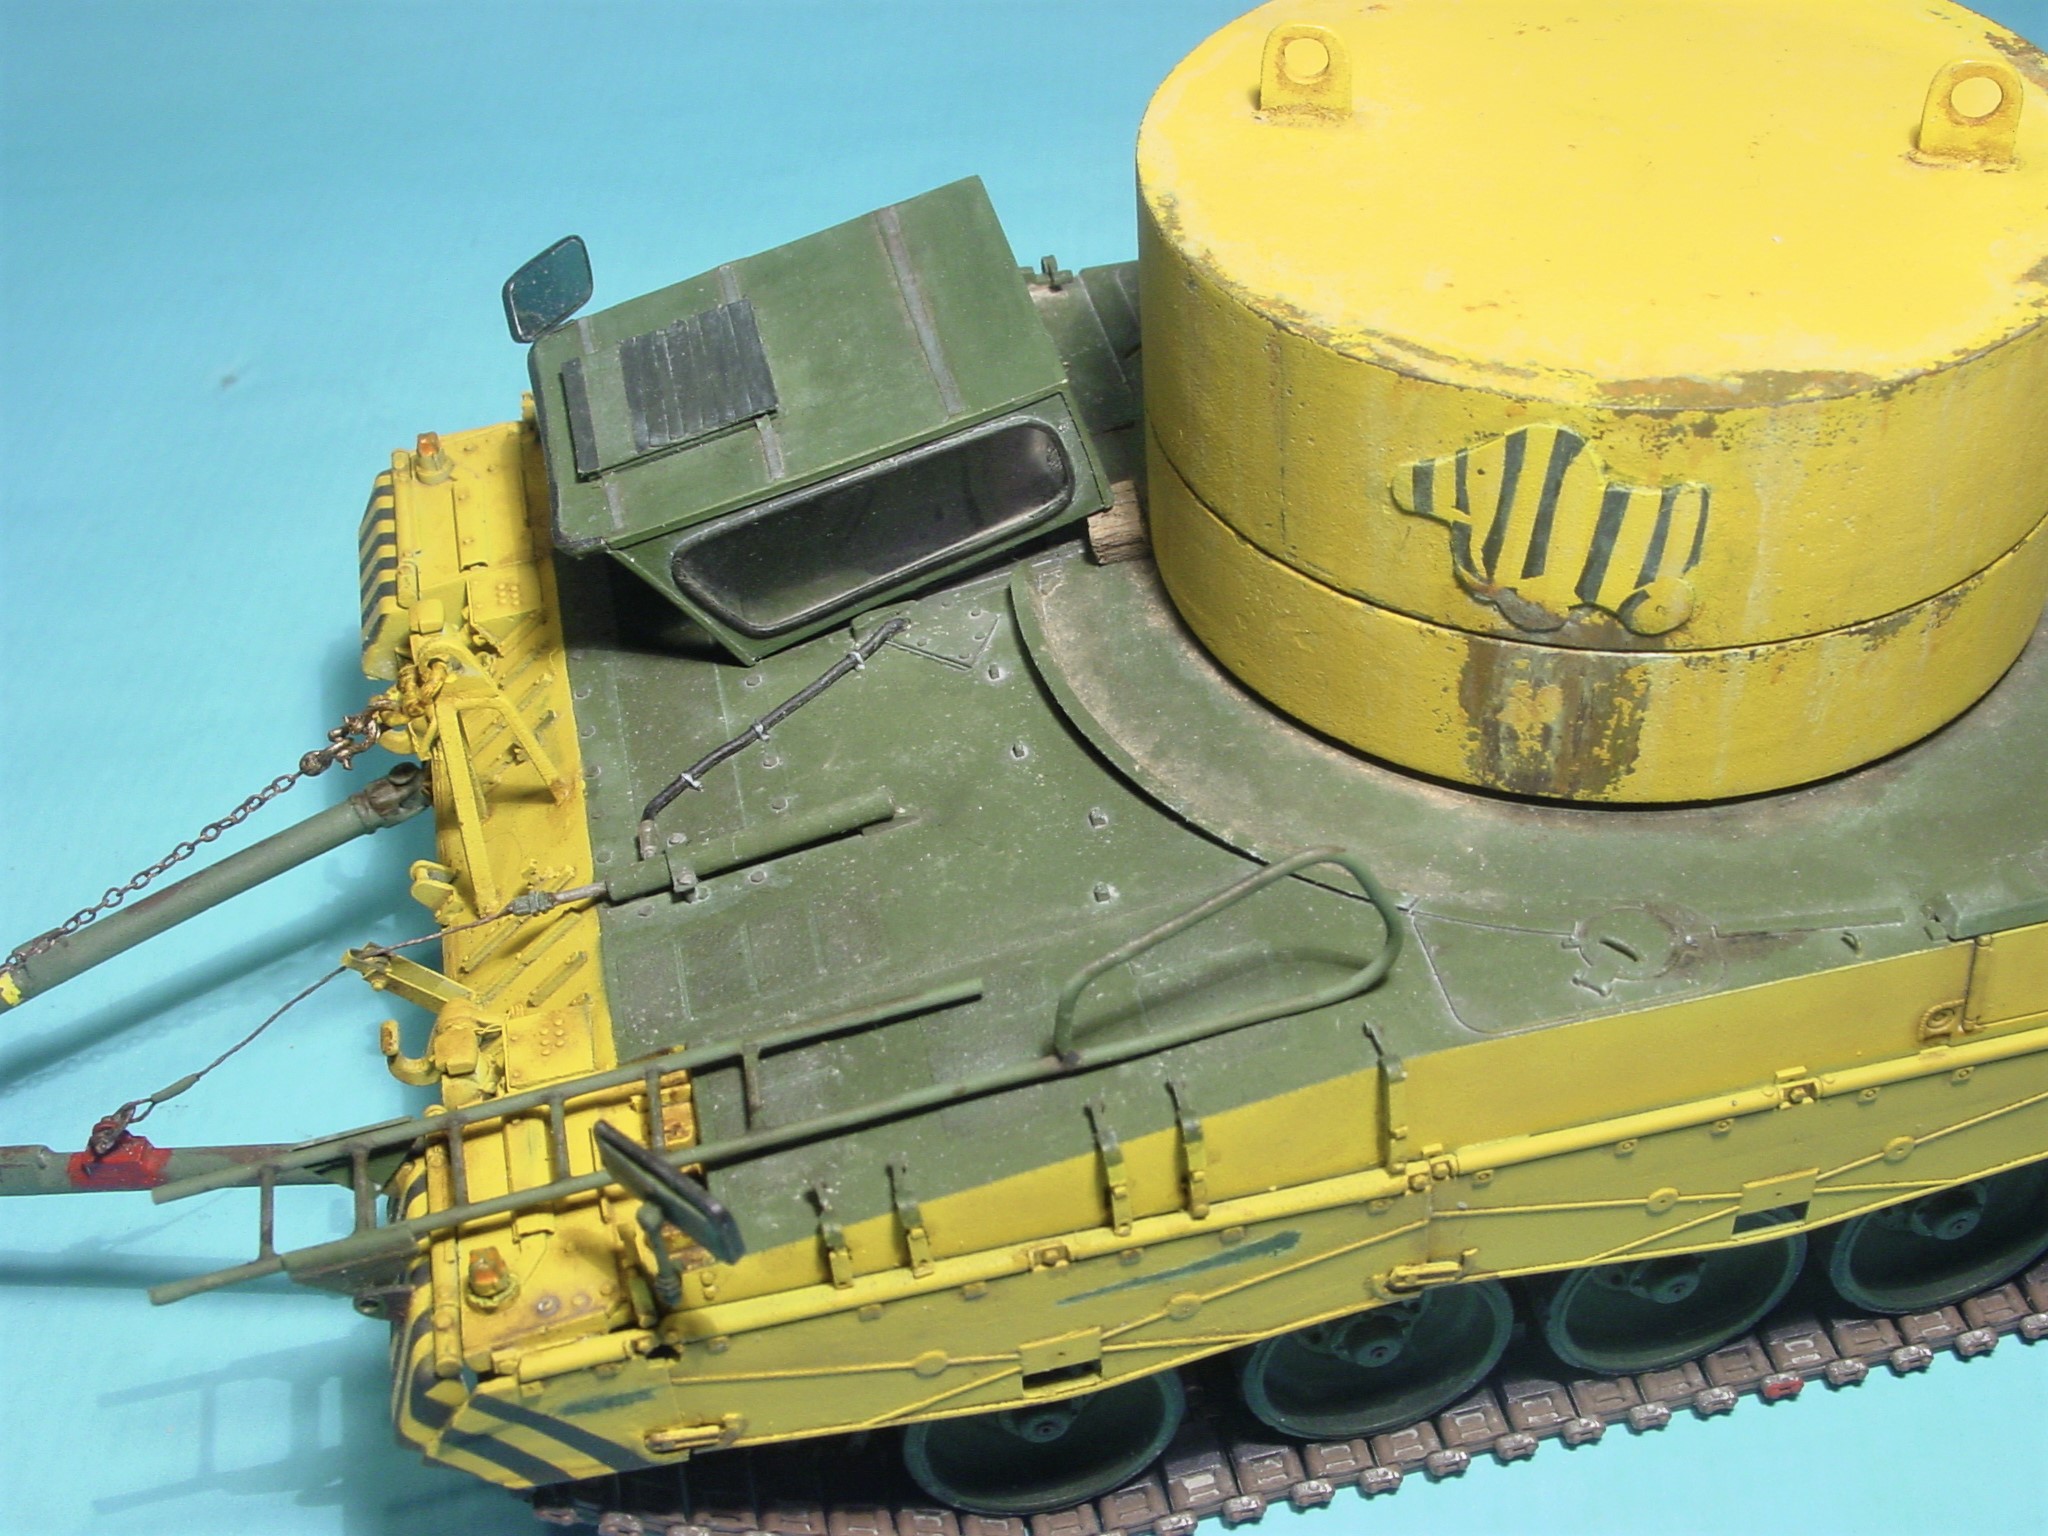
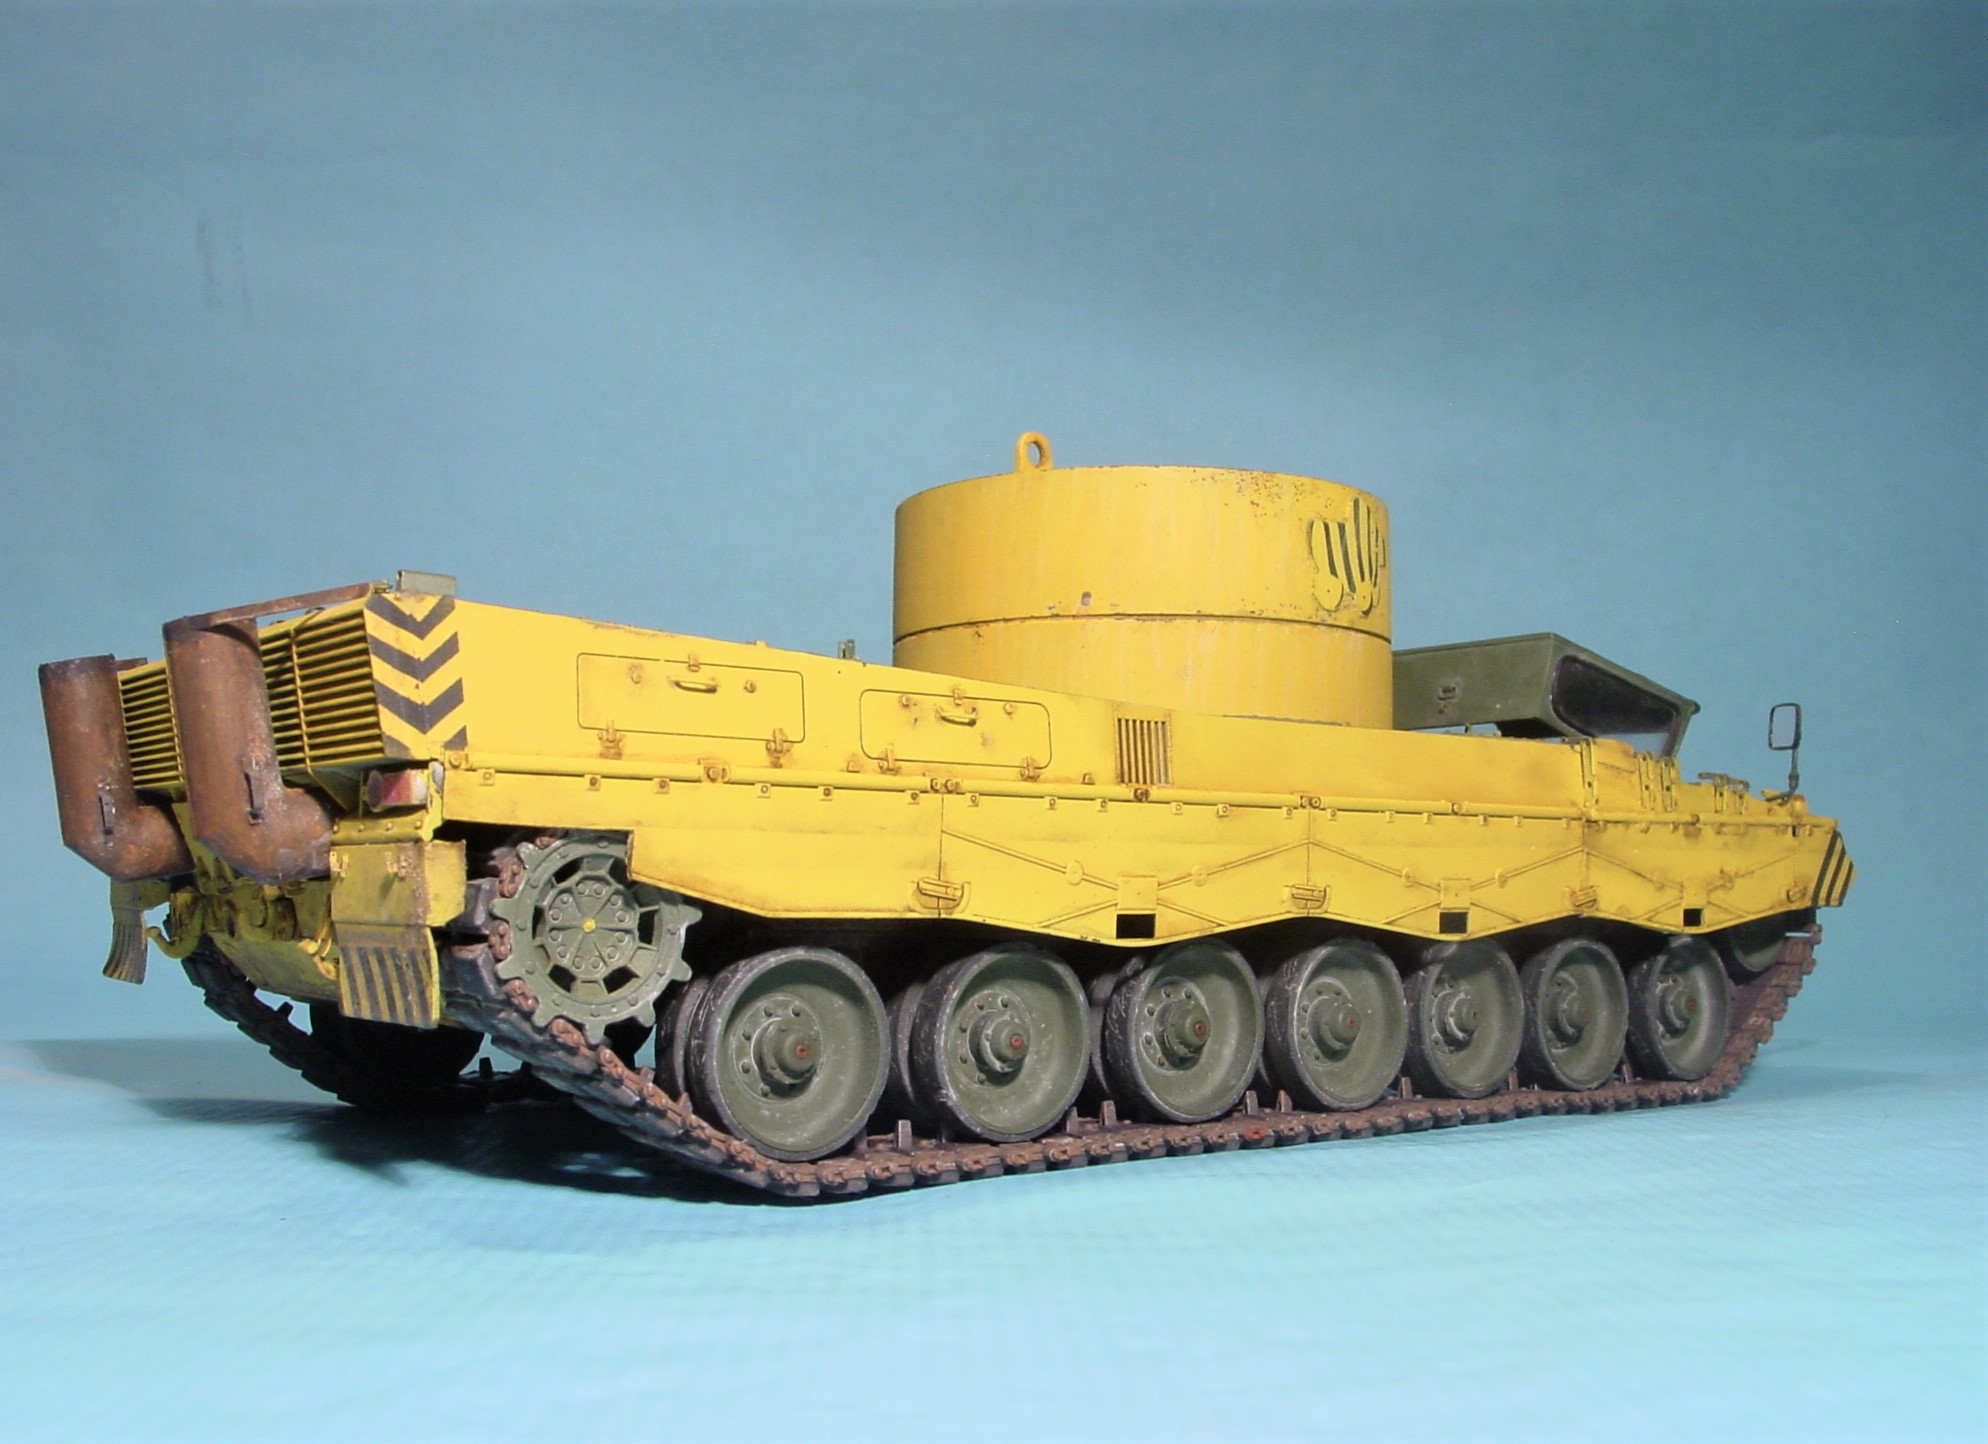
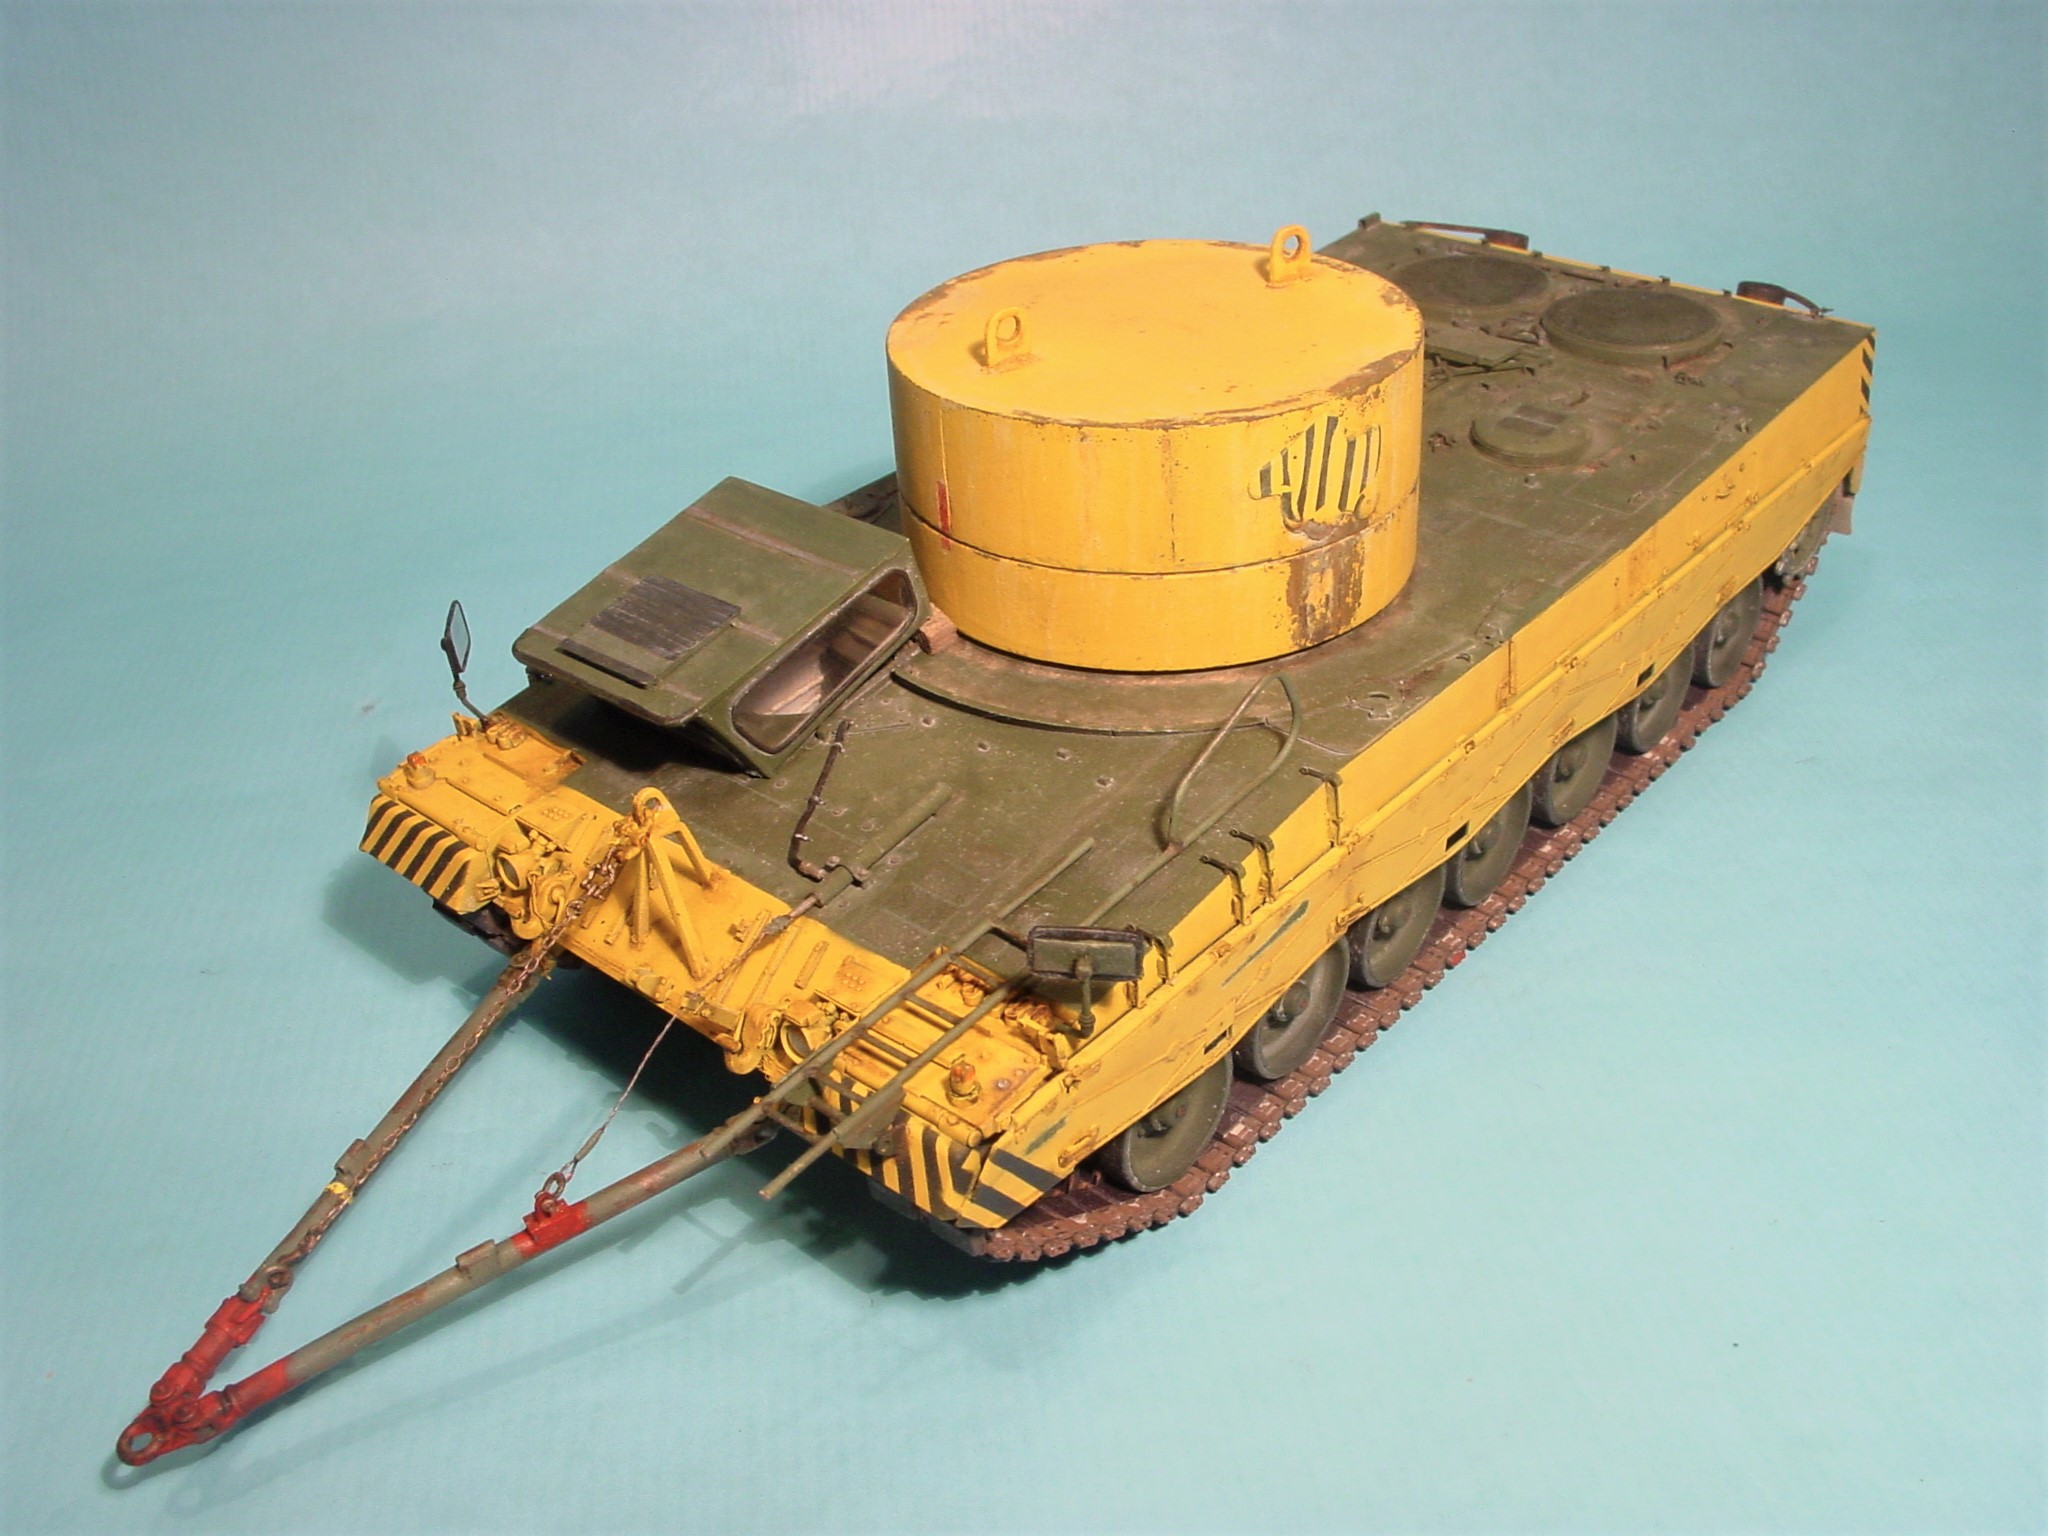
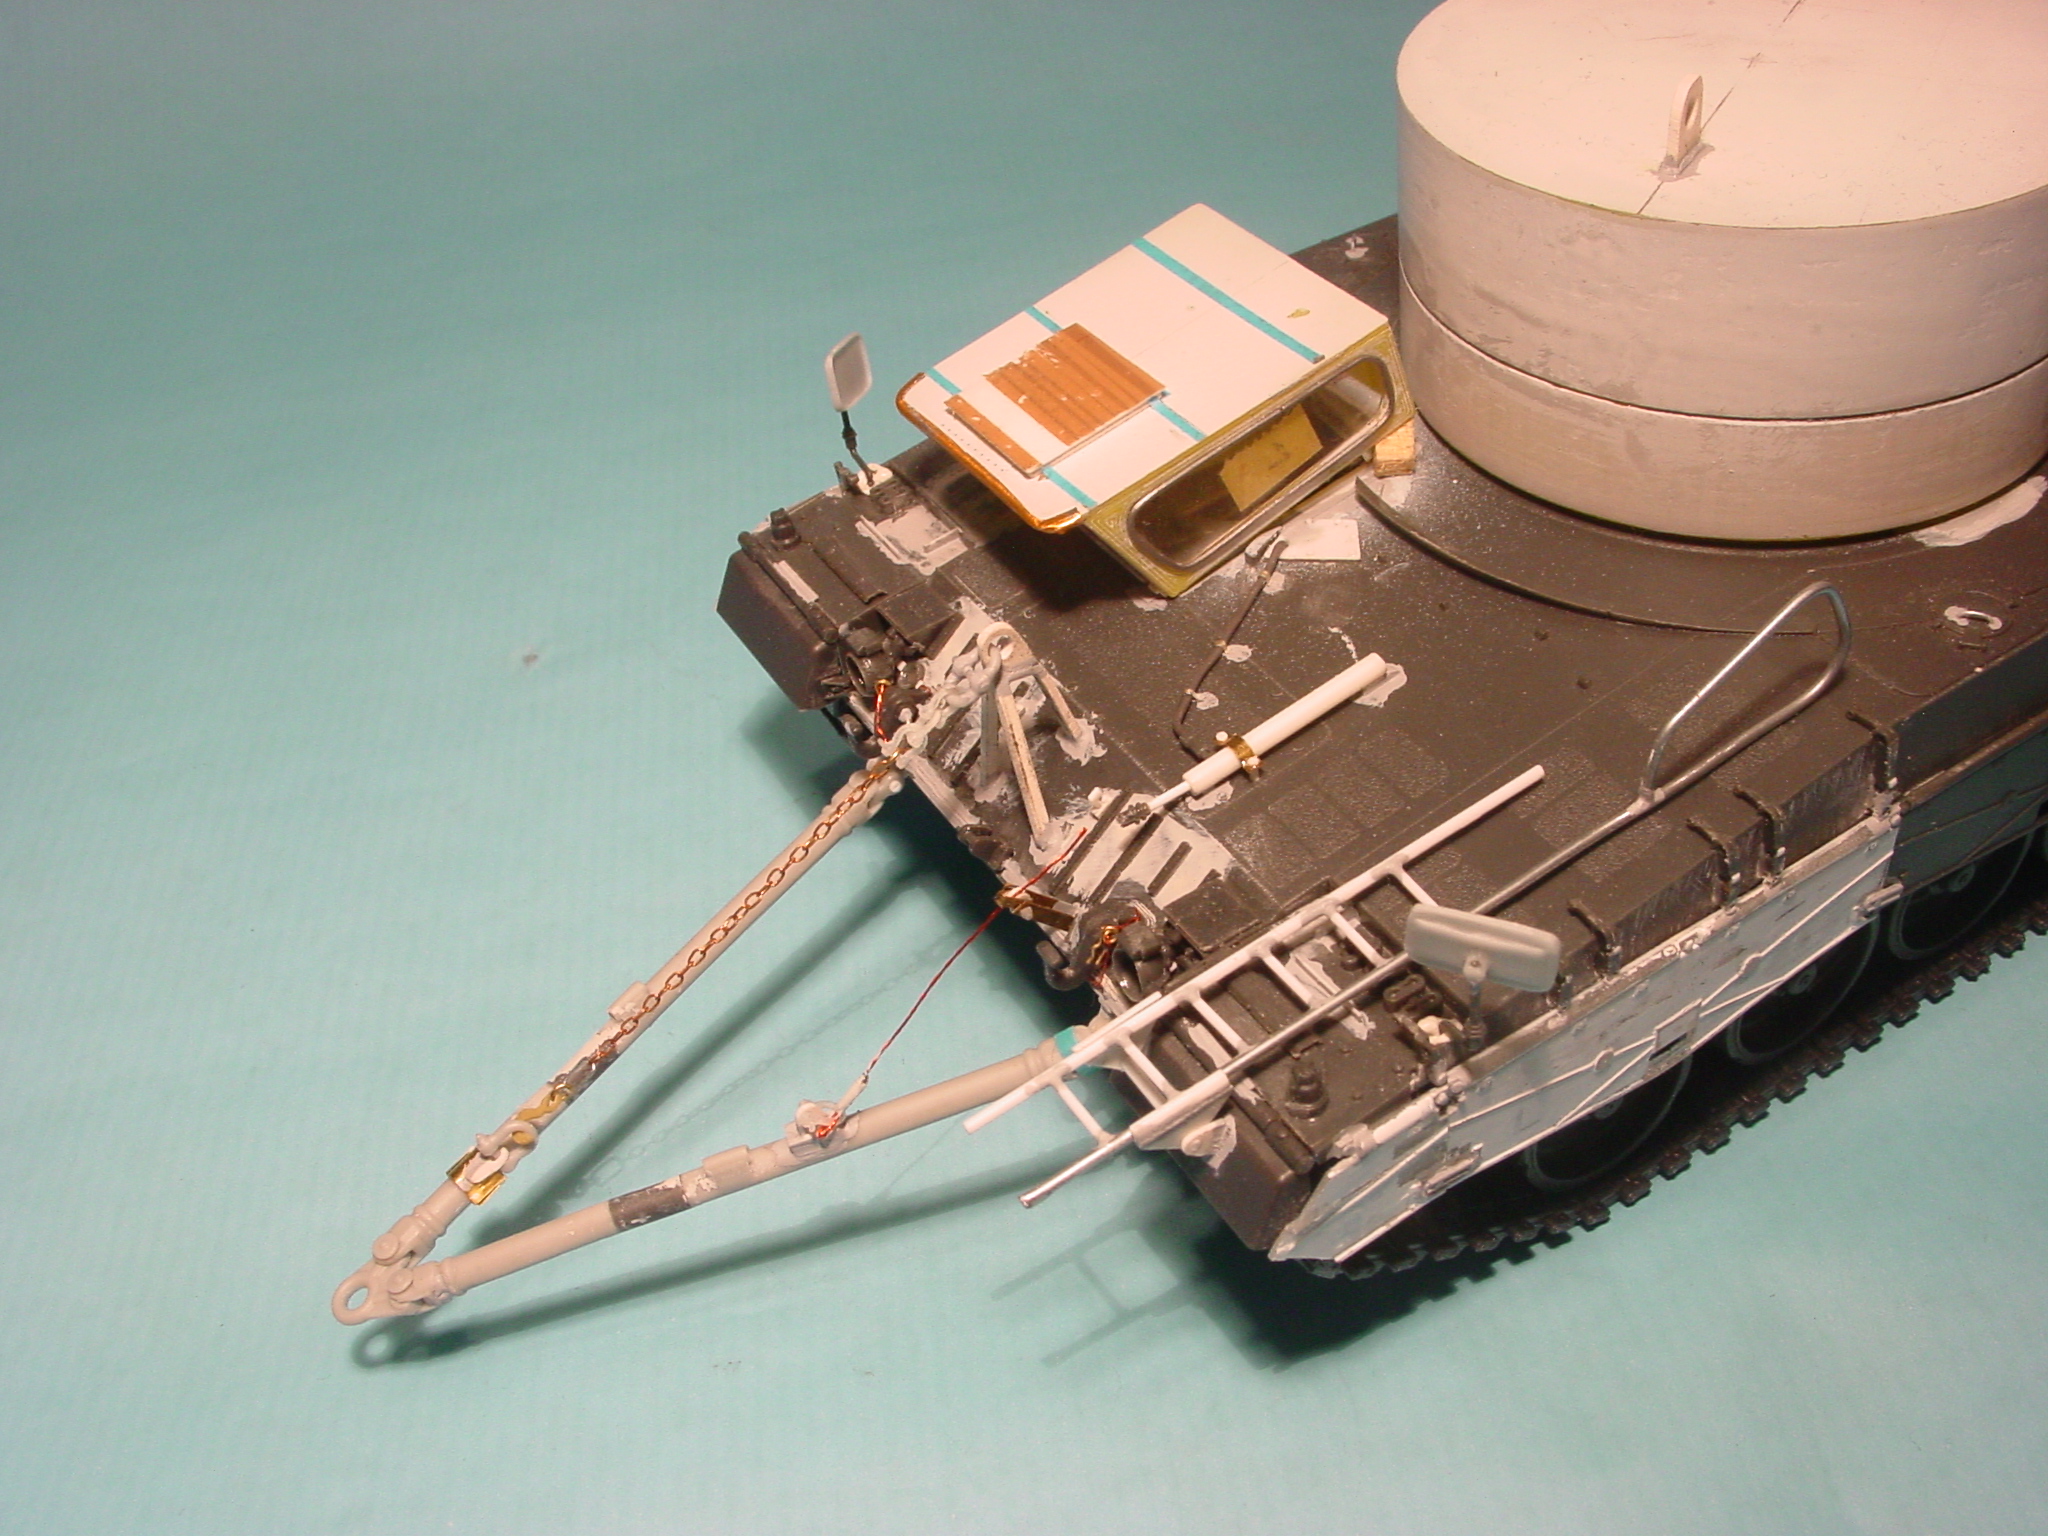
In 2002 the Army Maintenance Center in Darmstadt/ Germany converted a Leo 2 chassis into a towing vehicle. It received a very distinctive color scheme with a depiction of a tiger-striped duck from the German children's book author "Janosch". There are a few pictures of the tank in Frank Lobitz' Leopard 2-book and years ago I found a few more on a now inactive site.
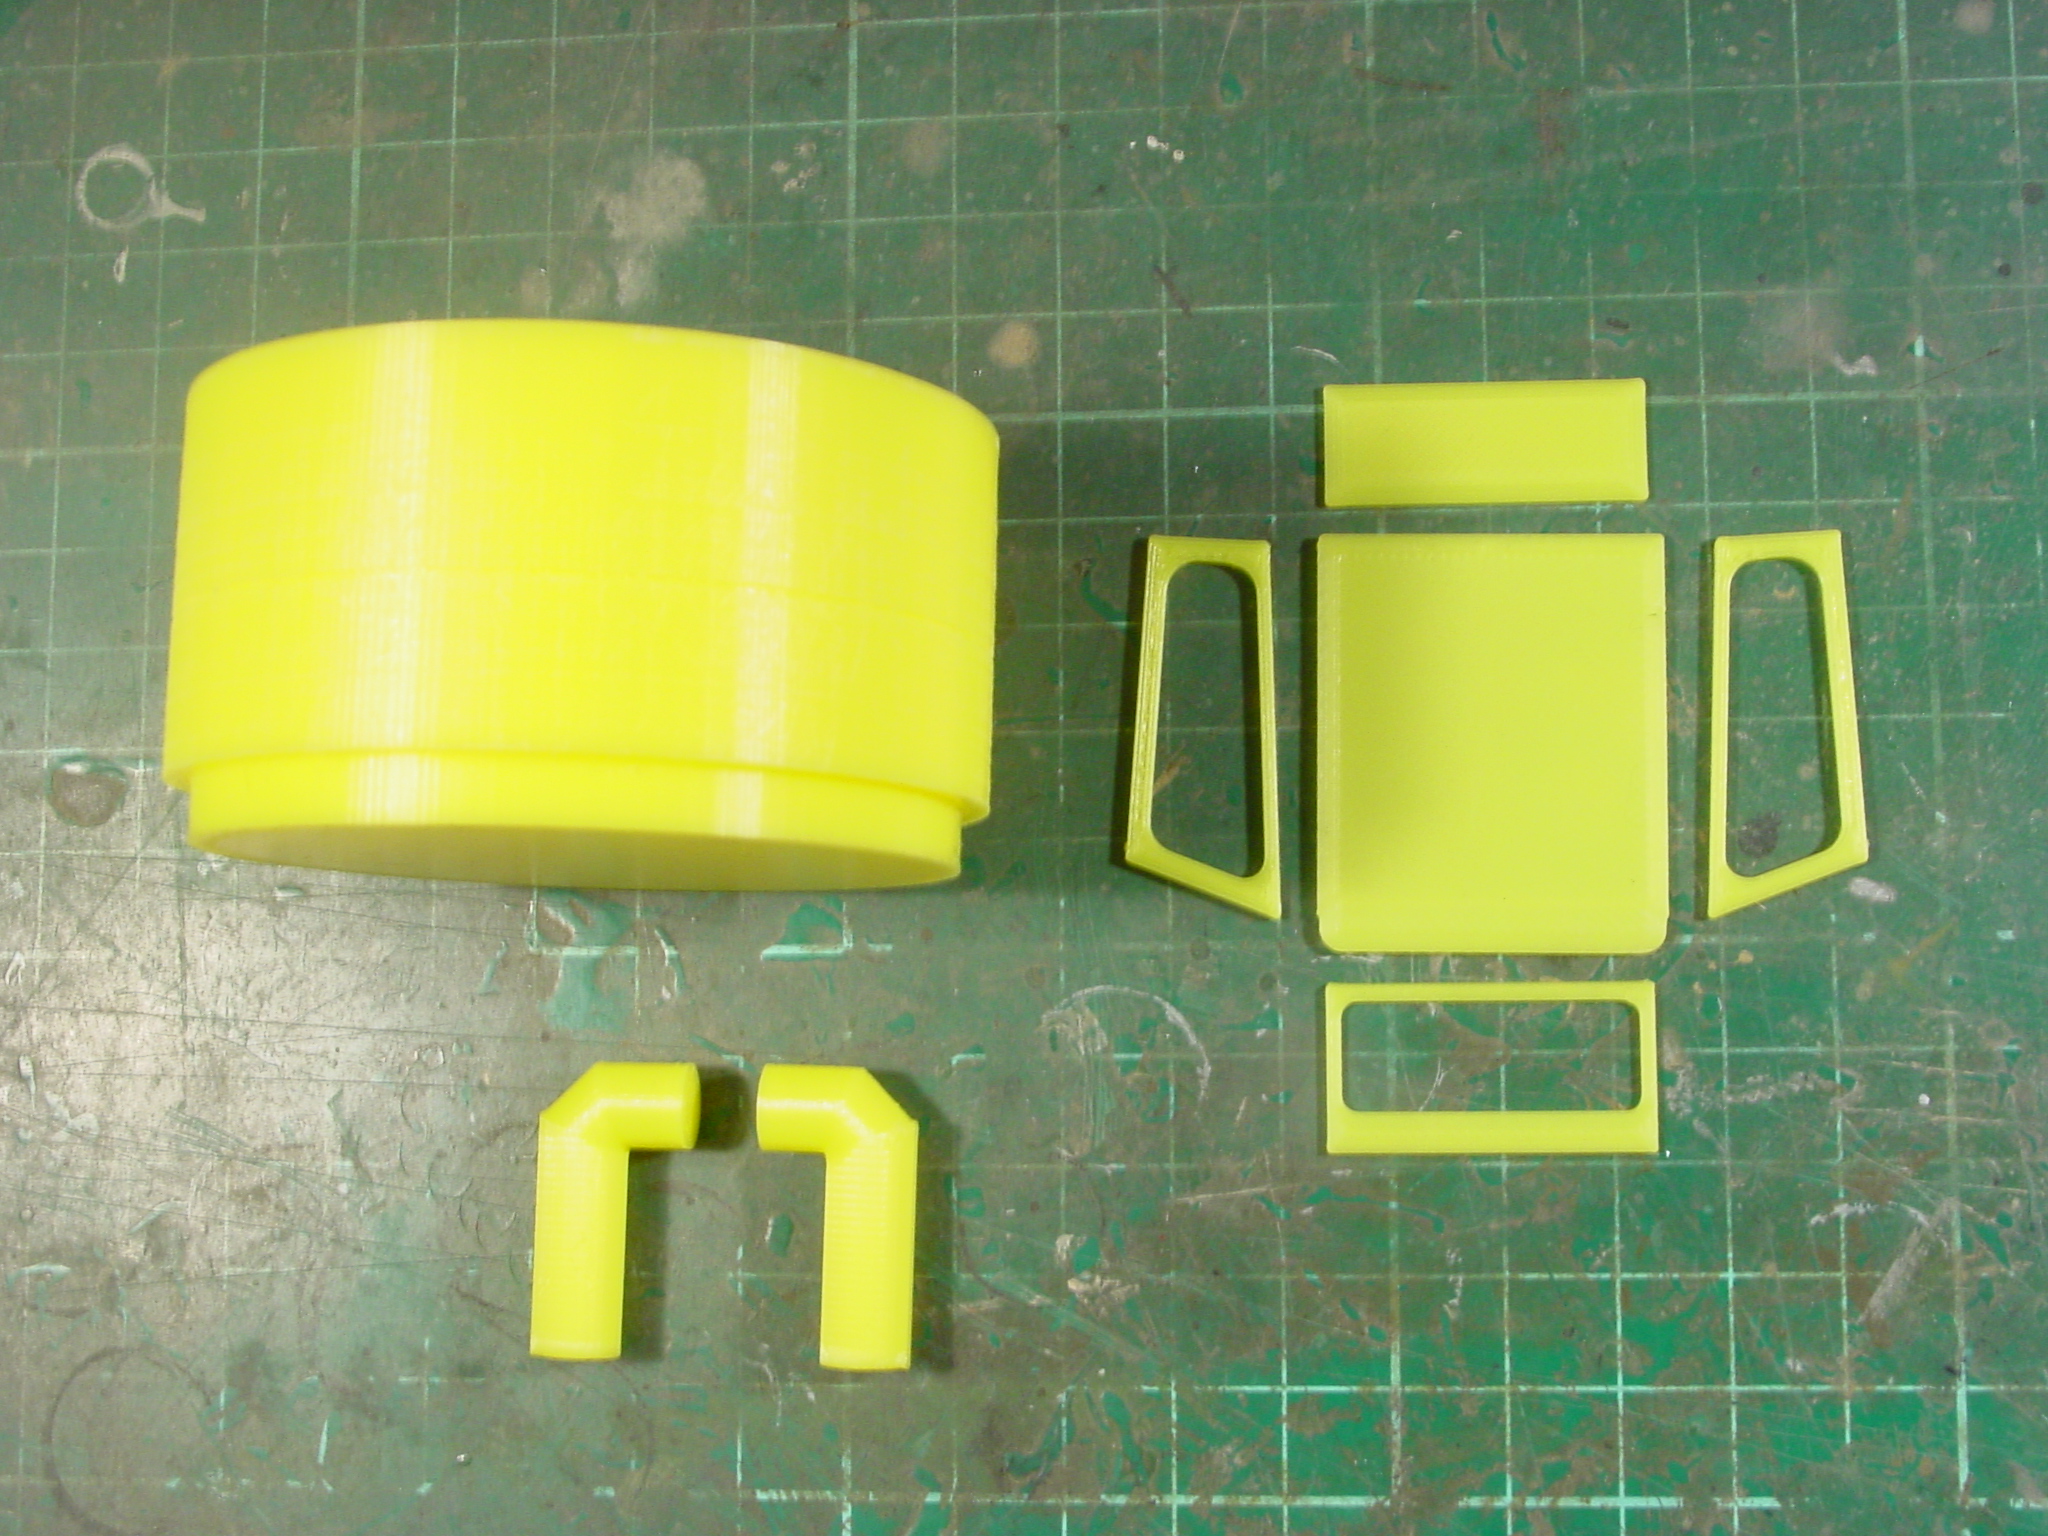
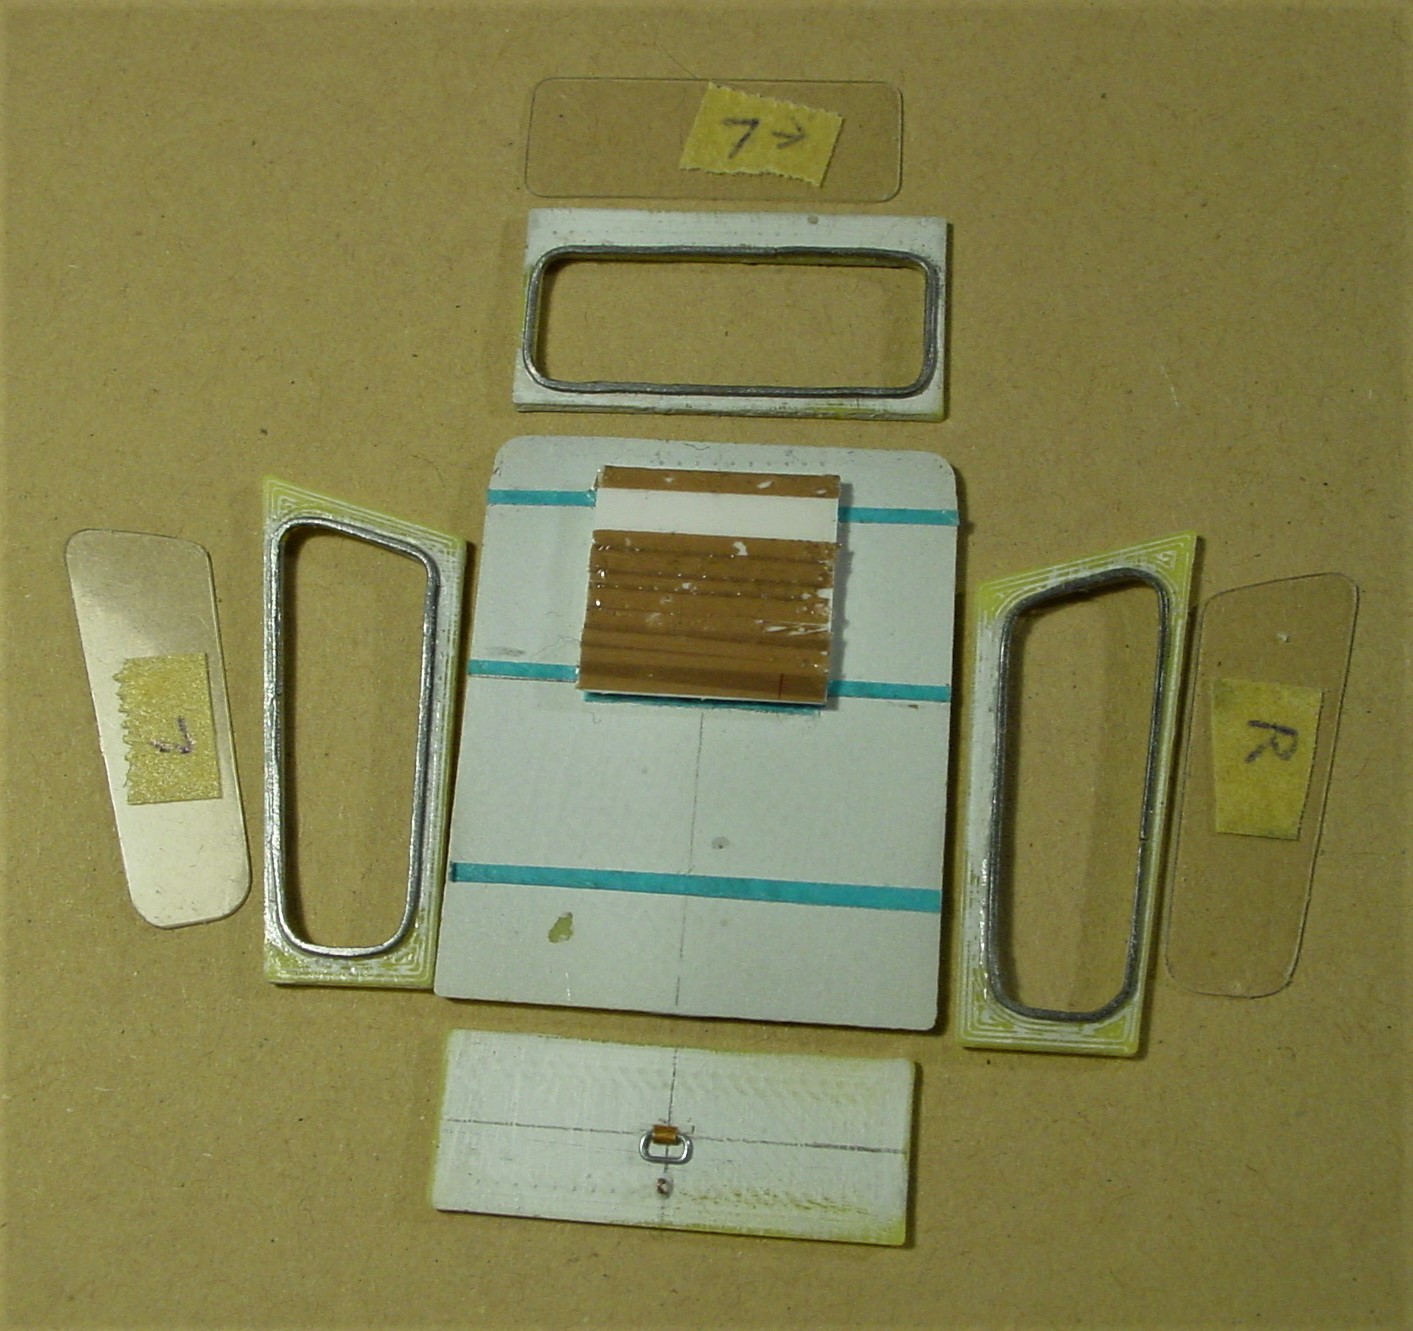
The "turret" (weight simulator), exhausts and the driver's rain cover are 3D-printed parts from a friend. The tow-bar is from Perfect Scale Models. Front sideskirts are resin copies. The other changes and additions were scratchbuilt. Base model is Meng's Leopard 2 A4.
© Leopard Club
![]() Contact us at leopardfibel@gmail.com
Contact us at leopardfibel@gmail.com