

 LF1356
Scale: 1:35
Media: cast resin, photo-etch, brass wire, electrical wire, string
Reviewed By: Michael Shackleton
The Canadian Leopard C1 is quite a complex subject. There were many small changes during its years of service, so choosing a specific time period for a conversion is not an easy one. Once upon a time, the Canadian company Maple Leaf produced early and late conversions for the C1, but these are long out of production and nearly impossible to find now.
Now though, Legend and Jason Bobrowich (lead contributor to this kit) have co-operated on what amounts to the final version. However, by leaving off certain elements, this set allows you to go back in time to model earlier variations.
I will quote Jason here to explain at least some of the problems with choosing a period:
" The 'early', 'mid', and 'late' versions of the Leopard C1 are terms coined by modellers to identify various modifications and upgrades. They are not official designations. The tank was simply identified as the Leopard C1 from start to finish. As with almost every Canadian AFV, various modifications and upgrades occurred over the life cycle."
Below is an overview breakdown of the timeline for larger visible operational and training modifications. As the tanks got older, there were variations seen across the entire fleet due to time delays in changes occurring, modifications being completed over extended periods of time, or that some modifications were simply not applied to all tanks. I have compiled this information from available technical information, studying a very large variety of personal, private, and published images, personal accounts from crewman who served on the Leopard C1s beginning in 1979 all the way to the tanks being retired, and my own experiences as a Leopard C1 Crew Commander and Advanced Armoured Gunnery Instructor.
That being said, there are always exceptions and I am not professing this to be the ultimate list. However, I have faith in the information compiled and I believe this provides the modeller with a very good sense of the evolution of the Leopard C1.
There is no black and white with the Leopard C1 modifications and upgrades. Some modifications were done on all Leopard C1s, and others were not. Seeking out appropriate reference material, asking questions, and understanding the modifications will greatly assist those modellers desiring to build a specific version of the Leopard C1.
As you can see, the amount of information below would be impossible to include in a small conversion box as part of the instructions. It would likely need to be accompanied by images of both the conversion parts undergoing multiple builds for the different versions, and the real tanks to be fully in depth. So no, a list of modifications is NOT provided in the Legend Productions instructions. Below you have one for free, to use and share."
The same conversation continues as a timeline for all of the changes on this discussion forum thread. According to the list in this thread, this Legend conversion will cover C1s from 1986 (when the IRS 100 Thermal Pointer was introduced) until 2000 when C1 was withdrawn from service in favour of C2.
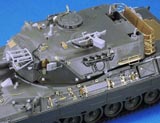
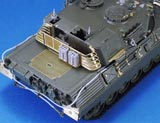
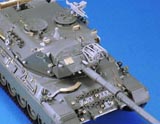
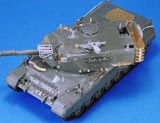
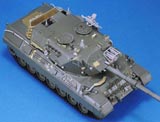

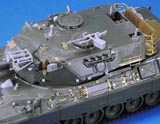
Photos above courtesy Legend Productions
There are twenty-two blocks of the usual superb Legend casting, three photo-etch frets, 0.3 mm brass wire for making handles, 0.8 mm brass rod for making the turret basket, thin electrical cable for the searchlight and a length of thread for the tow cables.
Resin parts include the PZB 200 thermal sight, IRS 100 thermal pointer and the wide cage that protects them, a water and a fuel jerrycan, gun cleaning rods, mantlet plugs, C6 machine gun with mount and ammo box, turret mounts for the later introduction of MEXAS blocks, various roof fittings including a pressure sensor and wind direction sensor, cable reel on the turret side, an antenna mounting unit and antenna bases, and various fittings around the hull. There is even a cradle to hold that PZB (when not in use) that fits inside the rear searchlight box ~ nice.
Amongst the three brass frets you will find a host of parts to complete the late-style turret stowage basket, rear mud flaps, travel locks, mantlet plug chains, padlocks, jerrycan racks, white-light searchlight door, hull fittings for MEXAS blocks, smoke chains and a full suite of tool brackets.
The instructions are 4-pages in full colour. Although the photos are quite small, they are perfectly clear and readable.
Some things are NOT mentioned in the instructions are:
Before starting construction, you will need to have a definite idea of which particular vehicle (or time period) you are going to build. Check your own references carefully.
All of the photos in the instructions are quite busy - but do not be put off as everything is clear in my opinion. The first page of the instructions show photos of a partially built or completely built-up model labelled with the relative part numbers. I don't see anything complicated here.
To simpilify the operation - if you wish - the PE etch tool brackets could be left as the plastic items in the Meng kit are pretty good. However, all of the MEXAS mounts will have to be made from the PE parts supplied (but remember these were only added relatively late). The turret-side luggage racks are shown as all-brass, but it might be easier to make the main frame from 0.8 plastic rod instead of brass. You will have the PE netting to get the shape right.
The wiper system for the driver's periscopes is applicable to ALL C1s (the etch 'roof' and the cable conduit down the side), so no problem here about choices.
Once again, the extra grousers on the hull front are only necessary if the MEXAS mounts are fitted (relatively late mod). Otherwise, use the kit parts. The engineering attachment bracket and electrical connection armoured cover may not be fitted to your particular reference vehicle. The C1 hulls, in reality, went on to become C2s when German 1A5 turrets were mated with them. The revised grouser layout, MEXAS mounts, etc. should be familiar to anyone who has already built a Takom C2.
Now comes the fun part, the turret basket. This was only fitted later on, so you can skip this as it does look a little daunting. However, the construction of this is very clever indeed. However, getting the curves consistent will not be easy. When I built my C1 MEXAS a few years back, I nearly gave it up just because of the basket I had to build at the time. Legend have provided drawings for the five levels and the five curves you will need to make (all with different lengths). What I did was to make a template to fit INSIDE the curves of the bottom frame from thick plastic card. I think you will have to anneal the 0.8mm brass rod provided to make it more malleable (bendable). What the instructions don't make clear is that the base frame has to go through 4 PE supports. I would suggest not making four cuts, but just one in the rear edge (where it will be largely hidden), then slide on all four supports - in the right order. In the instructions, Legend have misnumbered P85 (2 of them) as P87 on the little orange/green diagram. The clever part is that once the PE mesh is in place, the whole thing can be hinged to the right angles on the back of the turret, once the top frame is also in place. It isn't going to be easy, but Legend have provided a lot of photos to take you through the stages.
The next complexity are the sights on the mantlet and the protective cage. Seven photos show the positioning of the parts and you will have to study them closely. Below are some photos of the real thing - without the sights - to show positions of the brackets.
You may also notice that the left-side rangefinder is a white light searchlight on the C1.
US-style antennae (LW021B) were used throughout the early life of C1. Legend give you the resin bases for these antennae. C1s were posted to Germany from 1979, after which they were equipped with much shorter 1-metre antennae as depicted in LW046. When the Leopards returned to Canada in 1993, some retained the short antennae. The short antennae were then replaced with regular antennae mounts and two-piece antennae (as used later on the C2 - LW014B) as supplies of the short ones ran out.
Not much really. Legend have done a great job here to capture most of the points to depict C1 in its later life. However, there are some things missing up front. Two of them relate to the armoured cable cover which is only fitted when engineer attachments are used (e.g. dozer blade). There should be a pair of mounting points at the top of the glacis and - though not fitted all the time ~ an angled mounting plate/bracket that the armoured cable cover attaches to. See the two following photos. Thanks to Jason Bobrowich for the info.
One other thing that is missing are rubber mudflap reinforcing plates at either side of the glacis plate. No big deal really.
Further upgrades for this kit are available from Leopard Workshop:
Perfect Scale Modellbau Engineer Attachments:
All used on leopard AS1