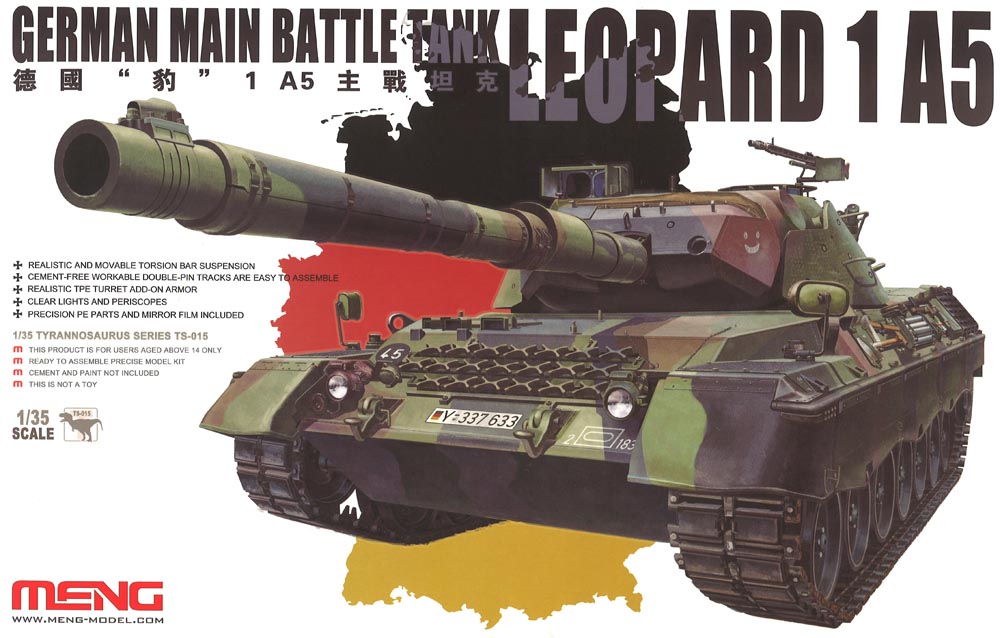
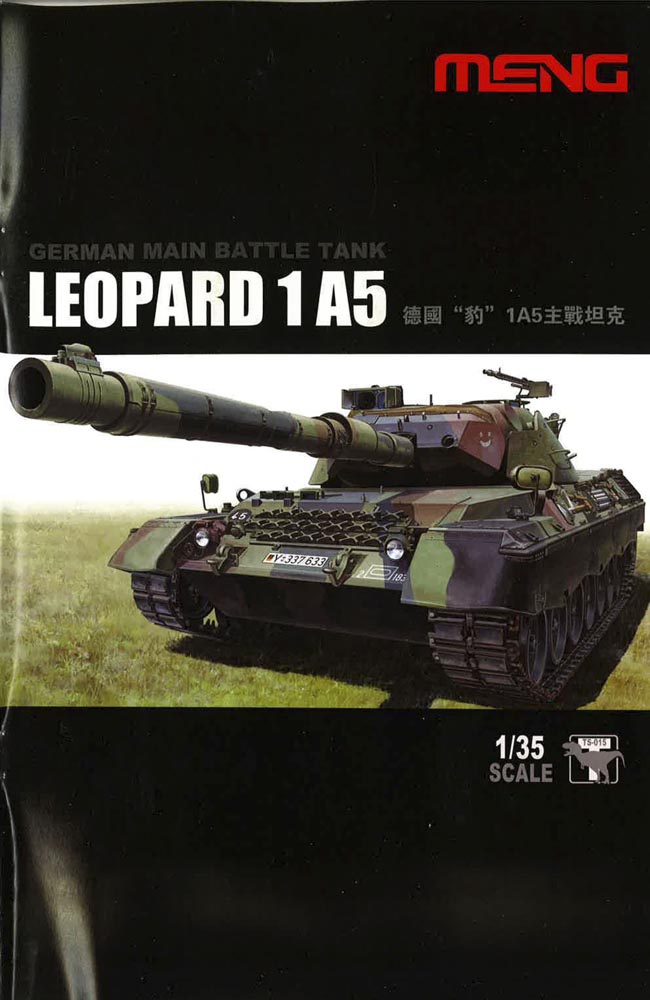
TS-015
Scale: 1:35
Media: injection moulded plastic, photo-etch brass
Reviewed By: Michael Shackleton

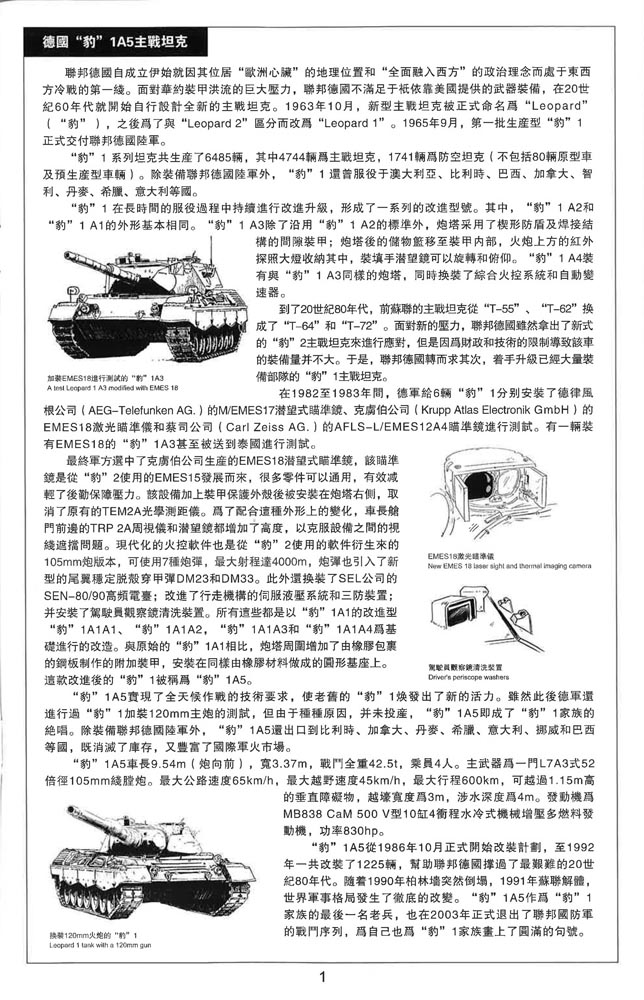
The Leopard 1 was a main battle tank designed and produced in West Germany that first entered service in 1965. The Leopard project started in November 1956 as a collaborative project between Germany and France in order to develop a modern tank, the Standard-Panzer, to replace the Bundeswehr's American-built M47 and M48 Patton tanks. After two series of prototypes and an extensive series of 50 pre-production models, Leopard 1 entered service with the Bundeswehr in 1965.
In total, 6,485 Leopard tanks were built, of which 4,744 were battle tanks and 1741 were special purpose variants - not including the eighty prototypes and pre-series vehicles. The Leopard quickly became a standard of European forces, and eventually served as the main battle tank in eleven countries worldwide.
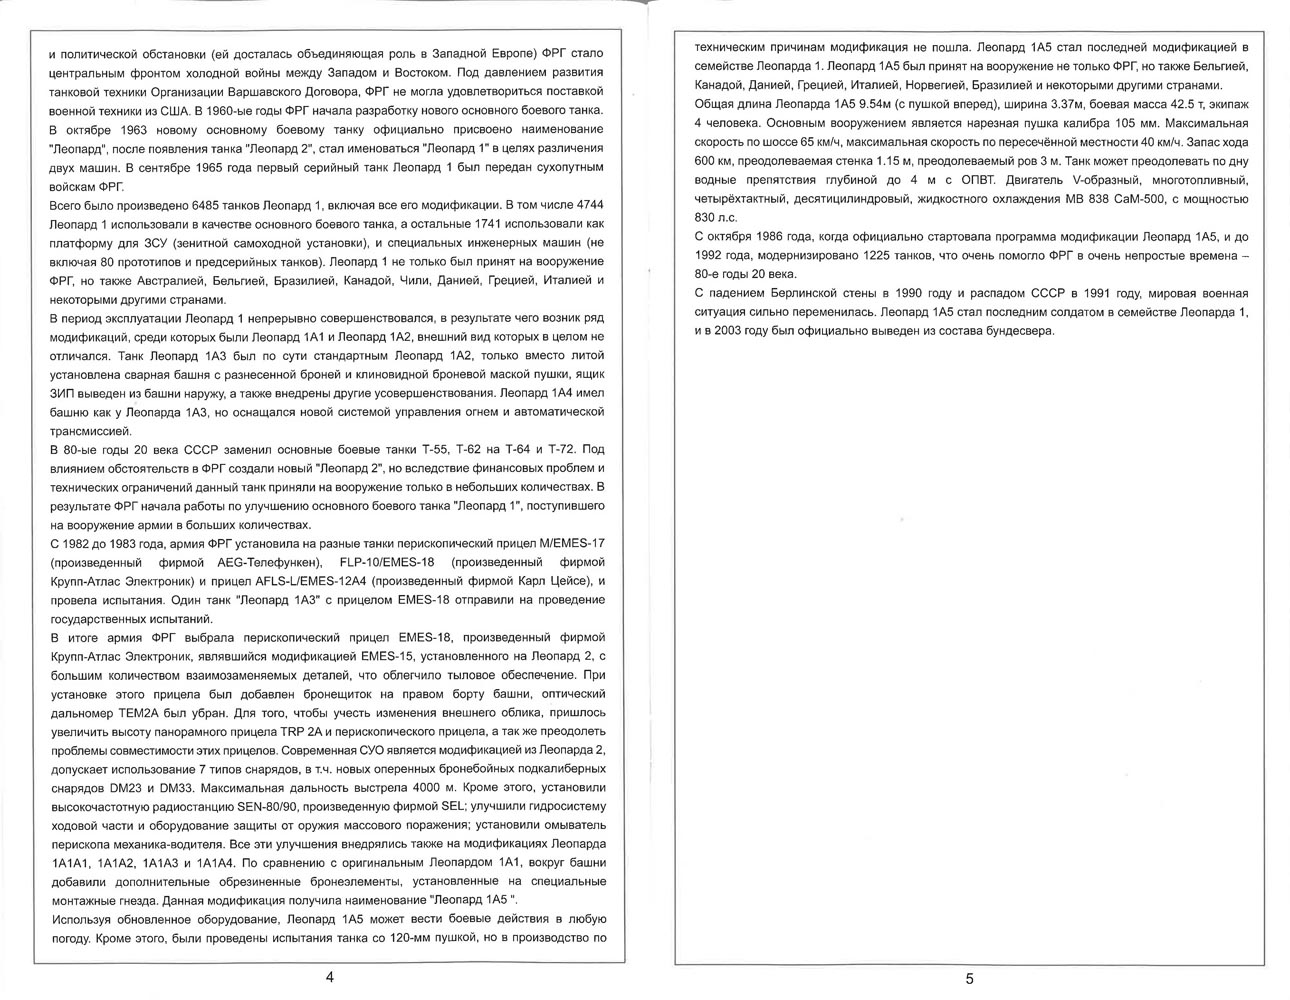
Leopard 1A5 was an update from the earlier 1A1A1 series, so these were not new-build tanks. Leopard 1 was continually developed from the original four production batches built in the late 1960s. This means that features from all batches can be found on 1A5 such as different style exhaust grilles and even square infantry telephone boxes from Batch 1. It was continually evolved to face the Cold War threat of Soviet T-55 and T-62 and later of T-64 and T-72.
Leopard 1A5 could be described as the 'ultimate Leopard 1' and this final update incorporated the fire-control system and thermal image site developed from the recently intoduced Leopard 2. 1,225 1A1A1s were modified with EMES-18 between 1986 and 1992. This was a revolution in the world of fire-control systems, the first to use a thermal imager allowing all-weaher, day or night, vision. 1A5 went on to be used by Brazil, Canada (C2), Greece, Turkey, Italy and Norway.
Since 1990, the Leopard 1 has gradually been relegated to secondary roles in most armies. In the German Army, the Leopard 1A5 was phased out in 2003 while Leopard 1 derived vehicles are still widely used. The Leopard 2 has taken over the MBT role. Leopard 1 hulls have been re-used in a wide variety of roles.

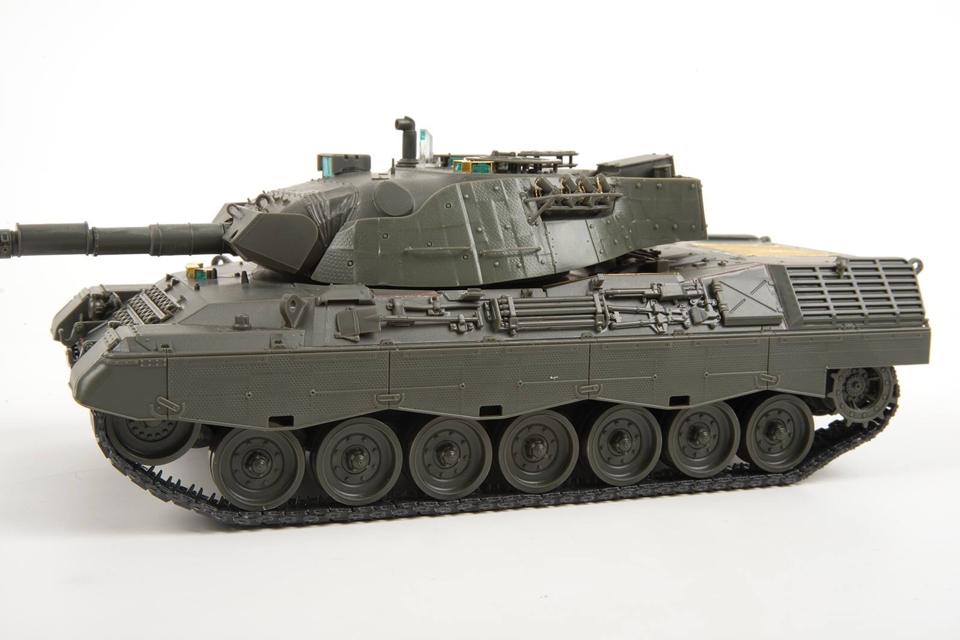

The model built almost straight from the box with photos courtesy of David Parker of Meng/AFV Modeller magazine. The only additions have been weld lines and Leopard Workshop mantlet plugs.
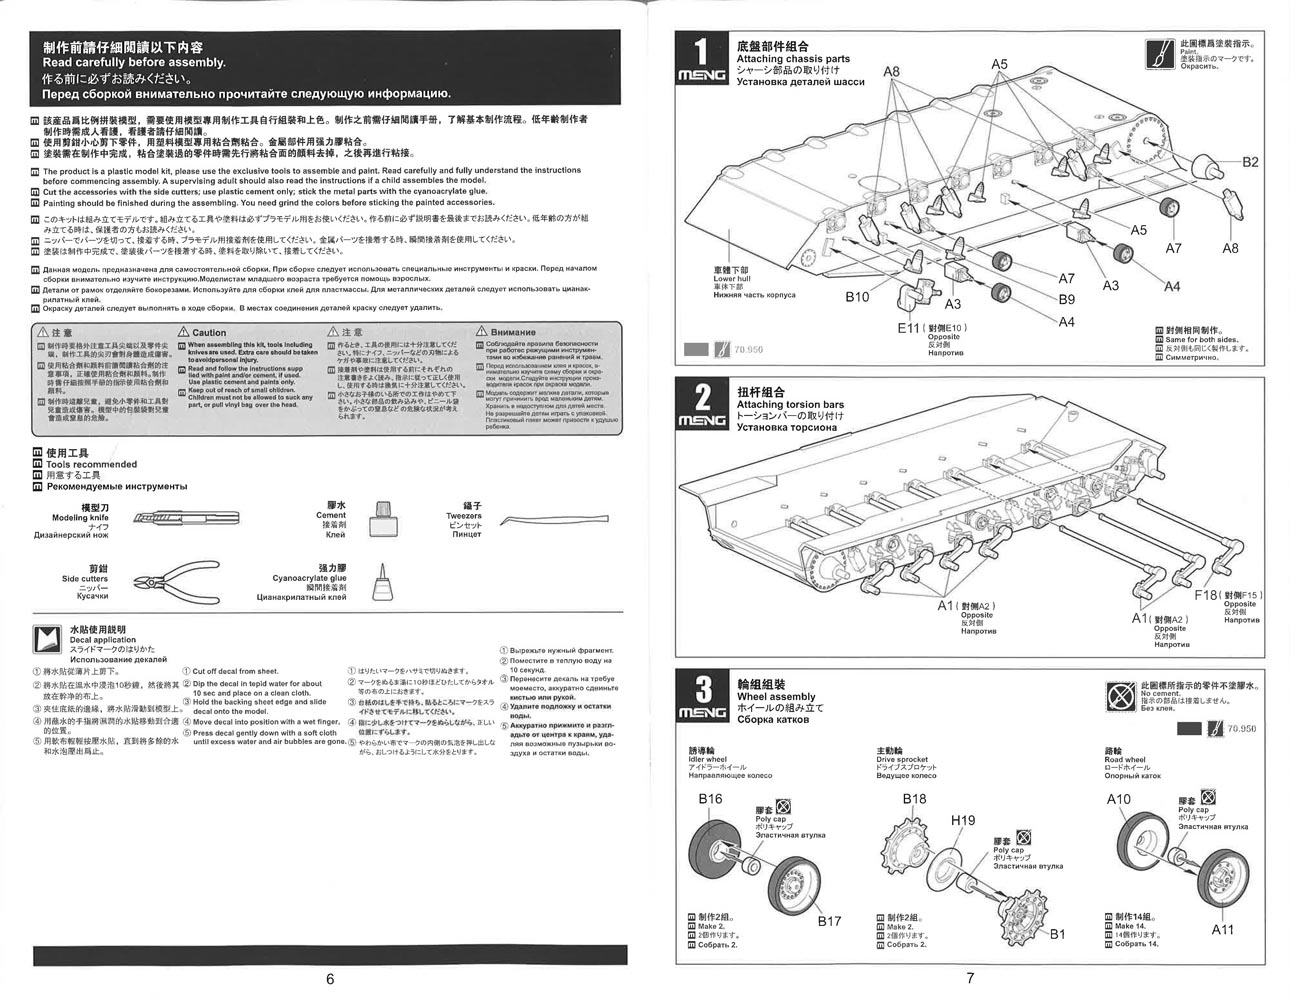
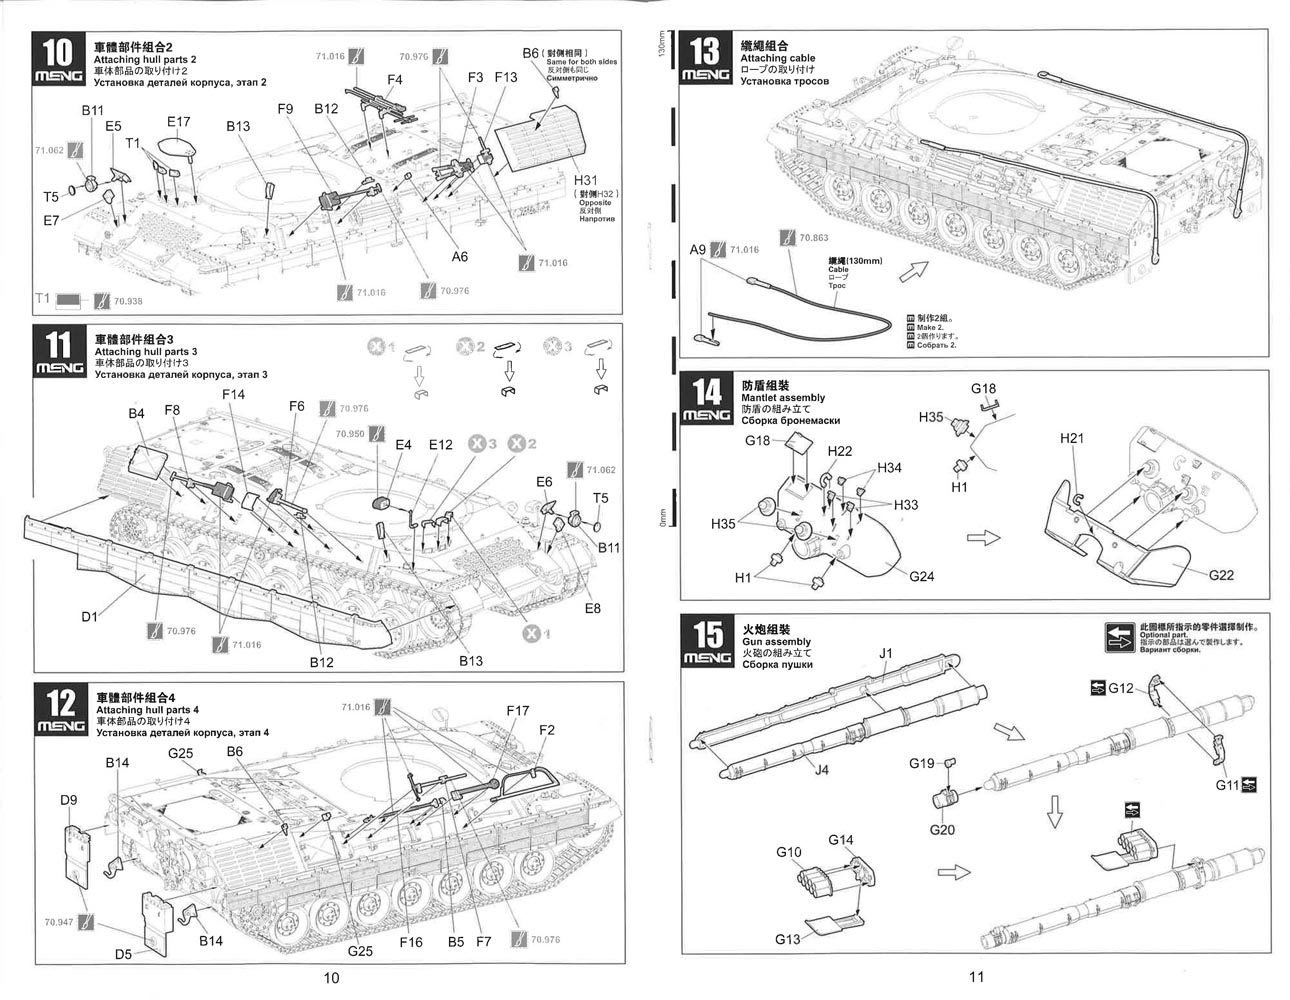
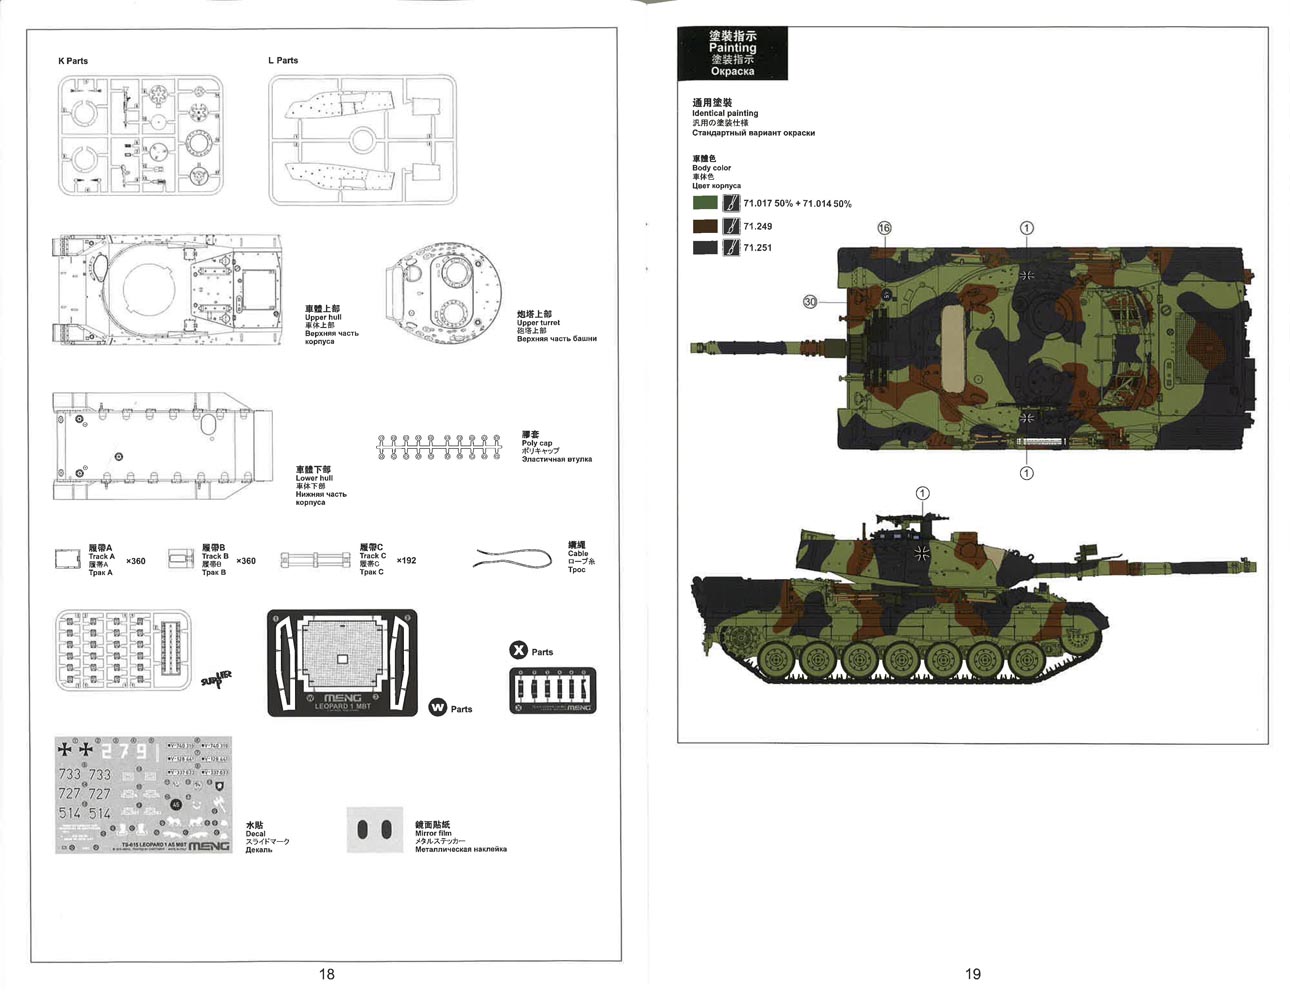
The instructions are presented as a 22-page, small format booklet with colour on the cover and for the camouflage/decal profiles. Each step is illustrated in a logical order with beautifully clear black and white line drawings. There are 29 steps in the construction process.

The contents are:
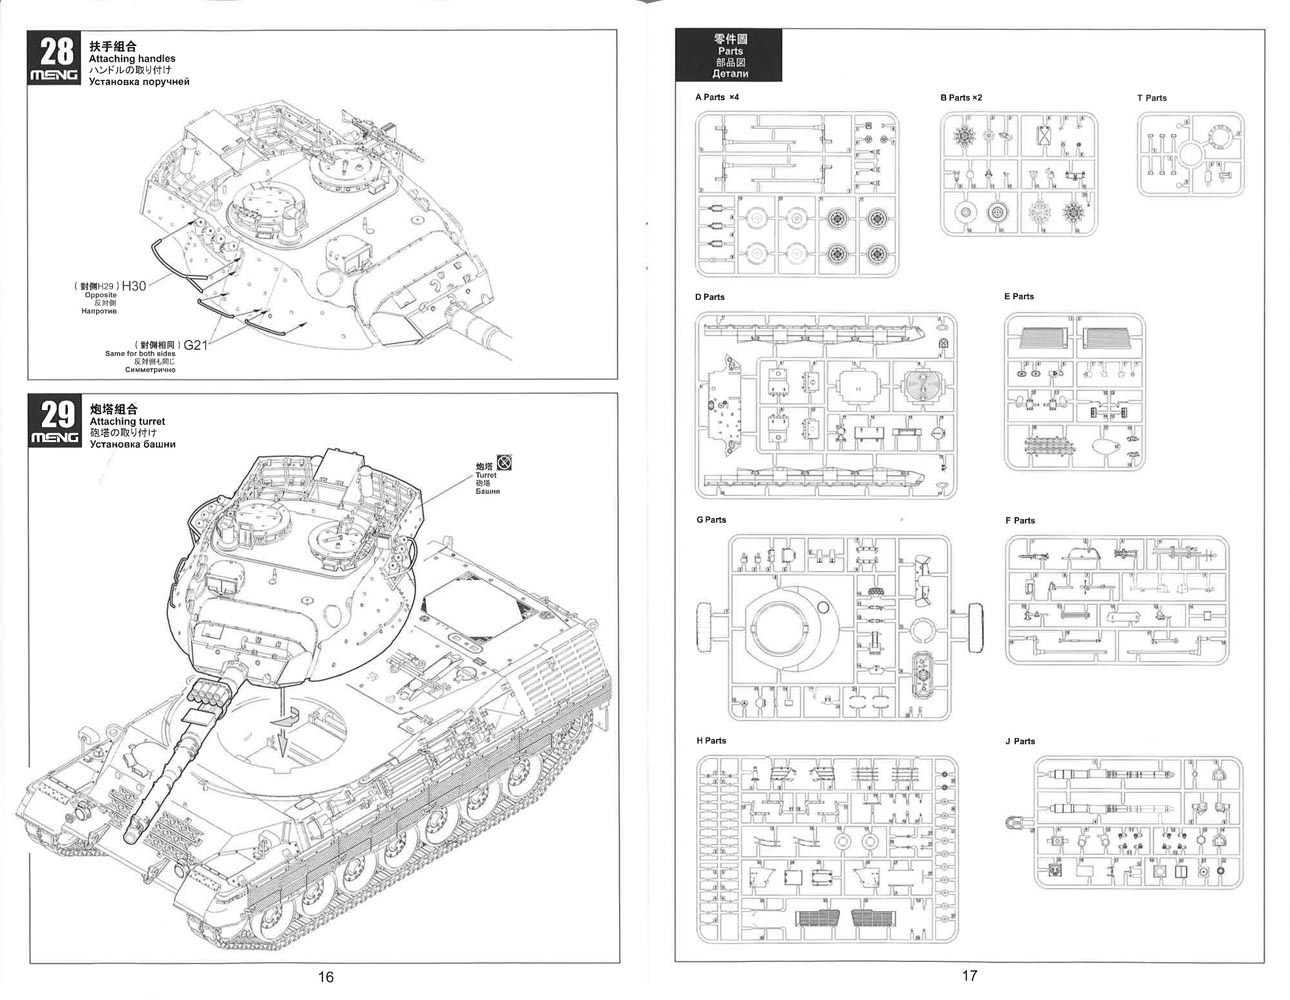
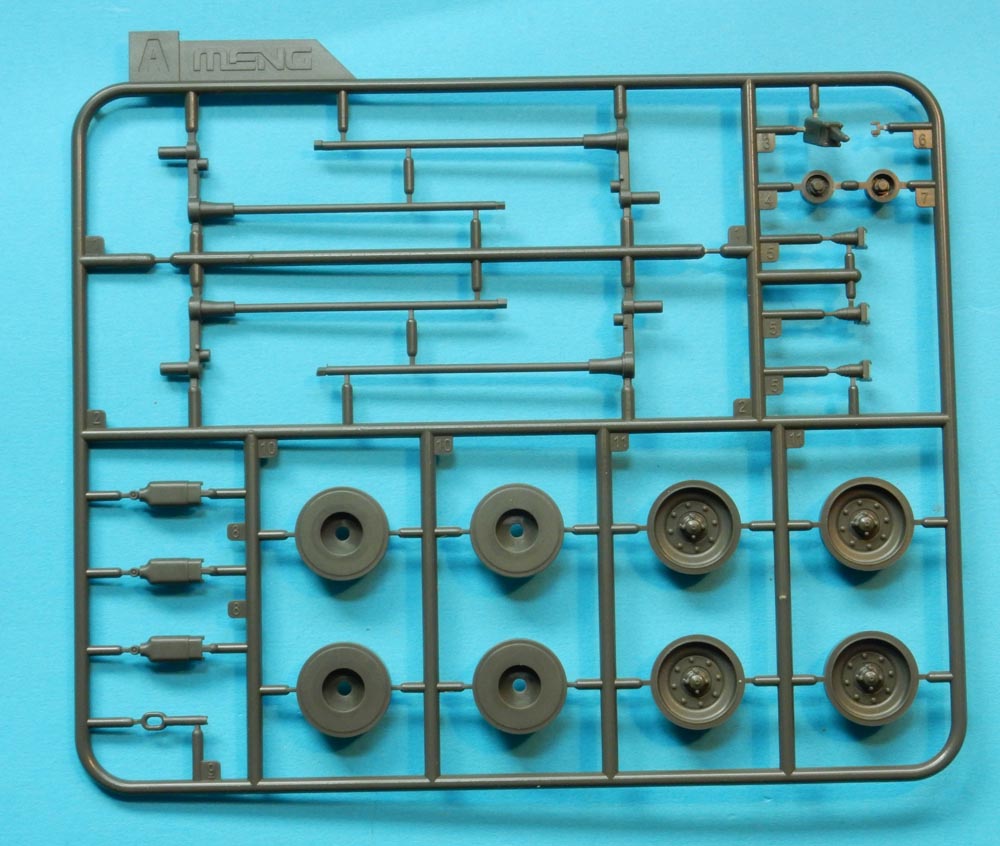
Sprue A (4 of) - parts for the main suspension including torsion bars, road wheels, shock absorbers, bump stops, return rollers.
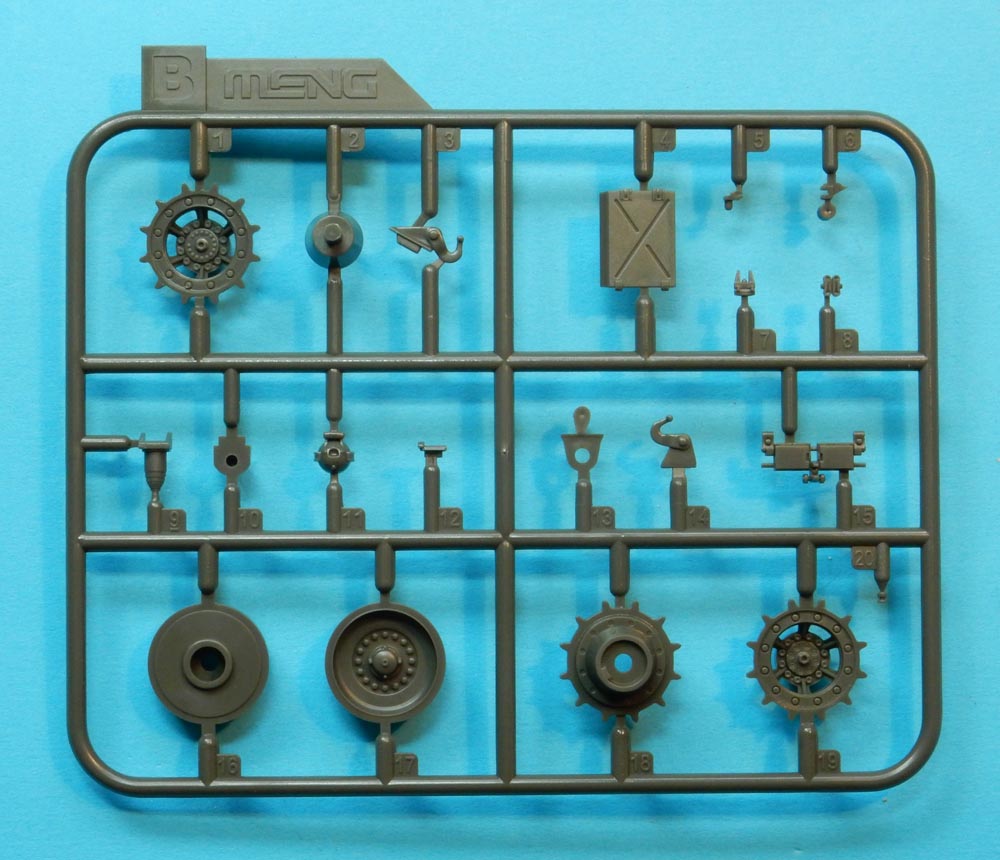
Sprue B (2 of) - idlers, alternative sprockets, headlights, spare track, various fittings.
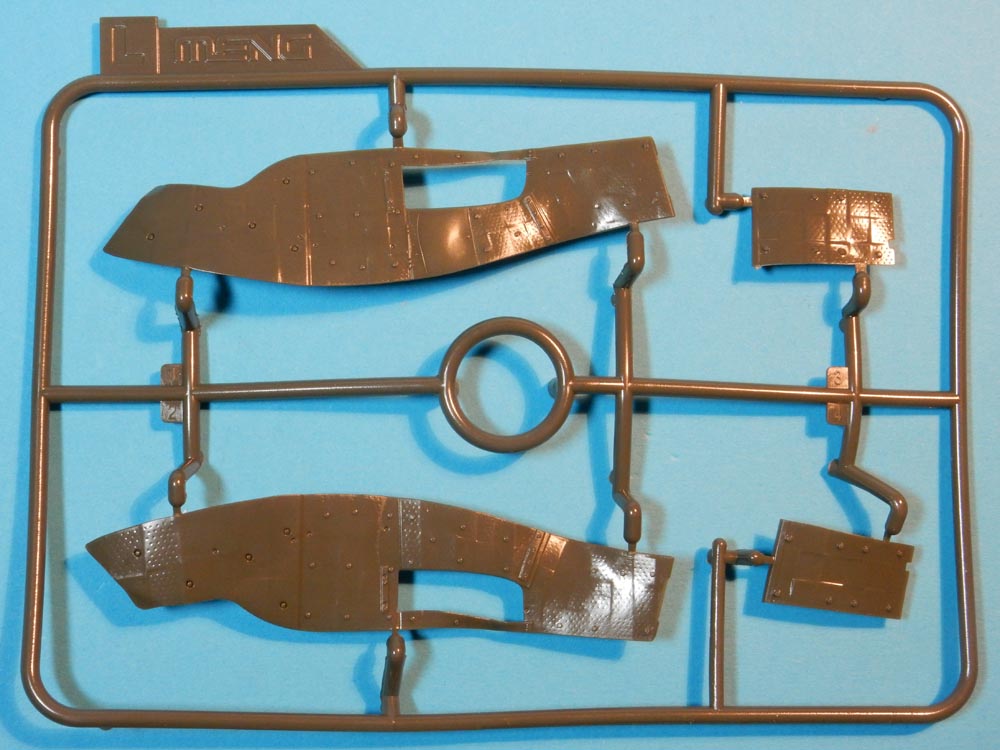
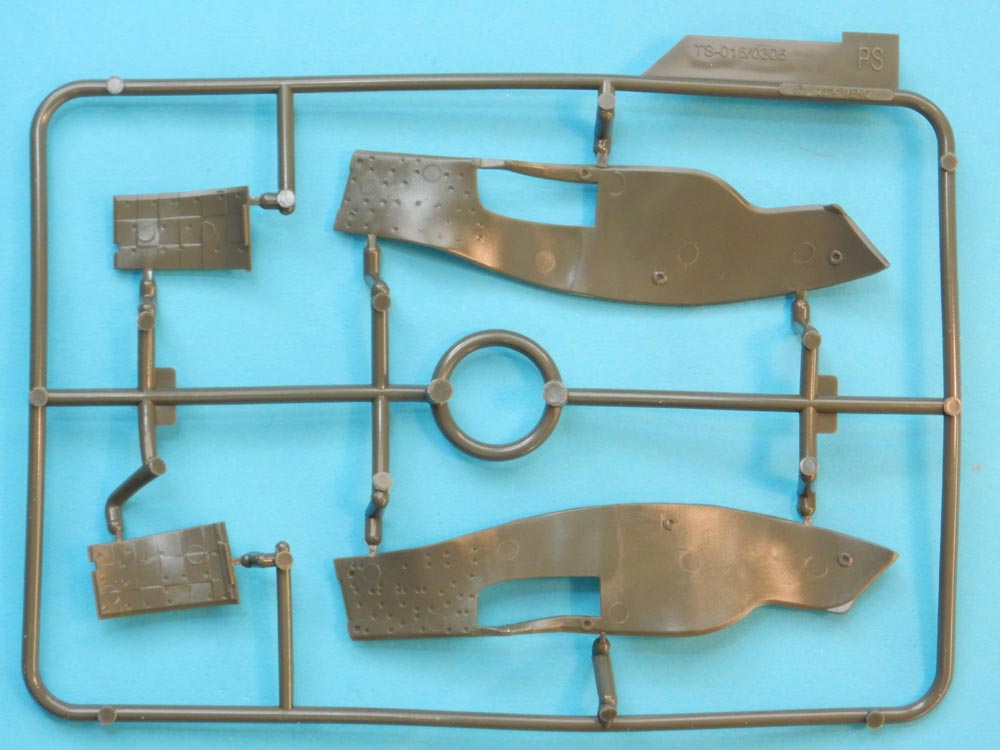
Sprue D - side skirts, rear hull plate, alternative mudflaps, alternative engine deck grilles (Greek option not needed), gun travel lock, toolbox.
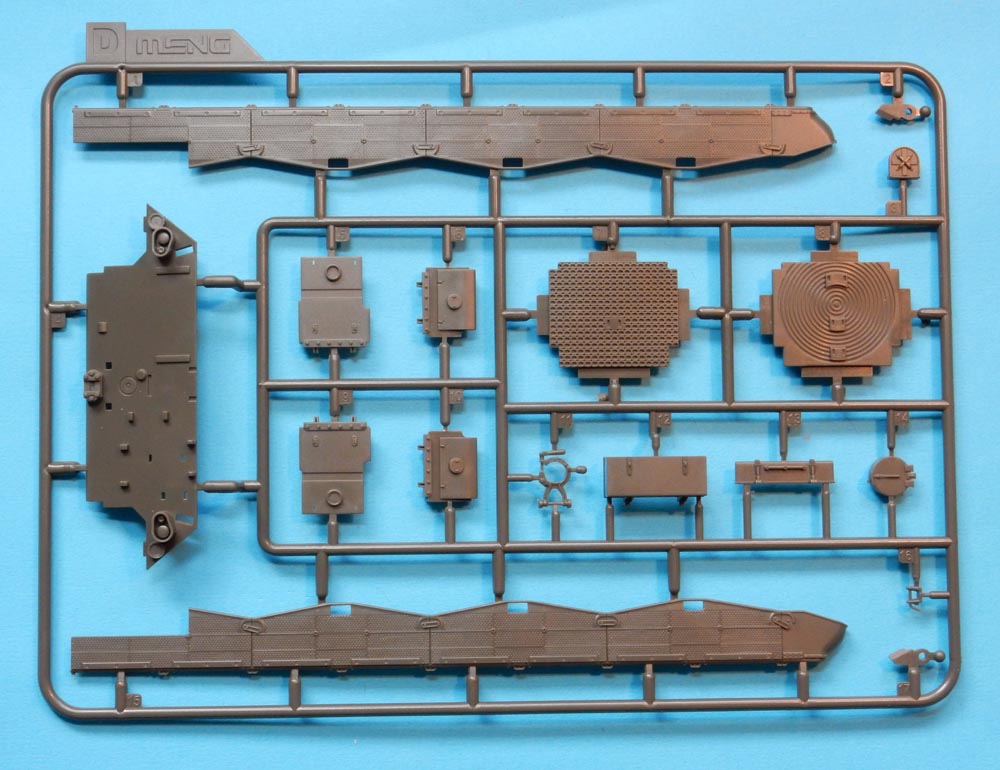
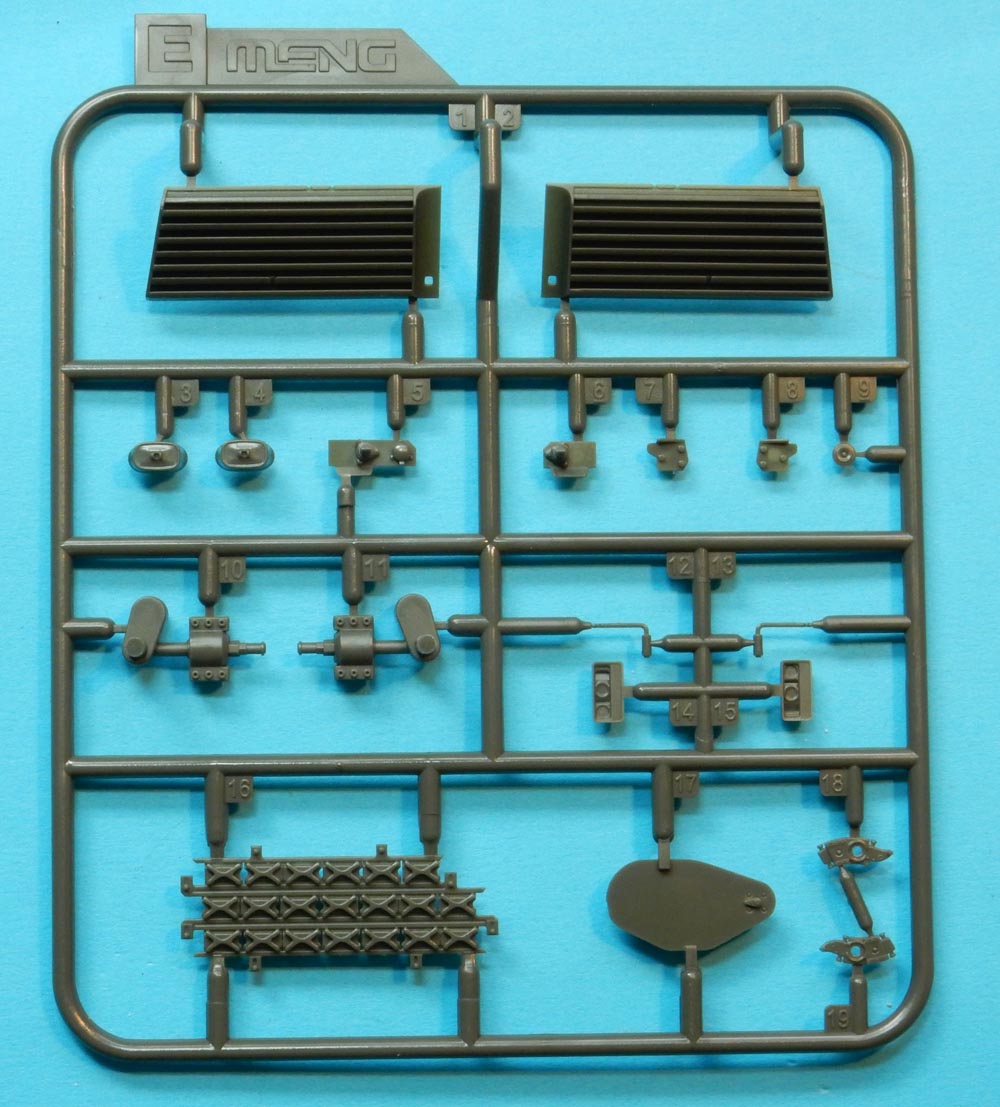
Sprue E - welded engine exhaust grilles, grouser rack, driver's hatch, idler adjuster, various fittings.
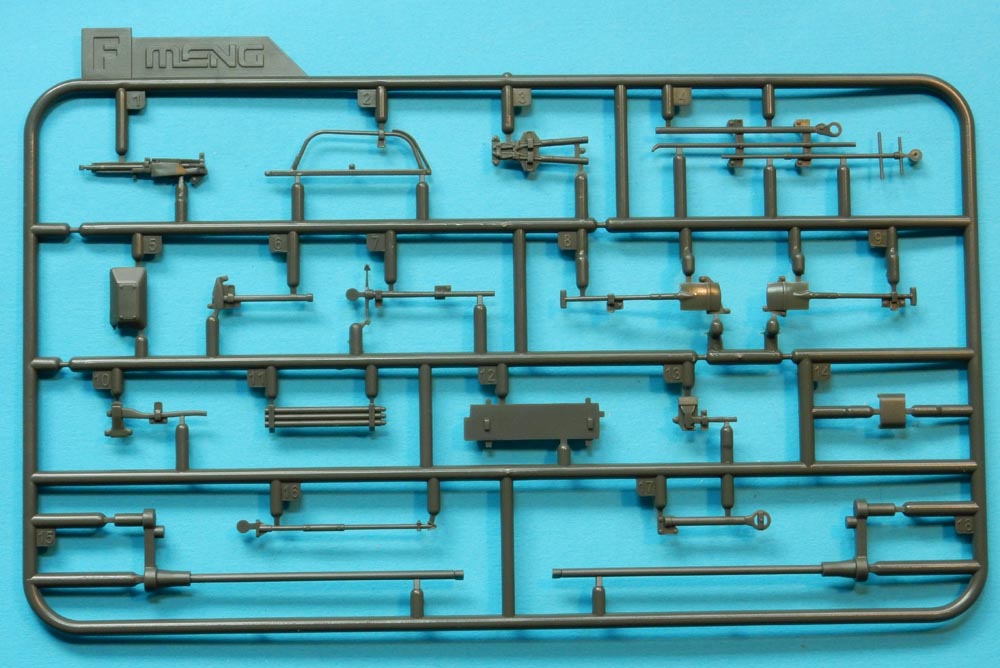
Sprue F - tools and NBC intake, front torsion bars.
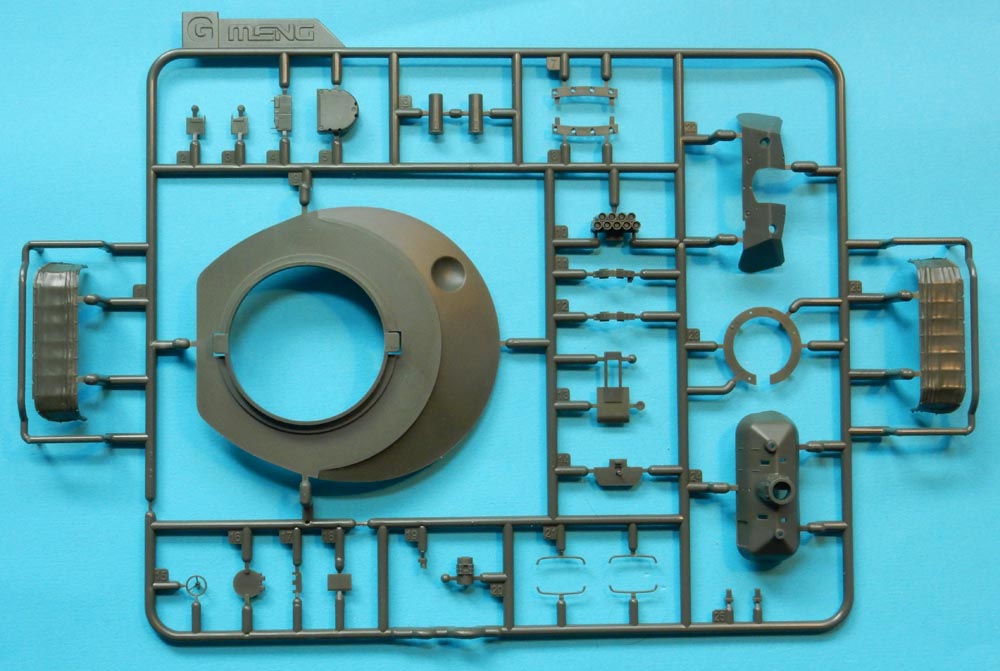
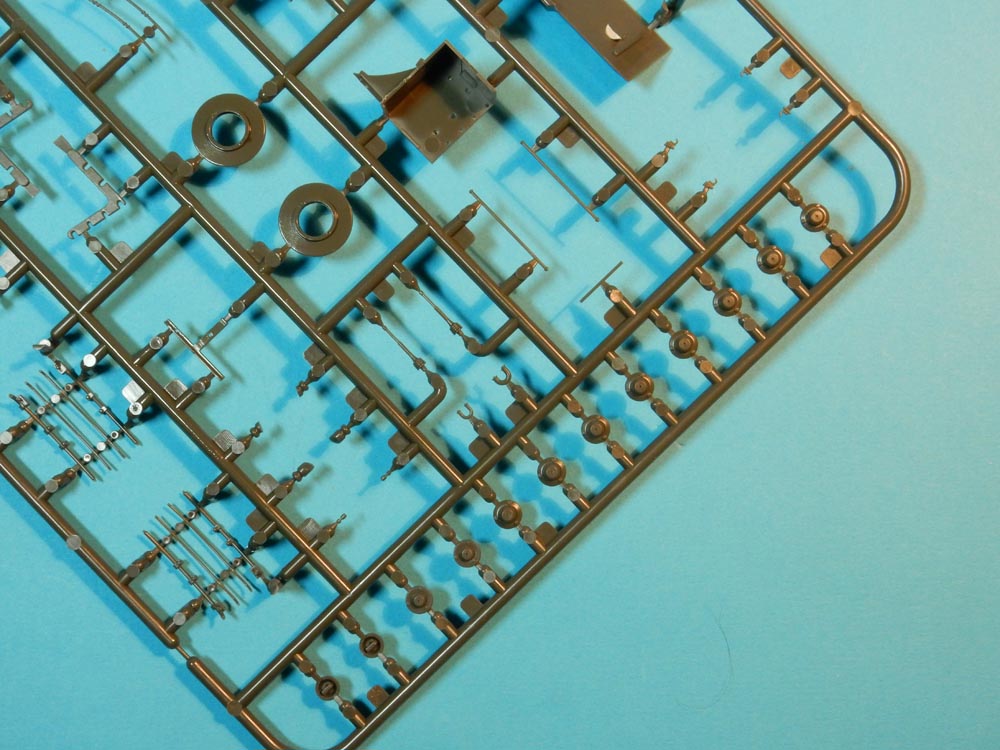
Sprue G - All new turret base, mantlet and mantlet shield, EMES-18 housing, gun-fire simulator and various fittings.
Sprue H - More turret fittings including armour mounts, searchlight box, stowage basket, ples cast exhaust grilles.

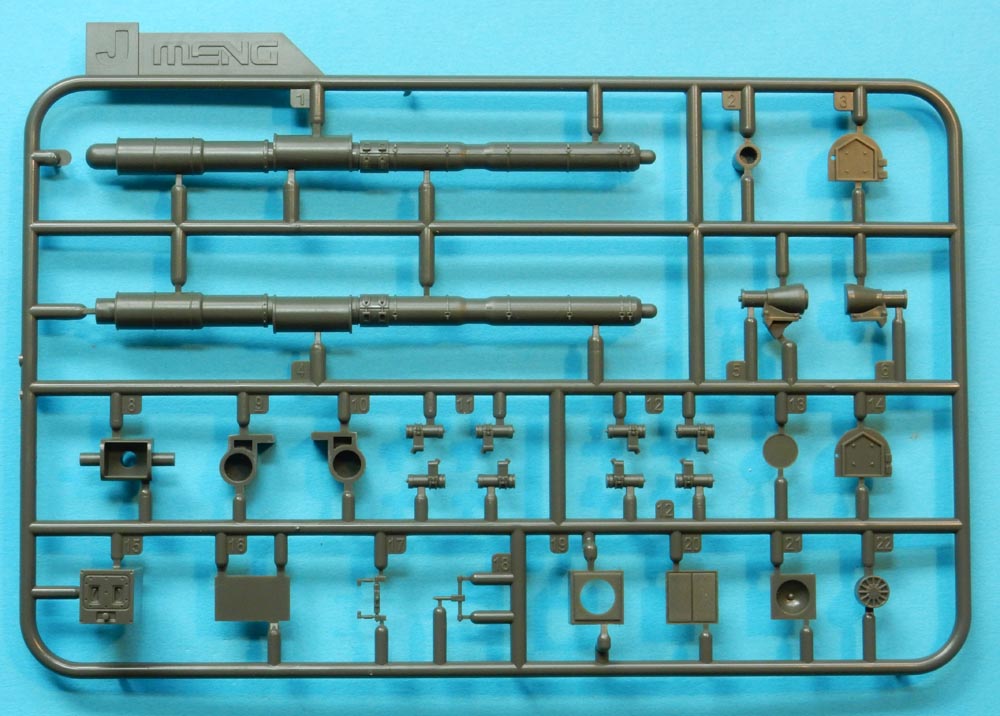
Sprue J - main gun, searchlight and PZB200 (both not used on 1A5), smoke launchers, gun mount.
Sprue K - cupola parts, MG4 and aerial mounts.

Sprue L - Add-on armour moulded in a flexible plastic.
The previous individual plastic track links of the 1A3/1A4 have now been replaced by Meng's superb set of workable tracks reviewed here. Vinyl tracks are no longer supplied.
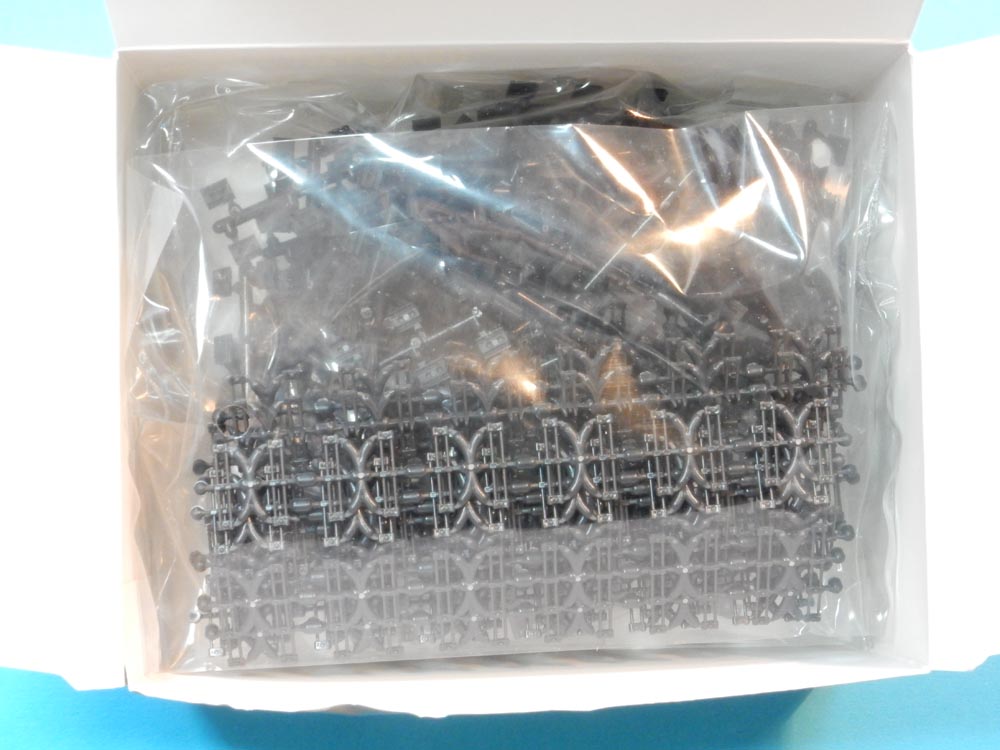
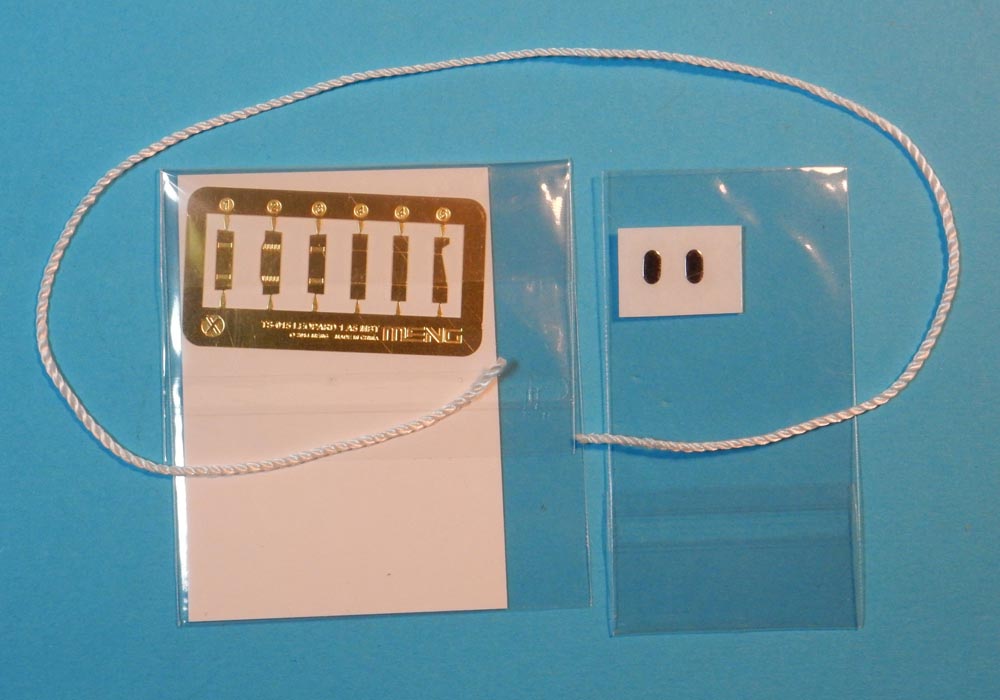
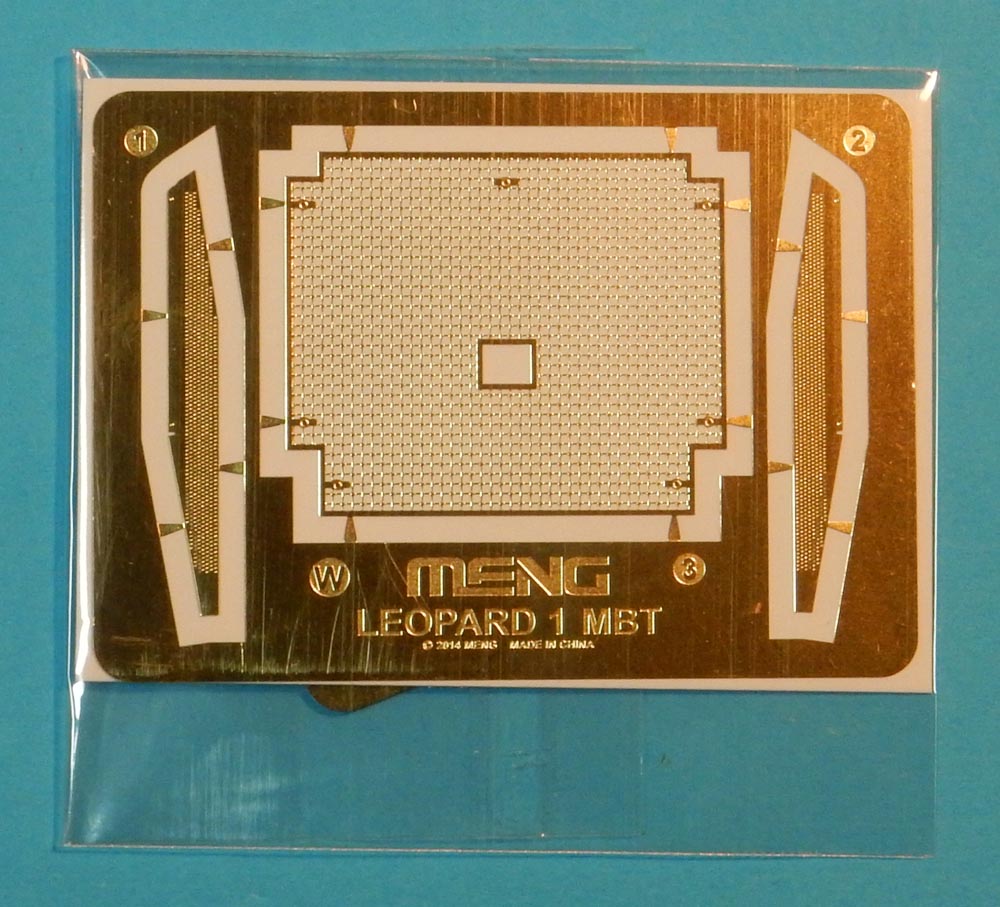
Other parts: lower hull; upper hull; upper turret; decal sheet; two etch frets, string for tow cables; poly caps for wheels, pre-cut foil for rear view mirrors and a jig for building the tracks.

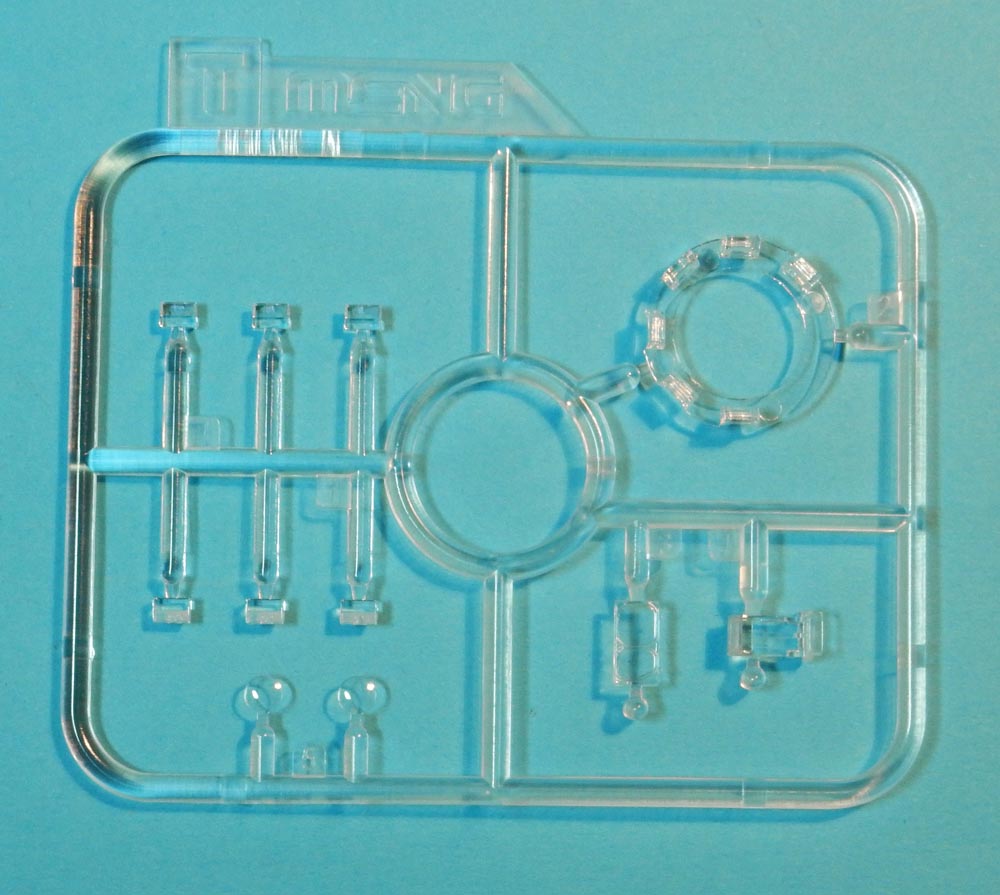
Sprue T - clear parts including periscopes, headlight lenses.
Decals
This is the second Leopard 1 from Meng. Much of it is inevitably based on their original 1A3/1A4 kit. The wheels and grilles have been improved as far as the hull is concerned, but the turret is completey new and very nicely done.
The Revell Leopard 1A5 has been the standard until recently. This kit was produced in the 1980s and can still be built into a good model, but the armour mounts on the turret were always wanting and the commander's periscopes were incorrect. More recently, Takom have produced a 1A5 (combined with a Canadian C2). This model from Meng easily surpasses either of the two previous models.
The overall quality of the parts is very good with excellent moulding. There are a lot of ejector marks but most will be hidden from view. Flash is almost non-existent. There is no sign of warping and only very minor sink marks (in the cupola rings, for instance). Once again we are witnessing state-of-the-art moulding with crisp detail and an excellent fit of parts, though some have been simplified compared to some other manufacturers.
The building options are very limited with just three alternative Bundeswehr schemes to choose from.
A lot of this review will be familiar to those who have read my 1A3/1A4 review on this site.
The current trend is to have working torsion bars and the Meng kit is no exception. The good thing here is that the bars are moulded onto the swing arms. Some kits I have seen recently have them separate which adds to the complication. Unfortunately, the swing arms have no detail whatsoever on their outer faces but Leopard Workshop can furnish better options. Where they are bolted to the swing arms, there should be a depression with a nipple in the middle. The shock absorbers are also over simplified and are portrayed as rectangular where they stick out from below there protective covers! The rest of the suspension goes together quite nicely, though the longer return roller arms (parts A3) are easily put on upside down as the instructions are not clear. Note that the angle of the arm should go on the underside. If you want better detail, then have a look here, although admittedly none of LW010 will be seen very easily behind the wheels and the sideskirts.
Being very nit-picky, there are ribs under the sponsons which should not be there. Under the exhaust grilles there should be scoop-shaped bilge outlets which are missing. I know these will be hidden under the skirts.
The most serious disappointment with the 1A3/1A4 kit were the road wheels and idlers. Two things were incorrect. The hub was too big and the shape of the inner rim was too right-angled.
The wheels have been re-engineered to improve their front faces which now have a better profile and smaller, more accurate, hubs. However, the rims for all road wheels and idlers are still too wide. Unfortunately (or fortunately for Leopard Workshop LW001-1 and LW002), the rear wheels are still just as bad as before as they are completely the wrong shape with huge 'drum brake' shapes on them. The kit wheels have polycaps and can literally be snapped together without any glue needed - the engineering is that good.
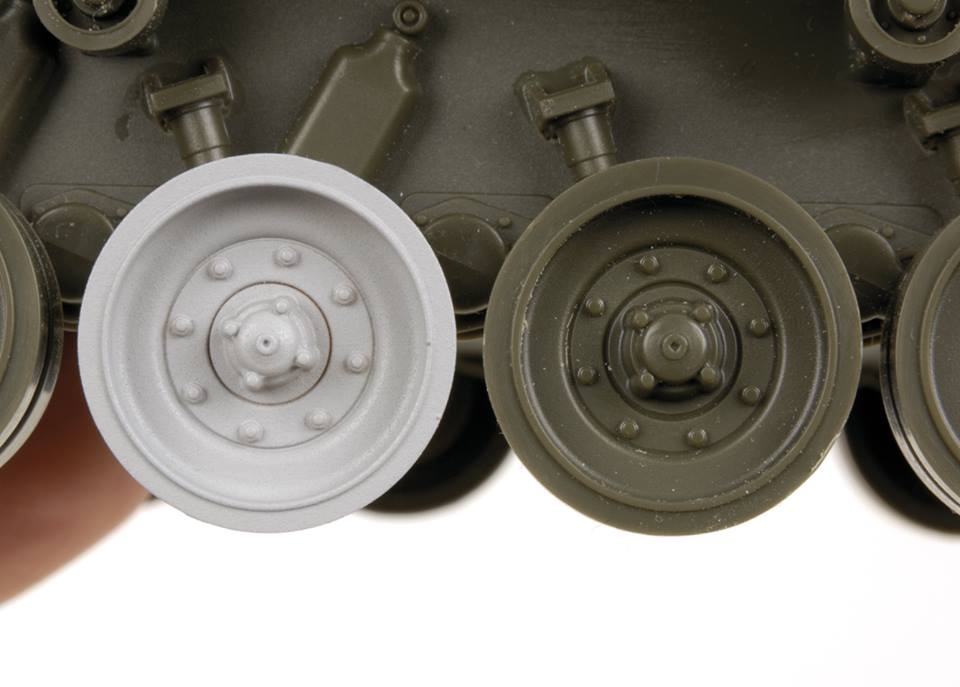
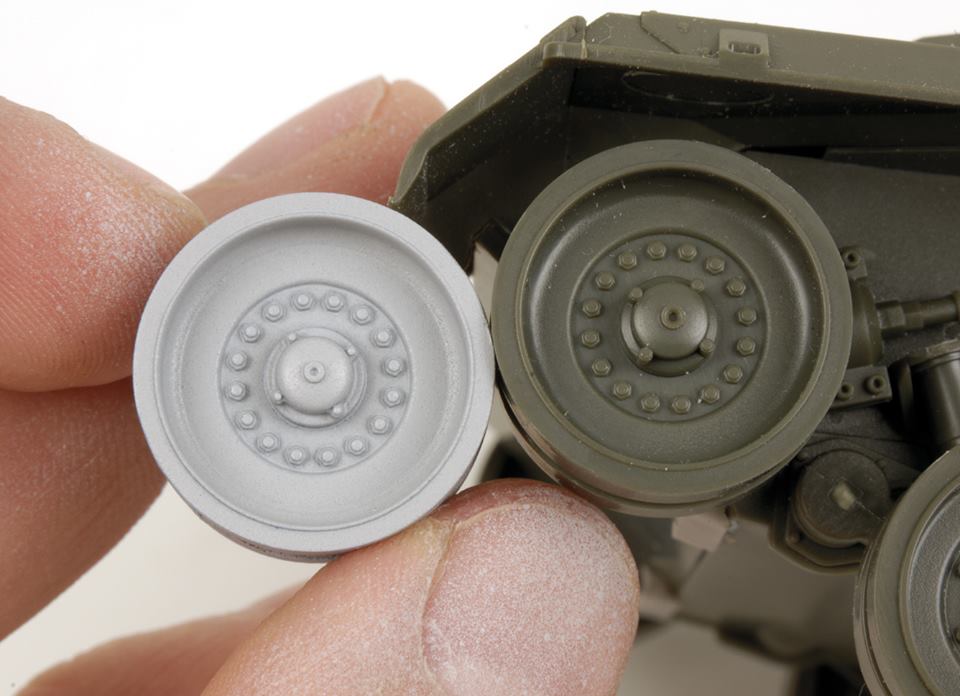
Both of the above photos courtesy David Parker
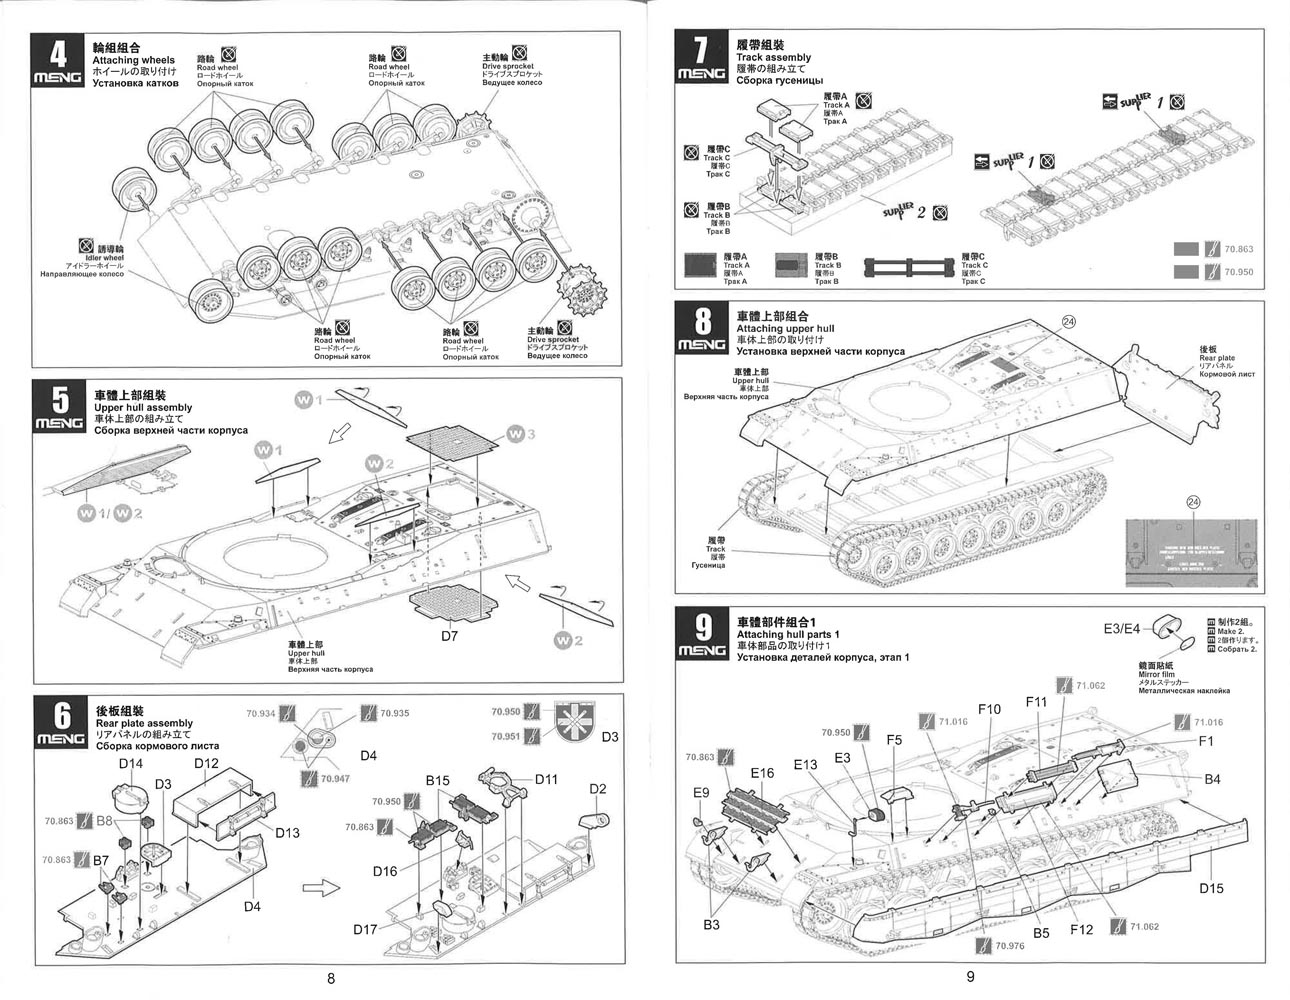
The sprockets are nice!! 15-bolt sprockets (Part B1) were introduced at the time of the 1A5 modification programme and were retrofitted to many tanks after overhaul. The original 8-bolt sprocket (Part 19) is still on the sprue from the 1A3 kit. These can also be used even though they are not called out in the instructions. Check your references if you want to build a particular tank.
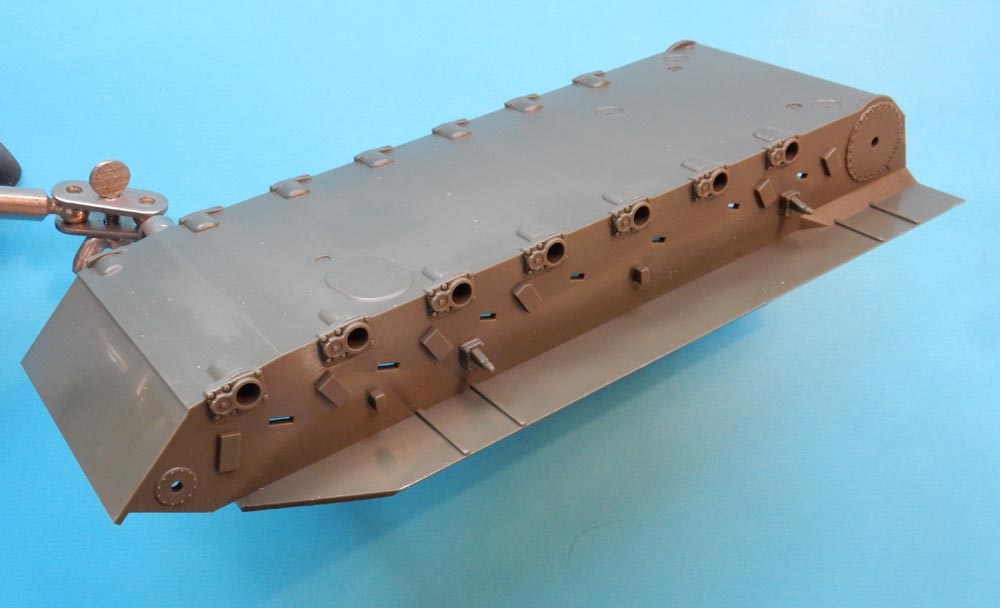
The lack of weld lines has still not been dealt with. They are there - but they are so narrow as to be almost invisible. As I keep saying, they are a significant feature of the Leopard 1 hull. The hull is a conventional tub and top - nice and simple and the fit is excellent. A nice feature are the air intake grilles along the sides which are photo-etch. Of course the main dek grille is also etch and literally clips into place as the engineering is that good. No need for glue if the etch is kept flat when positioned.
There are four access hatches on the hull top with grab handles. Meng have done a Tamiya over-simplification here and we just have have four rectangles of plastic. These are best removed, drilled and replaced with wire.
The hull has two driver periscope washers moulded on the glacis plate which is correct for this version.
There are numerous location slots for the hull side tool stowage. If a version is built with stowage boxes fitted instead of tools, there will be a lot of filling to do! The tools themselves are very nicely rendered with their mounting plates and numerous clips moulded on. This makes the most tedious Leopard 1 job quite easy. The perfectionists amongst us will probably want to carve the clips off and replace them with etch handles. The tools are much more to scale and in the case of the track wrench and sledge hammer, are far less anaemic than Revell's. However, the bottom mount for the saw is too long and should have a couple of millimetres carefully cut out. The axe heads are very delcate, so be careful when handling.
One thing that is very 1970s is the handle moulded on top of the rear hull tool box. It should be separate. It looks so toy-like and crude. I pointed this out last time and it hasn't been improved.
The welded engine exhaust grilles on the hull sides, as supplied in the 1A3, were awful with no depth at all. Thankfully, these have been re-engineered for a better appearance.
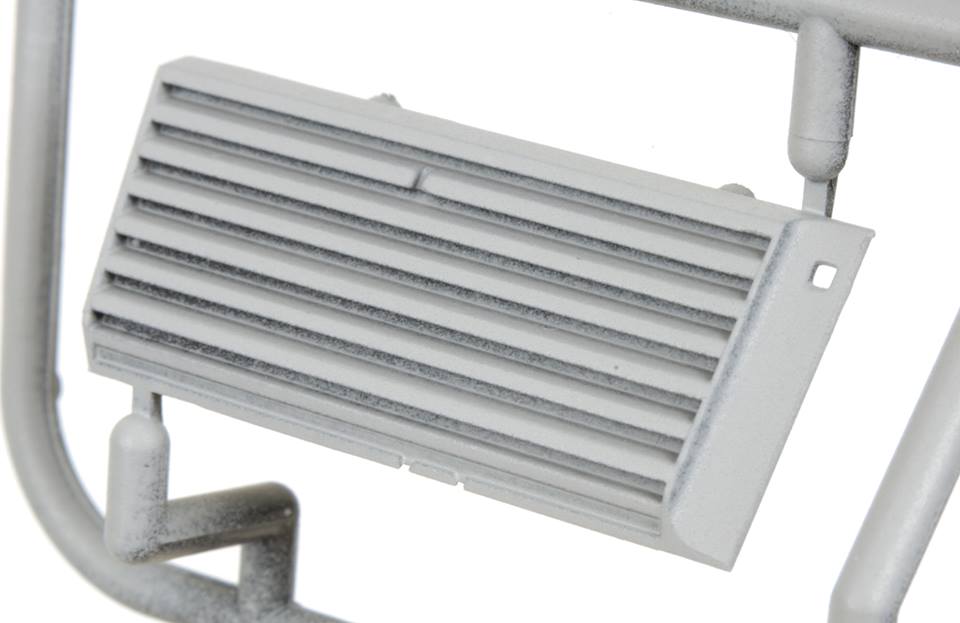
However they can still be improved upon. The same goes for the alternative cast grilles which are now supplied. Again, Leopard Workshop has better renditions of both types of grille: welded and cast.
The four lifting eyes, once again, don't have any welds around them which are quite a significant feature of Leopard 1. The headlights are hollow with separate clear lenses. All of the periscopes are also transparent and the guards are provided in etch. The central one has the correct peak but no hatch guard on the back (tiny detail that only a Leo geek would notice!).
The skirts have the typical dimpled texture and Meng have gone to a lot of trouble to reproduce it. They have even angled some of the skirt clips for a more authentic look. I do wonder if the dimples are a little overdone but doesn't look too bad under a coat of paint and weathering. One small problem is that there will be a joint to clean up where the front end of the skirt meets the flap over the front of the tracks. No big deal.
The horrid folded rear mudflaps (Part D6) are not mentioned in the instructions, but they are still there so we can still have the option of folded or unfolded flaps. These are often supplied as etch parts, but the rubber used is much thicker than etch so I'm glad we have them in plastic. The reason I don't like the folded flaps is that no effort has been made defining the fold from the sides. They are just blobs of plastic.
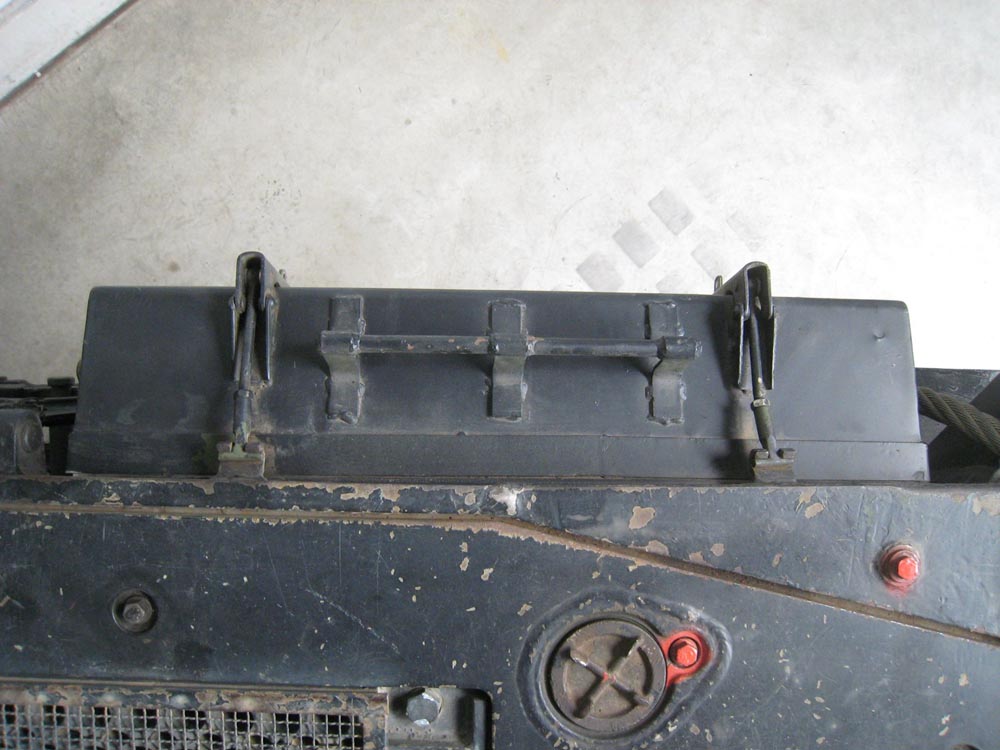
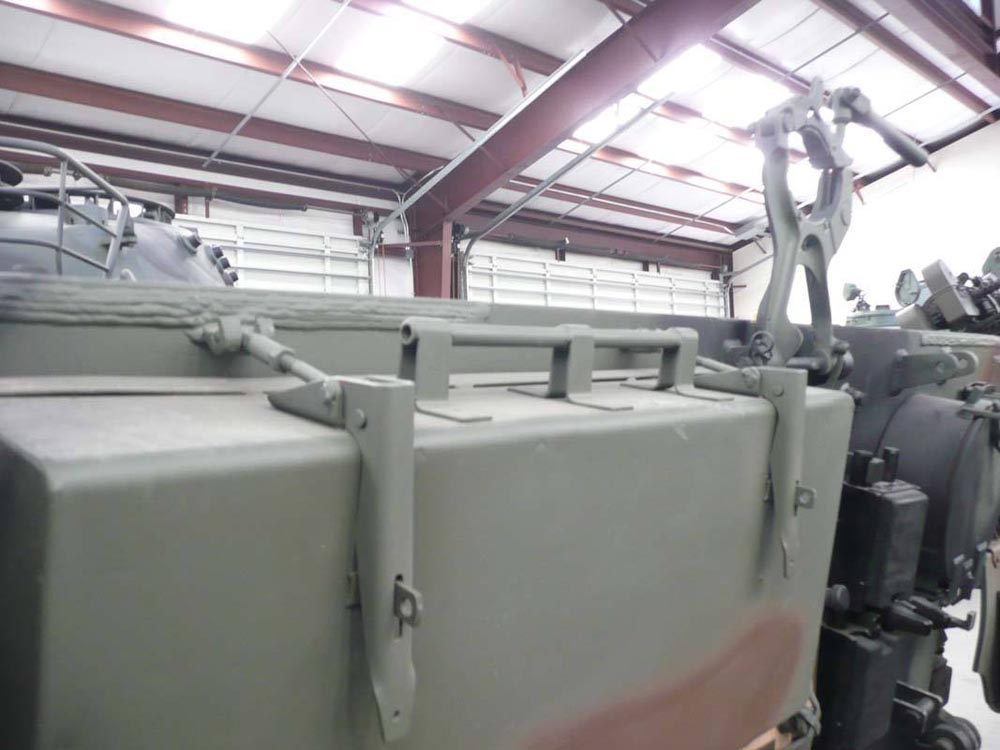
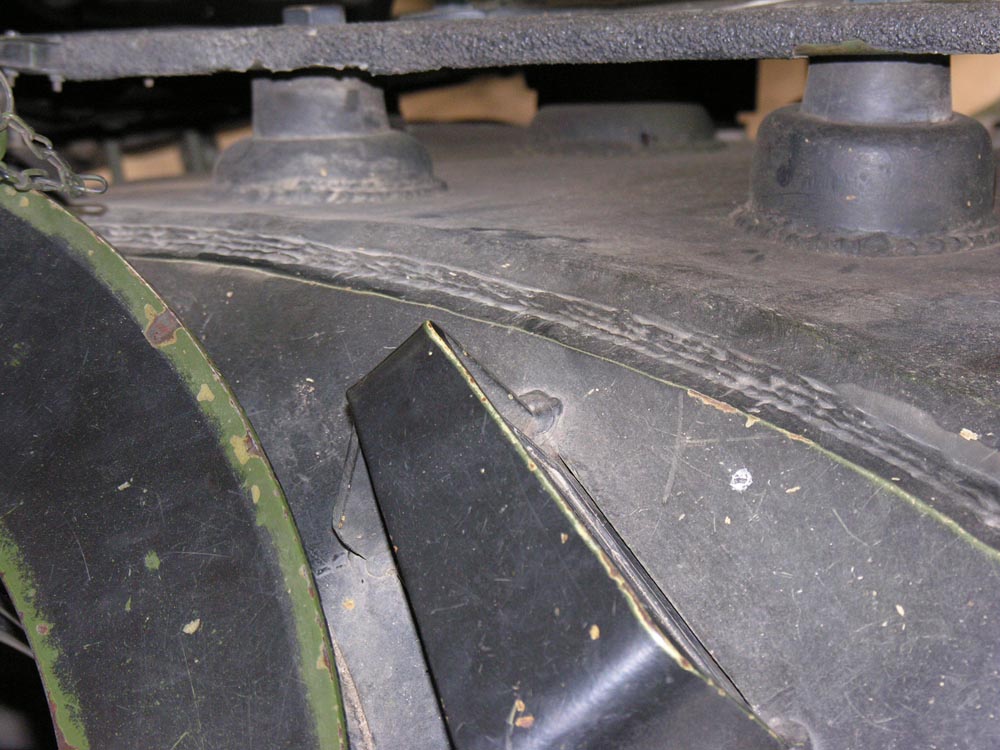
Where the side skirts stick out at the rear end, a small mounting point has been moulded onto the rear hull. This has always been overlooked until now. This T-shaped mount was the original production fitting and was replaced by a stronger C-shaped mount which was standard on 1A5. This has not been supplied, but is included in the Leopard Workshop exhaust grille sets.
The string supplied for the tow cables is best replaced with cable as the weave is too coarse (Eureka tow cables are a vast improvement. There is also no suggestion in the instructions about the length to cut them to.
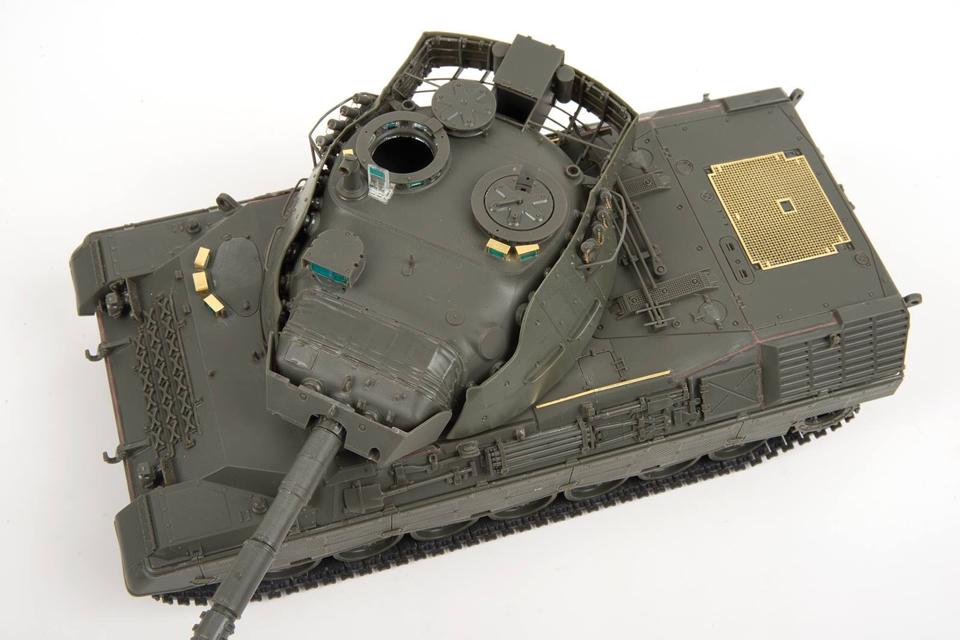
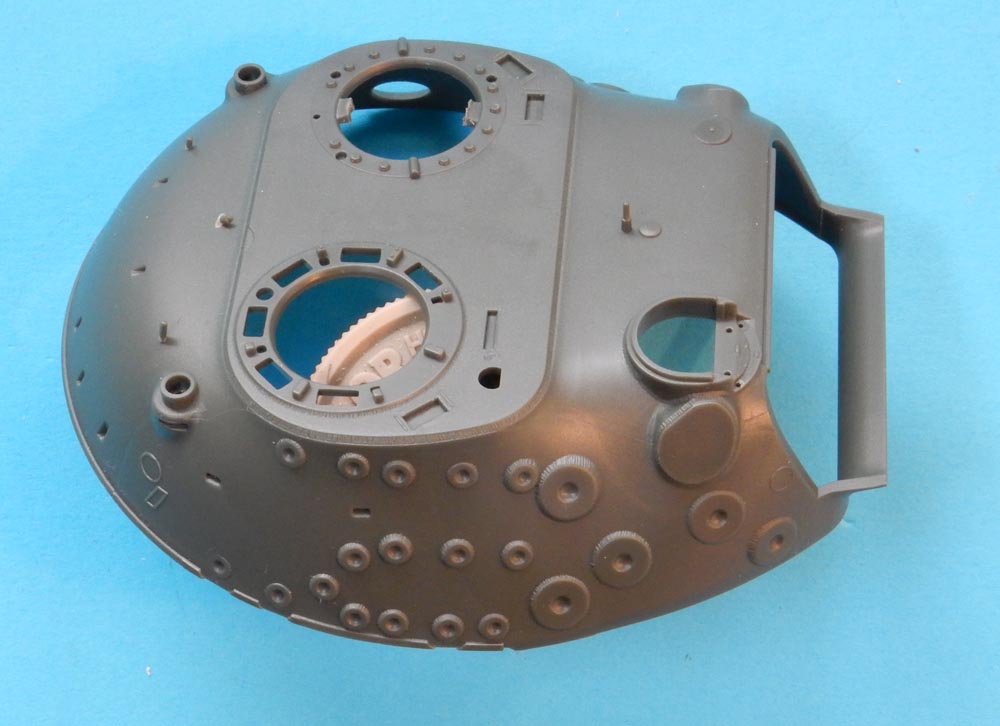
Where the hull has it's heriatge from an earlier model - which was possibly rushed into production too quickly - thankfully, the turret is definitely the best part of the kit. I am glad to say that this has been researched properly and I know that two well-known Leopard experts were consulted this time.
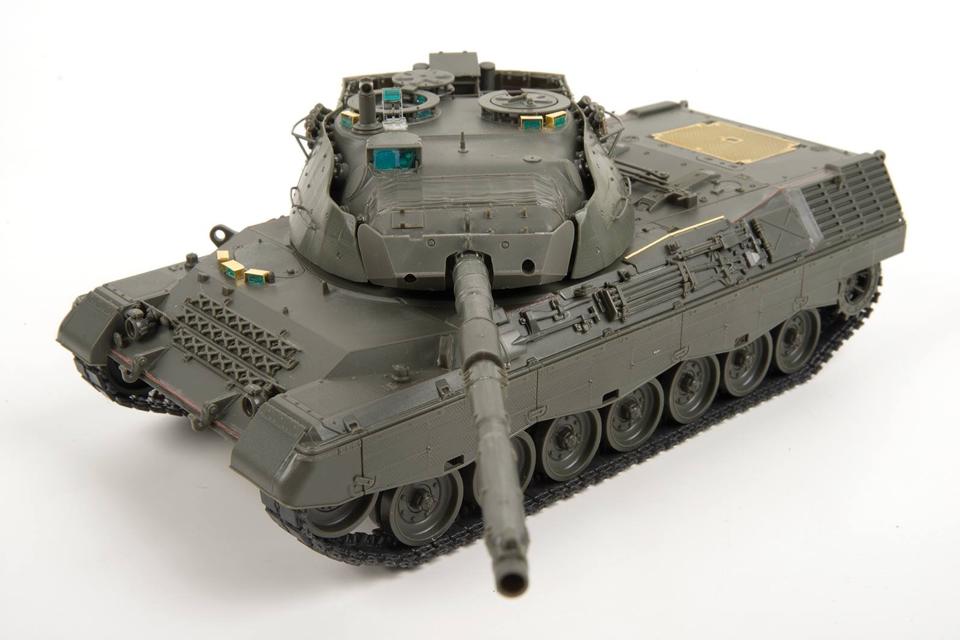
However, there are downsides so let's get those out of the way first. The gun comes straight from the 1A3 and hasn't been improved at all. The Leopard 1 gun is quite a complicated affair with its thermal jacket fitted. It is supplied the good old-fashioned way in two halves with a vertical split. This means a lot of very careful cleaning but any competent modeller won't mind this. The gun is also about 2 mm too short between the mantlet and extractor. Something I missed in the last review is that the main clamp in the centre of the gun is also wrong. It is depicted the same way up on both sides. It is OK on the left but should be upside-down on the right. The 1A3/1A4 muzzle had rifling inside the muzzle. This one does not??. Curious. It now has a nice collimator at the end with the later version included. There was an earlier version, but this is not depicted.
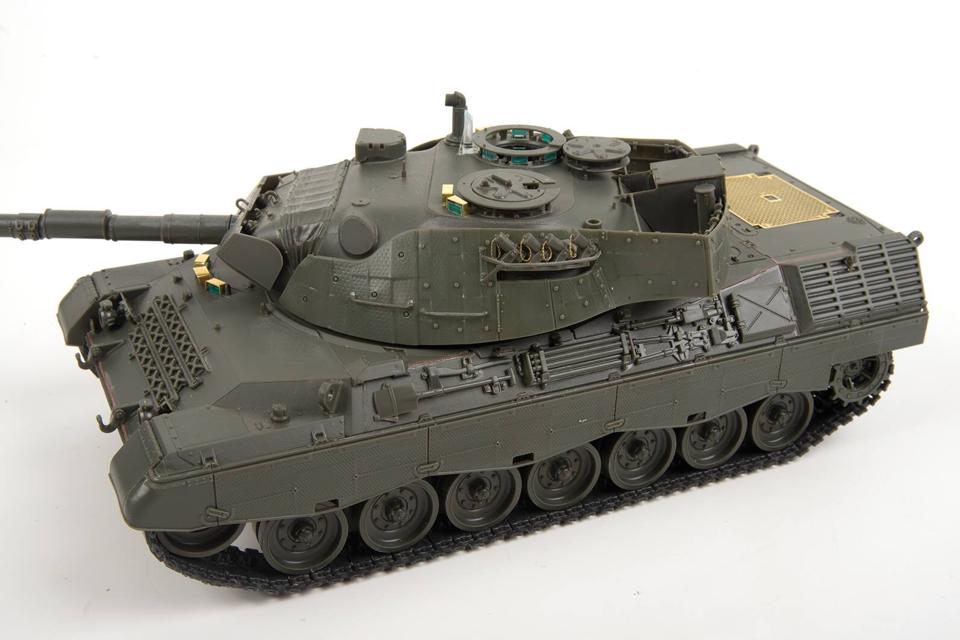
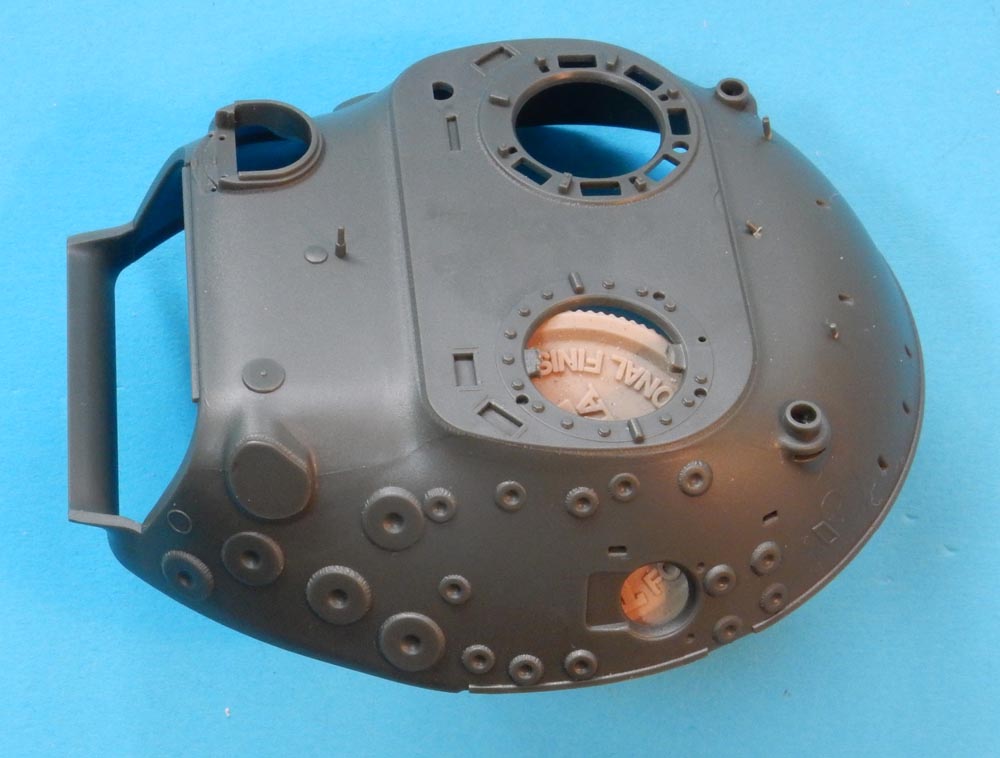
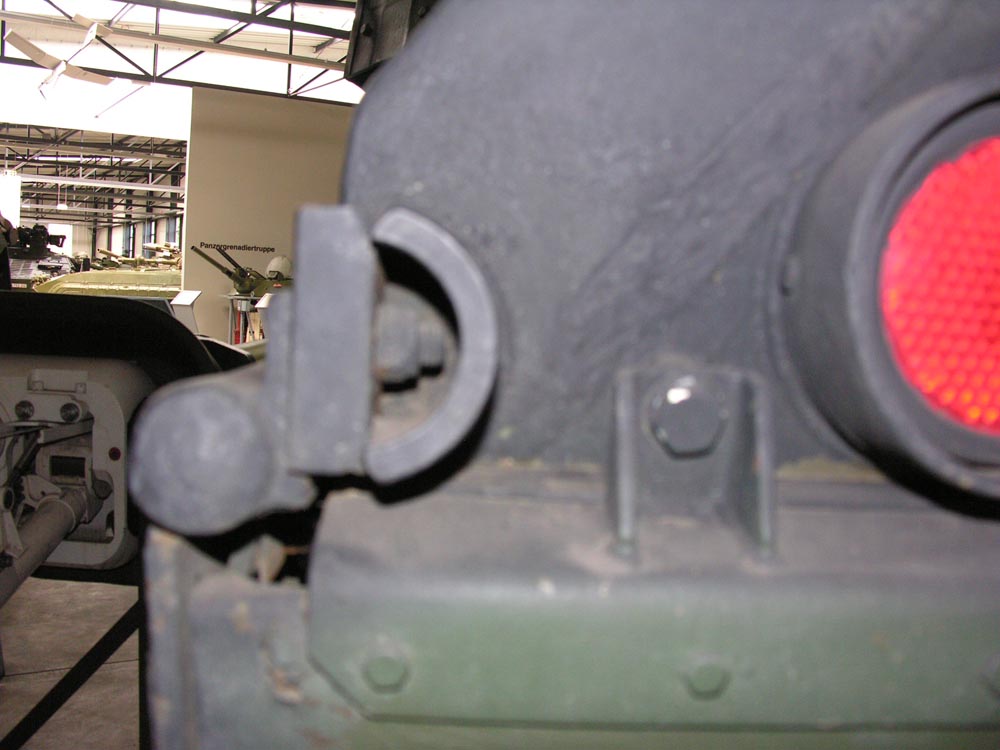
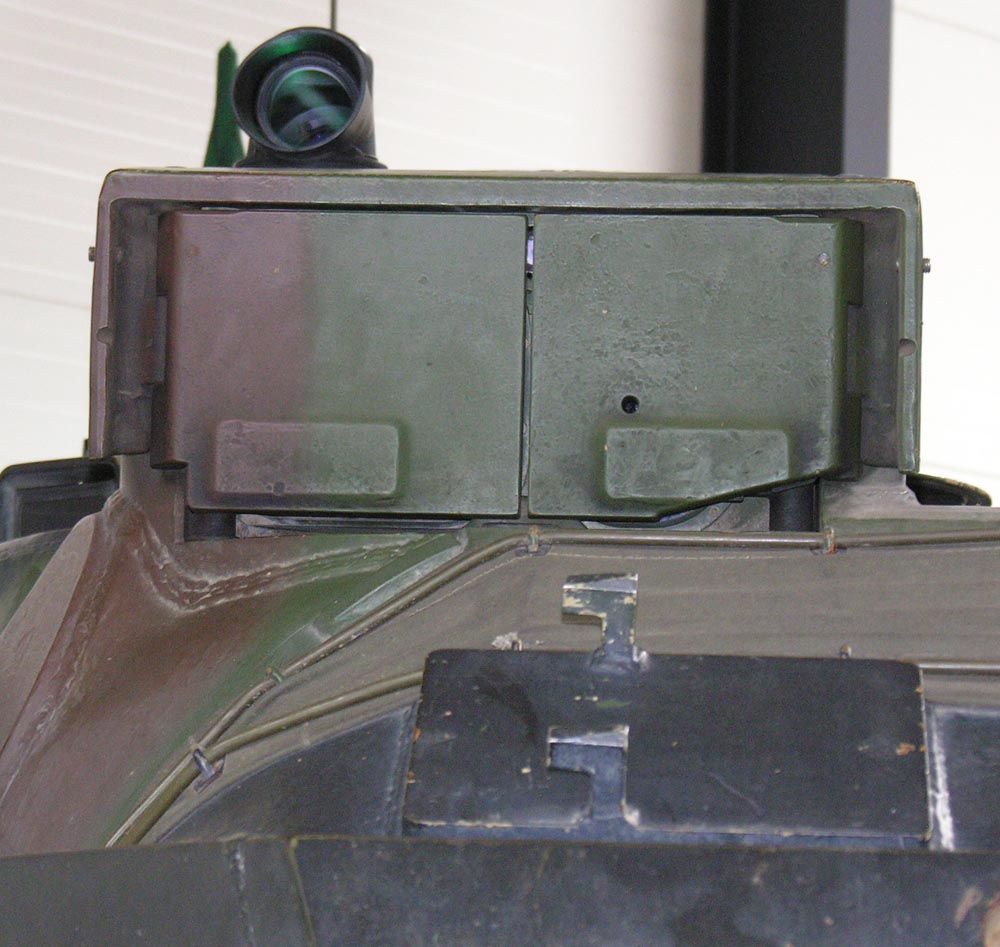
Those welds again! There is only one of any note on this cast turret which is around the flat roof plate. The weld should run longitudinally around the edge of the plate, but the kit depicts the welds vertically down, at right angles - wrong.
Note the direction of the welds and the shape of the rangefinder blanking plates
The rangefinder blanking plates are also the wrong shape as they should be circular apart from the straight edge on the top rear. They are also too small - see the photos below. The original optical rangefinders were round, so why aren't the plates? At least they are nothing like as bad as Takom's nonsense shape.
![]()

The turret roof has various posts. Two of these were bent and one nearly broken off on my turret. The turret is at the top of the box when you lift the lid, so they are easily damaged with the slightest weight on top of the box.
Those are the downsides. The rest are all very much better and a very, very definite improvement on Takom's attempt at the 1A5.
A Hoffman gun-fire simulator is supplied which clamps aroung the barrel. This is nicely done from five parts. At long last we have decent searchlight hooks to go on top of the mantlet. No mantlet plugs are supplied but are available here. The rectangular plate on top of the mantlet has two small tabs which should look like upside hooks, but this is easily remedied with a sharp knife.
The turret comes moulded with location points for all of the add-on armour mounts. On top of these, the mounts themselves have to be added. This is a much better solution than Takom's idea where you are given a side-view drawing and you have to eye-ball the mounts into place! Very accurate, not.
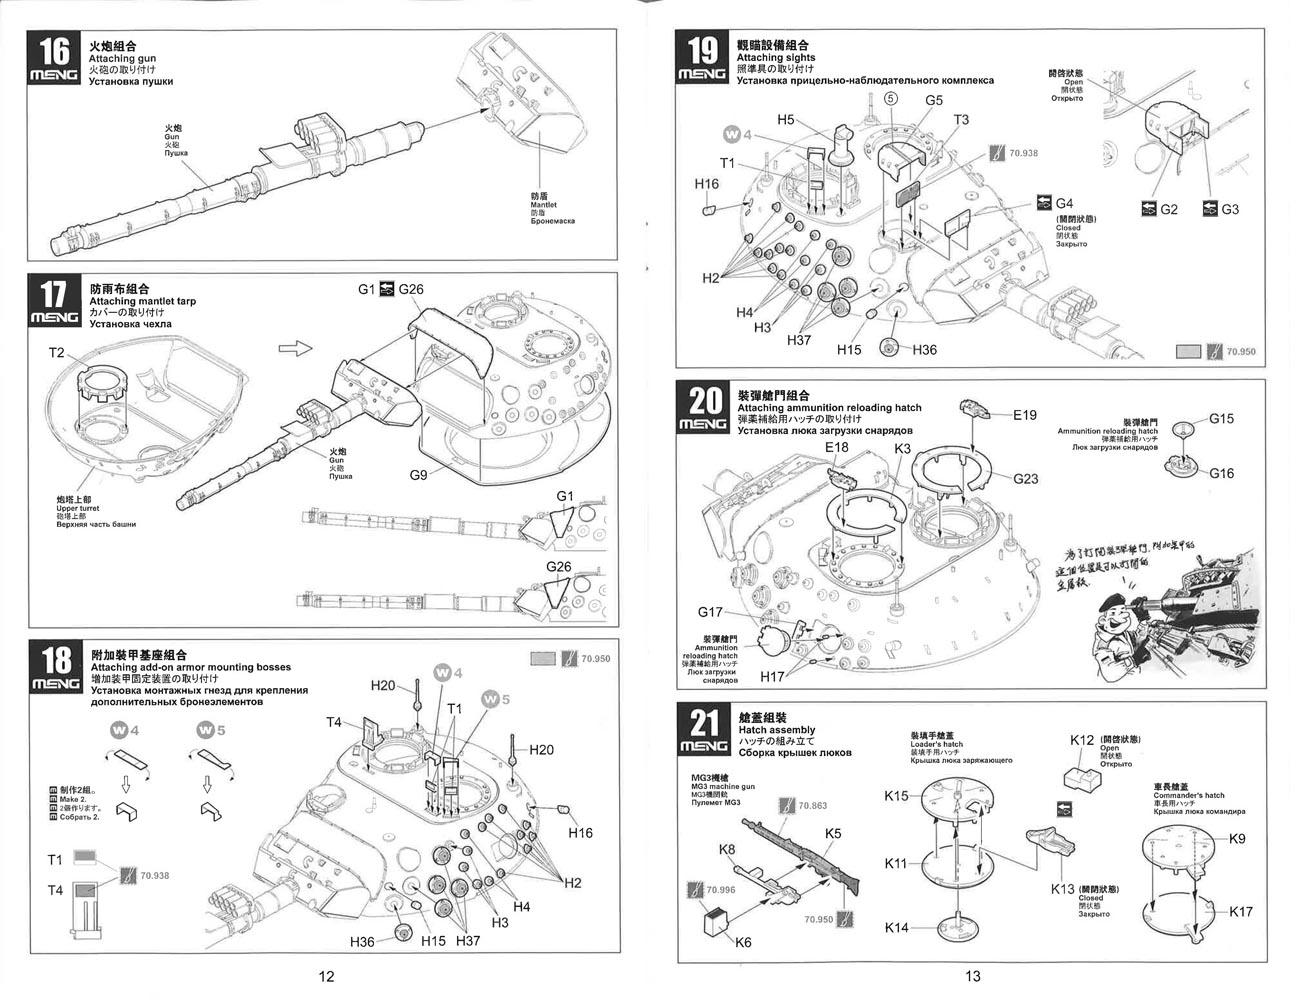
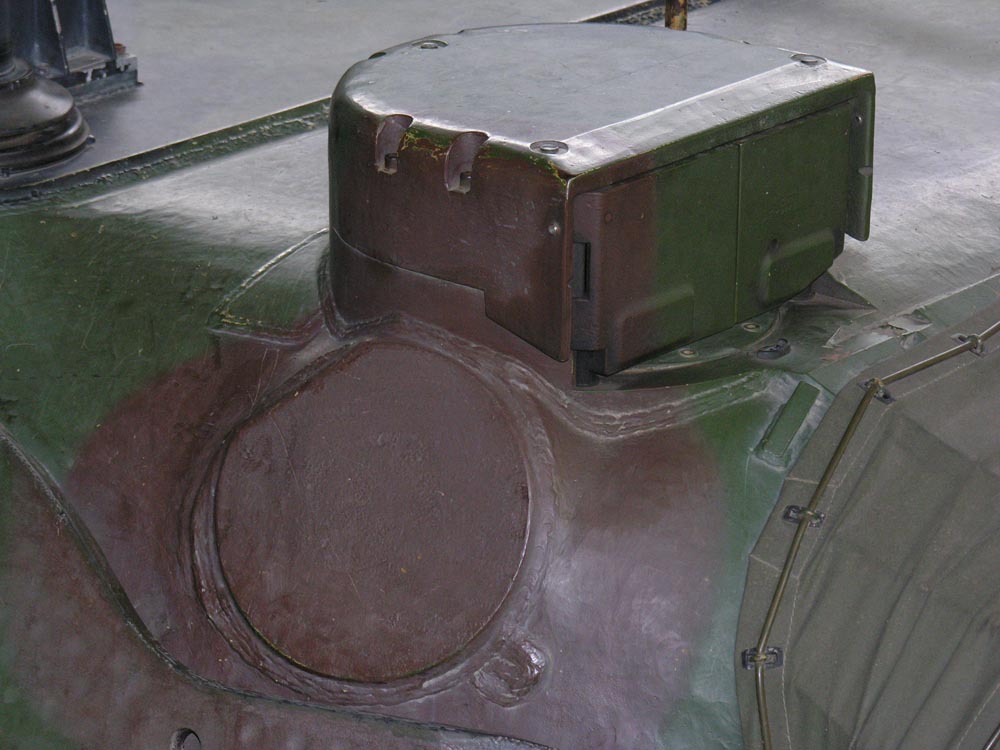
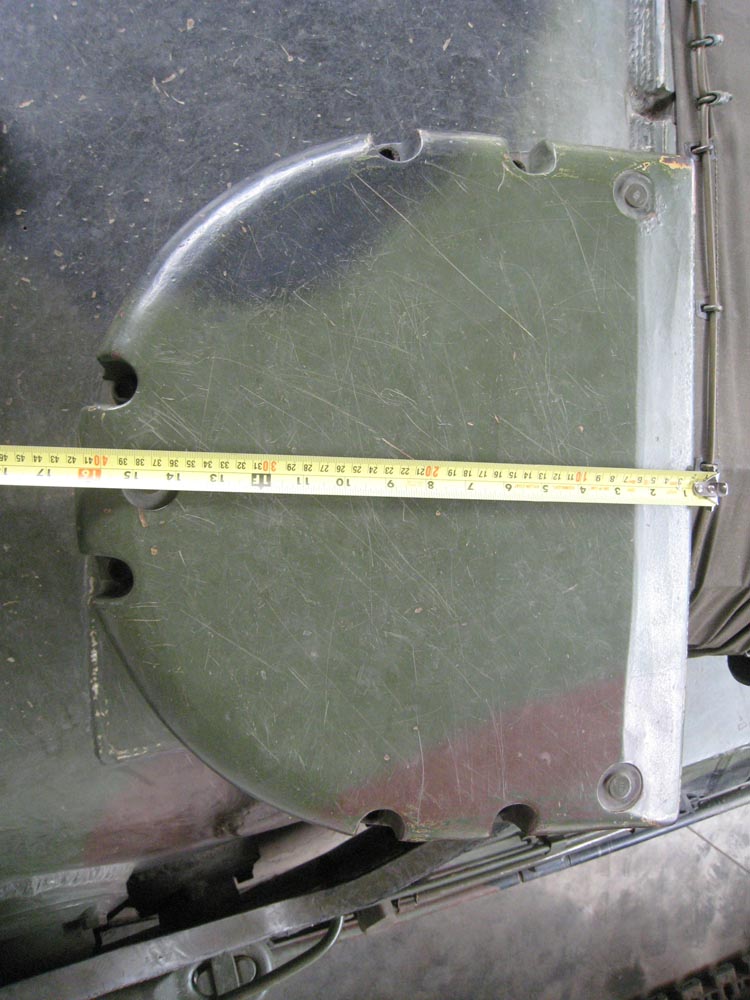
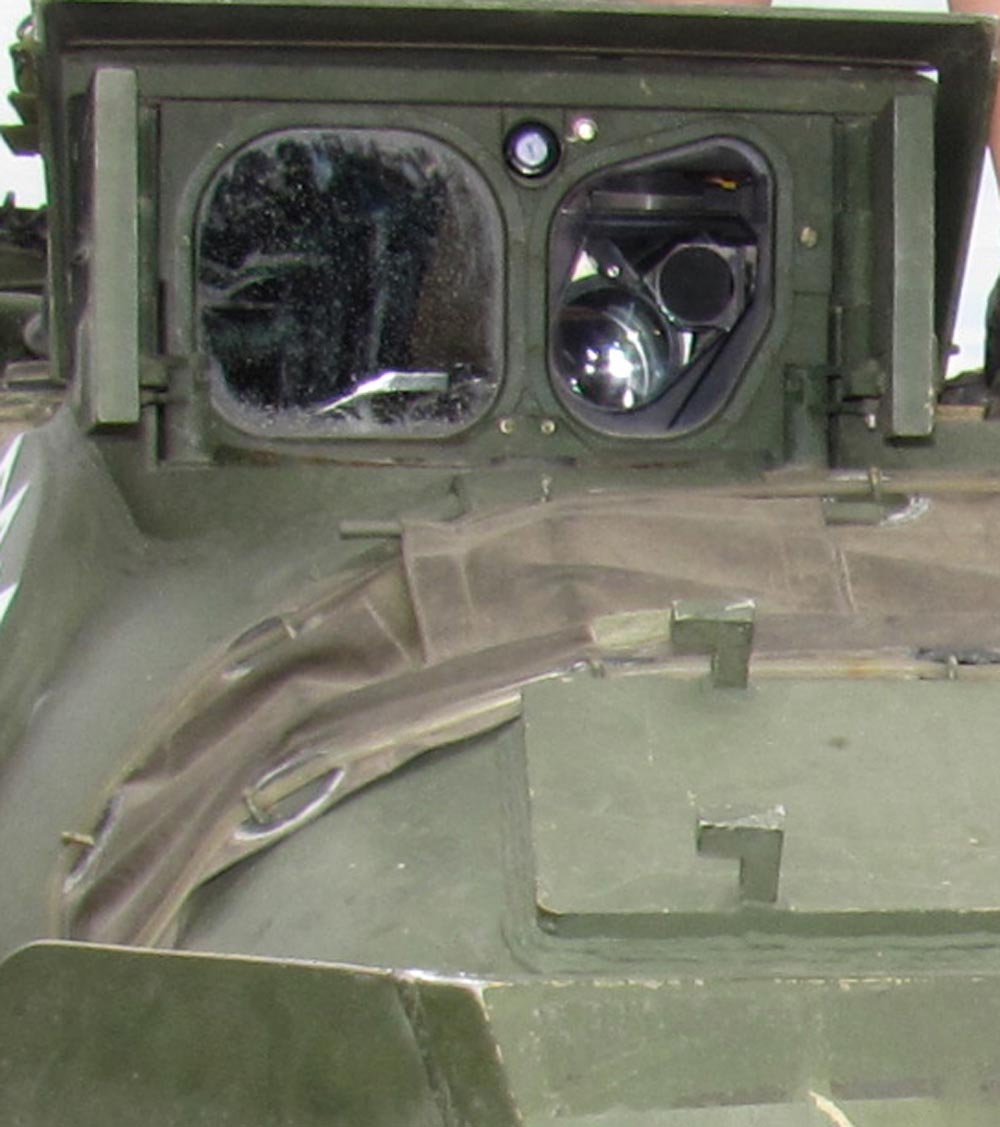
The EMES-18 gunner's sight is a hollow housing and has a clear front face which is a nice touch. It scales out at least 2 mm too narrow, and as THE most prominent feature of the 1A5, is a disappointment - see the photos with measurements below. The right window in the sight is tinted black in reality, and the left-side window has the relection of sight lenses behind it. I say reflection, because the lenses actually lie flat in the turret roof with an angled mirror above them. Who will be brave enough to try to depict this accurately?

The ammunition loading hatch in the side of the turret is a separate part so it can be depicted open. It has the correct internal locking cam moulded on, but the release wheel is circular where the real one has one side slightly flattened.
This turret has the rain gutter depicted as a raised edge around the rear end. The actual gutter has a lot more depth to it and is L-shaped in section. However, with the armour in place, this depiction is good enough as it will be barely visible.
There are two faint joint lines down each side of the turret which will be very easy to clean off.
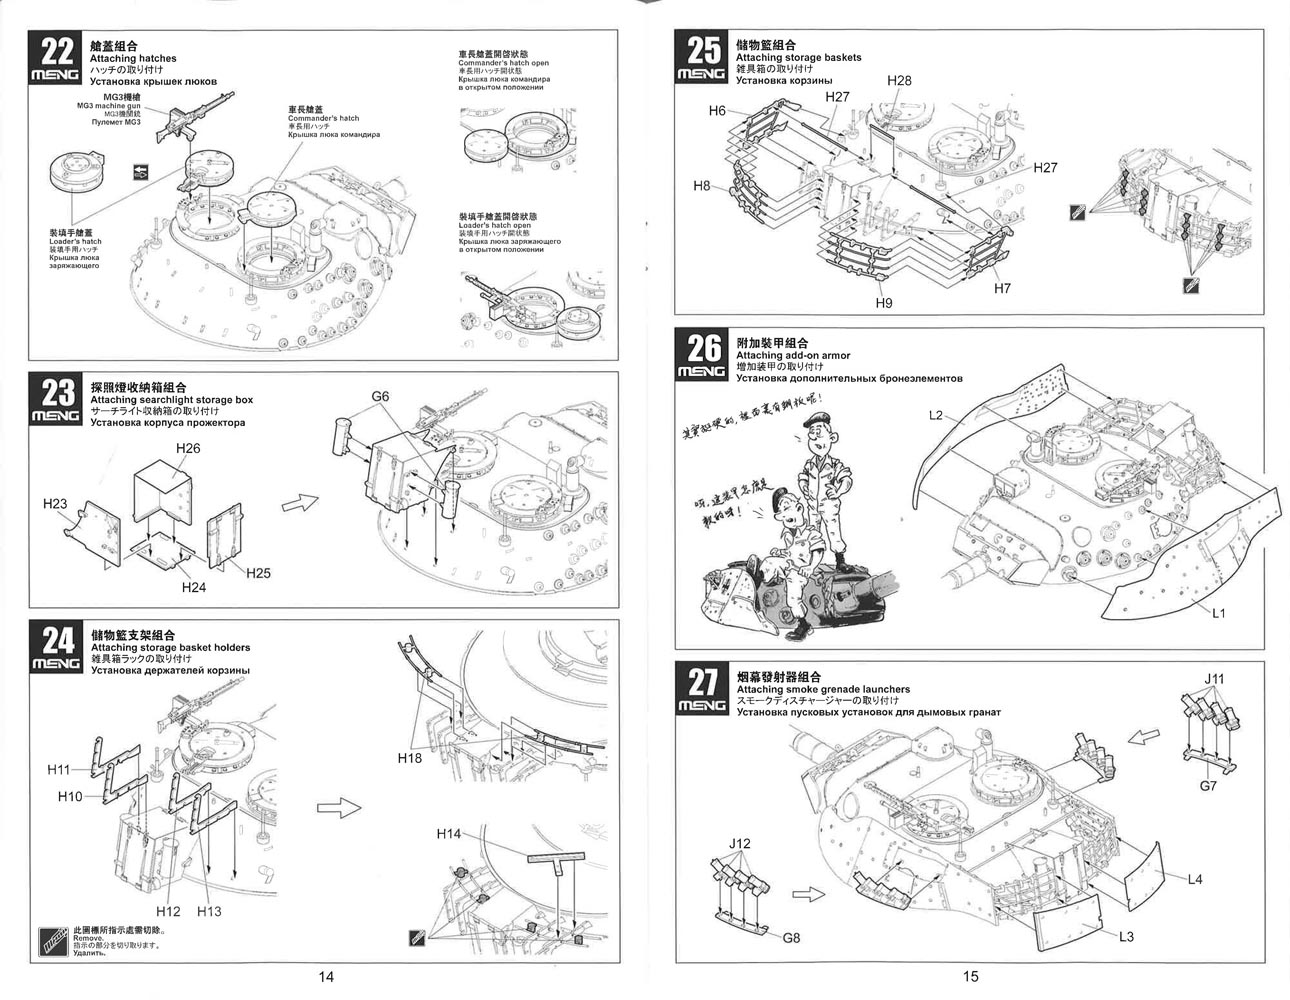
There are two big highlights on this turret ~ the stowage basket and the add-on armour itself. The stow basket is very cleverly engineered from multiple parts. Have a look at steps 24 and 25 in the instructions. Some of the bars have temporary spacers between them.DO NOT cut them off before assembly. They are there for a purpose and will help ease assembly. Once the completed basket is finished and the glue set, only then carefully cut them off, clean up the bars, and you will have a beautiful basket.
Of course, this will be partly hidden away (and strengthened) when the add-on armour is fitted. Rather than use conventinal hard plastic, Meng have moulded this in just four parts of flexible plastic. Some will question the wisdom of this, but David Parker of Meng/AFV Modeller magazine assures me that he found no problems at all when assembling (with conventional glues) or painting the armour. No flakey paint on this. David has kindly allowed us to use some build photos he took of an advance copy of the kit.
The grab handles on the armour are very finely cast, so be careful when handling the G sprue to avoid breakages. If you decide to depict the ammunition loading hatch open, the flap in the add-on armour will have to be physically cut. If you want total reality, then you will have to devise the bar that goes along the inside of the flap and through a hoop on the hatch.
Many people will wonder about the shape of the turret, as no one in the past has really got it right - with the possible exception years ago of Heller in their otherwise awful Leopard 1. The nose of the turret has always been the problem. The old Italeri/Revell cast turret had a nose that was too long and the side walls were too sloped. Takom managed to make it even longer. Comparing Meng's turret to the drawings I have, they have done the best job so far of all the plastic manufacturers. I could have done comparison photos of the other turrets but did not see the point. This is the best plastic one so far, so why compare?
Thankfully, the Meng kit has corrected a long-standing problem with the Revell kit. The commander's cupola now has the right number of periscopes! These are supplied as a clear ring with the periscopes in place. The fit is tight from under the turret so make sure to clean off the numerous sprue gates. The tall forward looking periscope is also clear. Originally, the 1A5 had a shorter version, but taller than its predecessor on the original turret. It was extended later on to provide a clearer view over the EMES-18 housing.
This time, the mantlet does not have any polycaps as any movement is negated by the plastic dust cover which goes between mantlet and turret. Alternative covers are supplied which allows two positions for the gun - horizontal and slightly elevated.
The commander's hatch has the circular locking wheel moulded to the bottom of the hatch, but it is barely visible with the hatch open as it is located underneath. Aerial mounts are provided but there is no indication about aerial length. The smoke launchers are a bit skinny and have no etch chains for their caps (about to be remedied by Leopard Workshop). Finally, we have quite a good rendition of the MG3 machine gun and its mount.
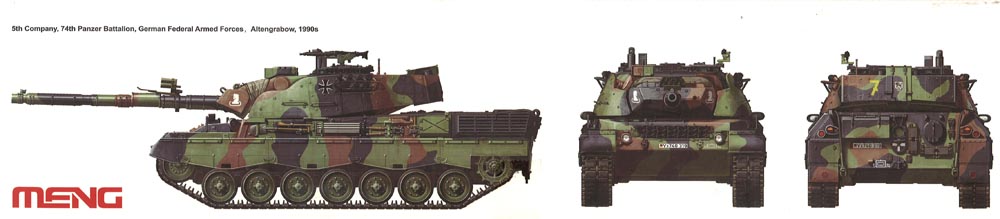
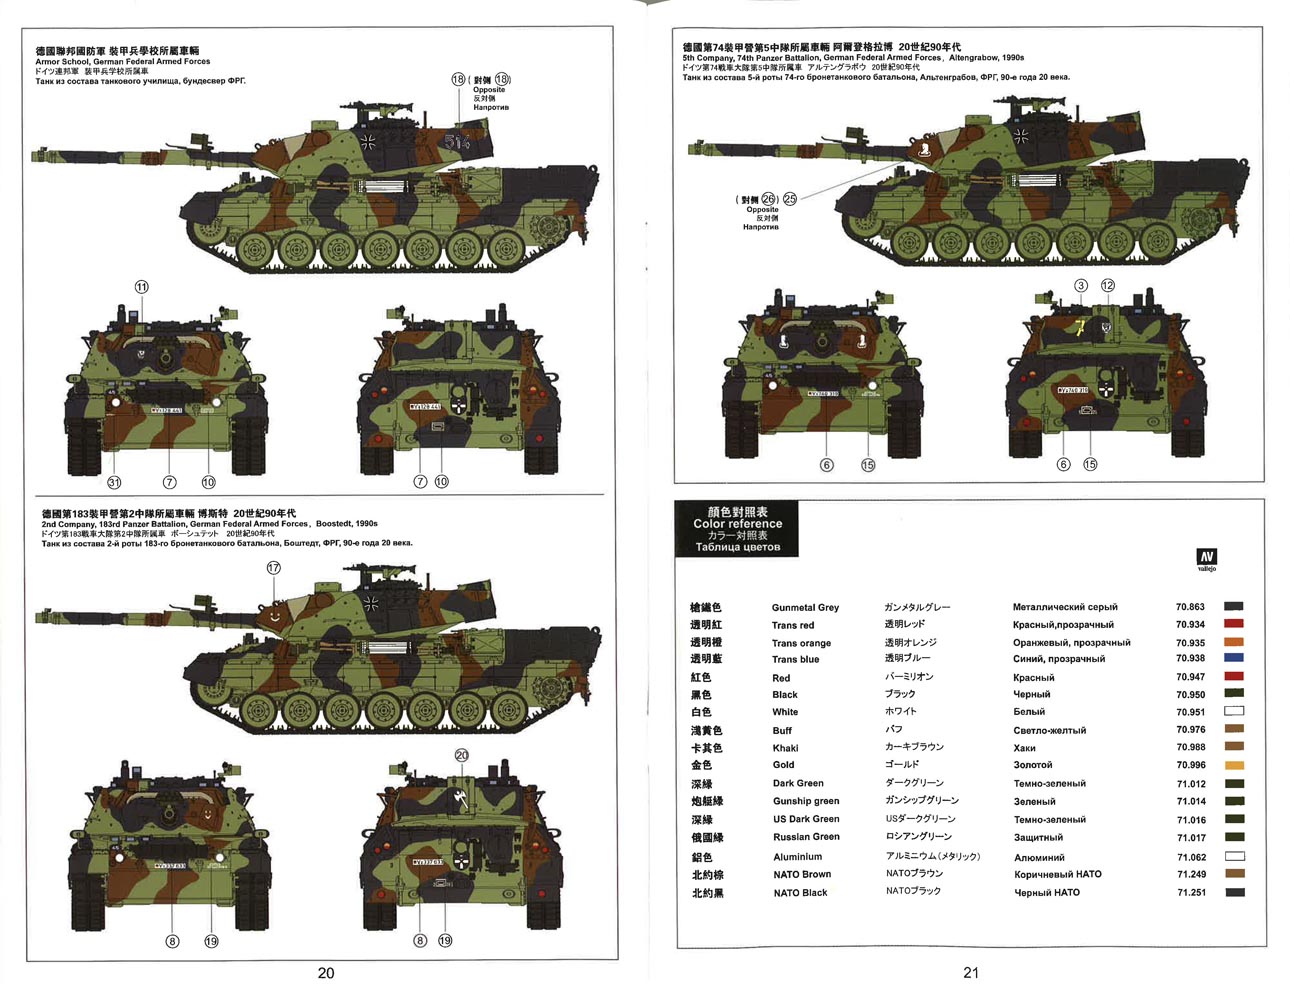
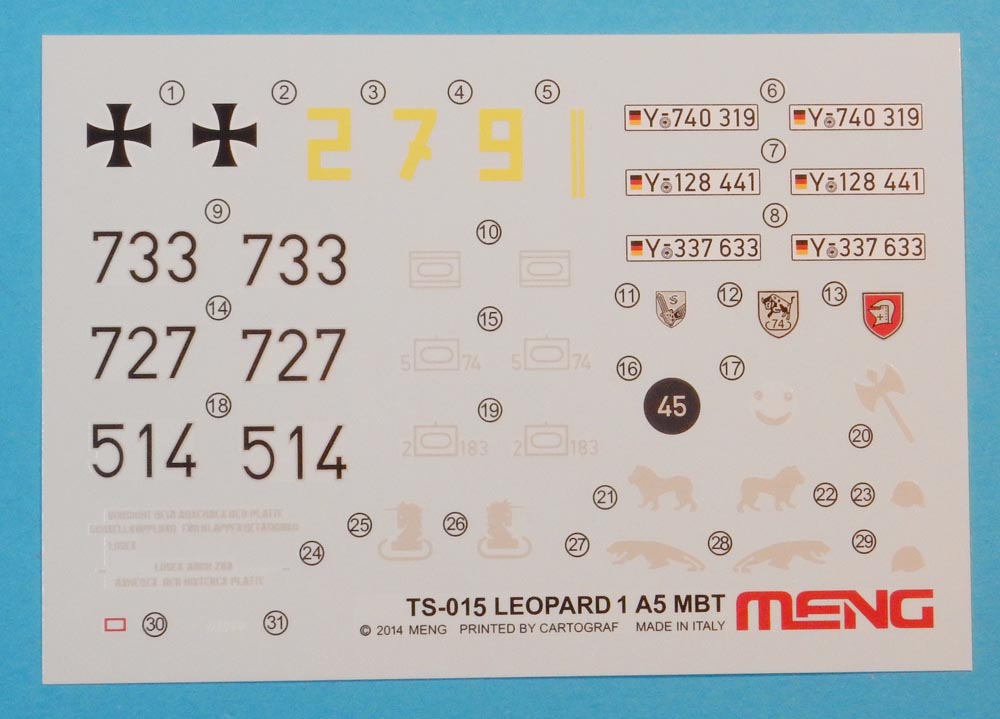
Three Bundeswehr 1A5s are depicted:
All three are in standard NATO green/black/brown.
Extra decals are also provided. The remaindeing decals are unit symbols and call-signs from otherwise anonymous tanks, so you will have do your own research to find a use for these.
All three are in standard NATO green/black/brown.
Meng have quickly built a reputation for accurate and interesting kits. The heritage of this kit from the previous 1A3/1A4 means that there is still room for improvement , particularly on the hull. But the jewel in the crown of this kit is the turret and the way the add-on armour has been depicted. Thank goodness we also have clear windows for the gunner's sight at last. Against that, it is such a shame that the gunner's sight and rangefinder heads are not as accurate as they could be. The stowage basket is very finely engineered. Though it will have to be treated with care during building, the end result looks superb.
Going back to the hull, the wheels are better than before, and so are the exhaust grilles. However, both could be better still and replacements are available from Leopard Workshop. However, it is a shame they didn't take the trouble to add some realistic welds, correct the dreadful handle on the rear tool box, do something about the folded mud flaps, etc. There is plenty of reference out there and they just haven't looked closely enough at some of the detail.
However, it is better than the old Revell kit and is certainly better than the far more recent Takom model.
Engineering the 1A5 turret as they have done, it does beg the question of whether Meng, at some stage, are going to re-engineer it without the armour mounting points, without the rangefinder blanking plates and without the open base for the EMES-18 to depict the naked cast turret before the upgrades were made? Or even simply without the EMES-18 base but with the optical rangefinder heads, AND leaving the armour mounts in palce to depict a 1A1A1 series. This could get complicated for Meng. I have the feeling that this might be only cast-turret Leopard 1 that Meng will do. But that is all it is - a feeling. Never say never. Before anyone suggests anything, I do not have any connection with Meng or know any of their plans.
Summing up, this is the best Leopard 1, so far. I hope that Meng do not end here and produce some more.
Leopard 1 Trilogy - Volume 1 - Prototype to Production
Michael Shackleton, 2003, Barbarossa Books (Tiptree, Essex, UK) ISBN: 0953877752
Leopard 1 Trilogy - Volume 3 - Foreign Usage
Michael Shackleton, 2003, Barbarossa Books (Tiptree, Essex, UK) ISBN: 0953877779
The Leopard 1 MBT in German Service - Early Years (Militärfahrzeug Special No. 5013)
Frank Lobitz, 2006, Tankograd Publishing (Erlangen, Germany) UPC: 419617571495165013
The Leopard 1 MBT in German Army Service - Late Years (Militärfahrzeug Special No. 5014)
Frank Lobitz, 2006, Tankograd Publishing (Erlangen, Germany) UPC: 419617571495165014
Leopard 1
Yves Debay, 2005, Histoire & Collections (Paris, France) ISBN: 2915239517
Modelling Leopard 1 - everything you need to know about what's available
Information about Leopard 1 - everything you need to know about reference in print
Leopard 1A5 walkaround sites:
http://www.primeportal.net/tanks/ulrich_wrede/leopard_1a5/
http://panzer-modell.de/
© Leopard Club
![]() Contact us at leopardfibel@gmail.com
Contact us at leopardfibel@gmail.com