

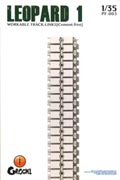
 PF-003
Scale: 1.35
Rating: 95%
Media: injection moulded plastic and vinyl plastic
Reviewed By: Michael Shackleton
Inside the surprisingly large strong cardboard box with a glossy print on the outside are:
On first looking at these tracks I was struck by how similar they look to the HKCW ones - which are no longer available. Some people hated these tracks, others loved them. The instructions from Orochi show that they go together in exactly the same way.
Each link is made up from four pieces ~ the double trackpad, a guide horn and two end connectors. What is clever about these is that two types of plastic are used. The pads and guide teeth are normal injection plastic. The pins on the trackpads have tiny little caps on their tips. The end connectors are in a softer vinyl type of plastic on sprue runners that are spaced correctly to fit over a run of links.
How do they go together? Once the pads and guide horns are removed from their sprues they obviously have to be cleaned up. There are no ejector marks anywhere on the parts! Using a very sharp scalpel blade, you can cut close to the parts for minimal clean up. Don't use sprue cutters. They are too crude for this. The sprue marks will be hidden when assembled anyway.
The guide teeth are first clipped in between the pads. This is the fiddliest part as, though they clip on well - and will stay on - they are very loose and flop about. Clip a few pads together depending on how many you are comfortable with and then the end connectors, still on their sprue, can be lined up and slid on. Then snip the connectors away from the sprue. Don't forget that the nuts on the connectors go on the OUTSIDE face. This isn't clear in the instructions.
Because the end connectors are softer plastic and the pins on the pads have small caps, the connectors stay in place and you have flexible tracks! This is where you hit the only snag. The end connectors have two sides - where they connect with the sprue and the resulting sprue mark, and the more detailed non-sprue side. Of course, if you use the sprues to attach the connectors and then cut them off, the detailed side is on the inside! This means they will all have to be turned around individually - at least the visible ones. However, this is not as bad as it sounds as they are easily removable and clip back on with no trouble. It's just fiddly, as you can imagine. Doing them one at a time means that the tracks won't fall apart as their neighbours, and the ones opposite, are still connected.
The tracks hold together well enough in short runs, but I haven't tried a long run yet. Don't expect them to be workable. They are not strong enough for that. However, they are strong enough to thread around the running gear, but once in place I would advise to glue them firmly onto the wheels. Whether you do this before or after painting the wheels and tracks will be up to the individual.
Here's my method for building a run as the instructions with the tracks are very basic.
Voila! Your first length is done. With practice this takes 5-10 minutes so a whole track length won't take too long. They are surprisingly strong and so far haven't fallen apart. They even survived being scrubbed clean in a bowl of water.
Are they accurate? Yes. When Orochi first showed photos of these tracks, there were many complaints that the trackpads didn't look right. Orochi are one of those companies that listen to us modellers and they soon announced they would re-engineer the parts before release. This they have done which is amazing for a new company. One thing missing on many Leopard 1 tracks are the rubber pads on the INSIDE face of the tracks. These have been engraved on and should be relatively easy to paint in, although the engraving is a little heavy.
Do they fit the sprockets? They are a very tight fit on the Meng sprockets, but do fit. It might be worth filing the inside of the sprocket teeth a little before fitting them. I also tried a Perfect Scale Modellbau resin sprocket (which is a copy of the Italeri/Revell one) and the fit is perfect.
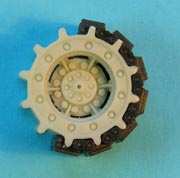
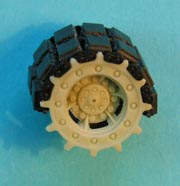
fitted to the Perfect Scale (Italeri copy) sprocket
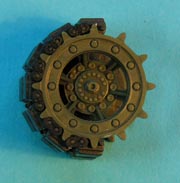
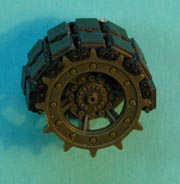
fitted to the Meng sprocket
These tracks are included in the Takom Leopard C2 MEXAS and 1A5/C2.
Highs - Super quality. Nicely engineered. A manufacturer that listens. No glue to assemble the tracks.
Lows - Having to turn end connectors around - but not all them.
Verdict - To add that extra touch of detail and authenticity, you need not look elsewhere.