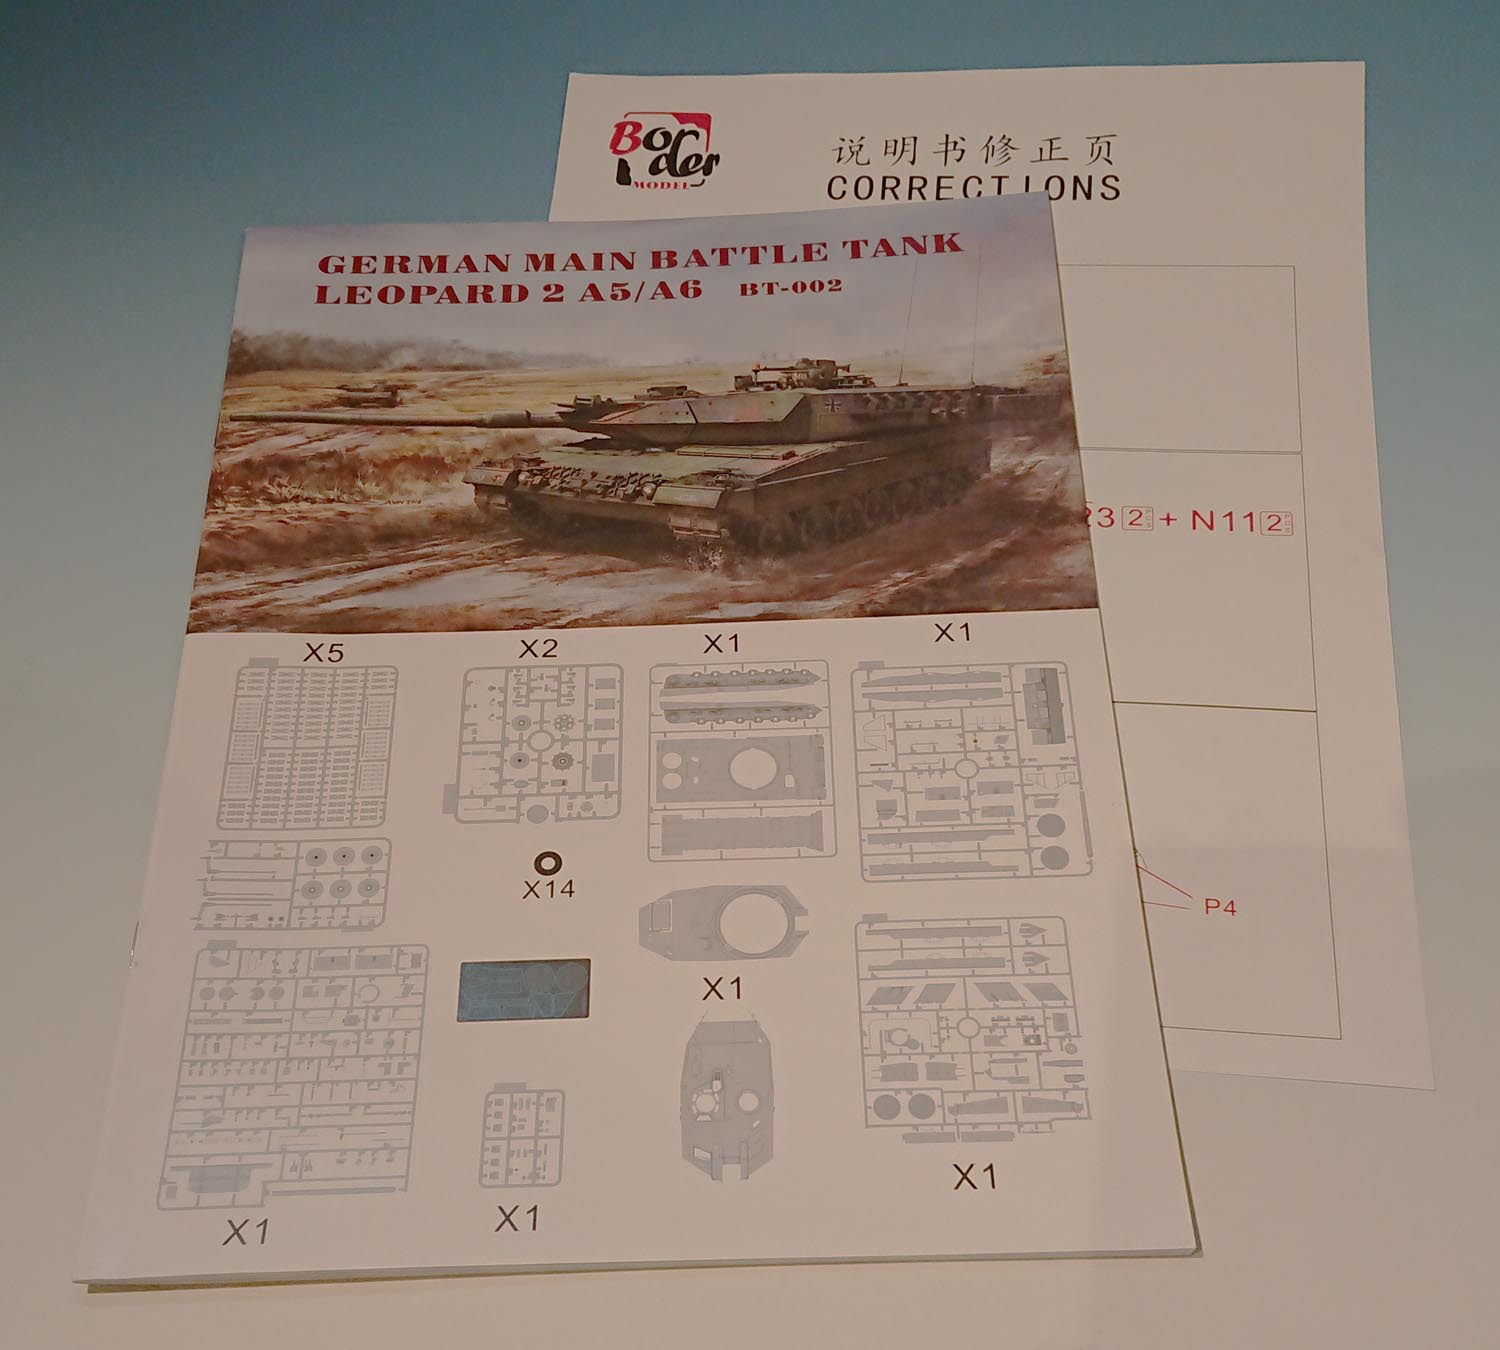
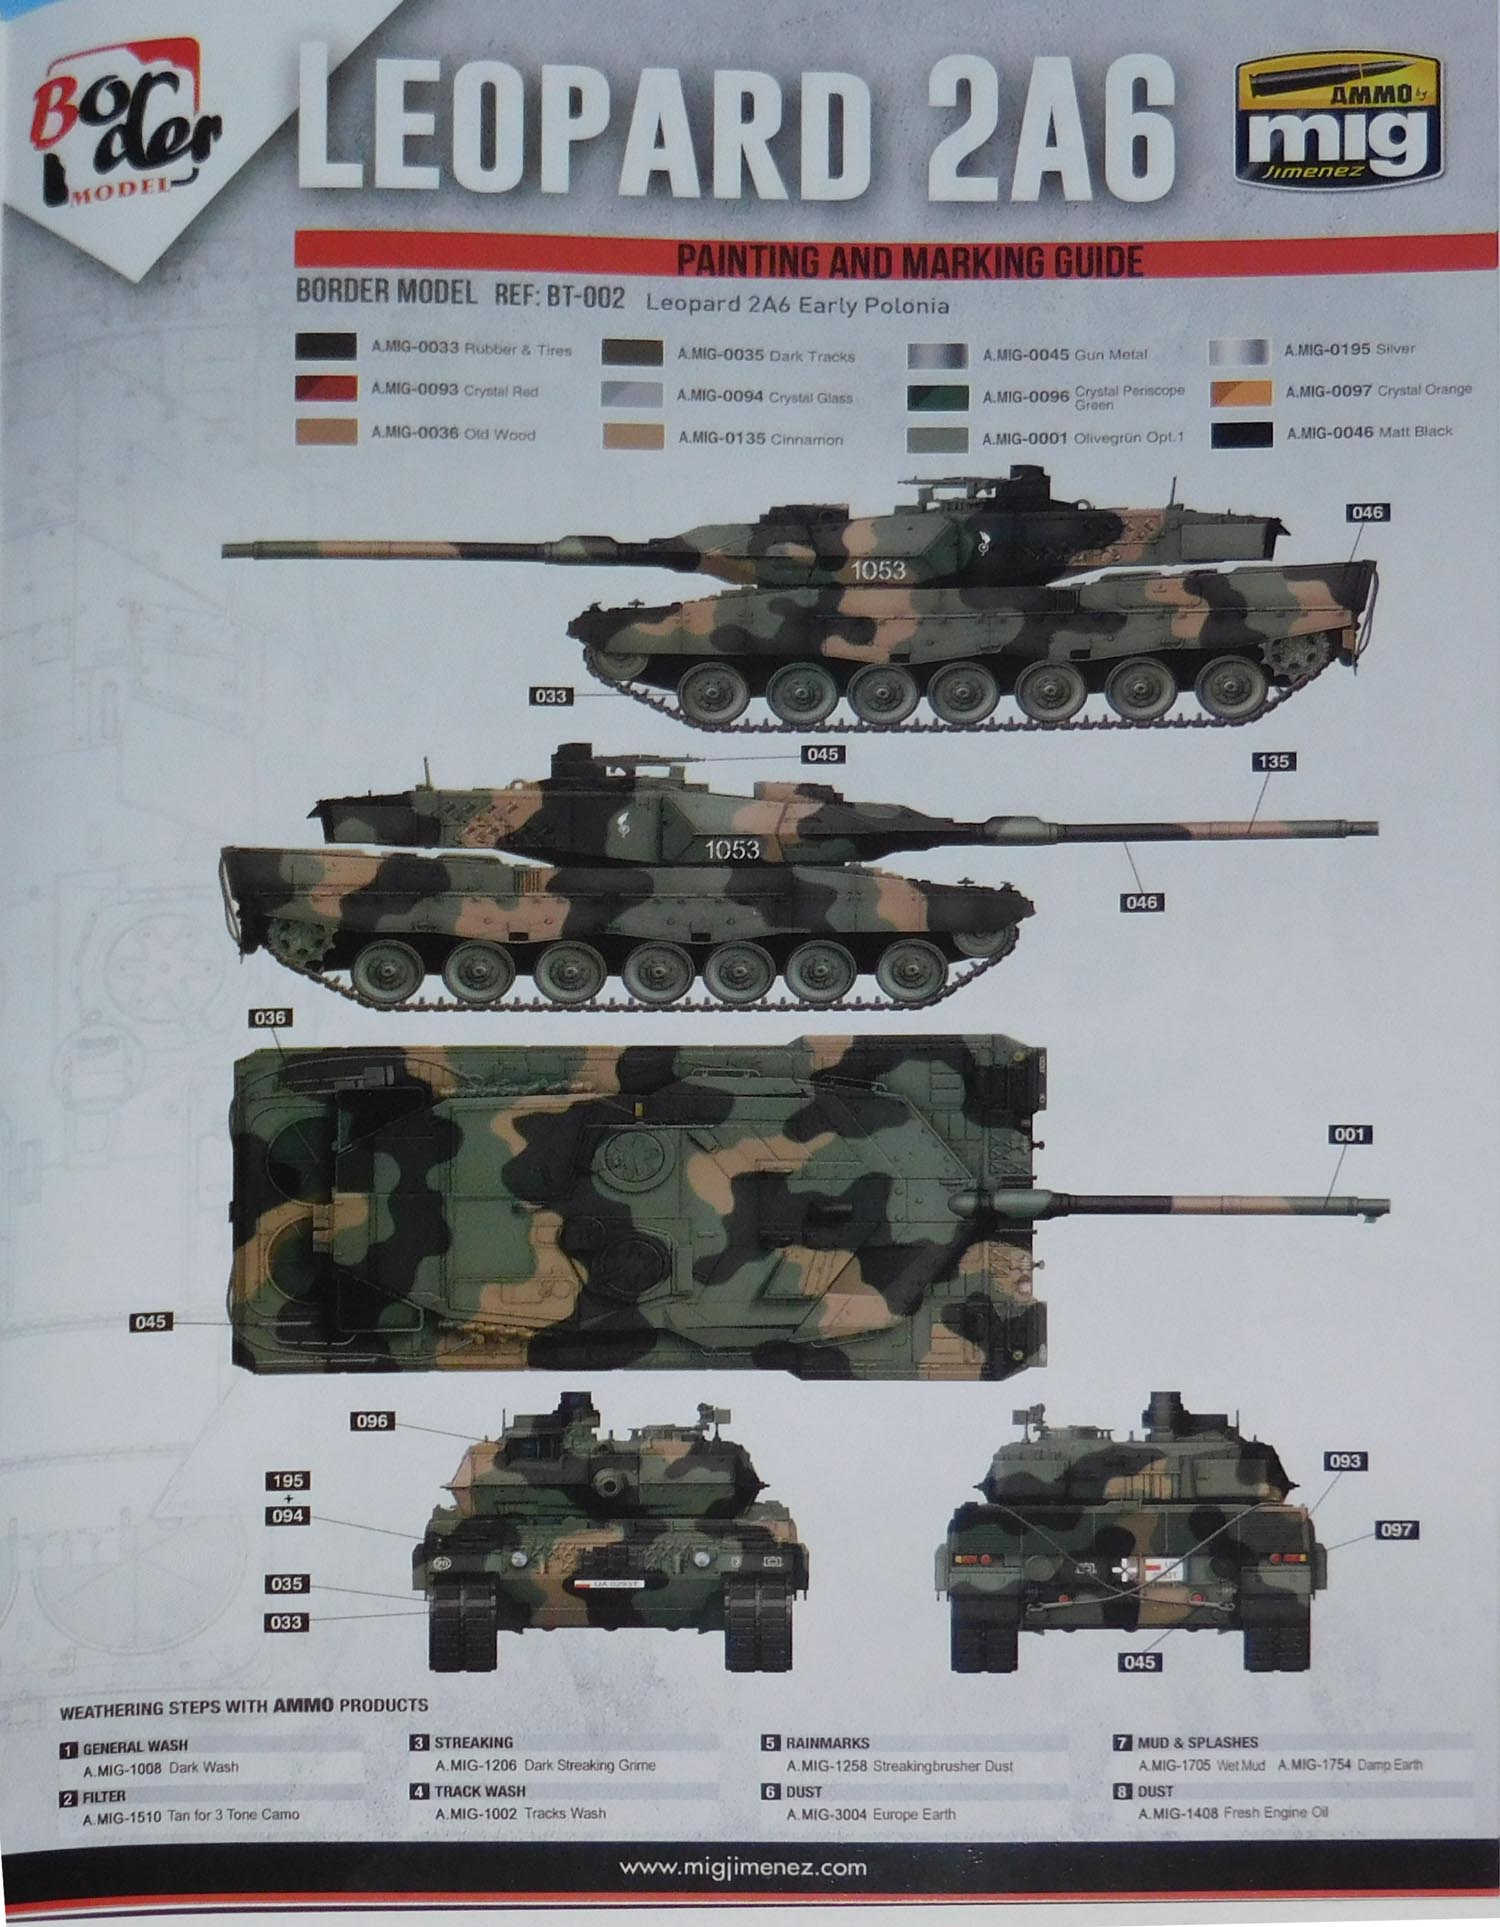
BT-002
Scale: 1:35
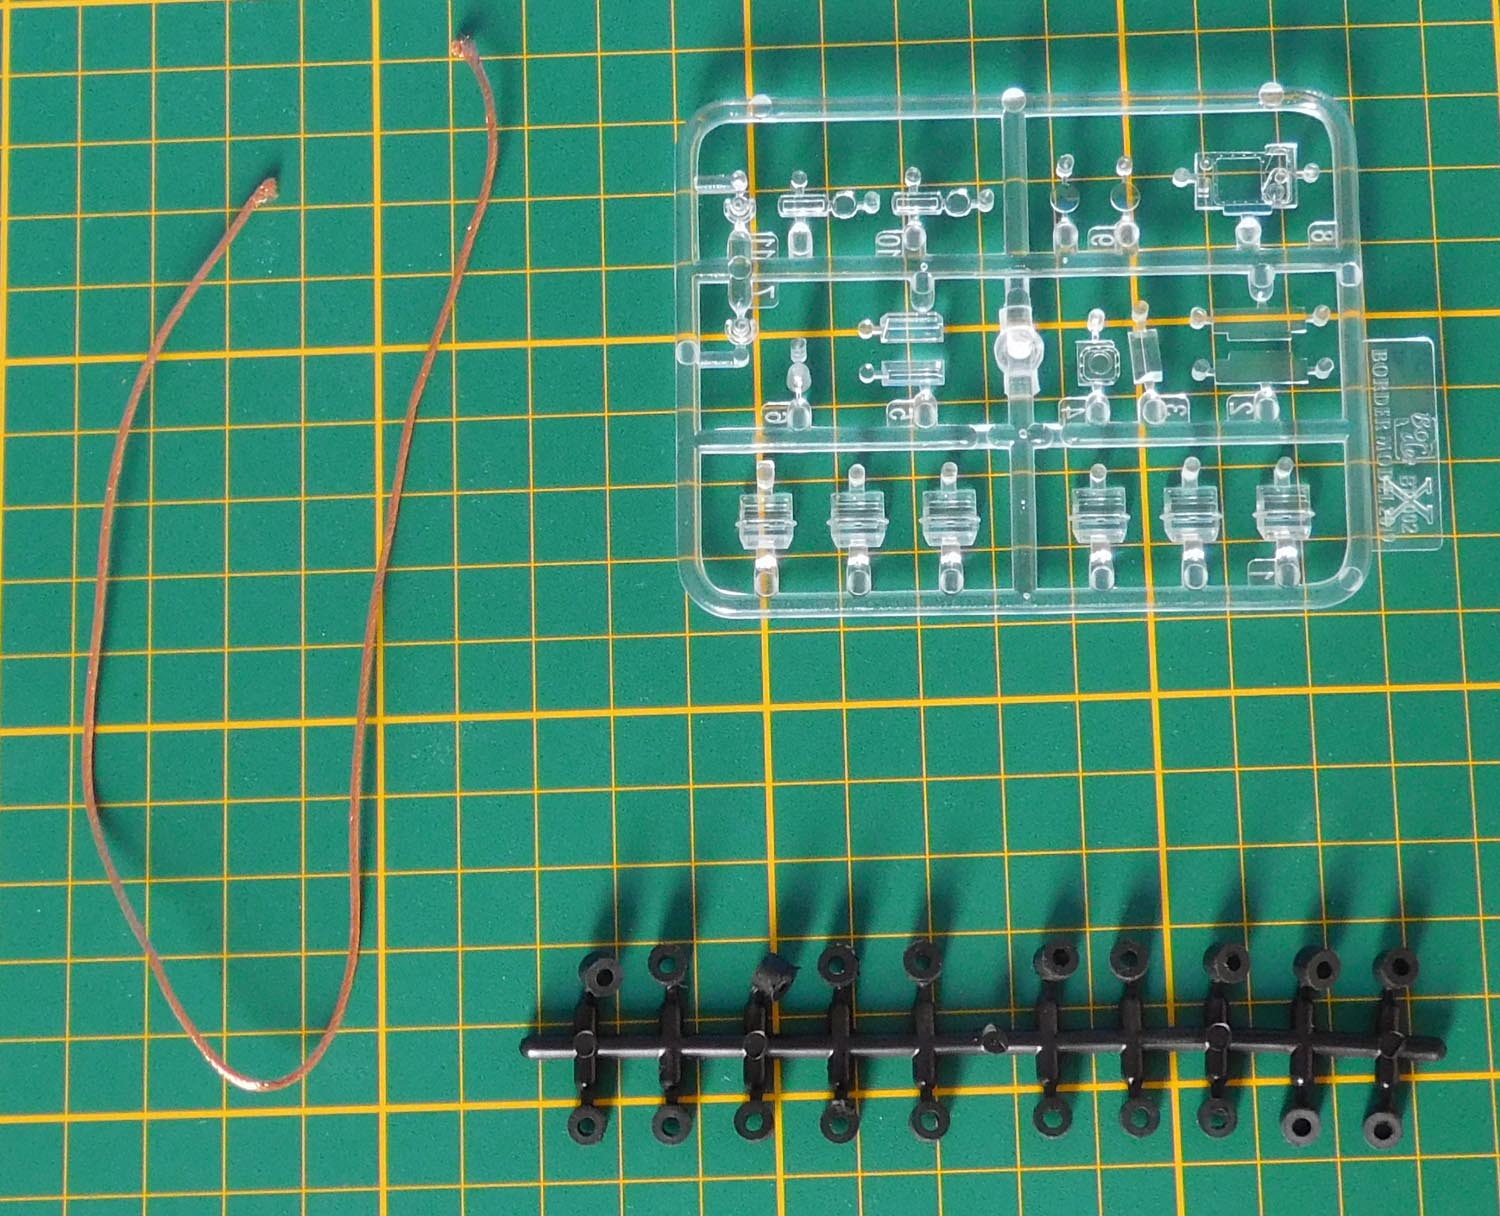
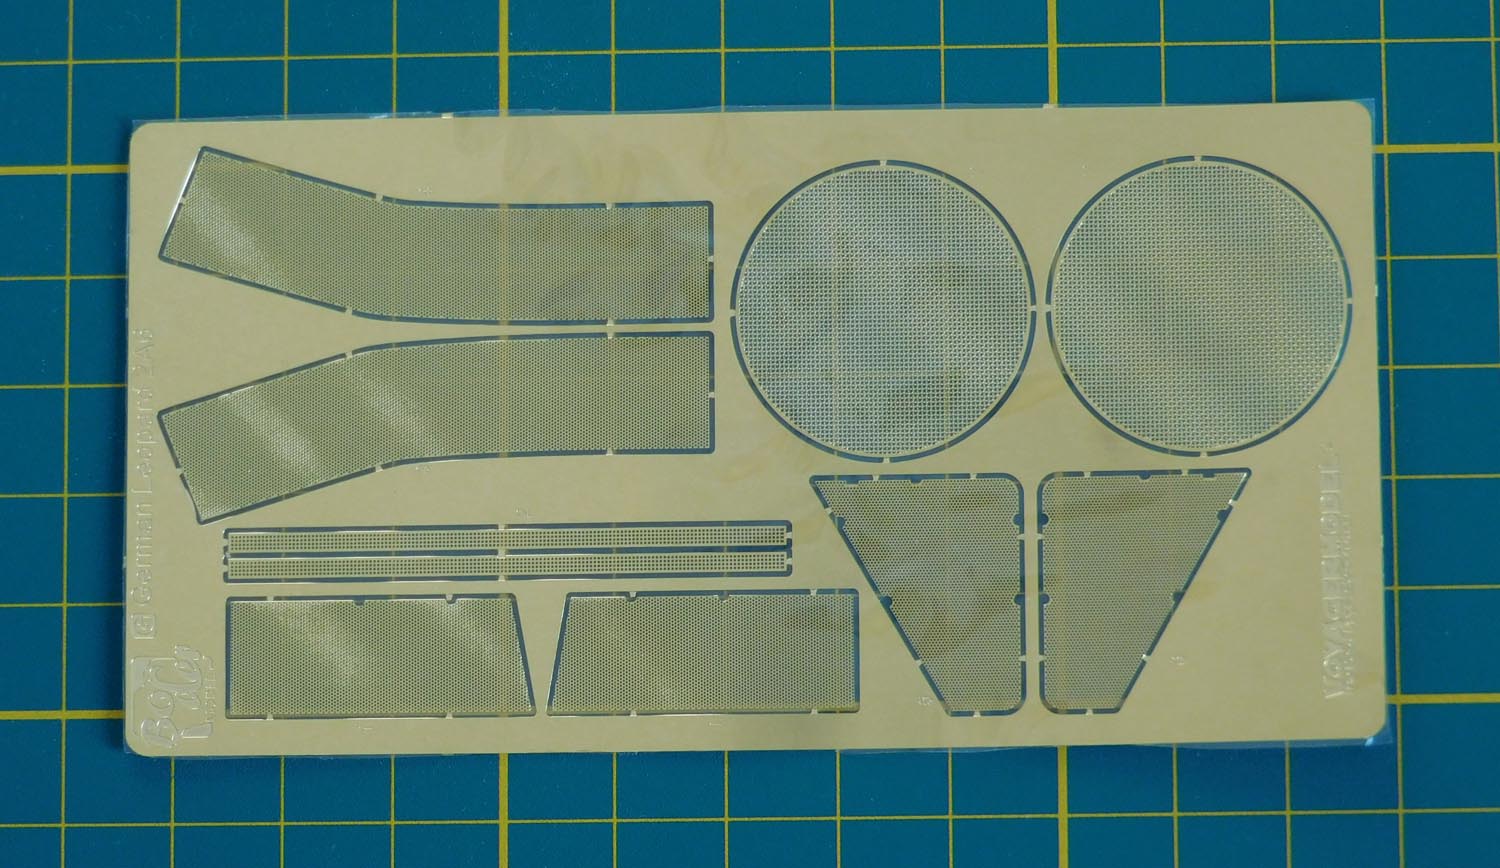
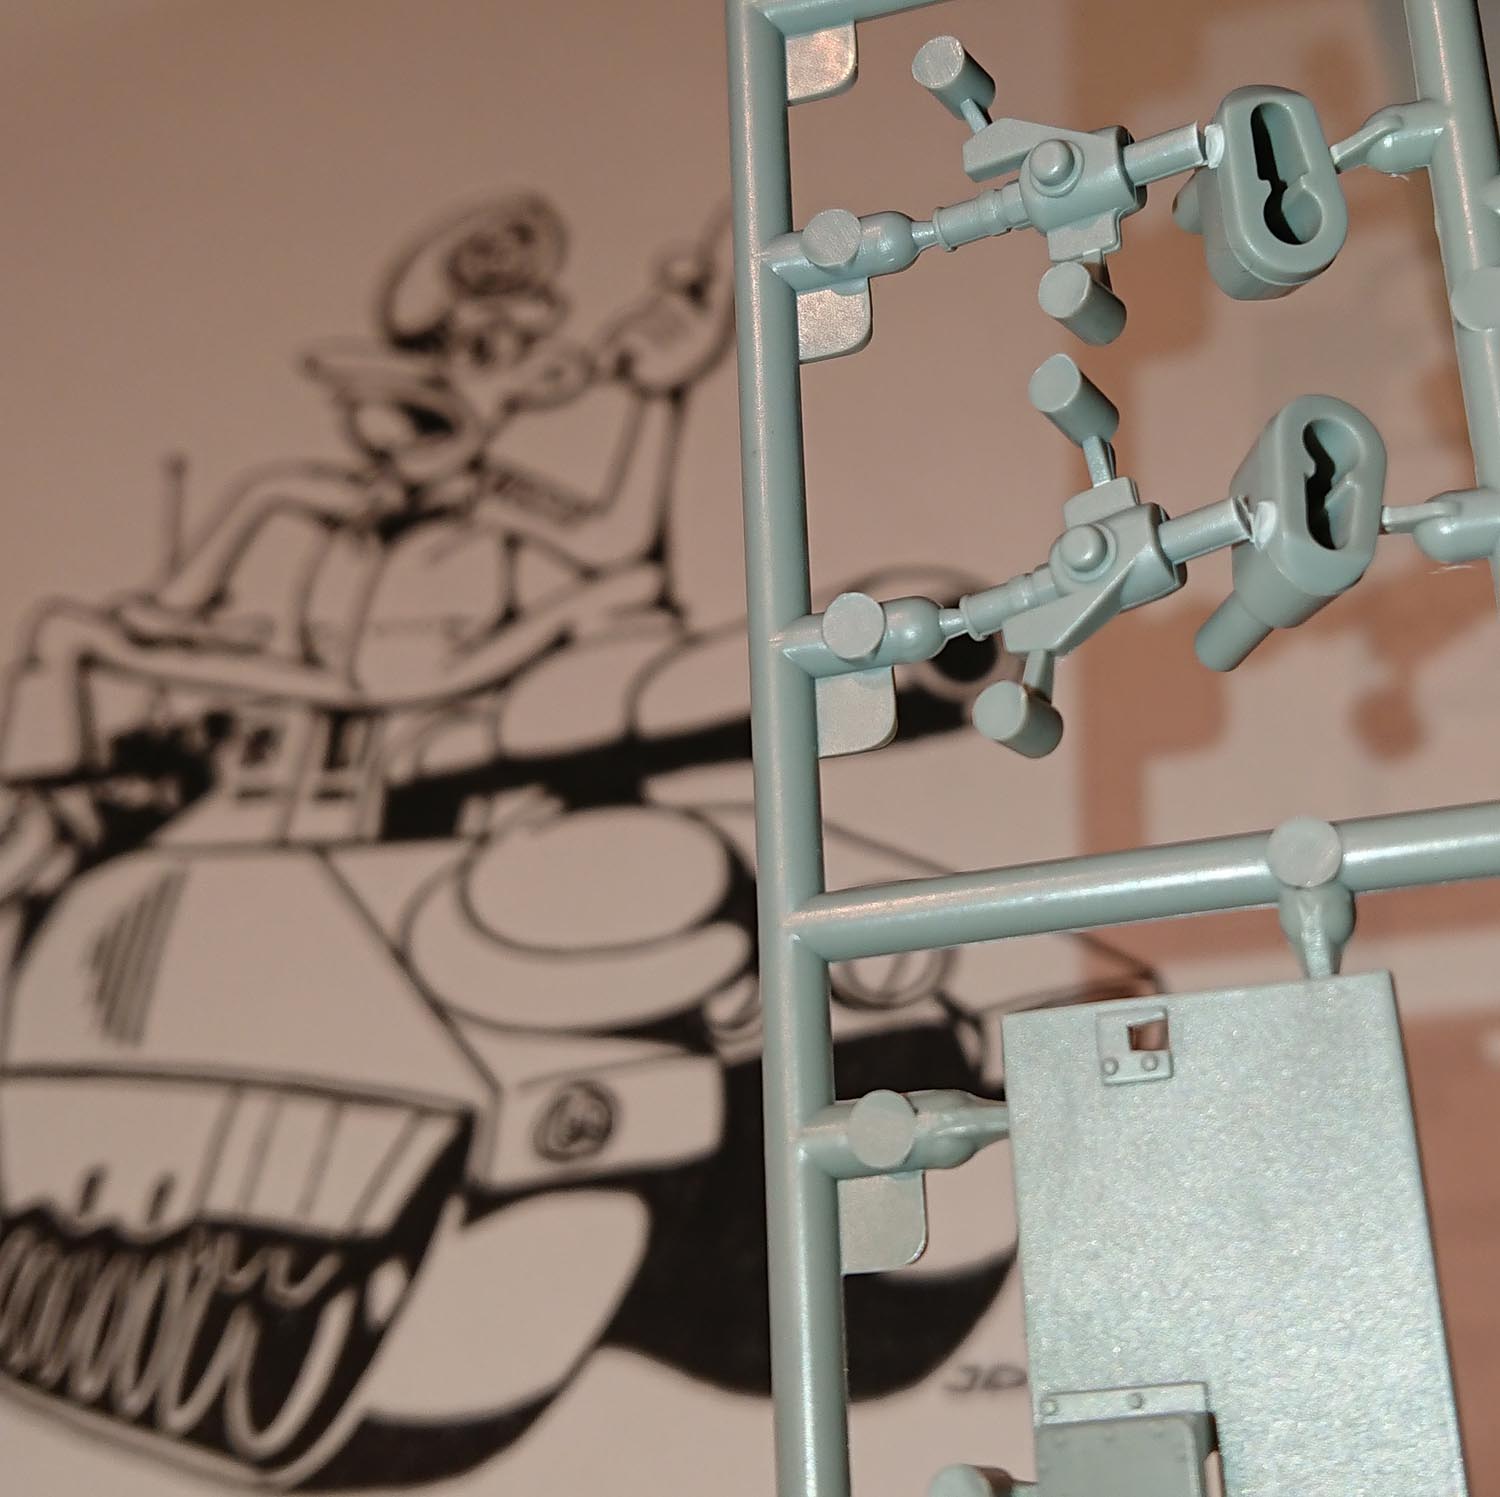
Media: injection moulded plastic (including clear parts), photo-etch brass, braided metal wire
Reviewed by: Frank Lobitz, all photos © Frank Lobitz
Reviewed in: September 2019
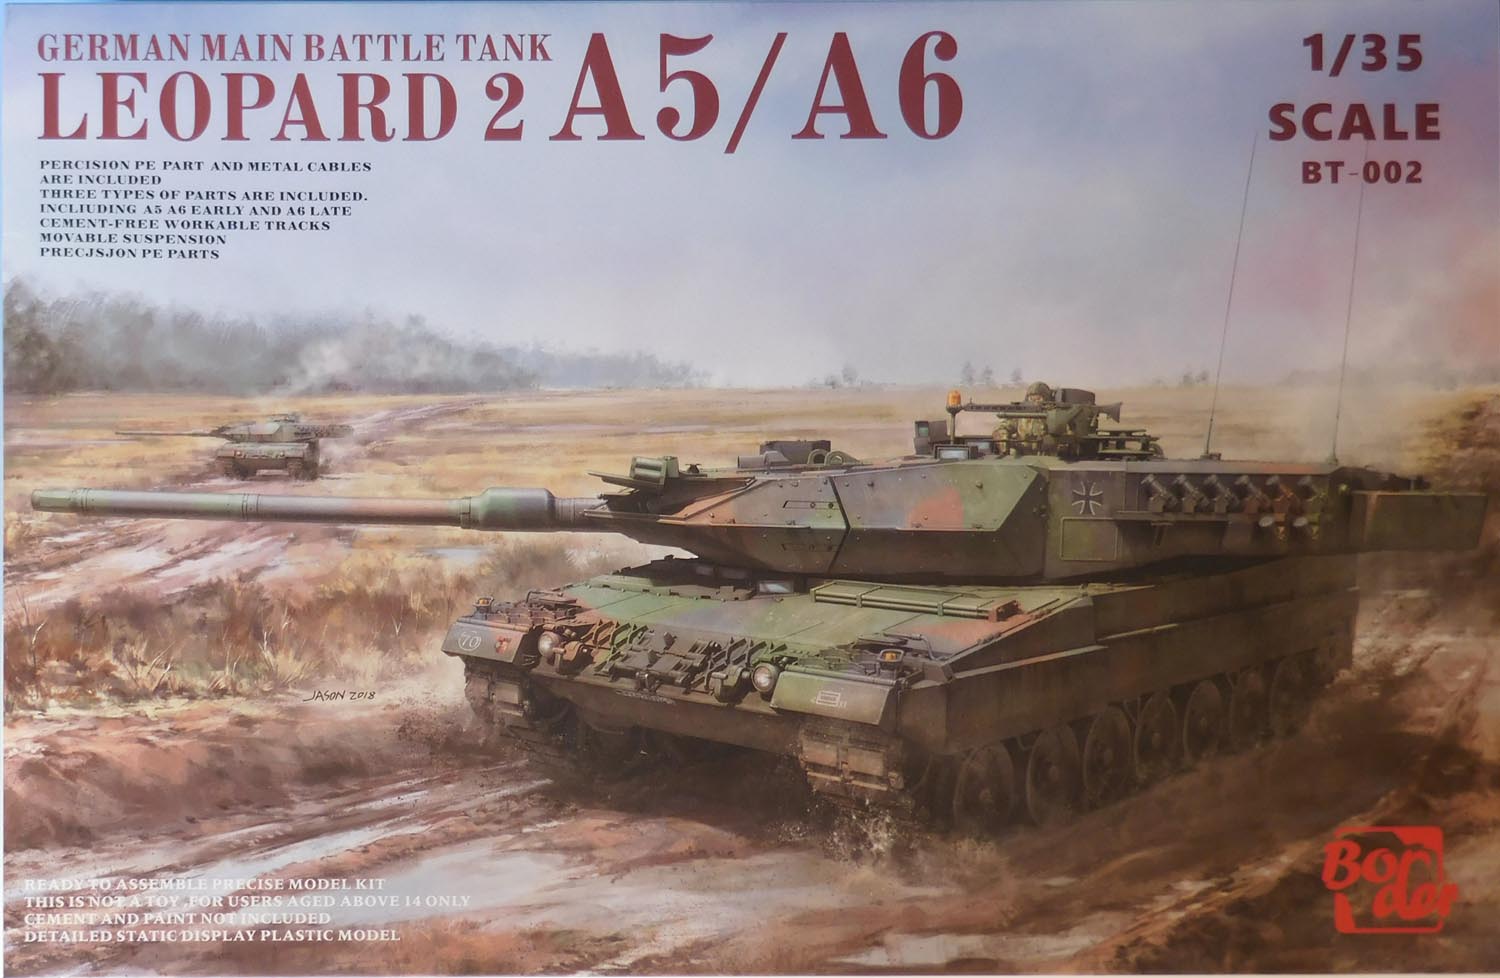
Another Leopard 2 has arrived in town. The new company, Border Model, has chosen the Leopard 2A5/2A6 as their second release (after a PzKpfw IV) to join the jungle of 1.35 scale Leopard 2 miniatures. Mike asked me for a brief in-box review which I gratefully accepted and started immediately. Here is the result.
Out of my four categories of kit-interest, Leopard 2 belongs to the highest level. However, the ruler did not leave the drawer here. Why? I was looking for improvements over the years from kit to kit, from producer to producer, bearing in mind the ever-increasing information available.
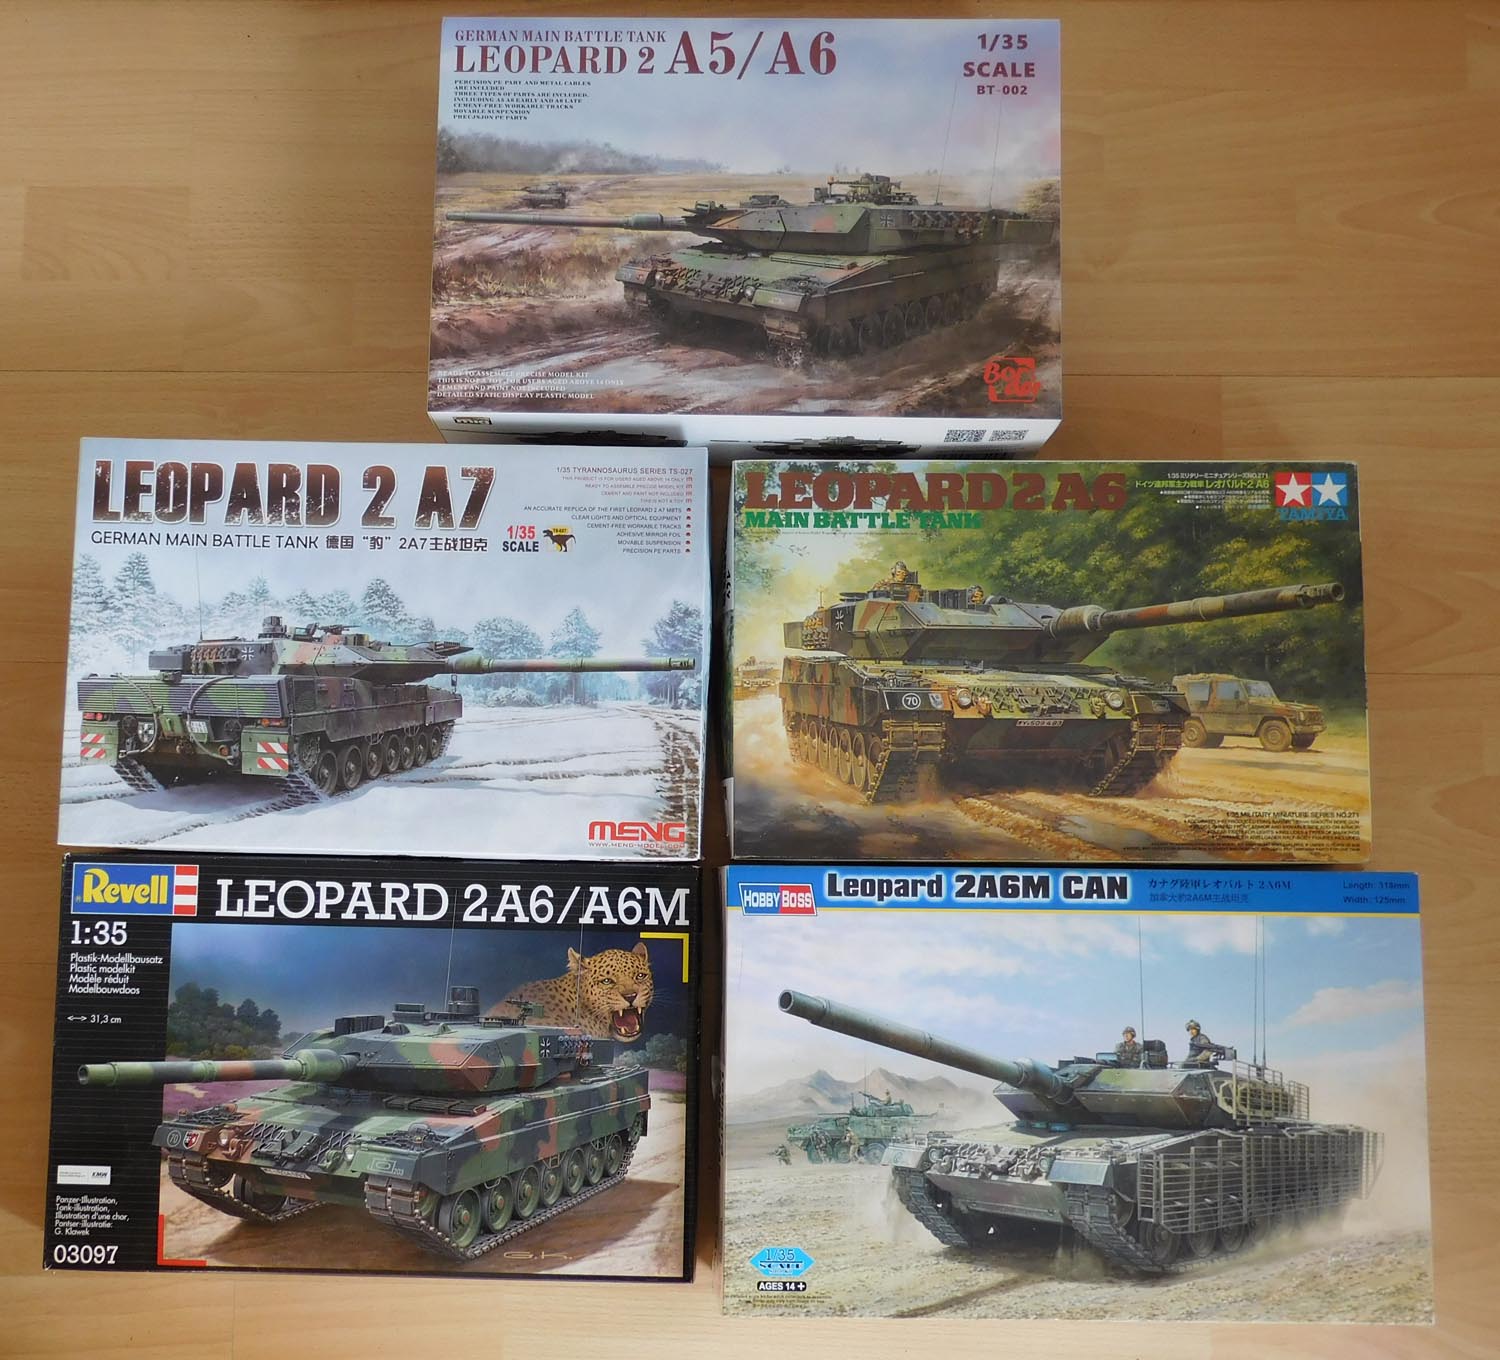
To see progress over the years, a comparison is helpful, and this is a fair basis to honour the new kit - or maybe not. We will soon see. Therefore, I chose from of a large range of available kits, the ever-lasting Tamiya 2A5 (or the alternative 2A6) from 2000/2003, the HobbyBoss 2A6M CAN from 2010 (based on their new tool from 2006), the Revell 2A6/2A6M from 2012 (please do not mix this up with earlier 1980s Italeri/Revell 2A5/2A6), and the Meng 2A7 from 2016.
Before starting to look at the Border kit, we should have an understanding of what they are offering. According to the box, there are alternatives for a 2A5, a 2A6 'early', and a 2A6 'late'. The question is - what is early, and what is late? Or, how do Border handle the alternative parts?
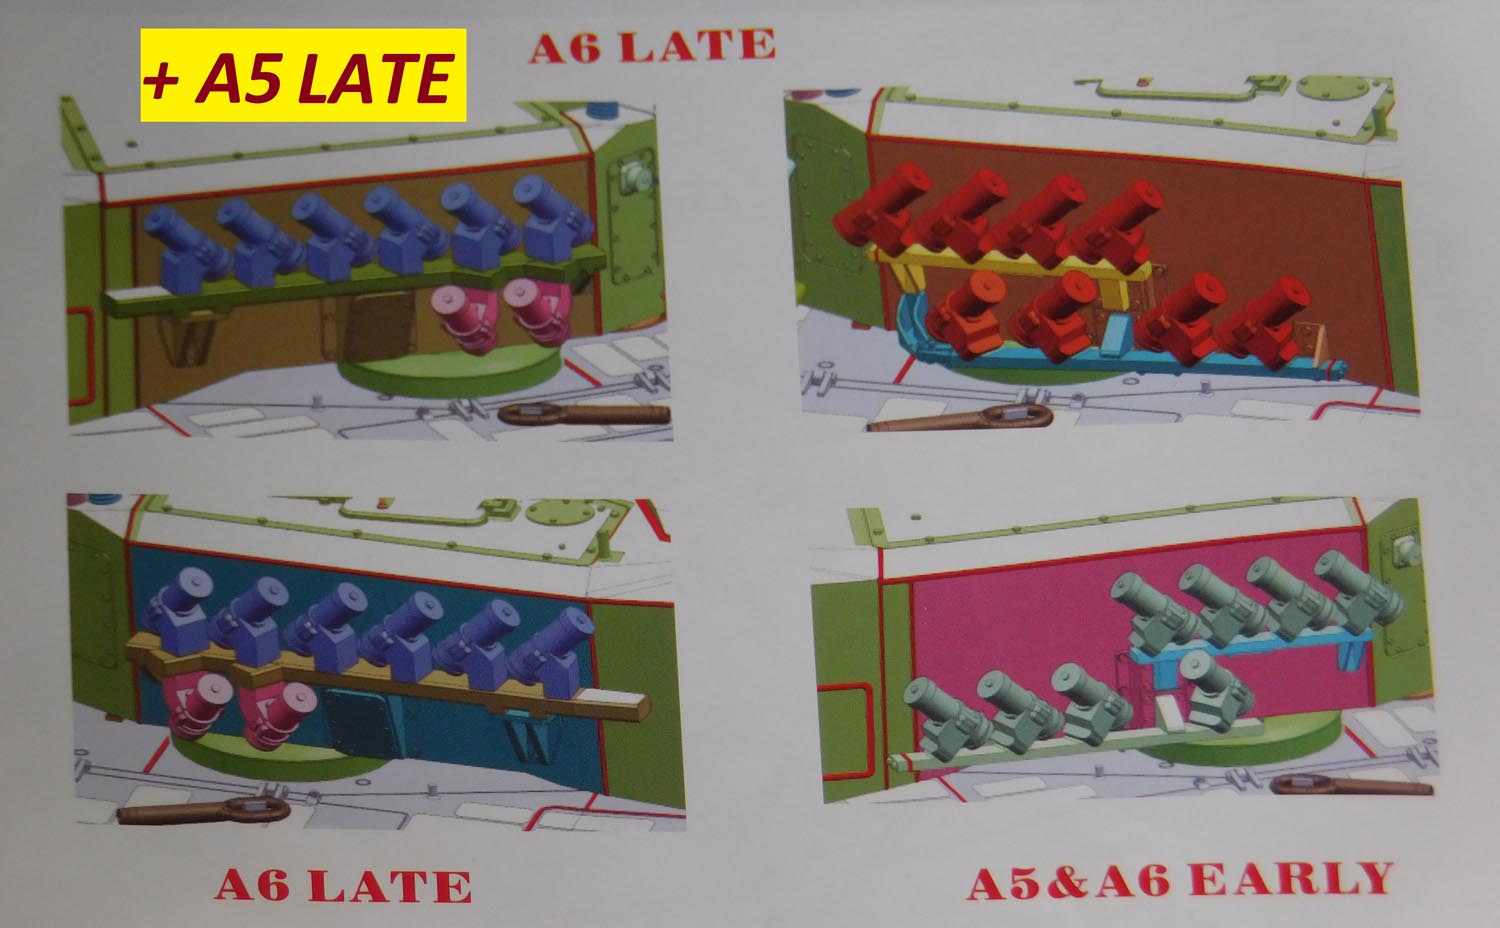
The change from the 4/4 to the 6/2 layout started around 2006/2007 and was finalised around 2011, maybe 2012. It doesn't matter if the tank is a 2A5 or a 2A6!
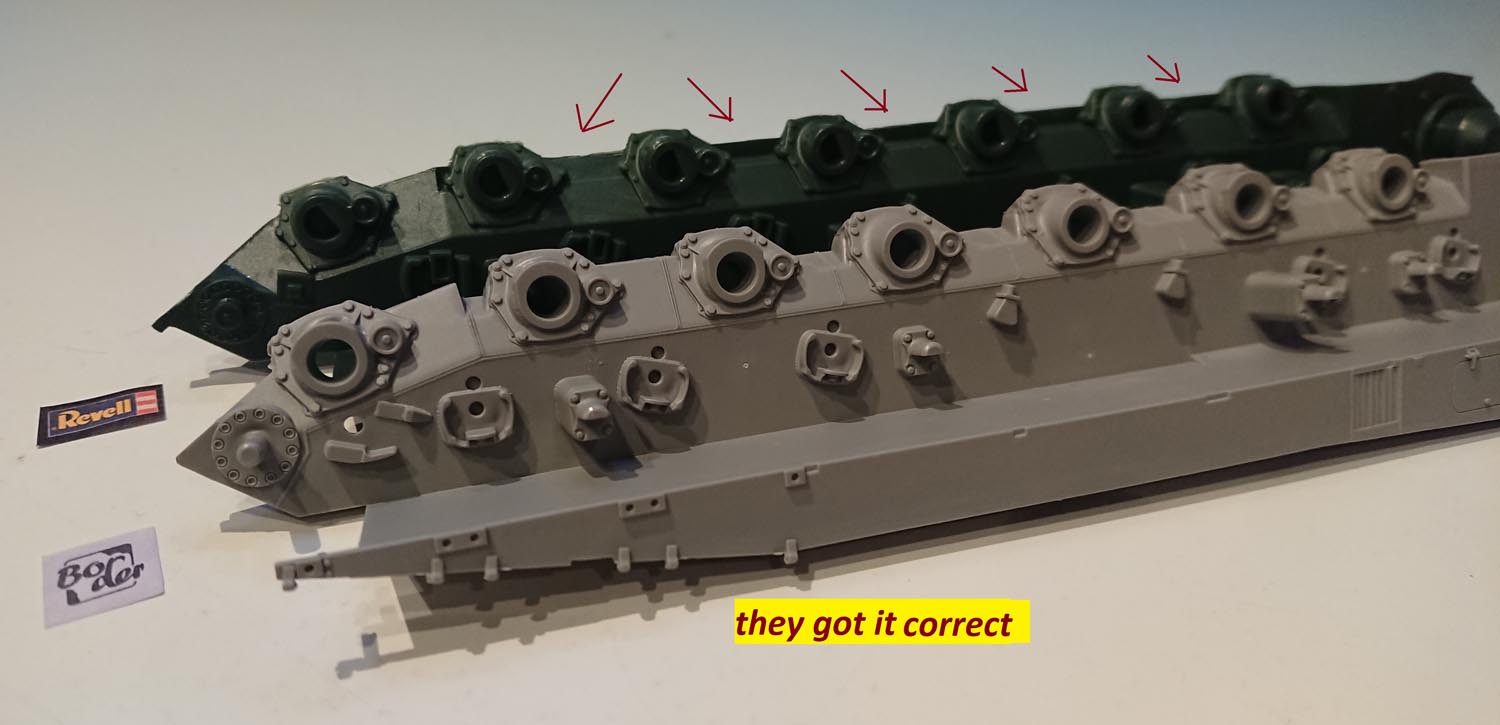
Anyhow. The tubes do not all point directly in the 12 o'clock direction in reality - the different side angles are NOT noted by Border. However, the angle of elevation is always the same. These looked awful on the photos of the Border Leopard 2 published before it was released. Border's model builder did not do it justice.

Border gives us three different skirts, but they have mixed them up in the instructions - at least to my understanding.
Therefore, during an interim period, all three versions of sideskirts could be seen, sometimes even with mixtures of 2nd and 3rd generation skirts on one side because of repairs (rarely, but seen).
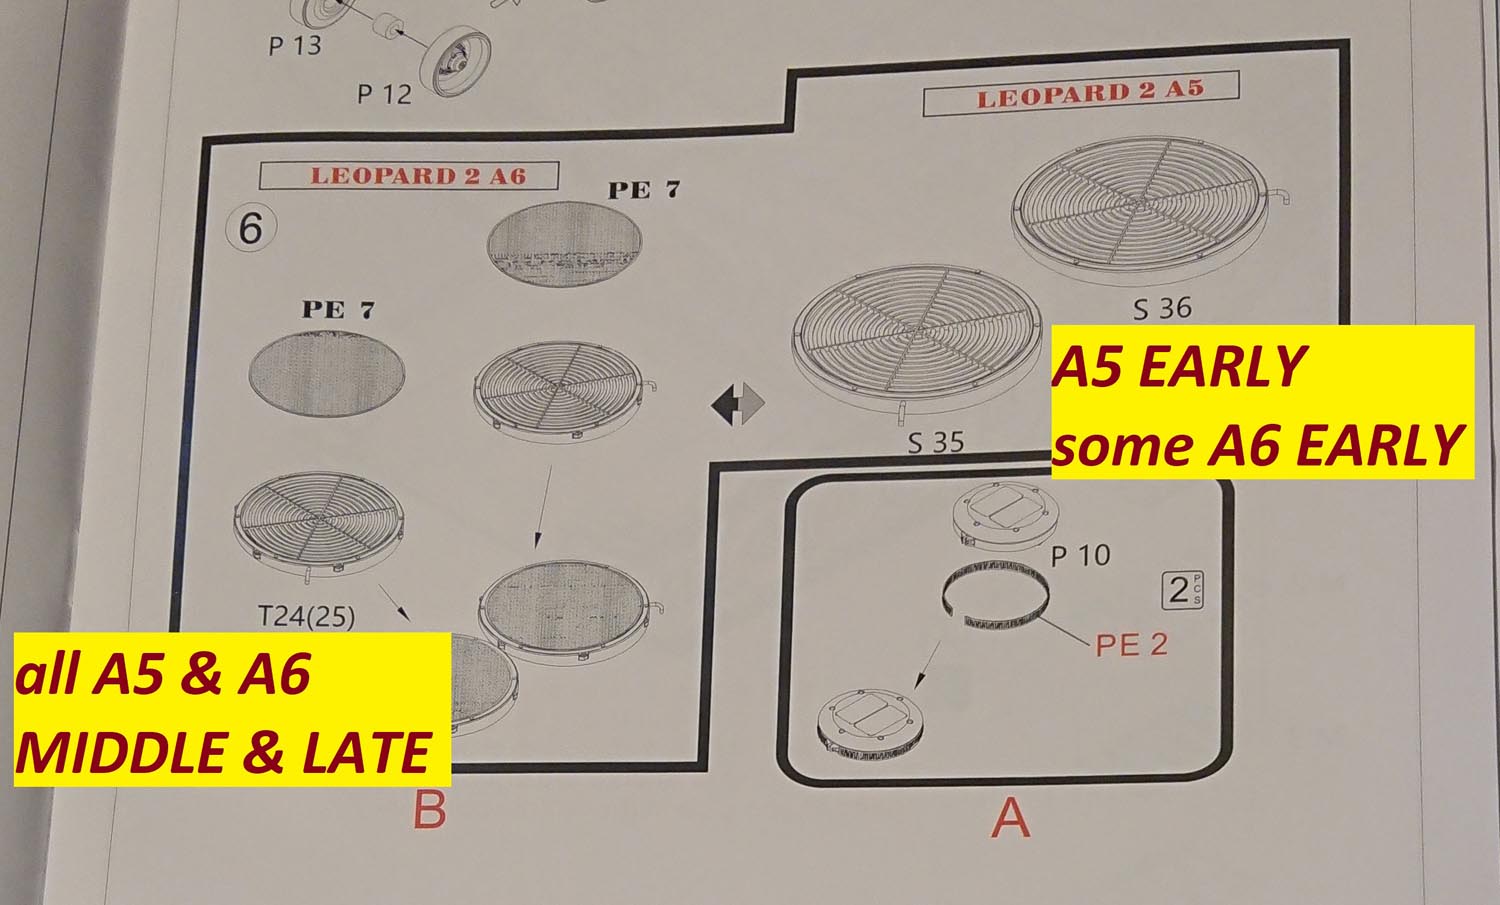
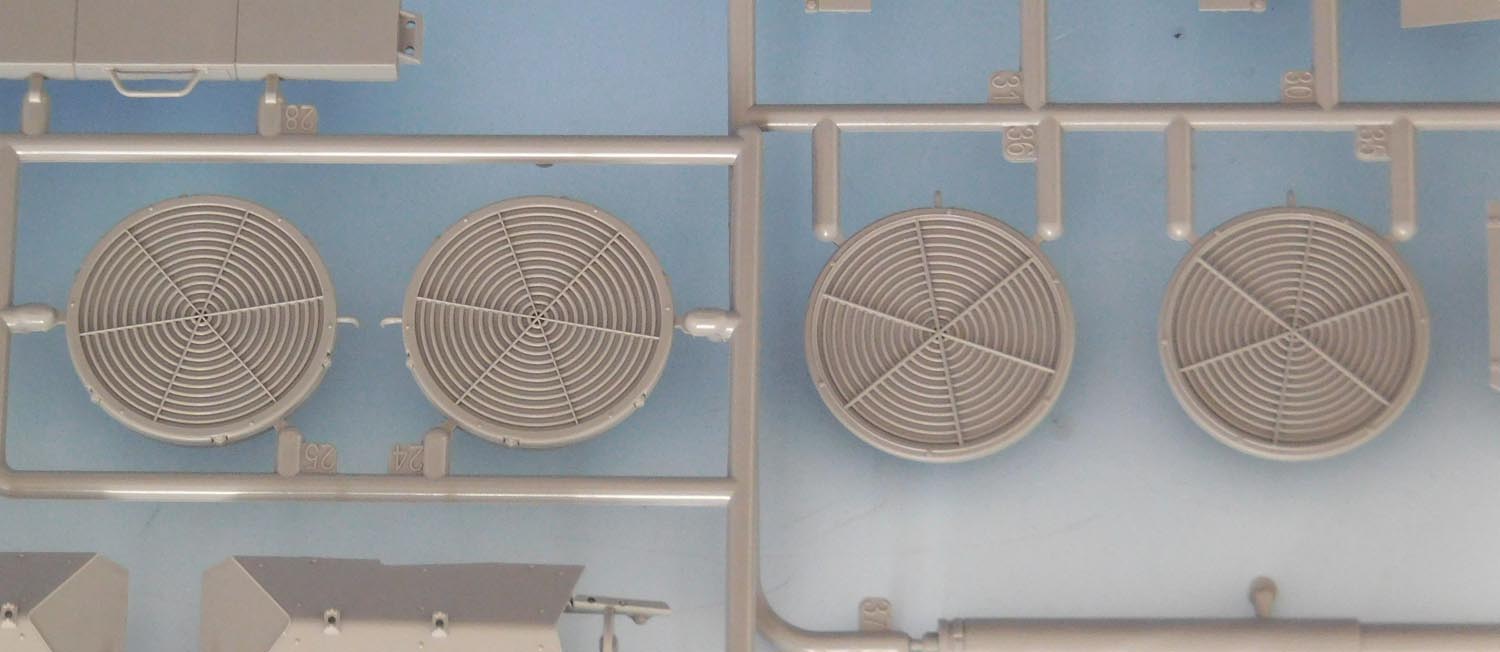
Border gives us two different versions of cooling grilles - the older one (S35/36) and the dampened one (T24/25) with bolts around the edge. This change started in late 1990s/early 2000s years and was done at depot level maintenance - meaning it took years to implement. It does not matter if it was 2A5 or 2A6. Meanwhile, all German Army Leopard 2s were changed to T24/25.
A 2A5 can be built from the parts supplied in every configuration from 1995 up until now using the 6/2 smoke dischargers (but not before 2006) and 3rd generation skirts (but not before 2008). For earlier 2A5s: 2nd generation skirts (since 1995) or 1st generation skirts (since 2000/2001) can be used.
For a 2A6 it is more or less the same - but starting from 2002. Because there were more external changes introduced from about 2016 (such as an external extension on the right-side rear turret top ~ the Ultra-Cap), the very latest configuration of 2A6 cannot be built in detail out of the box.
Too complicated? Never mind. Do what you like most, no-one can prove you wrong.
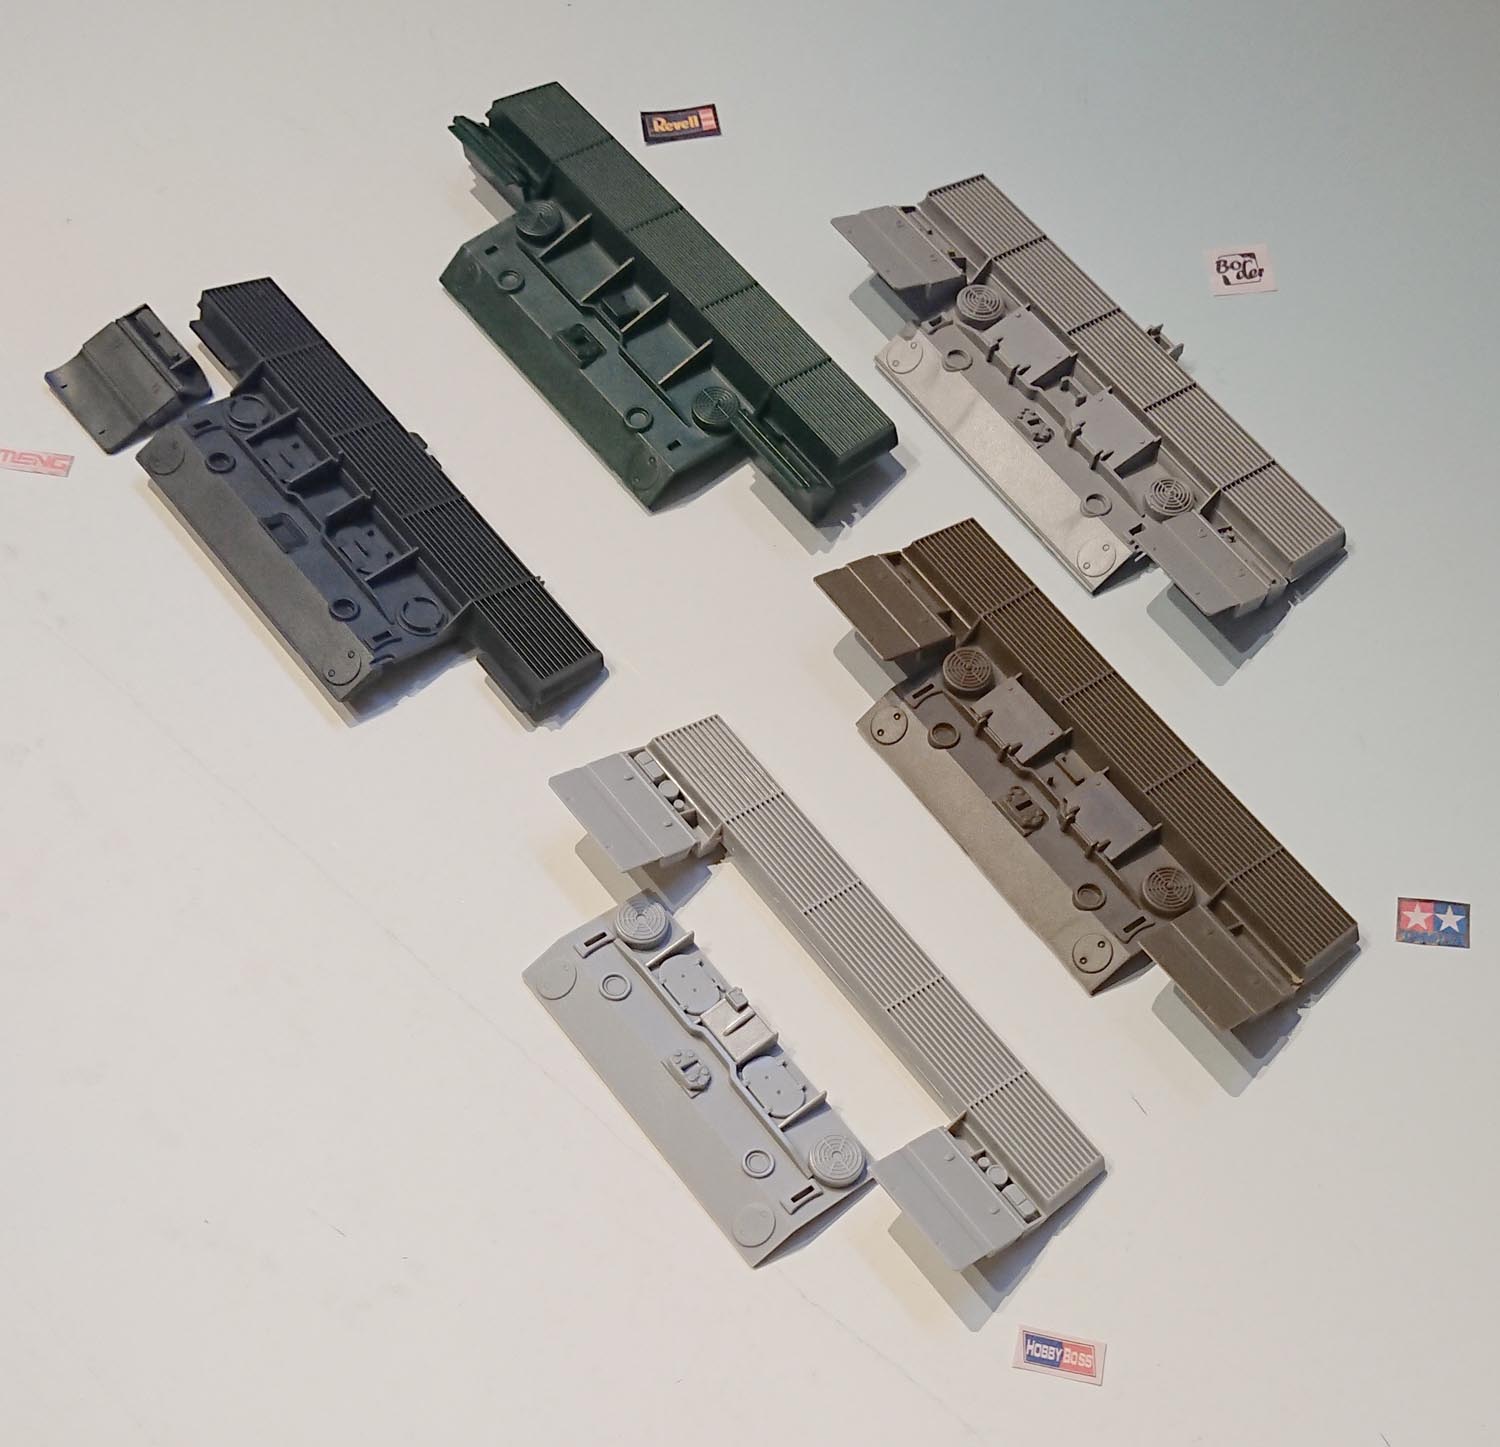
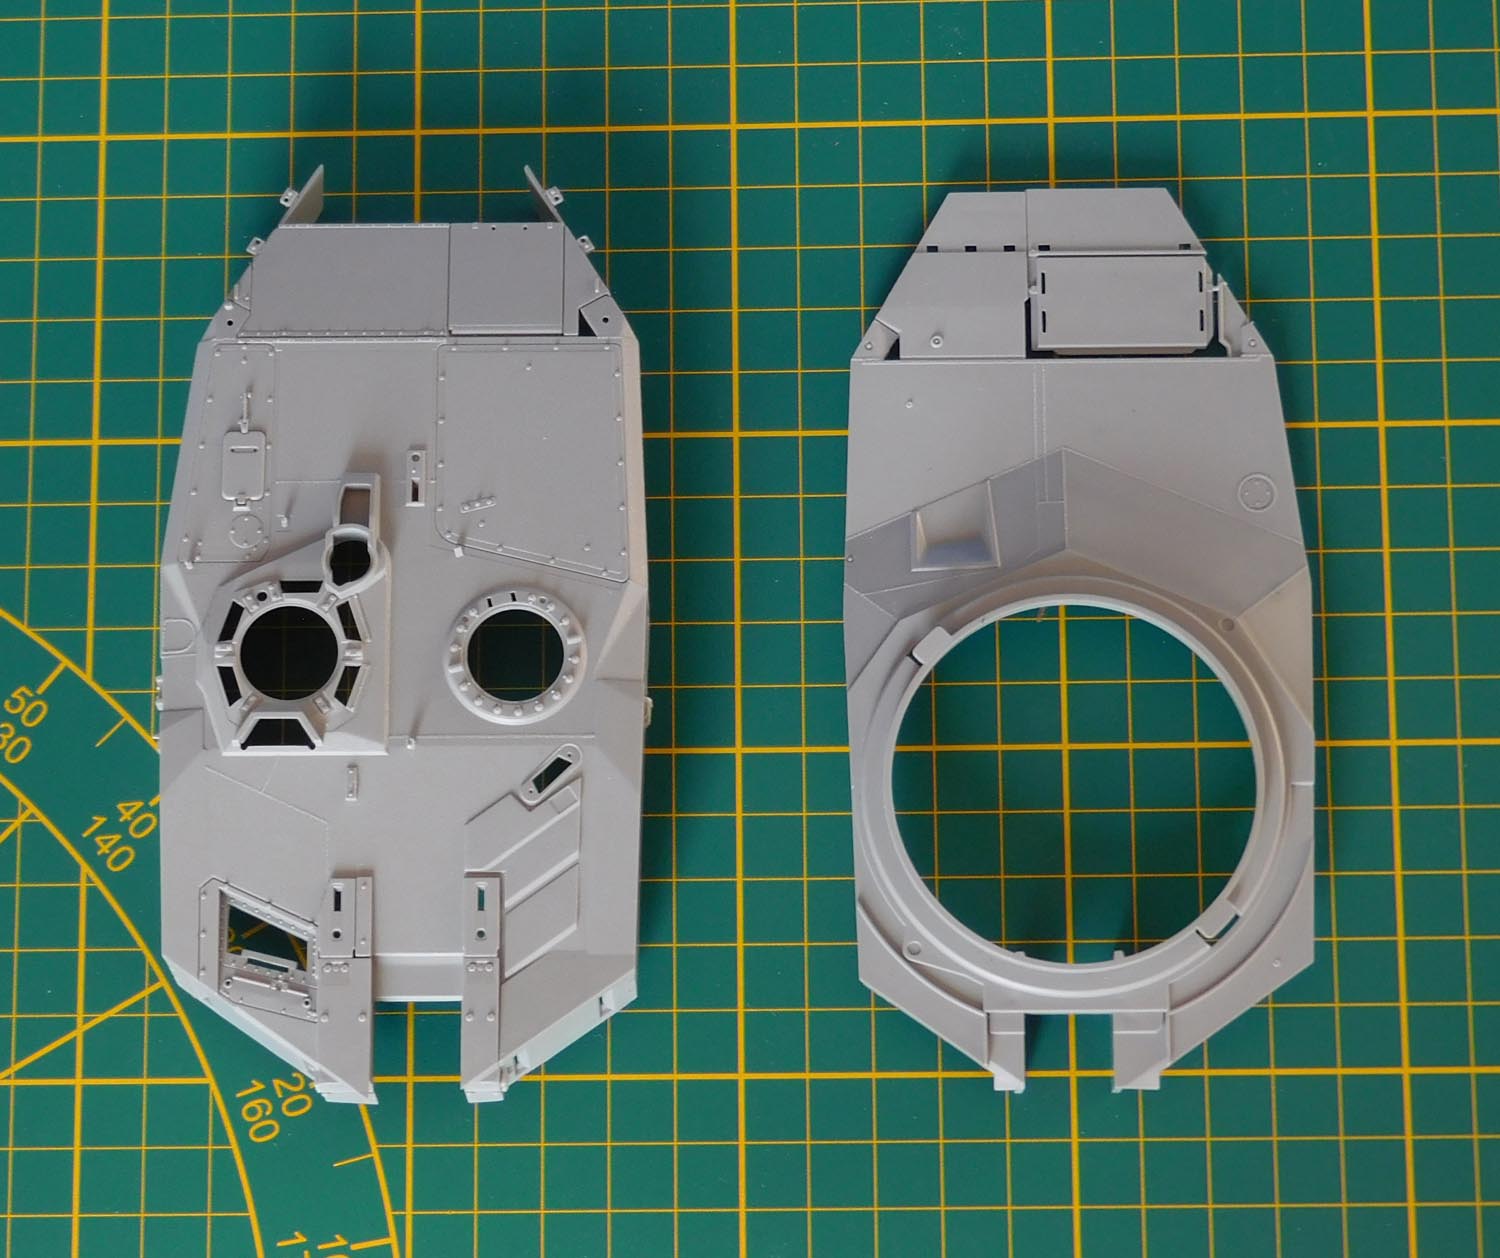
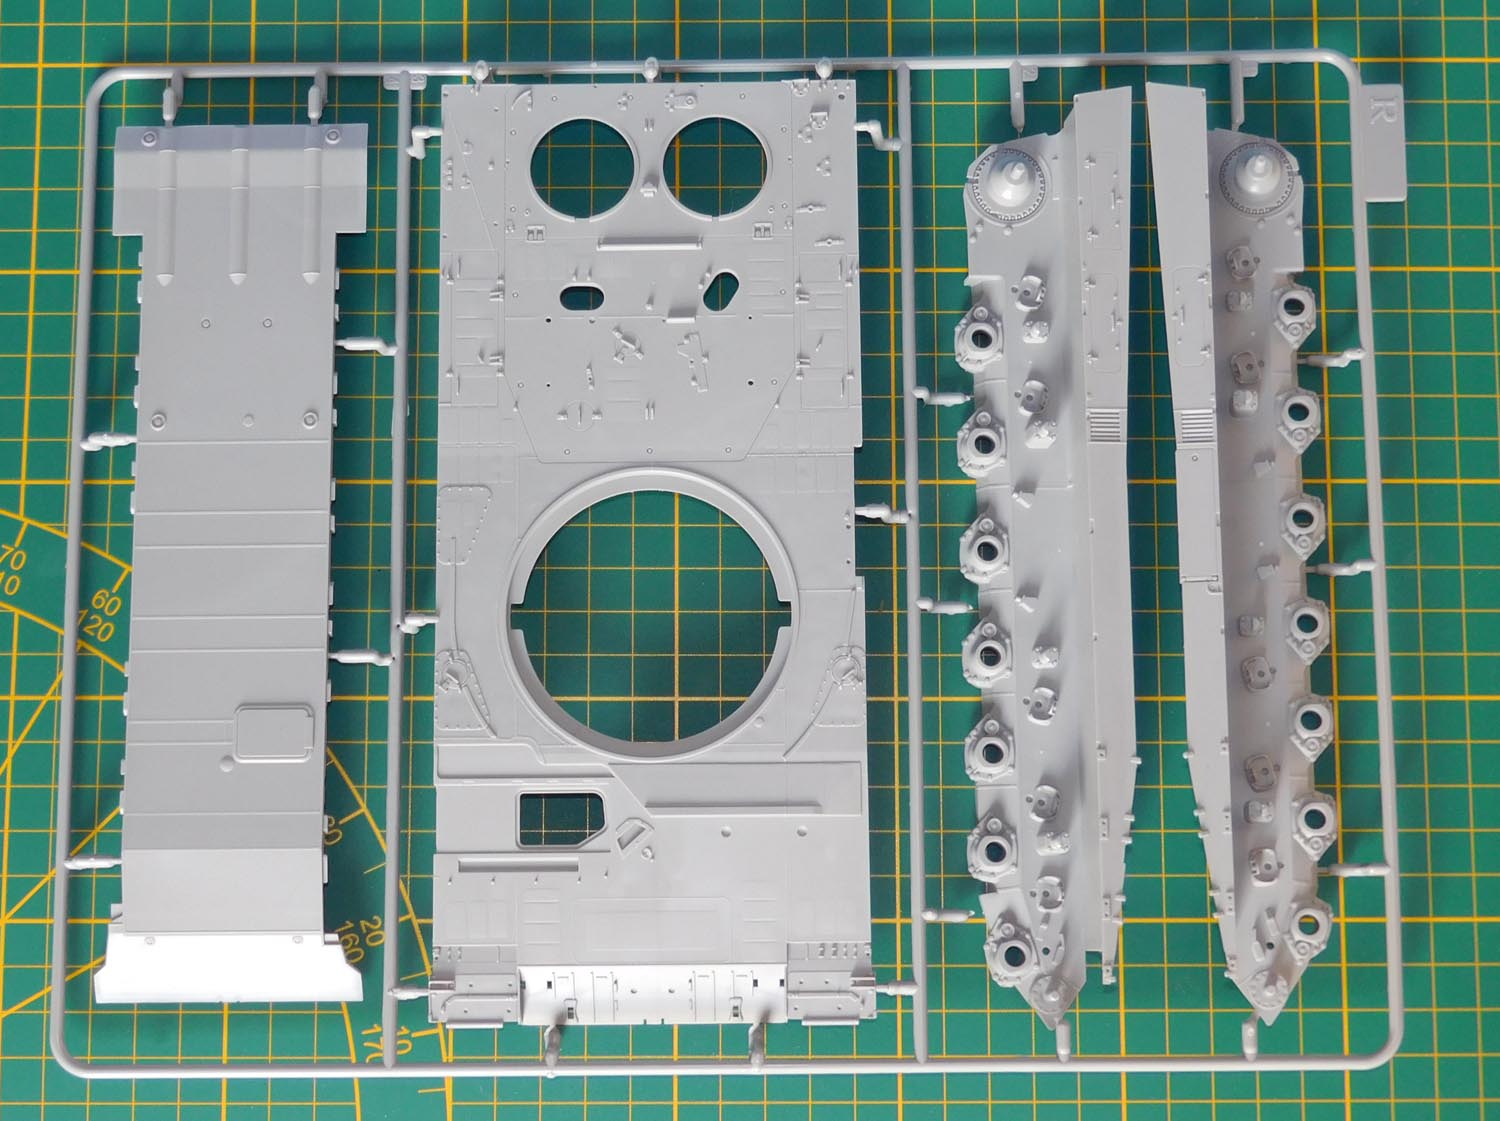
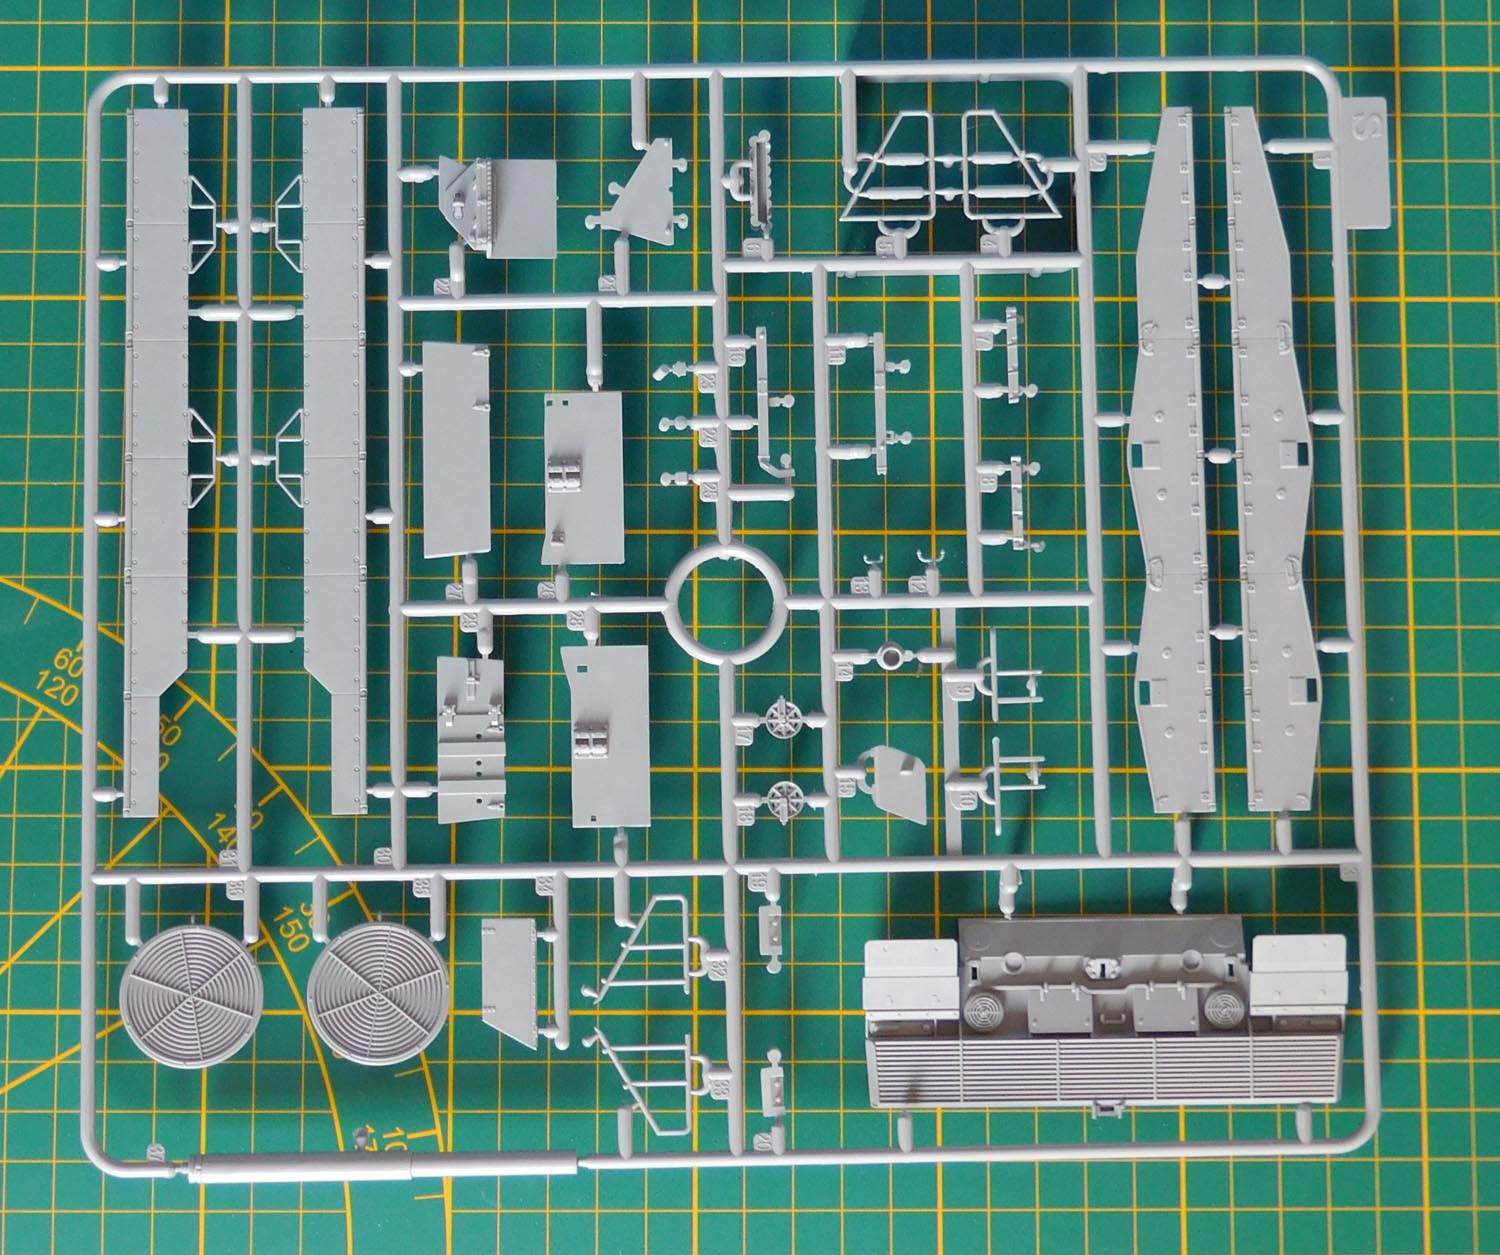
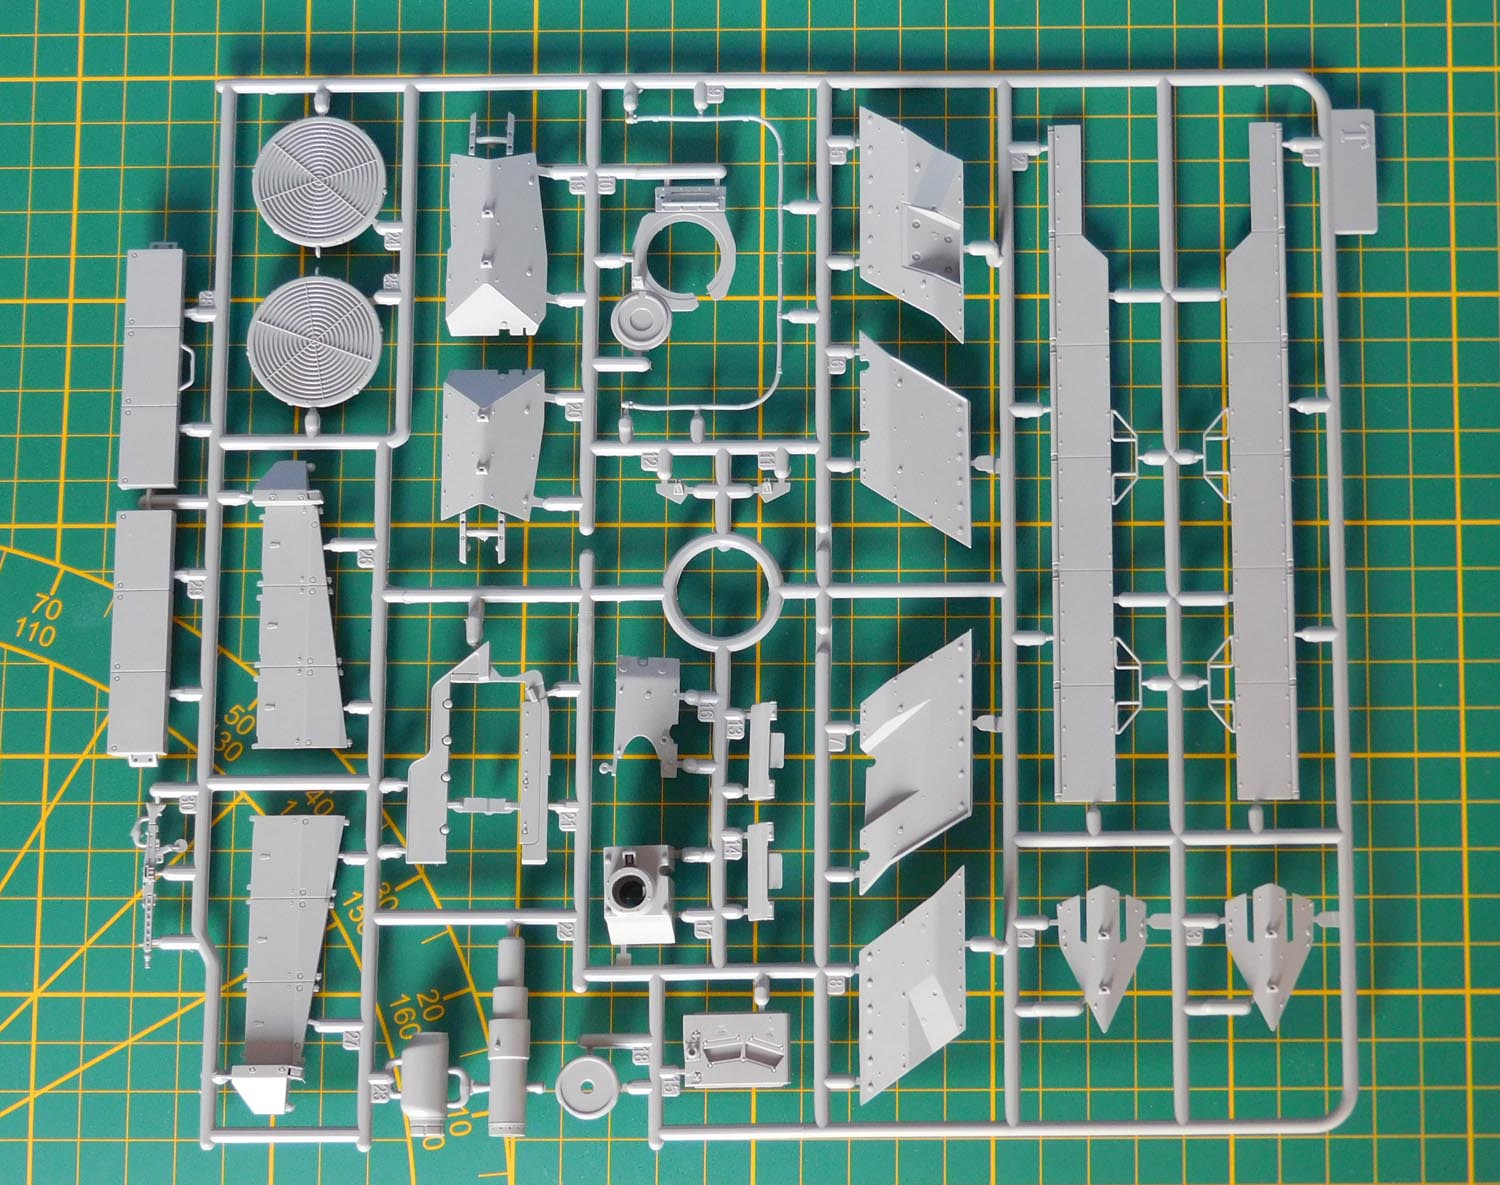
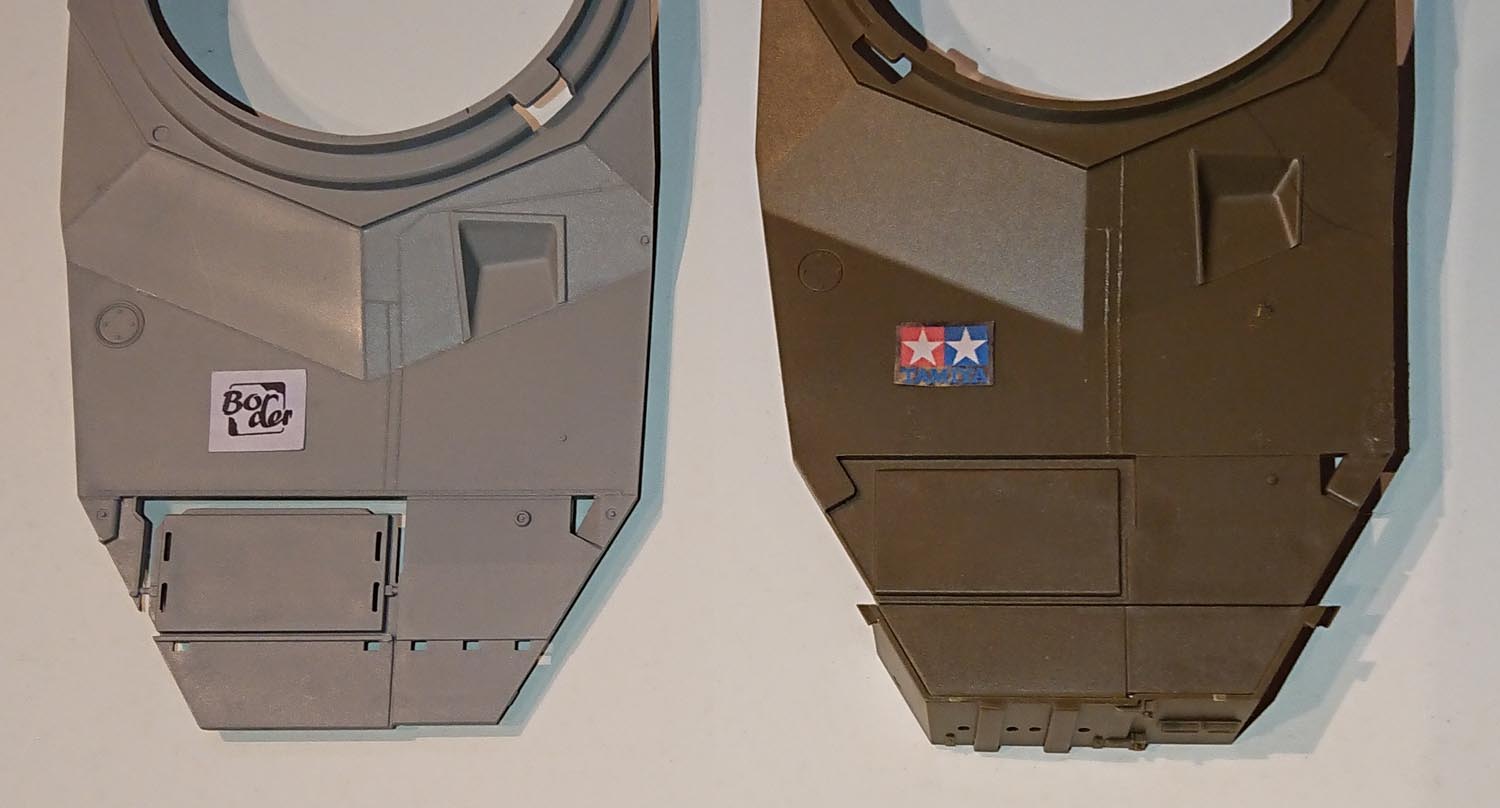
Instruction Step 1 involves the rear hull. I was pretty happy when I realised that it is much better than on the photos Border published before in their earlier publicity photos. In particular, the air outlet panel and the exhaust are fine and the best, compared to the other manufacturers. Interestingly, only Revell gives the mudguards as single parts. Cross-country, they are removed, only needed on public roads.
Border and Revell use bulkheads to reinforce the chassis, hopefully preventing the upper hull top sag when the turret is in place. The bulkhead from Border is close to the position of the real one.
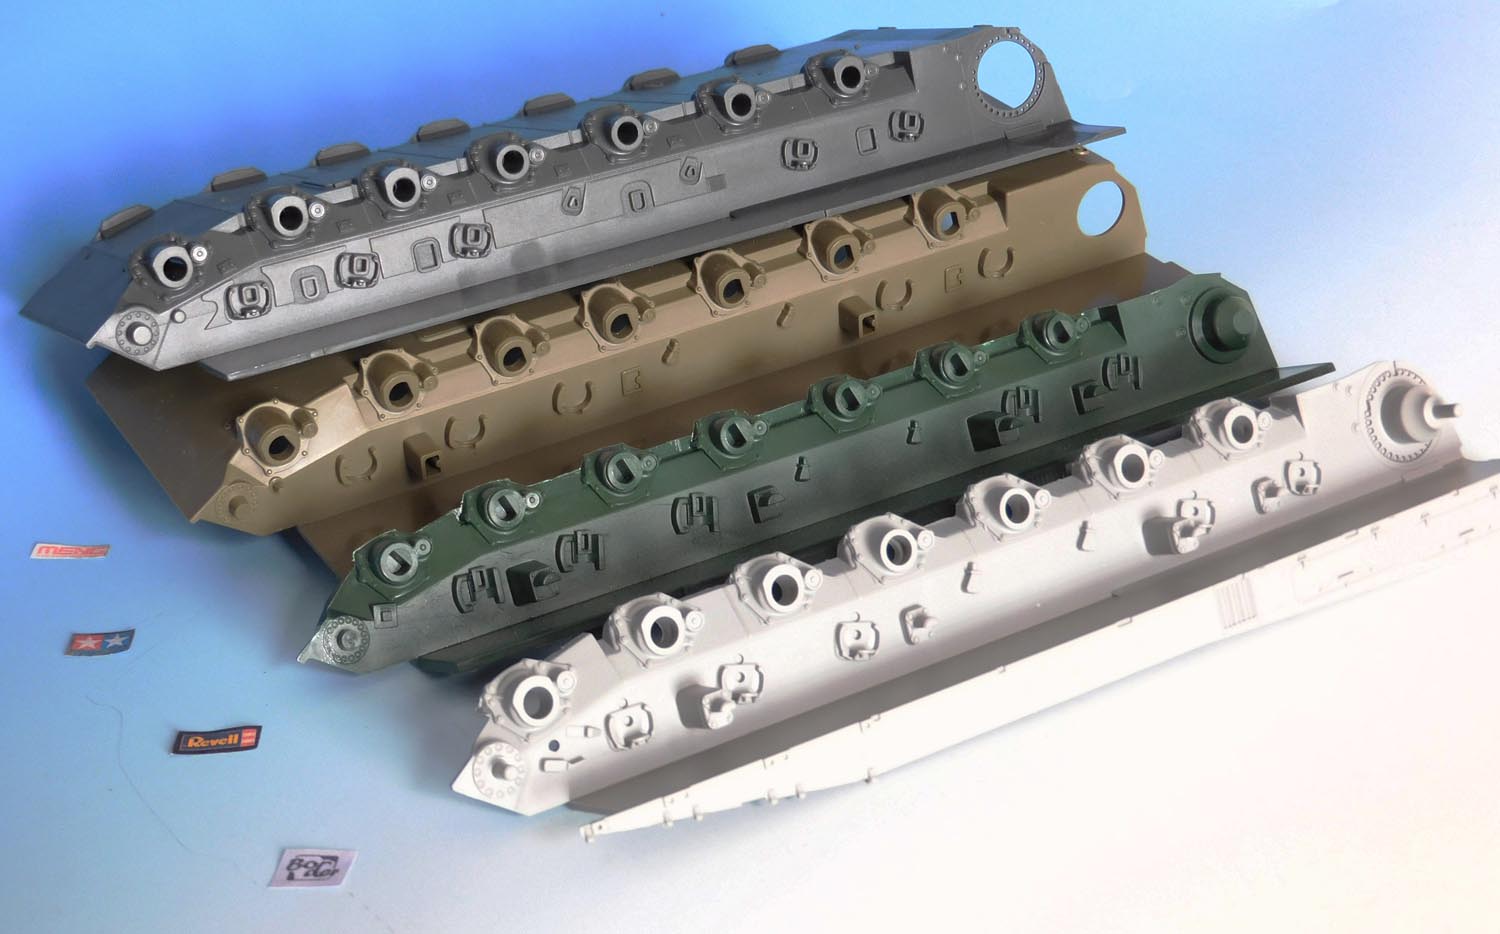
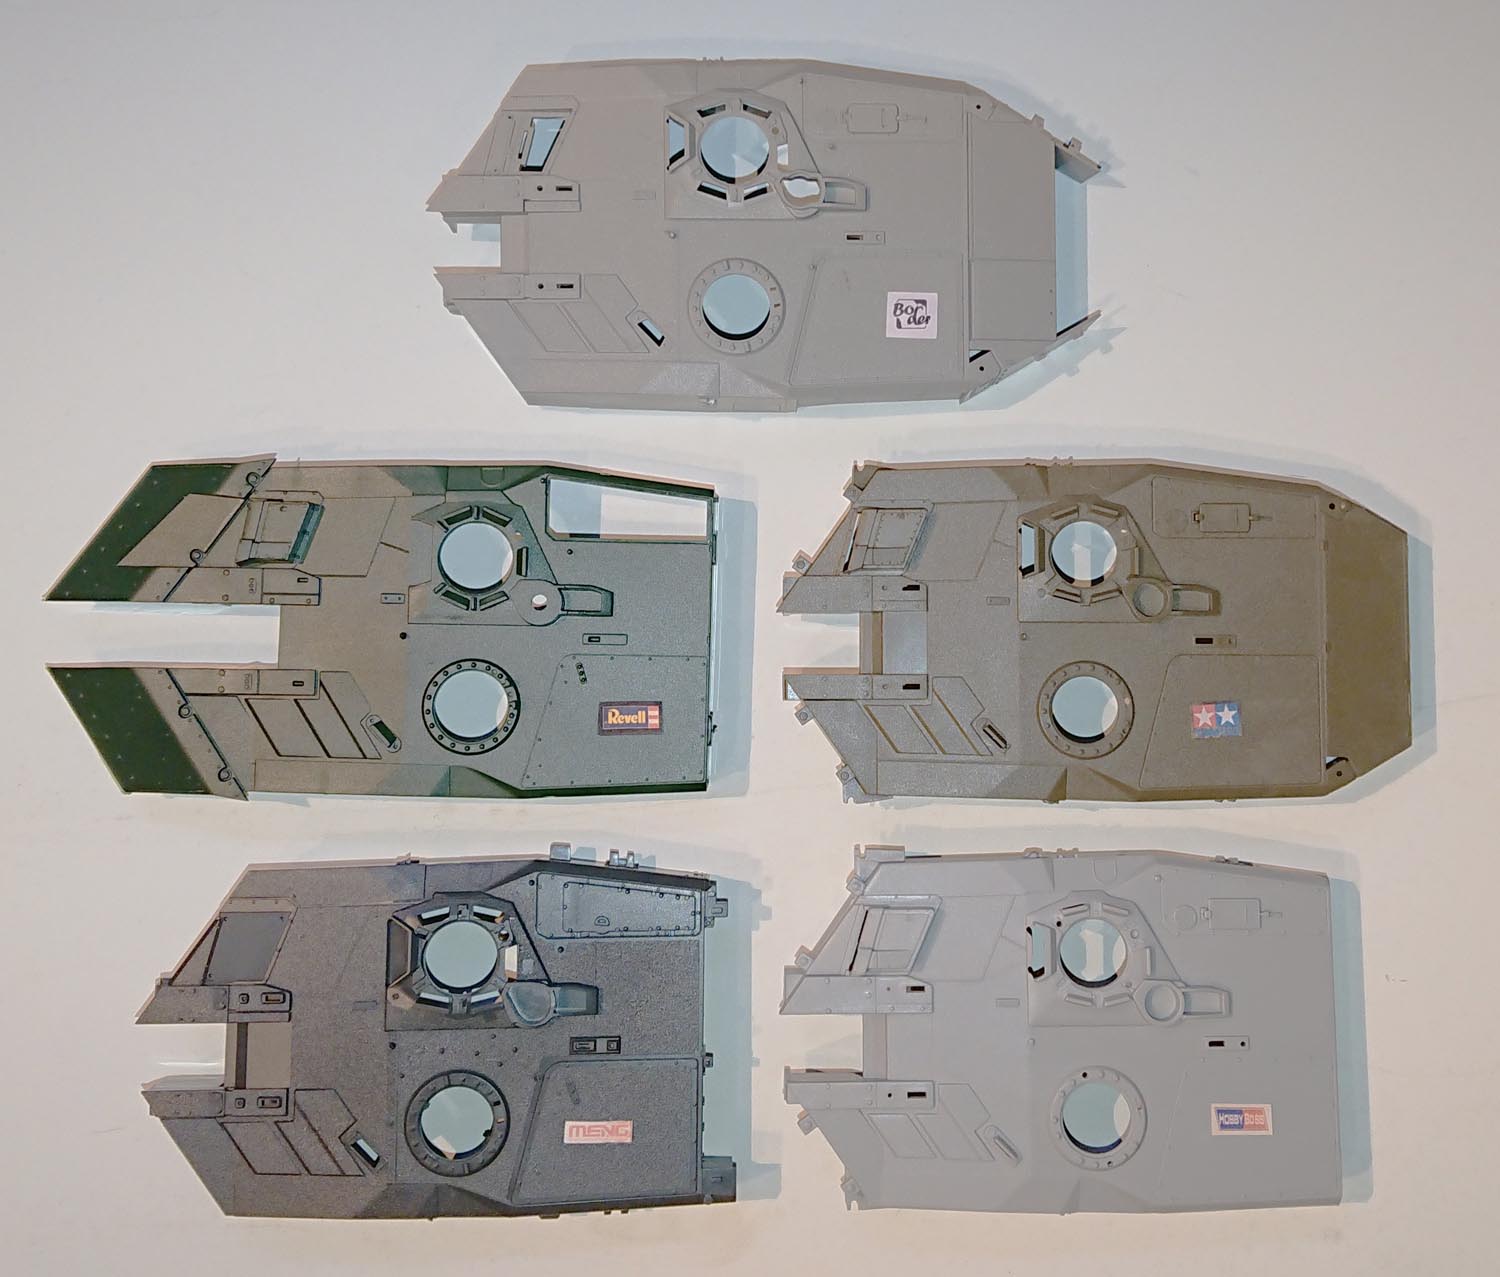
Revell was the first to have the correct shape of the area behind the second swing arm station on the right side. Now Border follows. Compare this area to the ones behind stations three to seven of the other manufacturers to see the difference.
At Step 4 in the instructions, the torsion bars should be fixed. I do not see the point of having a working suspension on a static display model. I will glue them both sides just to prevent sagging, long-term.


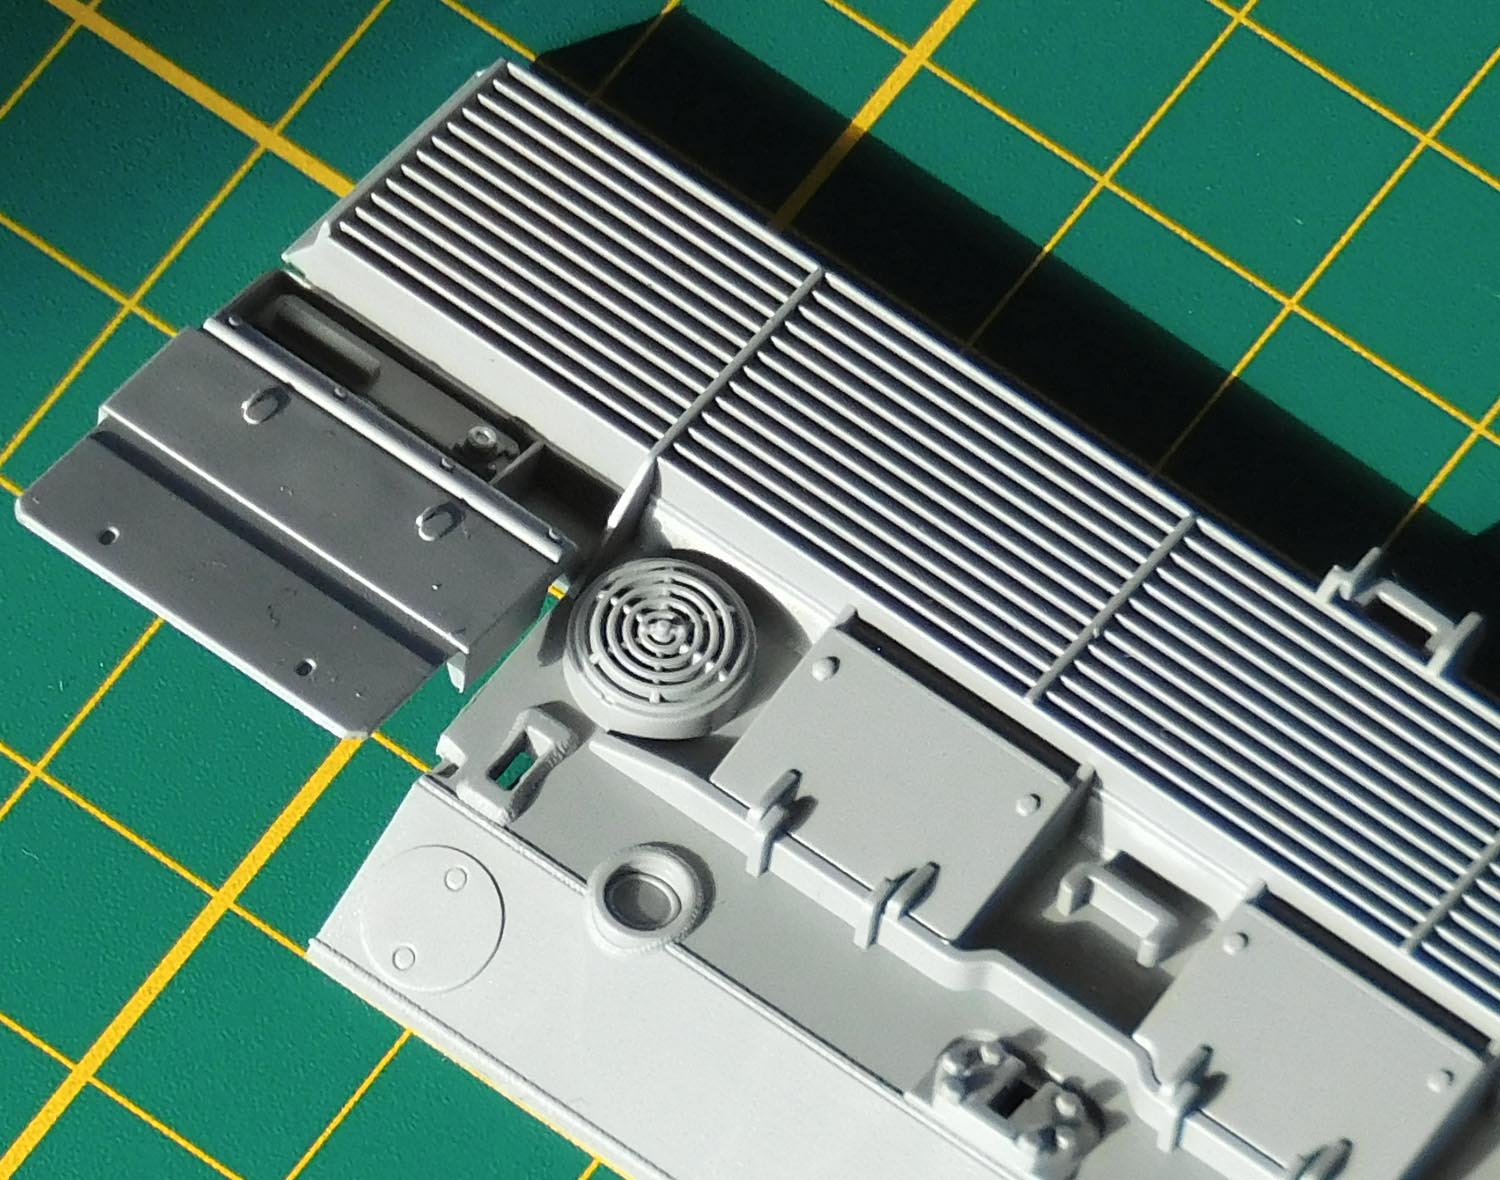
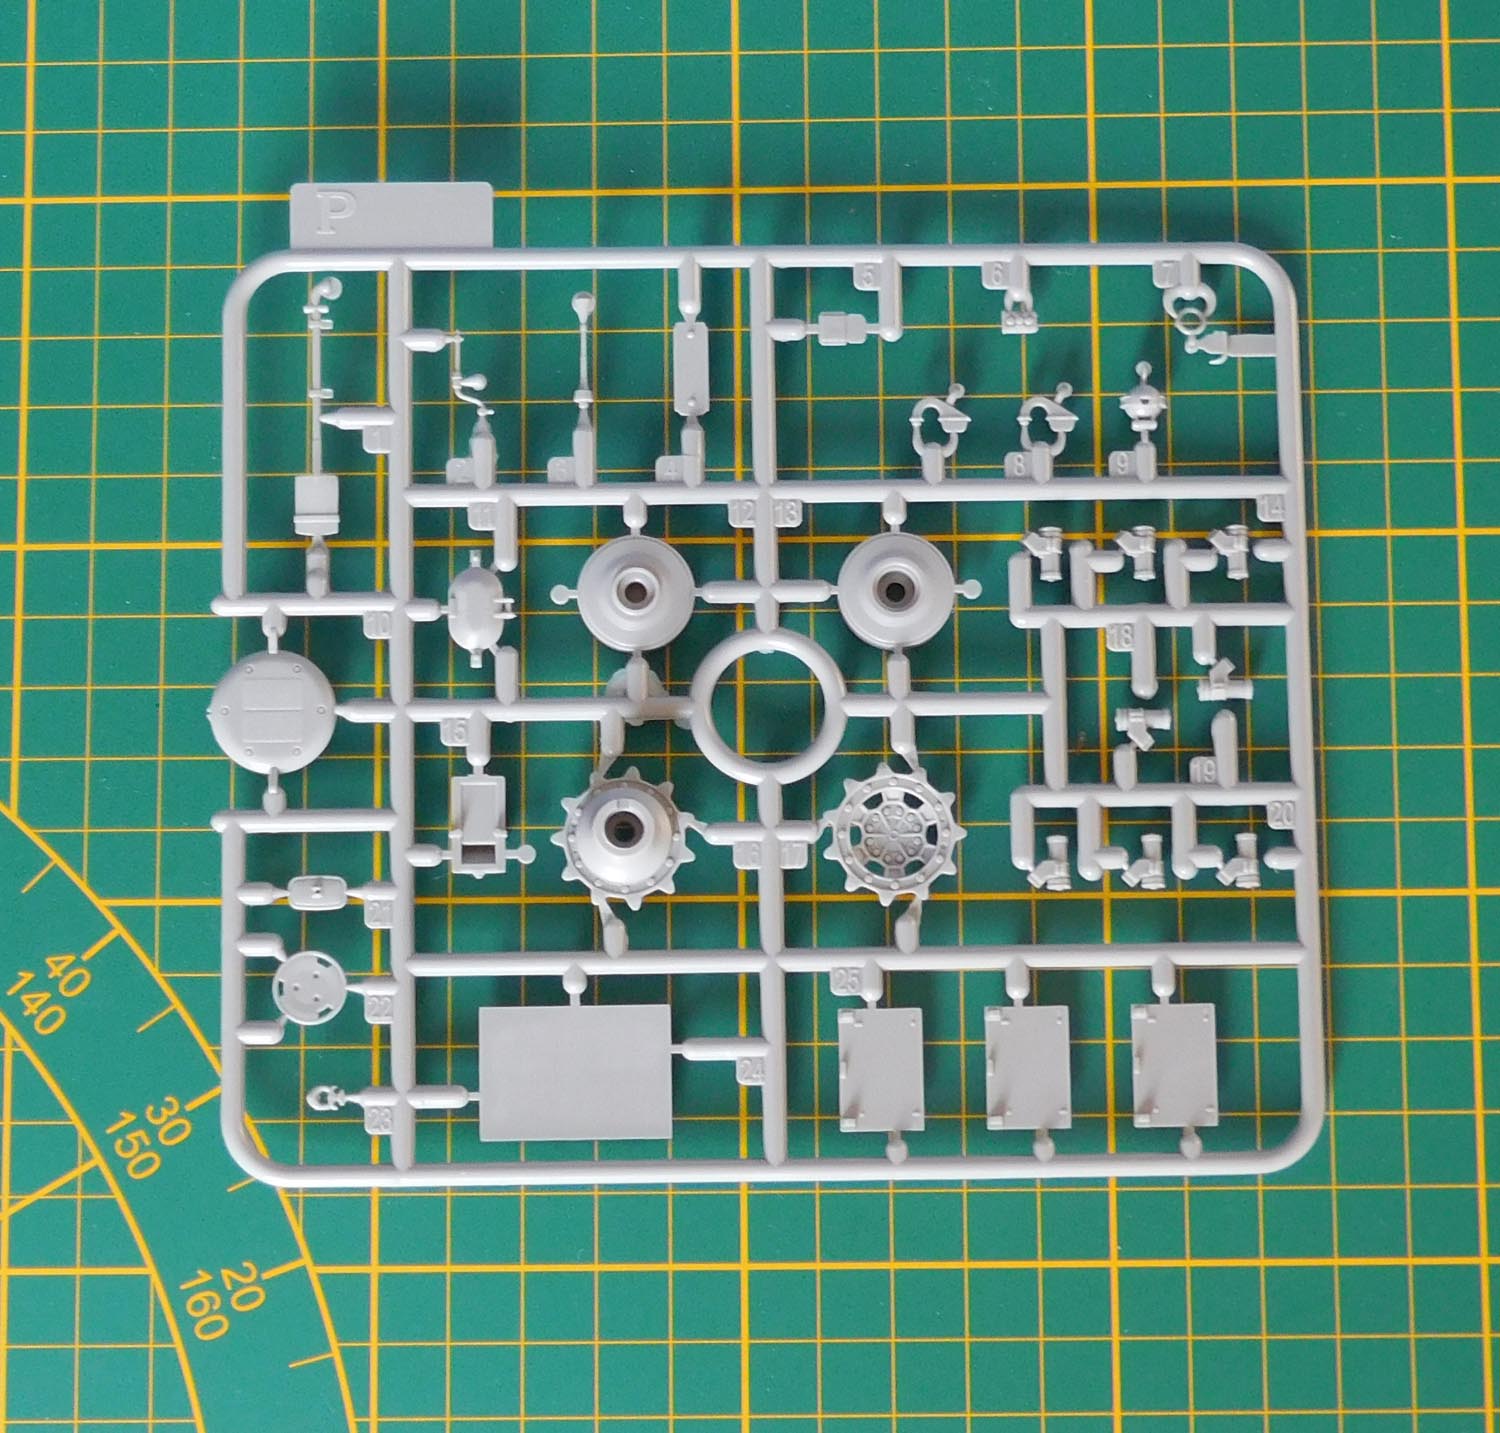
The position where the final drive is, is perfect in detail. Only Meng did it even better by making it possible to show the final drive dismantled.
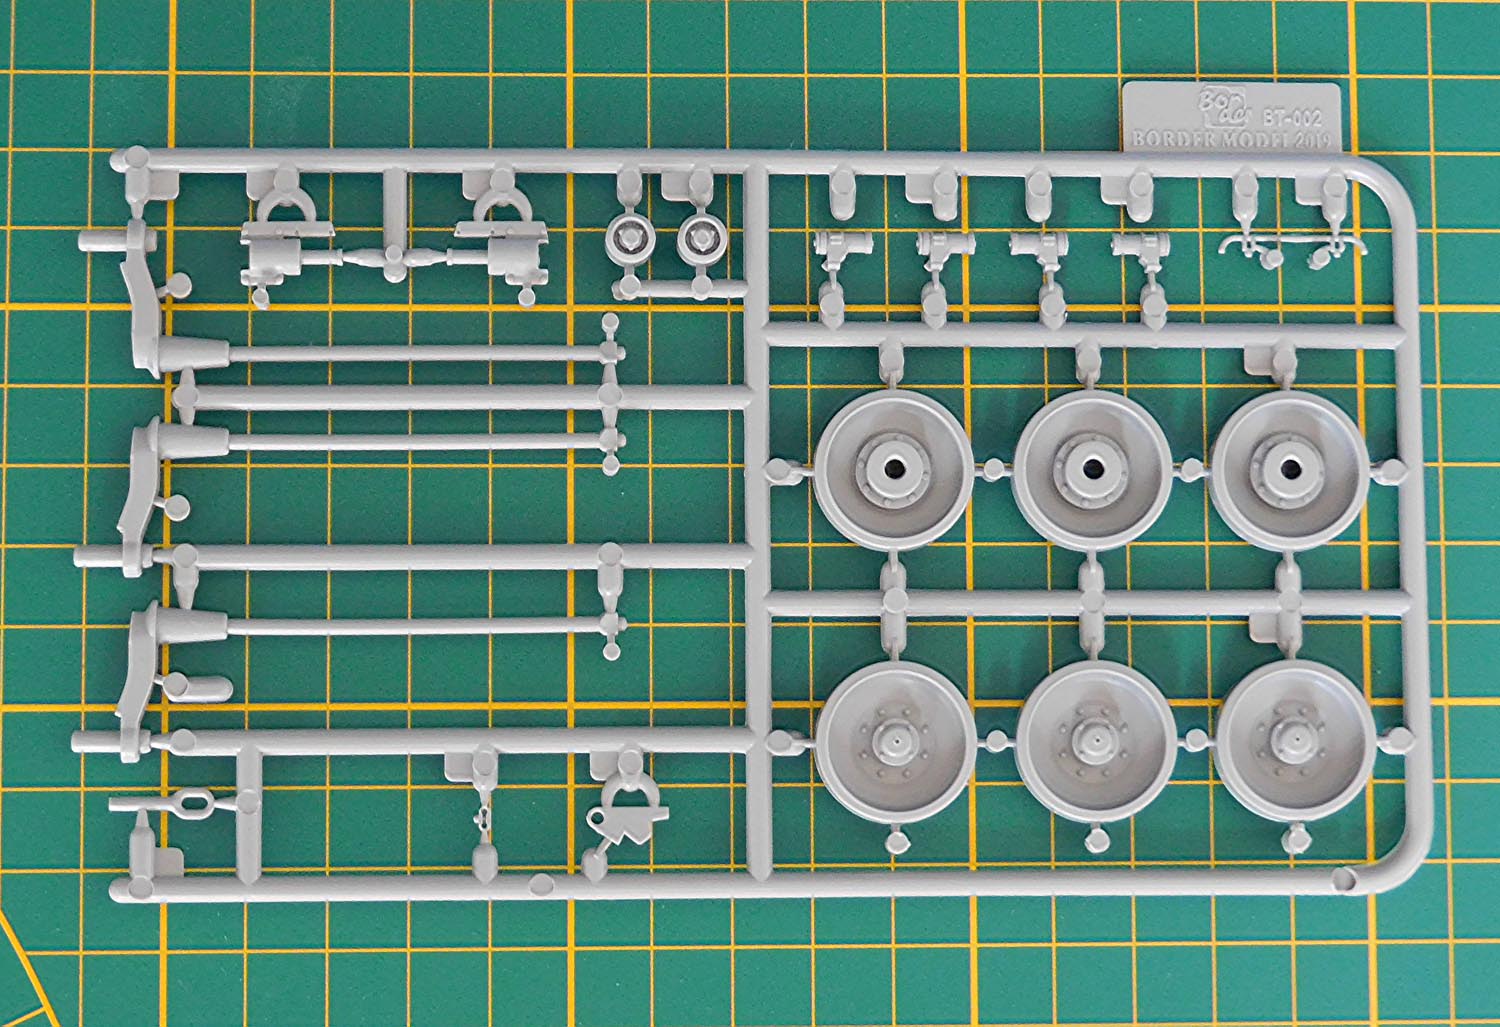
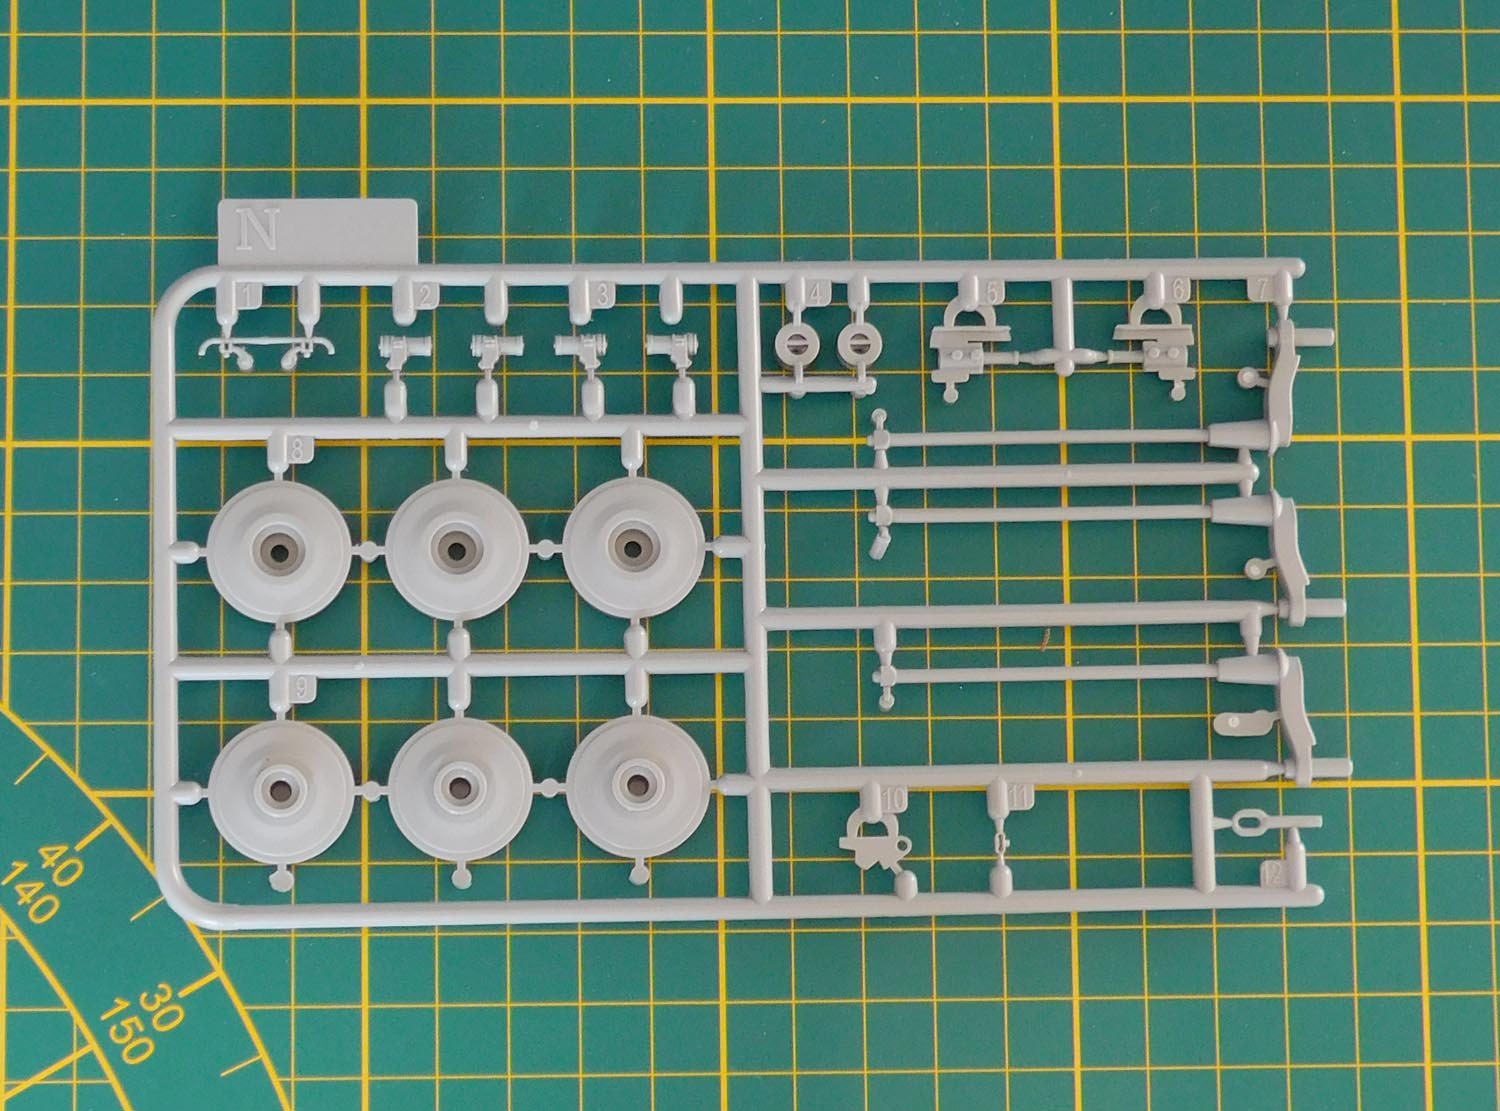
I am not going into every part and detail here and now. Overall, the Border model looks pretty good.
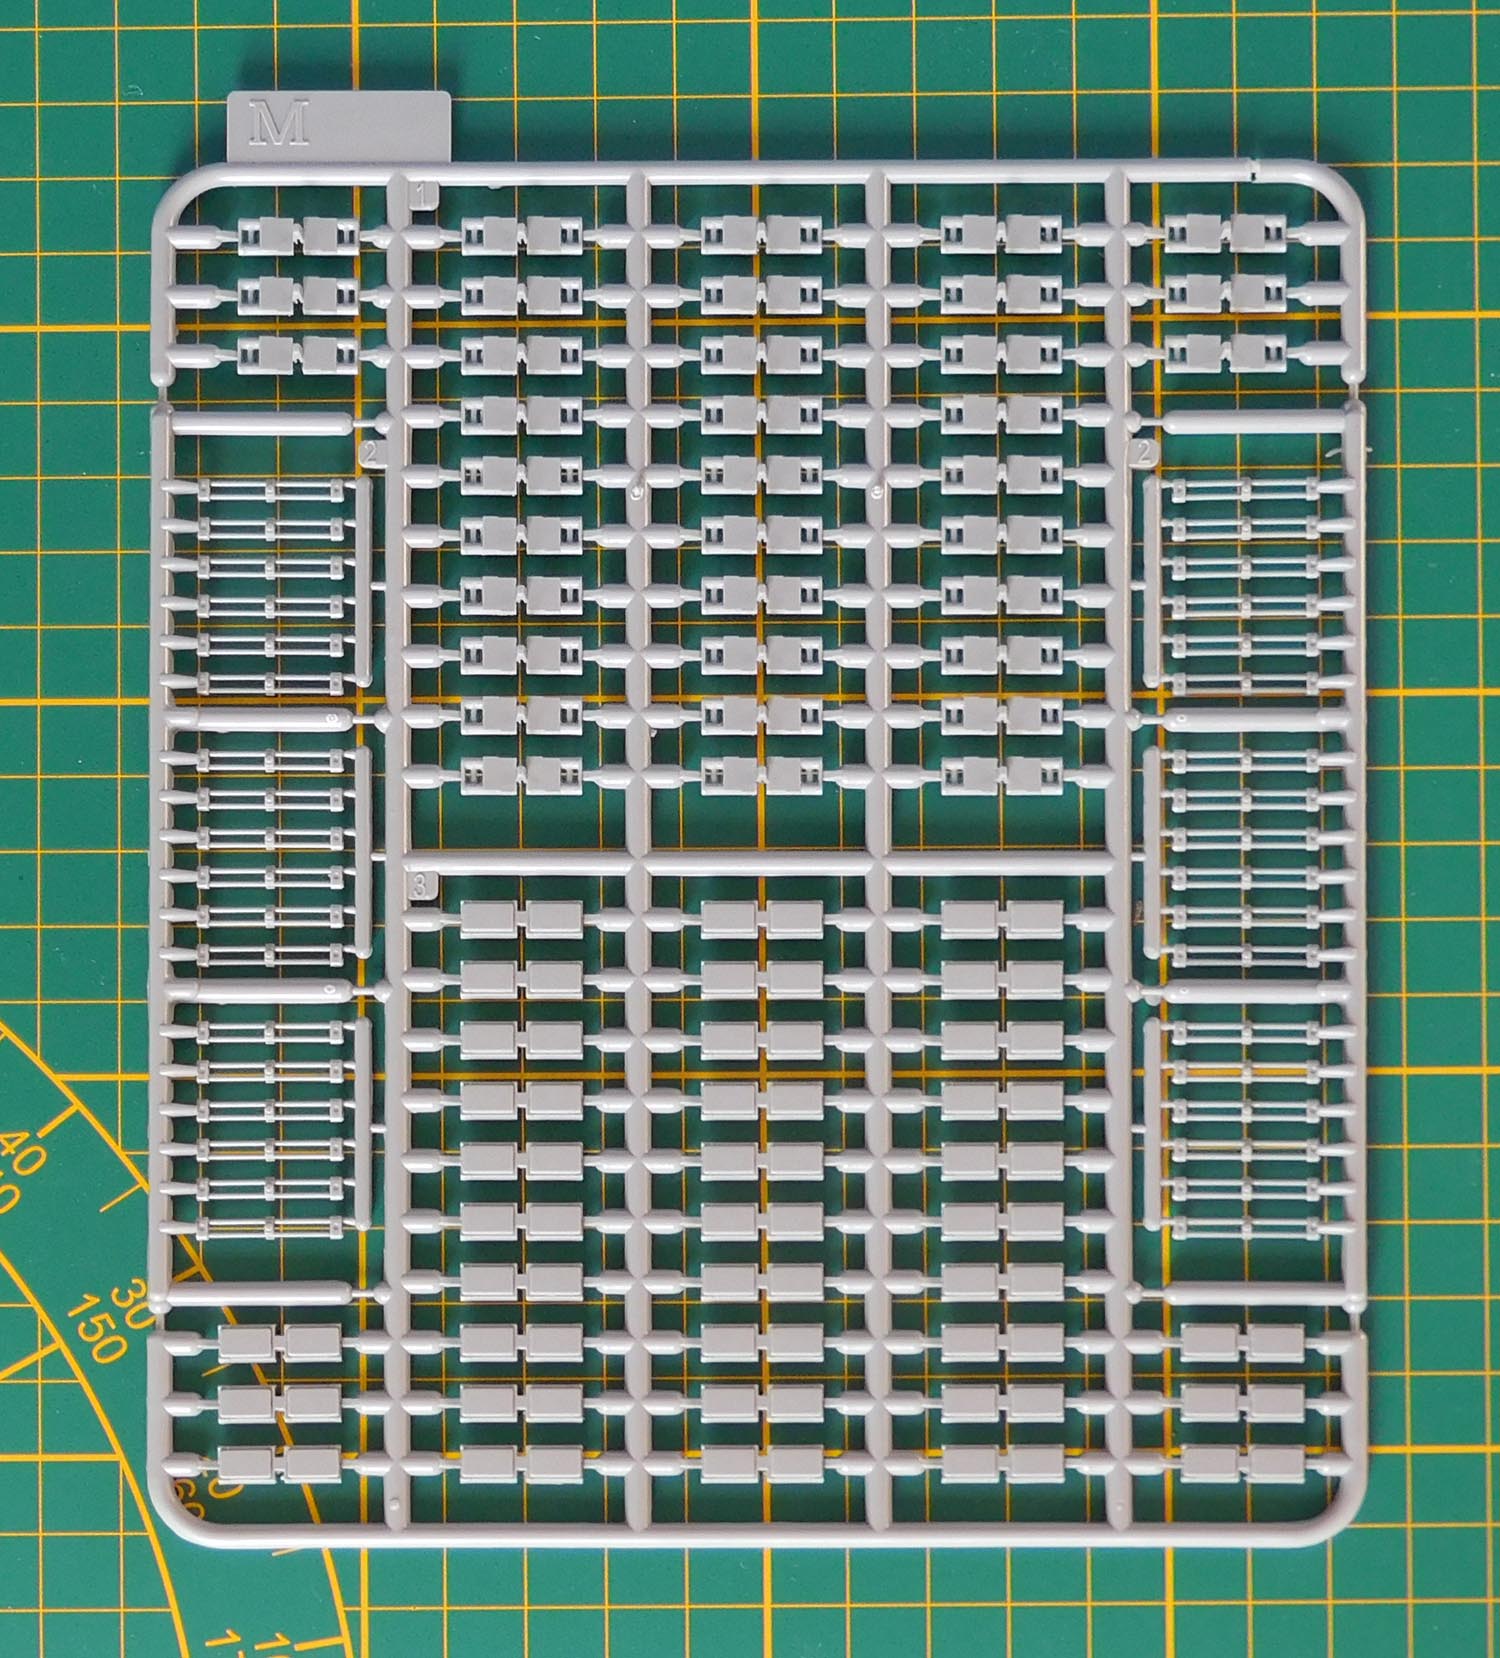
For modellers who do not like single-link tracks, Tamiya, Revell and Hobby Boss do it the classical way. Border use single-link injection-moulded parts.
There are clear parts for glass sights and lights. I was never happy about Tamiya's clear sheet solution for their vision blocks.
Hand grips are moulded on, with just a single exception. That's fine for the standard builder, and easily changed for experienced modellers.
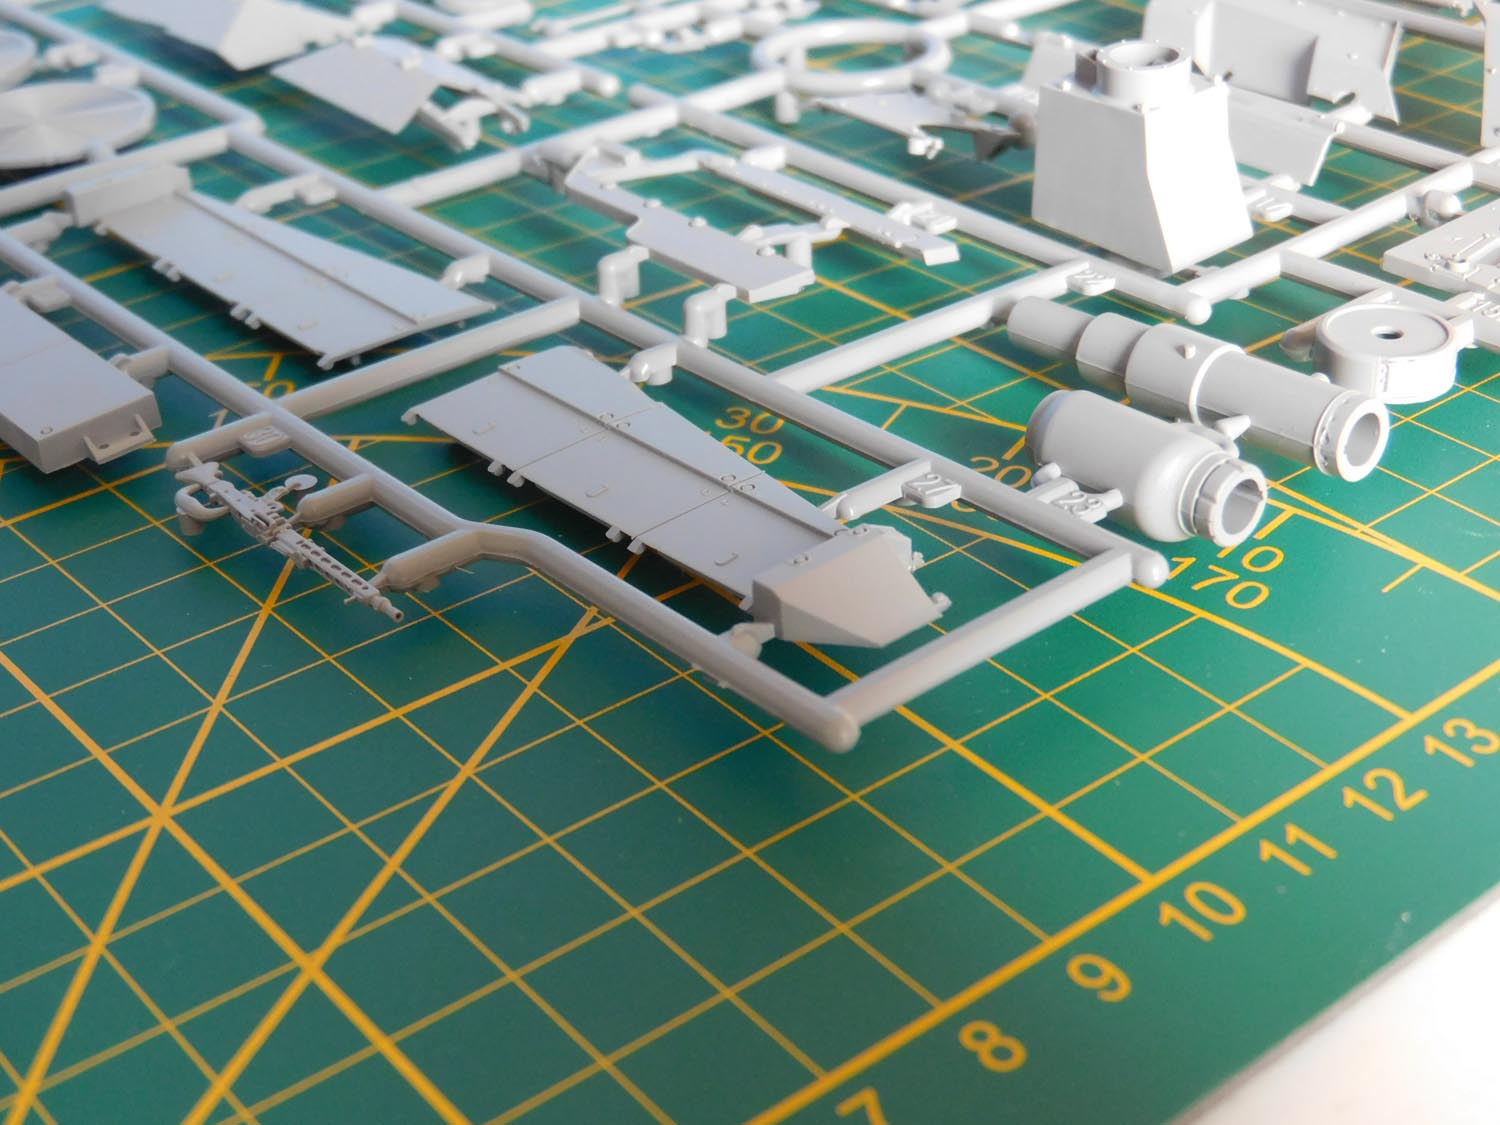
Both barrels come as no-split, one-piece parts - cannot wait to test them. The surface of the fume extractor is without texture - which is surprising.
All in all, there are far more good things than bad. 9.5/10 for moulding and details.
In general, the instructions are OK. A correction sheet is already included which tells us about missed identification numbers for some parts. No real mistakes so far. The page numbers are missing - just noticed for those who cannot live without!
The so-called DARKAS is a training device for gunfire simulation. Sometimes it is fitted as a stand-alone component on the tank, but it is more complete when the laser-based duel simulator AGDUS is in place as well. But this is NOT included.


This is a question of how serious you take your modelling.
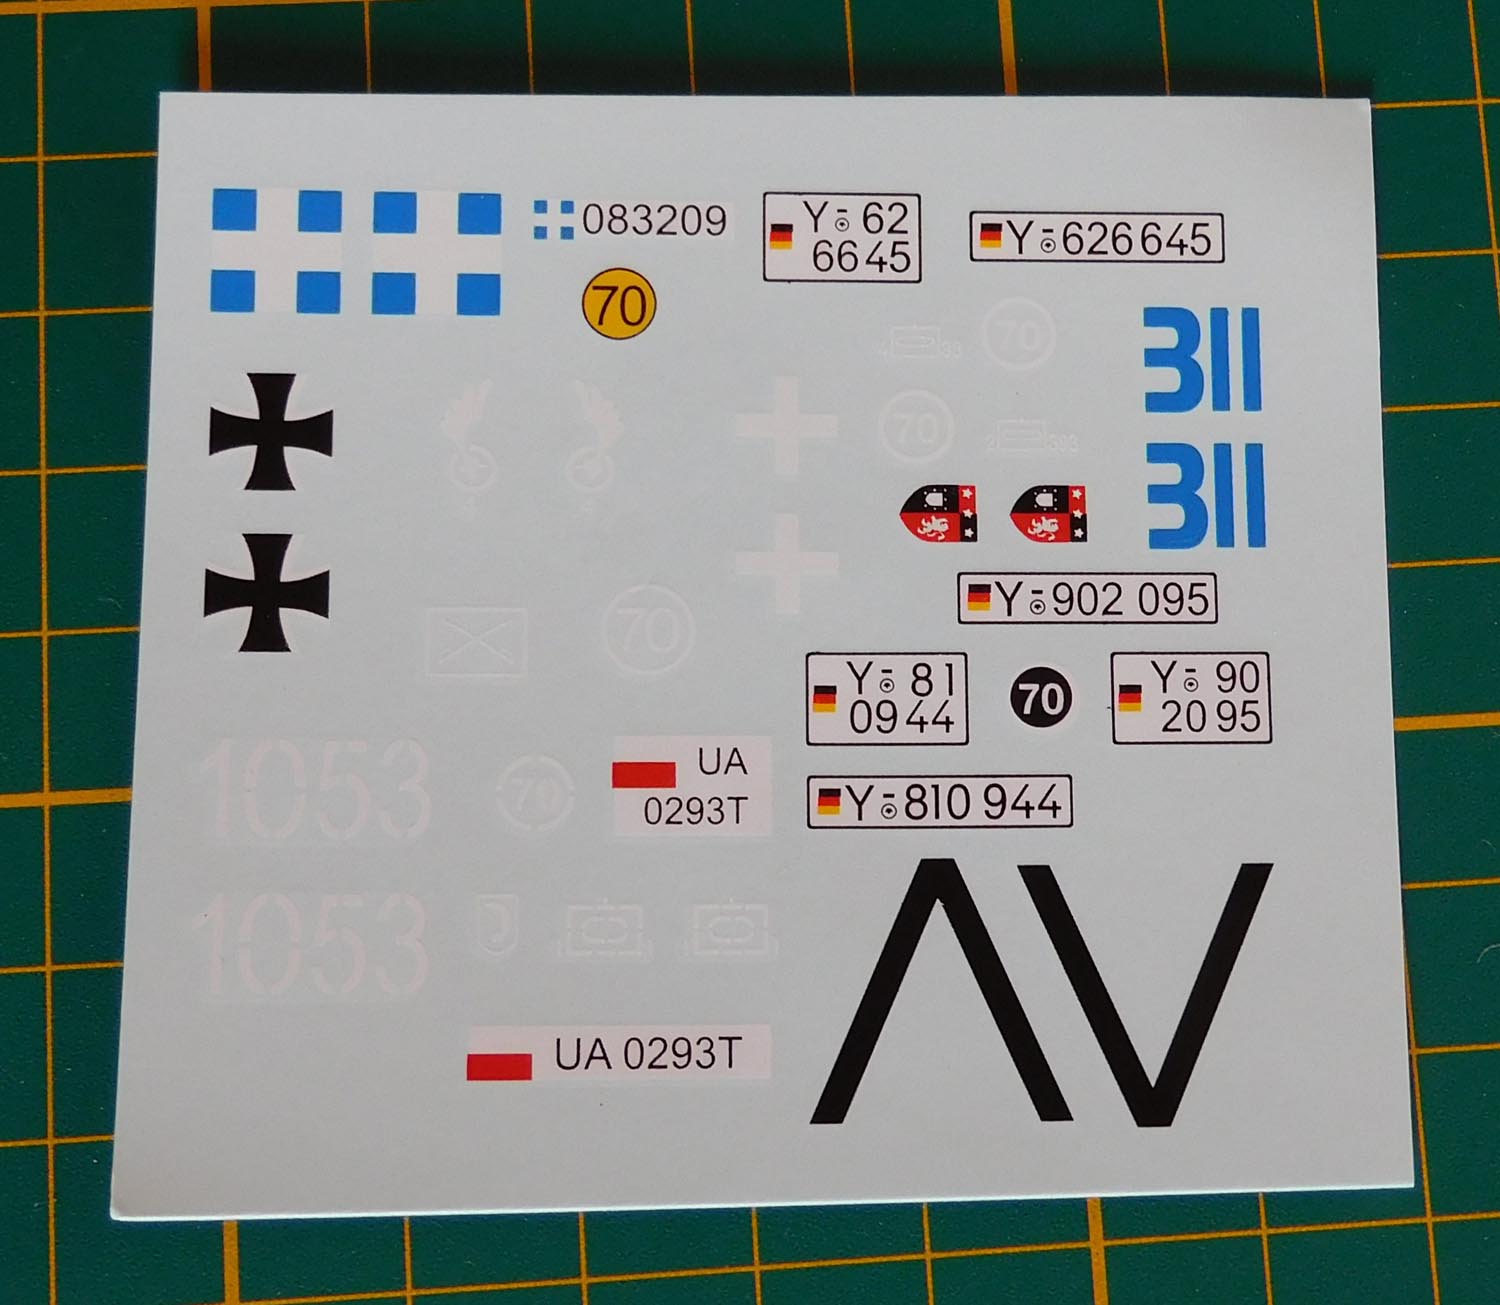
[1] Polish Leopard 2A6 'early'
The Polish Army would be very happy to own long-barreled 2A6s, but they do not! In case of reality, please use the short gun (S37), the late-style 6/2 launchers and mostly 3rd/sometimes 1st generation sideskirts, for a typical Leopard 2A5PL.
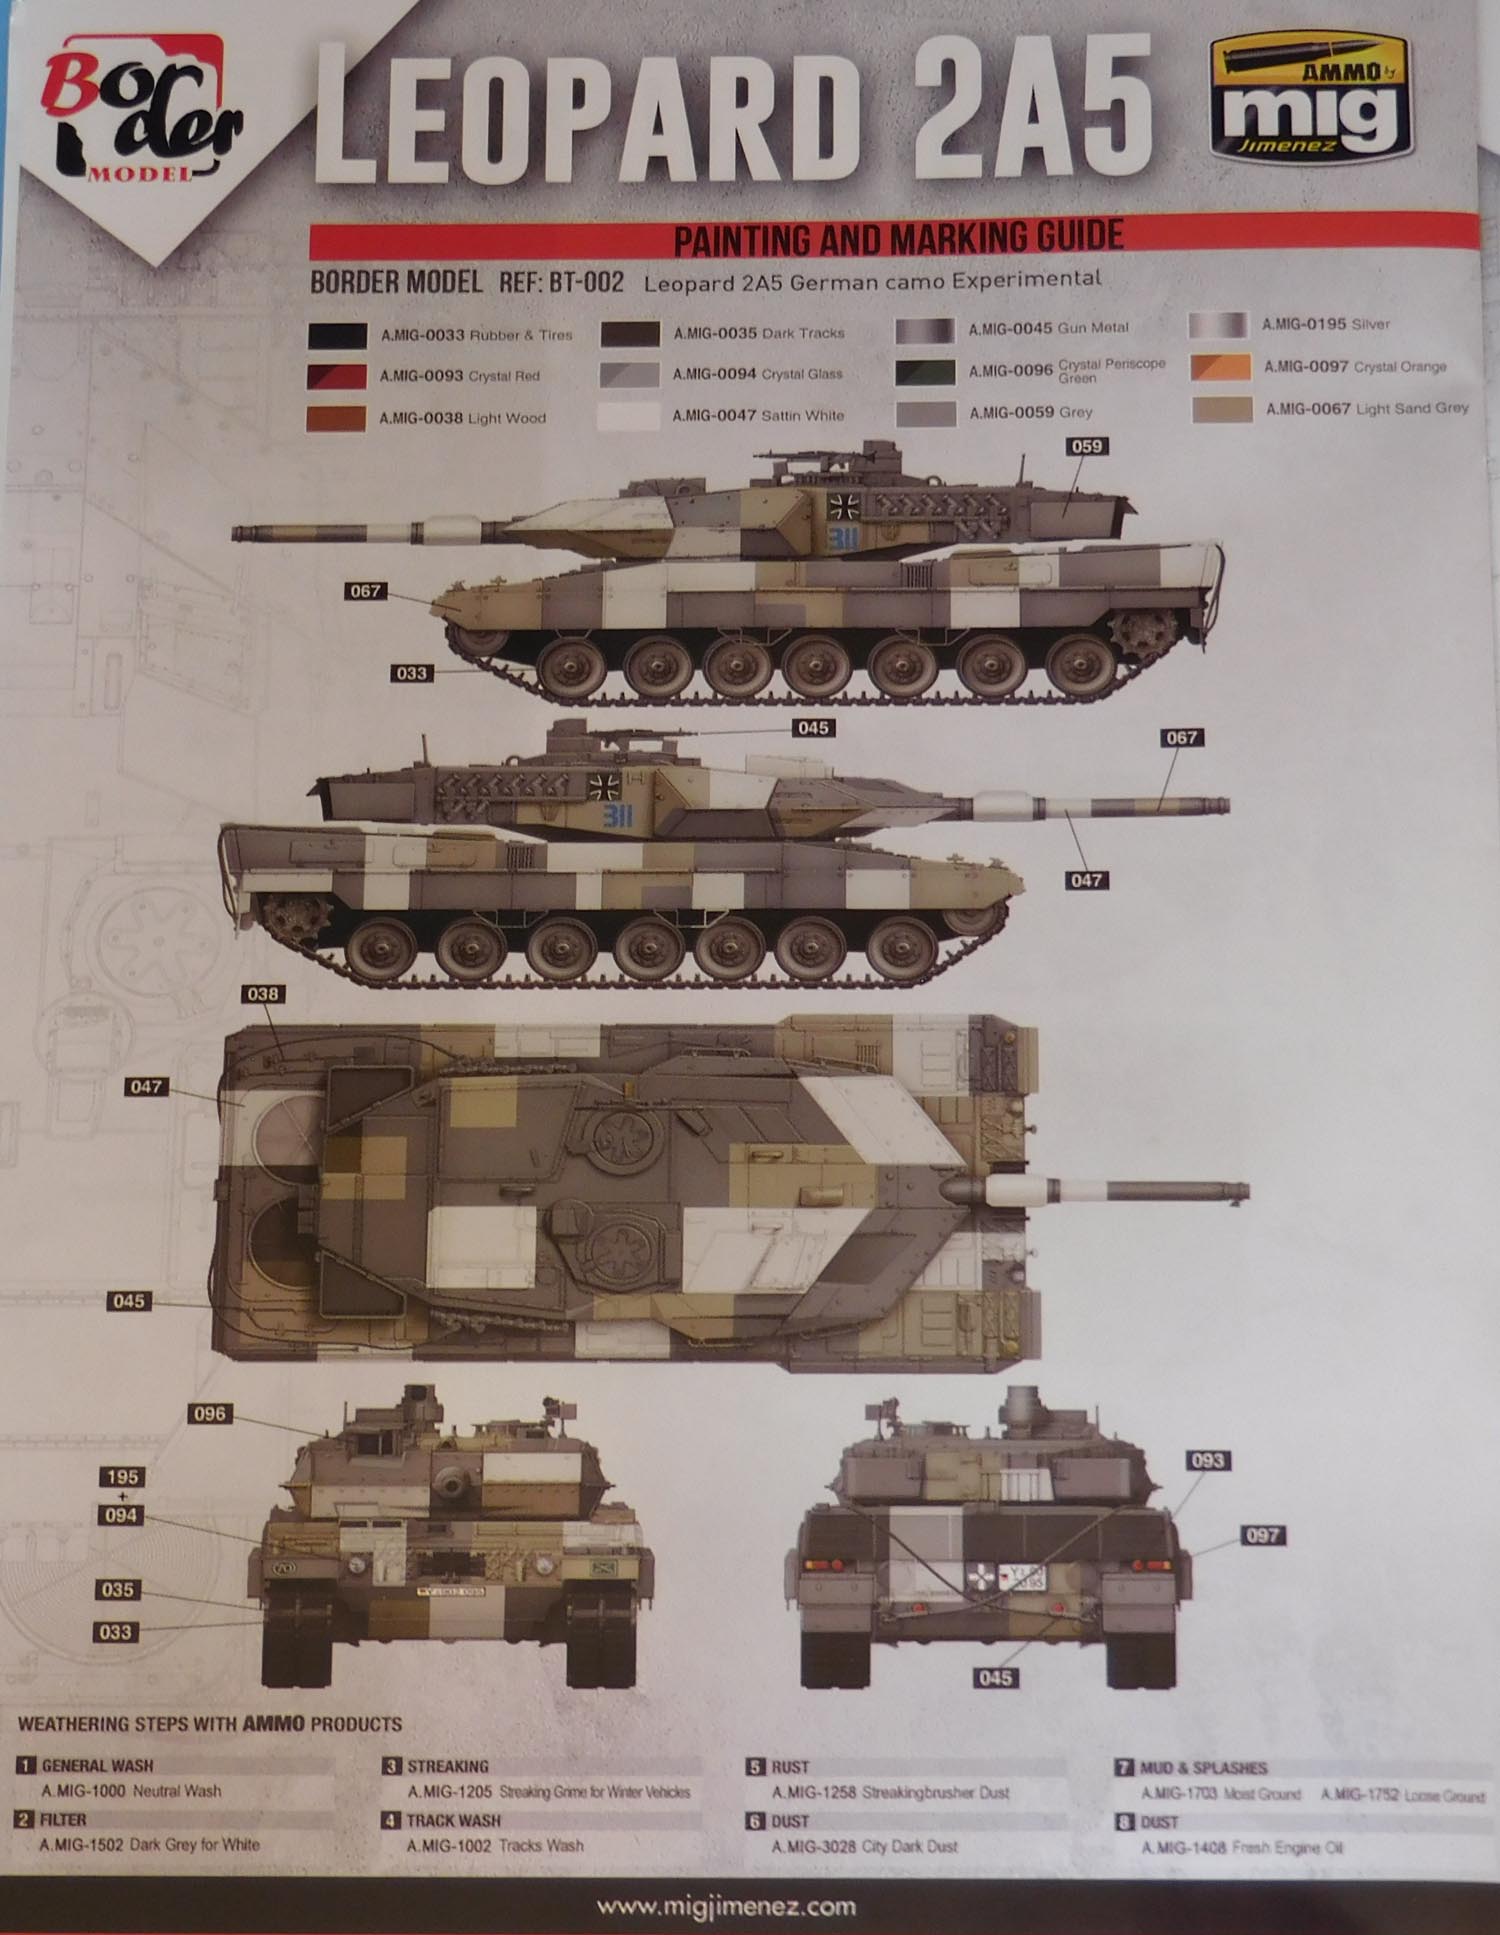
[2] German Leopard 2A5, experimental camouflage
Temporary painting of a single 2A5. Cool looking. This vehicle was for use in the OPFOR role.
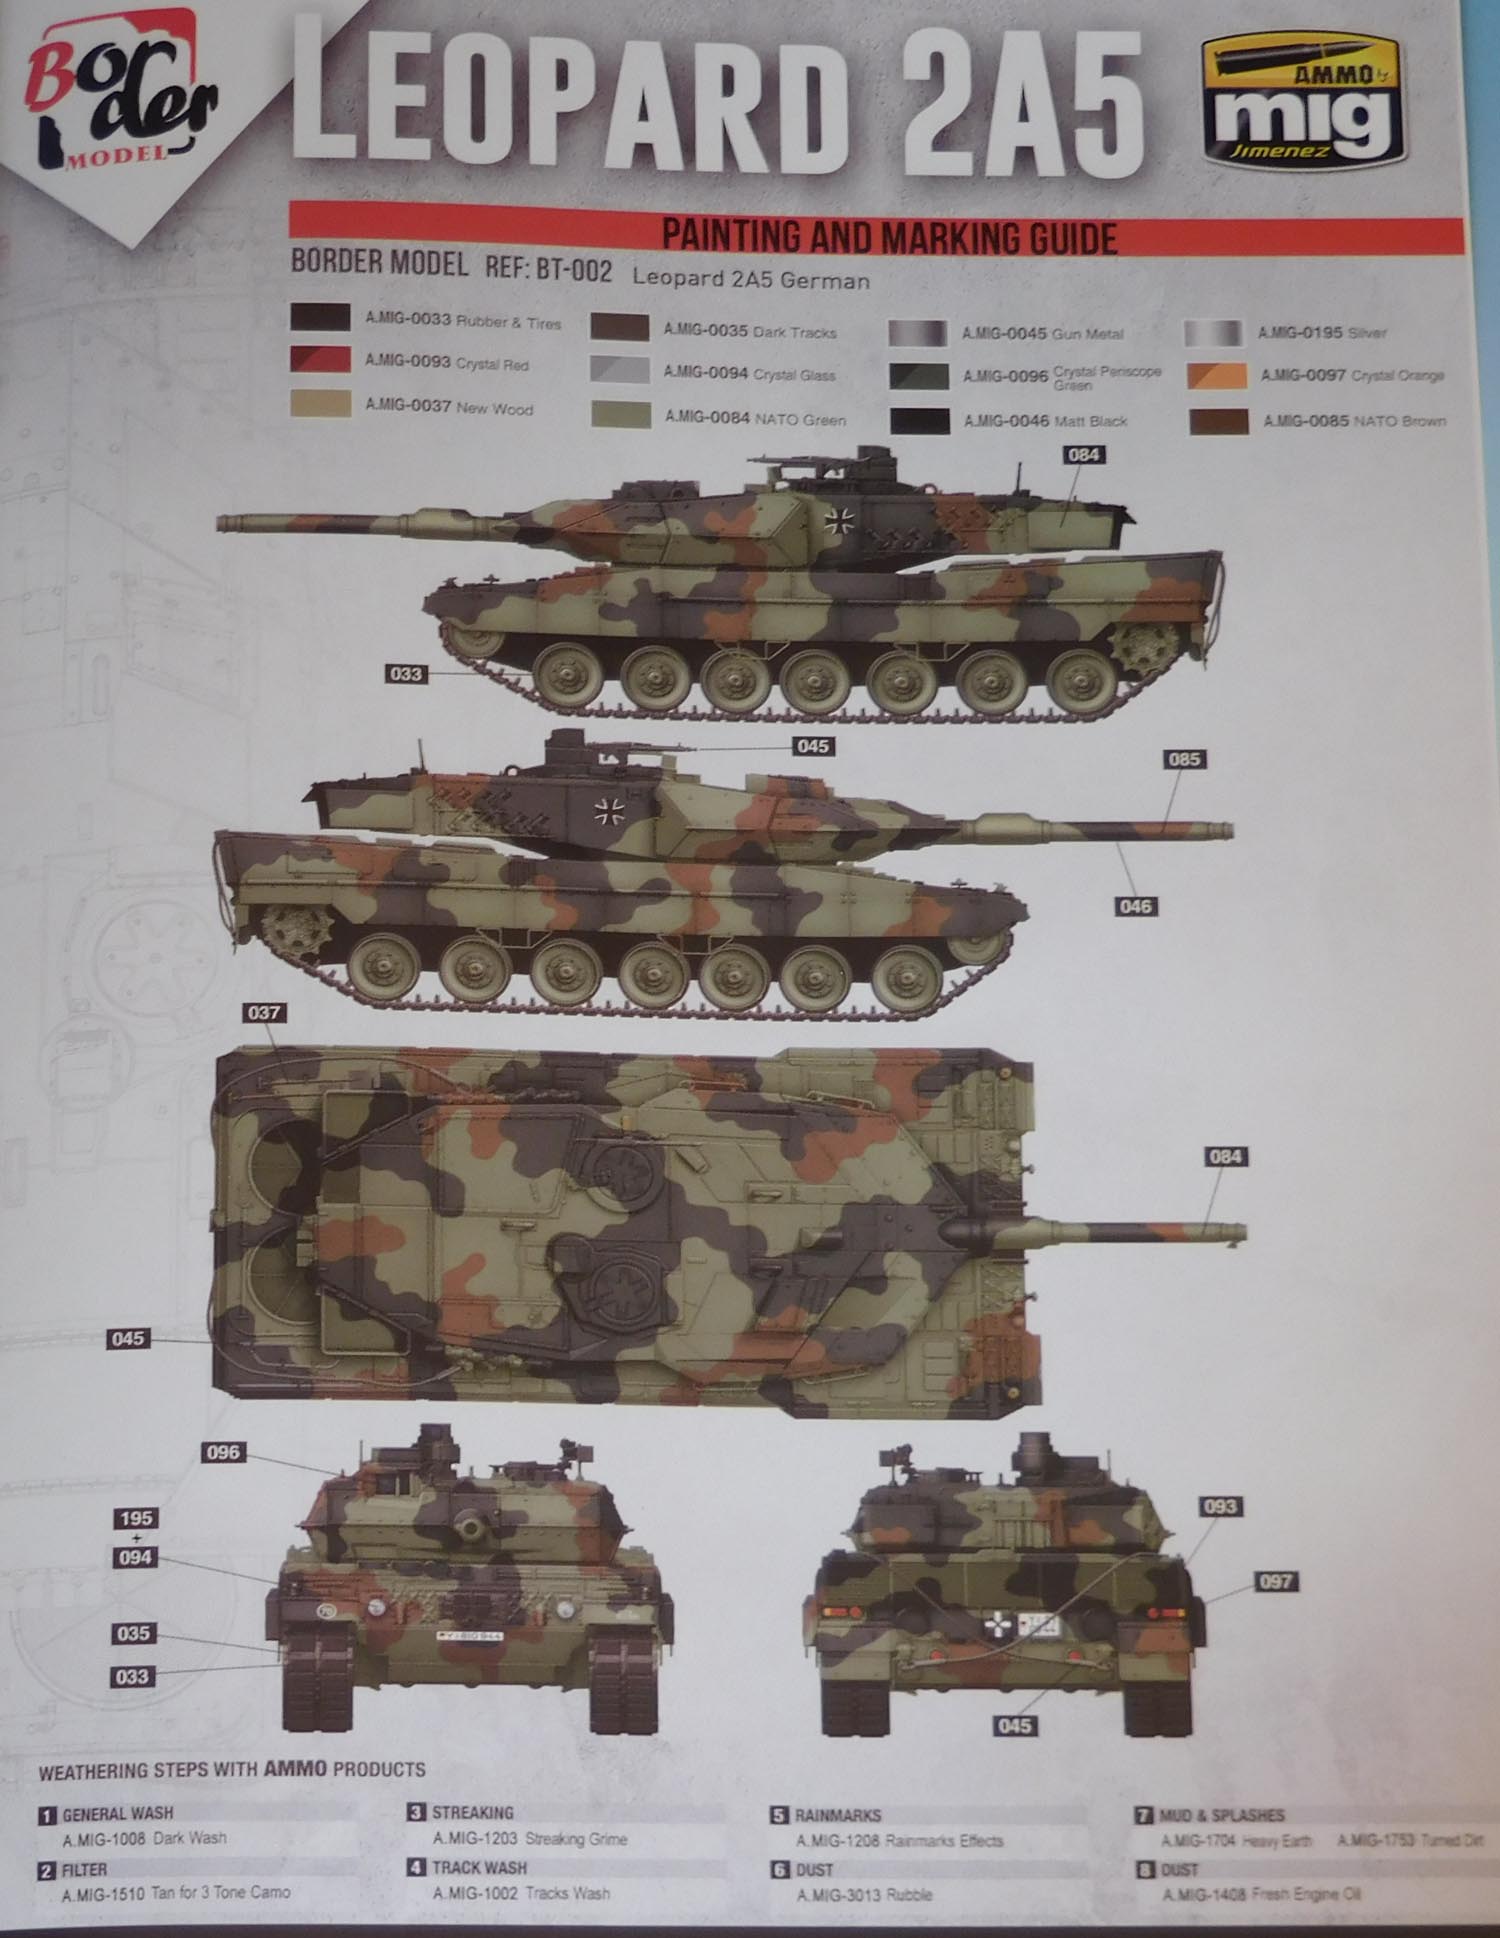
[3] German Leopard 2A6 'late'
This is the tank on the box-top painting. However, beware that this has the unit badge of TkBn 203 (PzBtl 203) and the tactical marking of TkBn 33 (PzBtl 33) on one vehicle. Really ~ at the same time? It depends on your fantasy of how realistic this is. In all other aspects OK.

[4] German Leopard 2A6 'late', desert camo
Pure 'what if'.

[5] German Leopard 2A5
Markings are for TkBn 393 (PzBtl 393), but there should be more markings, but it is realistic. 393 was a 2A5 user from the start.
All in all, the suggestions for markings and painting are the opposite of the plastic parts - disappointing.
Because A and B are most important, no overall rating possible is here and now.
The idea here was to comment about what is in the box, not the changes modellers might make in search of accuracy. Any halfway experienced modeller will find solutions in their spares box, decal box and by using the aftermarket parts, but there is not much to do.
Border is a newbie who produced a Leopard 2 as their second release. The pictures released early did not make me hopeful. This, and having seen other newbie attempts at Leopard 2 - the result in front of me is brilliant. Well done Border!
The Holy Grail question. Is it better than Tamiya's 2A5 or 2A6? Yes, the Tamiya 2A5/A6 is showing its age. However, it is still perfect for an easy built and some of the improvements of the younger kits are not that important to basic modellers - 'after the build, no-one looks behind the sideskirts'. Also, compare the detail of the underside of the turret bustles here, also not that visible when finished. The Tamiya configuration is correct until the 6/2 launcher conversion started, anyhow. This was mostly completed about 2010.
I will close with a short statement about the kits which were used in this comparison.
If the Border Leopard showed a similar 'shake 'n bake' as the 'T's one, the latter is in danger of becoming obsolete. Otherwise, it is still fine and can be updated in detail and upgraded to newer standards/configurations by using Leopard Workshop and PSM aftermarket parts.
Started with good ideas years ago and a large range of versions, but preferred quantity instead of quality. Poor details like the commander's sight, anti-slip pads looking like paving stones, missing bolts on sprockets, etc. Correction - HB does not make sense because of the poor effort. Surprisingly, their 'special parts' (e.g. for Canada or Denmark) are often pretty good and can be used as conversion parts.
Shows for the very first time some details that even 'T' missed. Best in case of price-quality-relationship, best marking/painting research. Not the easiest built, but up until now (September 2019), it builds the only 2A6M (with mine belly protection) out of the box. (No, I do not count the Hobby Boss 2A6M for already stated reasons.) A well-completed and nicely-painted Revell model is difficult to beat.
Pretty good moulding. Rare version. Shows the 2014 short-lived configuration in detail. Use PSM aftermarket sets to get the more common post-2015 configuration. BTW: this is the only one that has the engine decks separate for those who want to add in the powerpack.
Even without having built it (yet), it's a winner!
his is not a big issue for me. It is easy to fix. Hopefully, they will change their packing in the future.

© Leopard Club
![]() Contact us at leopardfibel@gmail.com
Contact us at leopardfibel@gmail.com